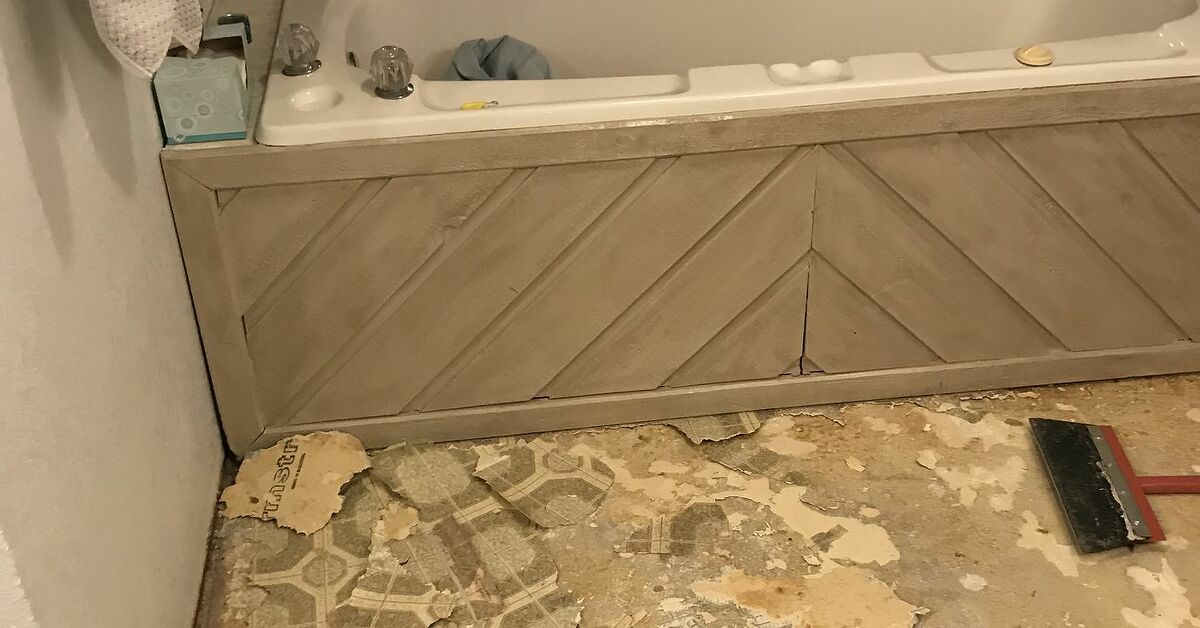
Tiling a bathroom floor yourself sounds intimidating until you realize the job is mostly a careful sequence of small, sensible steps: remove what does not belong, make the floor flat and solid, plan the layout, spread mortar, set tile, grout, clean, and resist the urge to walk on your masterpiece too soon. The glamorous part is choosing tile. The heroic part is kneeling on the floor with a trowel, wondering why your back has started writing complaint letters.
The good news? Learning how to tile a bathroom floor DIY is absolutely possible for a patient homeowner. The bad news? Tile is honest. It will reveal every shortcut, every wobbly subfloor, every rushed grout line, and every “good enough” measurement. But with the right preparation, tools, and method, a bathroom tile floor can look polished, last for years, and give you the sweet satisfaction of saying, “Yes, I did that,” every time someone compliments it.
Before You Start: Is DIY Bathroom Floor Tiling Right for You?
A bathroom floor is one of the friendlier tile projects because it is usually small compared with kitchens, entryways, or open-plan living areas. However, bathrooms also bring moisture, plumbing obstacles, tight corners, toilets, vanities, and door transitions. That means the project rewards patience more than brute confidence.
You can tile a bathroom floor yourself if you are comfortable measuring, cutting, mixing materials, following manufacturer instructions, and working slowly. You do not need to be a professional tile setter, but you do need to be picky. Tile is not wallpaper. You cannot simply “smooth it out later.” Once mortar cures, the floor keeps receipts.
Tools and Materials You Will Need
Gather everything before you begin. Nothing ruins a DIY rhythm faster than discovering you need a notched trowel while thinset mortar is already drying in the bucket like cement pudding.
Basic Tools
- Tape measure and pencil
- Chalk line or laser level
- Utility knife
- Notched trowel sized for your tile
- Margin trowel
- Rubber grout float
- Tile spacers or leveling clips
- Wet saw, snap cutter, or tile nippers
- Mixing bucket and drill paddle
- Sponges and microfiber cloths
- Knee pads, safety glasses, and gloves
Materials
- Floor-rated ceramic, porcelain, or stone tile
- Thinset mortar appropriate for your tile and substrate
- Cement backer board or uncoupling/waterproofing membrane
- Backer board screws, seam tape, or membrane accessories
- Grout suitable for your joint width
- Grout sealer if required
- Silicone caulk for perimeter joints and wet transitions
- Tile edging or transition strip if needed
Step 1: Remove the Toilet, Baseboards, and Old Flooring
Start by clearing the bathroom. Remove rugs, trash cans, storage baskets, and anything else that will become a tripping hazard. Turn off the toilet water supply, flush to empty the tank, disconnect the water line, and remove the toilet. Stuff a rag into the drain opening to block sewer gas, but do not forget it is there. Future you does not need that plot twist.
Remove baseboards carefully if you plan to reuse them. If the bathroom has old vinyl, laminate, or damaged tile, remove it according to the condition of the existing floor. Some old flooring may contain asbestos, especially in older homes, so if you suspect that, stop and have it tested before demolition. Safety is cheaper than regret.
Step 2: Inspect the Subfloor Like a Detective
Your tile floor is only as good as what sits underneath it. A beautiful tile installed over a weak, bouncy, uneven, or damp subfloor is basically a fancy countdown to cracked grout and loose tile.
Walk the floor and listen for squeaks. Check for soft spots near the toilet, tub, or vanity. Water damage often hides around plumbing fixtures, and bathrooms are experts at keeping secrets. Replace any rotten or swollen wood. Tighten loose panels with screws. If you have a concrete slab, check for cracks, paint, adhesive residue, grease, or uneven areas.
The surface should be clean, dry, flat, and structurally sound. “Flat” matters more than “level.” A floor can slope slightly and still accept tile, but dips and humps can create lippage, where one tile edge sits higher than the next. That is not charming rustic character; that is a toe-stubbing machine.
Step 3: Install the Right Underlayment
In most bathroom tile projects, you should not install tile directly over standard plywood. Wood expands and contracts, while tile does not enjoy emotional flexibility. Use cement backer board or an uncoupling membrane designed for tile floors. In bathrooms, a waterproofing or uncoupling membrane can be especially helpful because it protects the assembly from moisture and reduces stress between the tile and subfloor.
If you use cement backer board, spread thinset mortar underneath the board, fasten it with approved screws, tape the seams with alkali-resistant mesh tape, and cover the seams with thinset. If you use a membrane, follow the manufacturer’s instructions exactly. Different systems call for different mortar types, trowel sizes, seam treatments, and curing times.
This is not the step for creative interpretation. Tile products are designed as systems. Mixing random products without checking compatibility can create bonding problems, waterproofing gaps, or warranty issues.
Step 4: Plan the Tile Layout Before Mortar Enters the Chat
A dry layout is where the floor tells you the truth before it becomes permanent. Measure the room, snap center lines, and place tiles without mortar using spacers. This helps you avoid awkward slivers along walls, crooked lines near the doorway, or a full tile pattern that looks great everywhere except the most visible spot.
In many bathrooms, it is smart to make the tile look balanced from the doorway because that is the angle most people see first. You may shift the layout slightly to avoid tiny cuts along the tub or vanity. The goal is not mathematical purity; it is visual balance.
Mix tiles from several boxes during layout. Ceramic and porcelain tiles can have slight shade variation, and blending boxes prevents one corner from looking like it belongs to a different batch. If your tile has directional arrows on the back, keep them oriented consistently unless the tile manufacturer recommends a specific randomized layout.
Step 5: Cut Tiles for Obstacles and Edges
Bathrooms love awkward cuts. Around the toilet flange, door jambs, vanity legs, floor vents, and tub curves, you will need patience and the right cutting tool. A wet saw works well for clean straight cuts, especially on porcelain. Tile nippers help with small curves. A hole saw or angle grinder with a diamond blade may be needed for pipe openings.
Always measure twice and cut once, unless you enjoy donating tile to the “learning experience” pile. Leave a small expansion gap around the room perimeter and where tile meets tubs, thresholds, or cabinets. That gap should be covered by trim or filled with flexible sealant, not packed tightly with grout.
Step 6: Mix Thinset Mortar Properly
Thinset mortar is the bond between your tile and the floor, so treat it with respect. Use the mortar recommended for your tile type, tile size, substrate, and underlayment. Large-format tile often needs a mortar designed to support heavier pieces and reduce slump. Porcelain tile usually needs a strong bond because it is dense and less absorbent than ceramic.
Mix mortar according to the bag directions. Do not guess the water amount. Too much water weakens the mixture; too little makes it hard to spread and bond. Most mortars need a slake time, which means you mix, let it rest for several minutes, then remix. This step helps the ingredients fully activate. It is not optional, even if the bucket looks ready and you are feeling powerful.
Step 7: Spread Mortar and Set the Tile
Work in small sections so the mortar does not skin over before tile is placed. Use the flat side of the trowel to burn a thin layer of mortar into the surface, then use the notched side to comb straight, even ridges. Straight ridges help air escape when you press the tile into place, improving coverage.
Set each tile with a slight back-and-forth motion across the ridges. Use spacers to keep grout joints consistent. For larger tiles, back-buttering can help improve coverage: spread a thin coat of mortar on the back of the tile before setting it. Periodically lift a tile to check coverage. In wet areas, strong mortar contact is especially important.
Keep a damp sponge nearby and clean mortar from tile faces and grout joints as you go. Dried mortar in grout joints is no one’s friend. It makes grouting harder and can show through if your grout color is lighter.
Step 8: Watch for Lippage and Keep Lines Straight
As you work, use a level or straightedge to check that tile edges sit evenly. Tile leveling clips can help, especially with large-format tile, but they do not fix a bad substrate. They are helpers, not miracle workers wearing tiny plastic capes.
Step back occasionally and look at the whole floor. Are the grout lines drifting? Are cuts staying consistent along the wall? Is one tile proud of its neighbors? Catching these issues while mortar is wet is easy. Discovering them after curing is a character-building event you did not request.
Step 9: Let the Mortar Cure
After setting tile, stay off the floor for the time recommended by the mortar manufacturer. Many standard installations require at least 24 hours before grouting, but the exact timing depends on the mortar, tile size, substrate, temperature, humidity, and product instructions.
Do not rush curing. Walking on tile too soon can shift pieces, weaken the bond, or create hollow spots. The floor may look done, but underneath, chemistry is still clocking in for work.
Step 10: Grout the Bathroom Floor
Choose grout based on the tile, joint width, and bathroom conditions. Sanded grout is commonly used for wider floor joints because it offers strength and helps resist shrinkage. Unsanded grout is smoother and better for narrow joints or delicate tile that could scratch. Pre-mixed and high-performance grouts can offer stain resistance and consistent color, but they have their own application rules.
Mix cement-based grout according to instructions. Spread it diagonally across the tile with a rubber float, forcing grout into the joints. Hold the float at an angle to remove excess. After the grout firms slightly, wipe the surface with a damp sponge. Rinse often and avoid flooding the joints with water, which can weaken grout or cause color problems.
Once the haze dries, buff the tile with a clean microfiber cloth. If required, seal the grout after it cures. Not all grouts need sealing, so read the product label. Around the tub, toilet, vanity, and walls, use flexible silicone caulk rather than rigid grout where movement or moisture is expected.
Step 11: Reinstall the Toilet and Finish the Edges
Install a new wax ring or wax-free toilet seal before resetting the toilet. Do not reuse the old wax ring. It has had one job, and it is retired now. Set the toilet carefully, tighten bolts evenly, reconnect the water line, and test for leaks.
Reinstall baseboards, add shoe molding if needed, and finish doorway transitions. A clean edge makes the whole project look intentional. Even a well-installed tile floor can look unfinished if the trim is sloppy.
Common DIY Bathroom Floor Tiling Mistakes to Avoid
Skipping Subfloor Repairs
If the floor flexes, tile can crack. If the floor is uneven, tile can rock. If the floor is damp, materials can fail. Subfloor prep is not the boring part of the project; it is the part that decides whether your bathroom floor ages gracefully or starts making crunchy noises.
Using the Wrong Mortar
Not all thinset is the same. The right mortar depends on the tile, substrate, membrane, and room conditions. Always match the product to the job. Pre-mixed adhesives may be convenient, but they are not suitable for every bathroom floor or wet-area application.
Starting Without a Layout Plan
Randomly beginning in a corner can lead to tiny cuts in visible areas. Dry-lay first. Adjust the layout before mortar turns your decision into a permanent floor tattoo.
Adding Too Much Water to Grout
Overwatering grout can cause weak joints, blotchy color, or powdery residue. Follow the instructions, clean with a damp sponge, and avoid turning the floor into a splash pad.
Walking on Tile Too Soon
Tile needs curing time. Your curiosity is not a valid building material. Give mortar and grout the time they need before heavy use.
Best Tile Choices for a DIY Bathroom Floor
Porcelain tile is a favorite for bathrooms because it is dense, durable, and water-resistant. Ceramic tile is often easier to cut and can be more budget-friendly. Natural stone can look beautiful, but it usually requires more sealing, careful cleaning, and maintenance. For a first DIY bathroom floor, porcelain or ceramic is usually the safer path.
Pay attention to slip resistance. A glossy tile may look stunning in the store and become a skating rink after a shower. Matte, textured, or smaller mosaic tiles with more grout lines can improve traction. Also consider tile size. Large-format tiles create fewer grout lines and a modern look, but they demand a flatter floor and more precise installation. Smaller tiles are more forgiving around slopes and tight spaces but require more grout work.
How Long Does It Take to Tile a Bathroom Floor?
A small bathroom floor may take a weekend for an experienced DIYer, but first-timers should allow more time. One day may go to demolition and prep, another to underlayment, another to setting tile, and another to grouting and finishing. Add curing time between stages.
The fastest schedule is rarely the best schedule. A bathroom is a daily-use room, so plan ahead. If this is your only bathroom, coordinate toilet removal and reinstall timing carefully. No one wants to discover at midnight that the toilet is still sitting in the hallway like a porcelain campfire stool.
DIY Experience Notes: What Actually Helps When Tiling a Bathroom Floor
The biggest lesson from tiling a bathroom floor is that confidence should arrive after preparation, not before it. Many DIYers begin the project thinking the tile setting is the hard part, but the real test is everything that happens before the first tile touches mortar. A flat floor, clean underlayment, smart layout, and organized workspace make the installation feel calm. A messy room, missing tools, and mystery dips in the subfloor turn the same project into a home-improvement soap opera.
One practical experience tip is to create a “tile station” outside the bathroom. Keep the wet saw, extra tile, measuring tape, pencil, and trash bucket there. Bathrooms are small, and trying to cut tile inside the room usually leads to awkward bending, dust, water splashes, and language your grandmother would not approve of. A separate cutting station keeps the work cleaner and helps you think clearly.
Another useful habit is numbering tricky cuts. When dry-fitting tiles around a toilet flange, doorway, or vanity, mark the back of each tile with its location. For example, write “door left,” “toilet back,” or “vanity corner.” It sounds overly cautious until you have five similar-looking cut pieces and no idea which one was supposed to go where. Tile has a mischievous way of becoming a puzzle the moment you turn your back.
Do not underestimate lighting. Bathroom lighting can cast shadows that hide lippage or crooked grout lines while you work. Bring in a portable work light and check the floor from different angles. What looks perfect from above may look uneven from the doorway. Since the doorway is usually the first viewing point, inspect the layout from there before committing.
Keep cleaning as you go. Mortar smears, grout haze, and debris in joints become harder to fix later. A damp sponge and a bucket of clean water are as important as the trowel. Change the water often. Dirty water simply moves residue around and gives the tile a cloudy finish. The same idea applies after grouting: wipe carefully, rinse frequently, and avoid digging grout out of the joints.
Finally, accept that the project will take longer than the optimistic version in your head. This is normal. You may need one more tile cut, one more trip to the store, one more adjustment near the tub, or one more pause to let materials cure. That does not mean the project is going badly. It means you are doing real work in a real house, where walls are rarely square and floors have personalities. The best DIY bathroom tile floors are not rushed. They are measured, adjusted, cleaned, checked, and allowed to cure like civilized construction.
Conclusion
Learning how to tile a bathroom floor DIY is a rewarding project because it combines design, durability, and hands-on skill. The process is not about moving fast; it is about building a floor from the bottom up with care. Start with a strong subfloor, choose the right underlayment, plan your layout, use the correct mortar, maintain consistent grout lines, and allow proper curing time. When each step is done patiently, the result is a bathroom floor that looks fresh, feels solid, and handles daily moisture without drama.
A DIY tile floor can save money, upgrade your bathroom, and give you serious homeowner bragging rights. Just remember: tile rewards precision, grout rewards patience, and your knees deserve pads. Treat the project with respect, and your bathroom floor will return the favor every single morning.