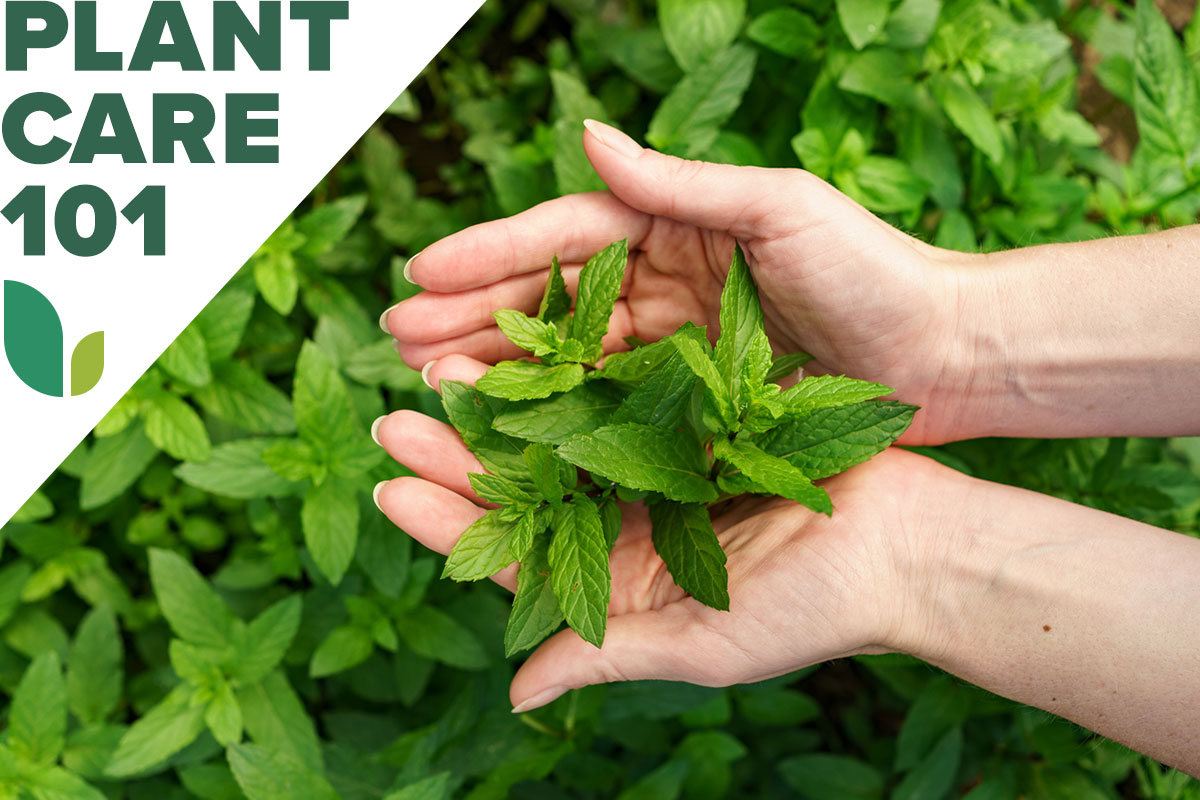
Mint is the friend who shows up to your party with snacks, helps clean up, and then quietly moves into your guest room.
It’s fragrant, useful, and ridiculously easy to growbut it can also spread like it pays rent by the square foot.
The good news: you can absolutely grow lush, flavorful mint at home without letting it take over your flower beds,
your lawn, and your personal identity.
This guide walks you through mint plant care (sun, soil, watering, harvesting) andmost importantlyhow to keep mint under
control using simple container strategies, pruning habits, and a few “don’t learn this the hard way” tips. Whether you want
a patio pot for mojitos, a kitchen windowsill herb garden, or an outdoor patch that behaves itself, you’re in the right place.
Why Mint Is So Easy to Grow (and So Hard to Stop)
Mint (Mentha spp.) is a vigorous perennial herb that spreads through underground stems called rhizomes and,
in many types, trailing stems that can root when they touch soil. Translation: it doesn’t just grow upwardit grows sideways,
looking for new territory like it’s auditioning for a nature documentary.
That growth habit is exactly why mint is a fantastic beginner herb: it tolerates a range of light, bounces back after harvesting,
and usually doesn’t demand fancy care. But it’s also why most gardeners recommend growing mint in pots or using barriers if you
put it in the ground.
Pick Your Mint: Peppermint, Spearmint, and the Fun Flavored Crowd
If you’ve only met “mint” as a generic leaf on a dessert plate, prepare to be delighted. There are many mint varieties, and they
don’t all taste the same.
Popular mint types for home gardens
- Spearmint: Sweet, classic, great for tea, salads, and summer drinks.
- Peppermint: Cooler and stronger, often used in desserts and infused oils.
- Apple mint: Softer flavor, fuzzy leaves, nice for iced tea.
- Chocolate mint: Smells like dessert, fun for garnishes and hot cocoa.
- Orange or pineapple mint: Fruity notes that make water and cocktails taste fancy.
One key tip: if you want a specific variety, start with a plant (nursery transplant, division, or cutting). Mint grown from seed
can be unreliable for matching flavor and traitsso buying a labeled plant saves you from “mystery mint” surprises.
Where Mint Grows Best: Containers vs. In-Ground
Option A: Containers (a.k.a. “Well-Behaved Mint”)
If you remember nothing else, remember this: mint in a pot is mint with boundaries. Containers are the easiest,
most reliable way to grow mint and keep it from spreading into nearby beds.
Container basics that actually work
- Size: Aim for a pot about 12–16 inches wide for a happy, productive plant.
- Depth: At least 6 inches deep (deeper is even better for consistent moisture).
- Drainage: Must have holesmint likes moisture, not a swampy foot bath.
- Material: Plastic holds moisture longer; terracotta dries faster (and may need more frequent watering).
- Escape prevention: Place the pot on a saucer, paver, or solid surface so roots can’t sneak out through drainage holes.
Want an extra-smart trick? If your pot sits on soil, rotate it occasionally. Roots can find drainage openings and “self-plant”
into the ground if given enough time. A simple quarter-turn now and then can keep your mint from staging a jailbreak.
Option B: In the Ground (Only With a Containment Plan)
Growing mint in the ground is possible, but you need a strategy. Otherwise, mint can spread beyond its original spot and become
difficult to remove later.
Two safer in-ground approaches
-
Sink a container: Plant mint in a pot, then sink the pot into the ground with the rim slightly above the soil line.
This creates a barrier while keeping a “natural” look. -
Use a barrier bed: Create a dedicated mint area with a physical barrier that extends above and below soil level to slow rhizomes.
(Even then, mint may try to escape eventuallymint is persistent.)
If you’re set on in-ground mint, make it a “contained zone” away from delicate plants, and check the edges regularly for runners.
Think of it like owning a puppy: adorable, energetic, and you’re in charge of the fence.
Sun, Soil, and Water: Mint Plant Care That Keeps It Thriving
Light
Mint grows in full sun to partial shade. In many home gardens, it does best with morning sun and some afternoon shade,
especially in hotter climates. If your mint is indoors, a bright windowsill works wellrotate the pot so it grows evenly instead
of leaning like it’s trying to eavesdrop.
Soil
Mint prefers soil that’s rich and moisture-retentive but still drains well. A simple potting mix with a bit of compost is perfect.
In garden beds, loosening the soil and adding compost helps keep roots happy and supports steady leaf production.
Watering
Mint likes consistent moisture. Water when the top inch of soil feels dry. In containersespecially in warm weatherthis may mean
watering every few days. The goal is “evenly moist,” not “soggy.” If your mint wilts on a hot day but perks up after watering, that’s
a classic sign it needs more consistent moisture.
How to Plant Mint: Step-by-Step
- Choose your container (12–16 inches wide is a great target).
- Add quality potting mix and mix in compost if you have it.
- Plant at the same depth it was growing in the nursery pot.
- Water thoroughly until water drains from the bottom.
- Mulch lightly (outdoors) to help hold moisture and keep leaves clean.
- Label the variety (future-you will thank you when “mystery mint” becomes a crowded mint buffet).
Pruning, Pinching, and Feeding: Keep Mint Bushy and Flavorful
Harvesting = pruning (and mint loves it)
Mint responds to cutting by branching, which makes it fuller. Regular harvesting is basically mint’s love language.
Snip stems just above a set of leaves to encourage the plant to branch out instead of growing long and floppy.
Pinch flowers for better flavor
When mint flowers, energy shifts from leaf production to blooming. Many gardeners pinch off flower spikes as they appear to keep
leaves tasting their best and to reduce unwanted spread by seed. Bonus: it keeps the plant compact.
Fertilizer: don’t overdo it
Mint isn’t a heavy feeder. Too much fertilizer can create fast, soft growth with less intense flavor.
For container mint, refreshing the top couple inches of soil with compost mid-season is often enough. If growth seems weak,
a gentle, balanced fertilizer used sparingly can help.
Divide every few years
Mint can get crowded and less productive over time. Dividing the plant (separating roots into sections and replanting) refreshes growth,
keeps it vigorous, and gives you new plants to shareassuming your friends haven’t started running away when you say “I brought mint!”
Harvesting Mint Without Regret
When to harvest
You can harvest mint throughout the growing season. For the best flavor, many gardeners pick leaves before heavy flowering. If you’re drying mint,
harvesting when buds are forming (but before full bloom) is a common sweet spot.
How to harvest
- Cut stems that are about 6–8 inches long for fresh use.
- Don’t remove more than about one-third of the plant at once (unless you’re doing a purposeful cut-back).
- For a big refresh, mint tolerates being cut back hard and often regrows enthusiastically.
How to store mint
- Refrigerator: Treat like a bouquetstems in water, loosely covered.
- Freezing: Chop and freeze in ice cube trays with water for teas and cocktails.
- Drying: Air-dry small bundles in a ventilated spot out of direct sunlight, then store in airtight jars.
- Infusions: Mint makes excellent infused water, simple syrup, and (carefully done) herbal oils.
Common Problems (and the Quick Fixes)
Leggy mint
Usually a light issue. Move it to a brighter spot (or give indoor mint supplemental light) and start harvesting more often to encourage branching.
Yellow leaves
Often watering-related. Check drainage and soil moisture. Constantly soggy soil can stress roots. Very dry soil can also cause leaf drop or yellowing.
Aim for steady, moderate moisture.
Pests
Mint can attract aphids, spider mites, and occasionally whiteflies. Start with the gentle approach: rinse leaves with water, remove heavily infested stems,
and improve airflow. If you use insecticidal soap, follow label directions and avoid spraying during hot sun.
Diseases
Poor airflow and wet foliage can invite issues like rust or powdery mildew. Water at the base, avoid soaking leaves late in the day,
and thin the plant if it’s too dense. If a section is badly affected, prune it out and discard it (don’t compost infected leaves).
Keeping Mint Under Control: The Anti-Takeover Toolkit
Here are the most reliable ways to keep mint from spreadingpick a few and you’ll have mint that stays productive without becoming a neighborhood nuisance.
- Grow mint in pots (the #1 best method).
- Use a saucer or barrier under pots so roots can’t escape through drainage holes.
- Rotate pots occasionally if they sit on soil to discourage rooting out.
- Sink a pot in the ground with the rim above soil if you want an in-ground look with containment.
- Prune oftenfrequent cutting reduces spread and keeps growth compact.
- Remove runners the moment you see them creeping beyond boundaries.
- Pinch flowers to keep leaf production strong and reduce self-seeding.
- Don’t plant mint with other herbs in one pot unless you want mint to “win” the container.
- Check edges weekly during peak growthmint spreads quickly when it’s happy.
- Plan a “mint-only zone” if you insist on in-ground planting.
Simple Mint Setups You Can Copy
1) The Patio “Mint Bar” Pot
Use a 14–16 inch pot, plant one variety (like spearmint), and keep it near the kitchen door. Harvest weekly. Add a saucer underneath.
This setup gives you easy access and minimal drama.
2) The Windowsill Tea Mint
Choose a smaller pot (but still with drainage), keep it in bright light, and pinch tips regularly. If it gets leggy, cut it back and let it regrow.
You’ll have a steady supply for tea, yogurt, and fruit salads.
3) The “Contained In-Ground Look”
Sink a pot into a garden bed and keep the rim a bit above soil level. Trim any stems that try to flop over and root.
It looks planted-in, but behaves (mostly) like a container plant.
FAQs
Does mint come back every year?
Many mints are hardy perennials, meaning they can return year after year in suitable climates. In containers, winter survival depends on your local conditions,
pot size, and exposuresome gardeners overwinter mint outdoors, while others bring pots to a sheltered spot.
Can mint grow indoors year-round?
Yes, with bright light, consistent watering, and regular harvesting. Indoor mint may grow more slowly in winter, but it can still produce usable leaves.
How do I keep mint from taking over my garden?
Use containers, barriers, and frequent pruning. If mint is already spreading in the ground, dig out runners, remove roots as thoroughly as possible,
and consider relocating what remains to a pot.
Hands-On Experiences and Real-World Lessons from Growing Mint
Mint is one of those plants that teaches you gardening lessons whether you signed up for them or not. Many home gardeners start with the purest intentions:
“I’ll just tuck a little mint near the tomatoes.” Then a few months later, they’re holding a shovel like it’s a therapy tool, asking themselves how a plant
that fits in a 4-inch nursery pot managed to claim a 4-foot radius.
The most common “aha” moment comes when people realize that mint doesn’t spread like a polite clumpit spreads like a network. The leaves you see are only
the above-ground part of the story. Under the surface, rhizomes can travel outward, send up new shoots, and create a patch that looks like it appeared
overnight. That’s why gardeners who’ve been through it often become the loudest supporters of the container method. After you’ve spent a weekend trying to
remove mint roots from a bed, a pot starts to feel like the invention of the century.
Another frequent experience: mint gets floppy and “lazy” when it isn’t harvested. People sometimes assume an herb should be left alone to grow big, but mint
rewards the opposite approach. Regular snipping makes it bushy, dense, and much more attractive. It also improves your odds of having mint that tastes great,
because the tender new growth is usually the most flavorful. Gardeners who harvest weekly often say they end up with a healthier plant and a steady
supply of leavesso the plant stays compact instead of turning into a sprawling green octopus.
Container-grown mint also teaches a very practical watering lesson: pots don’t forgive forgetfulness the way garden soil sometimes does. When mint is in the
ground, its roots can chase moisture. In a container, the soil volume is limited and can dry quicklyespecially in sun or windy spots. Many gardeners find
their best rhythm by doing a quick “finger test” every morning or two: if the top inch feels dry, it’s time to water. Once you build that habit, mint
becomes wonderfully low-stress.
Then there’s the “mint escapes through the drainage hole” storysurprisingly common when pots sit directly on soil. Gardeners often notice the plant looking
extra vigorous and think, “Wow, I’m doing great!” Only later do they discover roots have grown out the bottom and anchored into the bed like a grappling hook.
The fix is simple (a saucer, paver, or stand), but the lesson sticks: mint will take every opportunity you give it. If you’re growing mint to keep it under
control, you have to be just a tiny bit more stubborn than the plant.
Finally, many people learn that mint is at its best when you treat it like a renewable resource, not a precious ornament. Cut it back. Share it. Freeze it.
Toss handfuls into iced tea. Make mint water that tastes like you’re at a spa that charges $19 for parking. When you use mint generously, it feels less like
a plant you’re managing and more like a helpful kitchen staple you happen to grow. And that’s the sweet spot: mint that stays contained, tastes amazing,
and makes you feel like the kind of person who just casually has fresh herbs on handbecause you do.