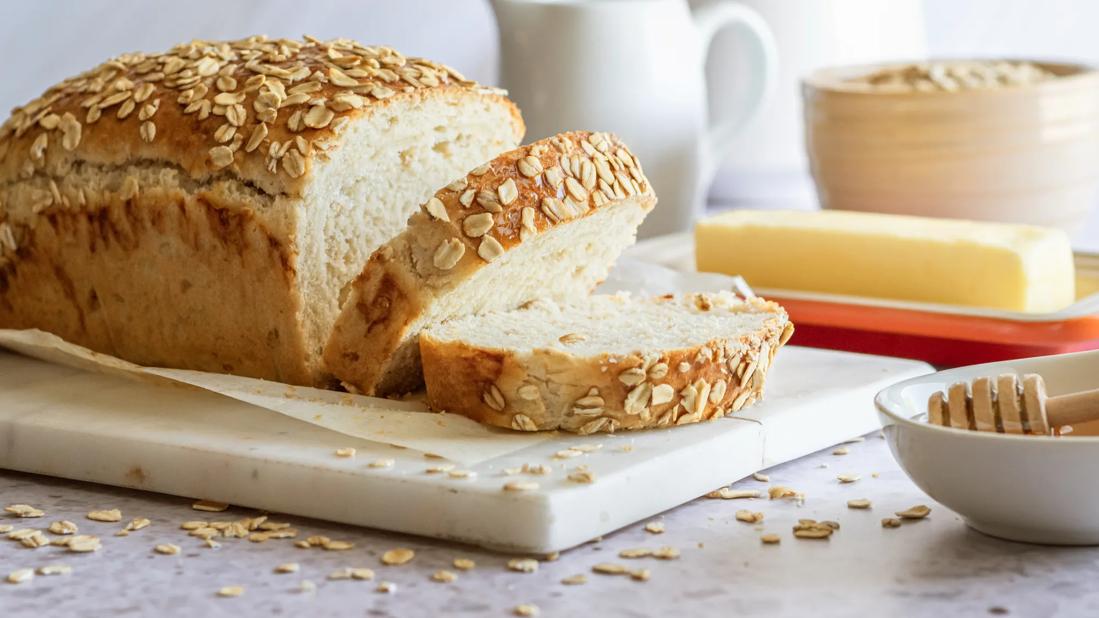
There are breads that politely sit on the table, and then there is oats and honey bread: soft, golden, slightly sweet, and charming enough to make butter melt before it even touches the slice. This homemade loaf has the cozy flavor of rolled oats, the gentle sweetness of honey, and the kind of tender crumb that makes sandwiches feel like they got promoted.
This oats and honey bread recipe is designed for home bakers who want a dependable loaf without needing a bakery degree, a wood-fired oven, or a dramatic flour-covered apron moment. The dough is enriched with milk, butter, honey, and oats, which means it bakes into a soft sandwich-style bread with a lightly chewy texture and a warm, nutty flavor.
Use it for toast, peanut butter sandwiches, grilled cheese, breakfast slices, dinner bread, or that highly scientific kitchen activity known as “standing over the counter eating one more piece.”
Why This Oats and Honey Bread Recipe Works
The magic of honey oat bread comes from balance. Oats bring texture and mild nuttiness, honey adds moisture and natural sweetness, and bread flour gives the loaf enough structure to rise tall instead of slouching like it missed its morning coffee.
Many oatmeal bread recipes begin by softening oats in hot liquid. That step matters because dry oats can steal moisture from the dough while it bakes. By soaking them first, the oats become tender and blend into the crumb instead of turning into tiny breakfast speed bumps.
This recipe uses a combination of warm milk and water. Milk helps create a softer texture and richer flavor, while water keeps the dough from becoming too heavy. Butter adds tenderness, honey improves browning, and a small amount of whole wheat flour gives the loaf a deeper, more rustic taste without making it dense.
Ingredients for Homemade Oats and Honey Bread
Main Ingredients
- 1 cup old-fashioned rolled oats, plus 1 tablespoon for topping
- 1 cup hot water
- 3/4 cup warm milk, about 105°F to 110°F
- 2 1/4 teaspoons active dry yeast or instant yeast
- 1/3 cup honey
- 3 tablespoons unsalted butter, melted and slightly cooled
- 1 1/2 teaspoons fine salt
- 1 cup whole wheat flour
- 2 1/2 to 3 cups bread flour, plus more as needed
- 1 egg mixed with 1 tablespoon milk, for brushing the top
Ingredient Notes
Old-fashioned oats: Rolled oats give the best texture. Quick oats can work, but the loaf may be slightly softer and less chewy. Steel-cut oats are not ideal here because they stay too firm unless cooked first.
Honey: Use a mild honey unless you want a stronger floral flavor. Clover honey, wildflower honey, or orange blossom honey all work beautifully.
Bread flour: Bread flour gives this honey oat bread a stronger rise and better chew. All-purpose flour can be used, but the loaf may be a little softer and shorter.
Whole wheat flour: One cup adds flavor and color without making the bread feel like a brick wearing a sweater.
Step-by-Step Oats and Honey Bread Recipe
Step 1: Soften the Oats
Place the rolled oats in a large mixing bowl. Pour the hot water over them and stir. Let the mixture sit for 10 to 15 minutes, until the oats absorb much of the water and become soft. The mixture should feel warm, not scorching hot, before you add the yeast mixture.
Step 2: Activate the Yeast
In a separate small bowl, stir the warm milk and yeast together. Let it sit for 5 minutes, until slightly foamy. If using instant yeast, you can add it directly to the flour, but blooming it first is helpful because it confirms the yeast is alive and ready for bread duty.
Step 3: Mix the Dough
Add the honey, melted butter, salt, yeast mixture, whole wheat flour, and 2 1/2 cups of bread flour to the softened oats. Stir until a shaggy dough forms. The dough should be slightly sticky but not soupy. If it looks like pancake batter with ambitions, add more bread flour a few tablespoons at a time.
Step 4: Knead Until Smooth
Knead the dough by hand for 8 to 10 minutes on a lightly floured surface, or use a stand mixer with a dough hook for about 5 to 7 minutes. The dough should become smooth, elastic, and just a little tacky. It should cling slightly to your fingers but not coat your hands like bread glue.
Step 5: First Rise
Place the dough in a lightly greased bowl. Cover it with a clean towel or plastic wrap and let it rise in a warm place for 60 to 90 minutes, or until doubled in size. Rising time depends on room temperature, so trust the dough more than the clock.
Step 6: Shape the Loaf
Lightly grease a 9×5-inch loaf pan. Turn the dough onto a lightly floured surface and gently press it into a rectangle. Roll it up tightly from the short side, pinch the seam closed, and place it seam-side down in the prepared pan.
Step 7: Second Rise
Cover the loaf and let it rise for 35 to 55 minutes, until the dough crowns about 1 inch above the rim of the pan. Do not overproof it. If the dough rises too much before baking, it may collapse in the oven like a soufflé that heard bad news.
Step 8: Add the Oat Topping
Preheat the oven to 350°F. Brush the top of the loaf gently with the egg and milk mixture, then sprinkle with the reserved oats. The egg wash gives the bread a shiny golden crust and helps the oats stick.
Step 9: Bake
Bake for 35 to 42 minutes, until the top is deeply golden and the loaf sounds hollow when tapped. For the most reliable result, check the center with an instant-read thermometer. A soft sandwich loaf is usually fully baked around 190°F.
Step 10: Cool Before Slicing
Remove the loaf from the pan and transfer it to a wire rack. Let it cool for at least 1 hour before slicing. Yes, this is difficult. Yes, the bread smells amazing. But slicing too early can make the crumb gummy, and nobody wants bread that behaves like oatmeal pudding in loaf form.
Recipe Summary
- Prep time: 25 minutes
- Rise time: 1 hour 45 minutes to 2 hours 25 minutes
- Bake time: 35 to 42 minutes
- Total time: About 3 hours
- Yield: 1 large 9×5-inch loaf
- Best for: Toast, sandwiches, breakfast bread, grilled cheese, and dinner slices
Tips for the Best Honey Oat Bread
Measure Flour Carefully
Too much flour is the fastest way to turn soft homemade bread into a doorstop with crumbs. Spoon flour into the measuring cup and level it off, or use a kitchen scale if you have one. The dough should be soft and slightly tacky, not dry and stiff.
Do Not Add Hot Milk to Yeast
Yeast enjoys warmth, not a sauna. Milk that is too hot can damage or kill yeast. Aim for warm milk that feels like bathwater, around 105°F to 110°F for active dry yeast.
Let the Oats Hydrate
Soaking the oats first helps create a moist, tender loaf. Skipping this step can make the bread drier because the oats continue absorbing liquid during baking.
Watch the Second Rise
The second rise is where sandwich bread earns its shape. Let it rise until it crowns above the pan, but bake it before it becomes puffy and fragile. If you poke the dough lightly and it springs back slowly, it is usually ready.
Cool Completely
Fresh bread needs time to finish setting after it leaves the oven. Cooling may feel like punishment, but it rewards you with clean slices, a better crumb, and less squishing.
Flavor Variations
Whole Wheat Oats and Honey Bread
For a heartier loaf, replace an additional 1/2 cup of bread flour with whole wheat flour. The bread will taste nuttier and slightly denser. Add 1 to 2 tablespoons of extra milk if the dough feels dry.
Cinnamon Honey Oat Bread
Add 1 teaspoon of cinnamon to the dry ingredients. This version is excellent for breakfast toast, especially with butter, cream cheese, or apple butter.
Seeded Oat Honey Bread
Add 2 tablespoons of sunflower seeds, flaxseed, or sesame seeds to the dough. Seeds add crunch and make the loaf feel a little more bakery-style, which is just a fancy way of saying everyone will ask where you bought it.
No-Egg Topping Option
If you prefer not to use egg wash, brush the loaf with milk or melted butter before adding oats. The crust will be softer and less shiny, but still delicious.
How to Serve Oats and Honey Bread
This bread is mild enough for savory meals and sweet enough for breakfast. Toast it and spread it with salted butter, honey, jam, or peanut butter. Use it for turkey sandwiches, egg salad, grilled cheese, or French toast. It also pairs beautifully with soups, especially tomato soup, chicken noodle soup, vegetable stew, or creamy potato soup.
For a simple breakfast, toast a slice and top it with Greek yogurt, banana slices, and a drizzle of honey. For lunch, make a sandwich with roasted chicken, sharp cheddar, lettuce, and mustard. For dinner, serve thick slices beside a bowl of chili. This loaf is basically the friendly neighbor of breads: it gets along with everyone.
How to Store Homemade Oatmeal Honey Bread
Store the cooled loaf in an airtight bag or container at room temperature for up to 3 days. Because homemade bread does not contain commercial preservatives, it is best enjoyed fresh. For longer storage, slice the loaf and freeze it.
To freeze, place slices in a freezer-safe bag with parchment paper between layers. Freeze for up to 2 months. Toast slices straight from frozen, or thaw them at room temperature. Avoid refrigerating bread because the refrigerator can make it stale faster.
Common Mistakes and How to Fix Them
The Bread Is Too Dense
Dense bread usually comes from too much flour, weak yeast, under-kneading, or not enough rise time. Use fresh yeast, measure flour carefully, and let the dough double during the first rise.
The Top Browns Too Quickly
If the crust gets dark before the loaf is done, loosely tent it with foil during the last 10 to 15 minutes of baking. Honey encourages browning, so keep an eye on the oven near the end.
The Bread Collapsed
A collapsed loaf may be overproofed or underbaked. Bake when the loaf rises about 1 inch above the pan, and check doneness with a thermometer for better accuracy.
The Dough Is Sticky
Oat bread dough is often a bit tacky because oats and honey both hold moisture. Add flour slowly. A slightly sticky dough usually makes softer bread than a dry dough.
Experience Notes: What Baking Oats and Honey Bread Teaches You
Baking oats and honey bread is one of those kitchen projects that makes you feel more capable than you did an hour ago. It is not flashy. It does not demand complicated folding techniques or a sourdough starter with its own emotional support group. Instead, it teaches patience, texture, timing, and the deeply satisfying truth that simple ingredients can become something spectacular.
The first thing you notice is how the oats change the personality of the dough. Plain white bread dough is smooth and stretchy, but oat bread dough feels more rustic. It has softness, weight, and a gentle stickiness from the honey. At first, beginners sometimes panic and add too much flour. The dough looks a little clingy, so they keep dusting and dusting until the loaf loses its tenderness. The better move is to accept a little tackiness. Bread dough does not have to feel like modeling clay to be successful.
The second lesson is that rise times are flexible. A warm kitchen can make dough puff up quickly, while a cool kitchen can slow everything down. This is where bread baking becomes less like following a stopwatch and more like learning a conversation. The dough tells you when it is ready. It grows, softens, and becomes airy. Once you start watching the dough instead of the clock, your bread improves immediately.
Another experience worth mentioning is the smell. Oats and honey bread has a cozy aroma that feels different from basic sandwich bread. The honey caramelizes gently, the oats toast on top, and the butter gives the crust a warm bakery fragrance. It is the kind of smell that makes people wander into the kitchen pretending they need water. They do not need water. They need bread.
This recipe is also forgiving enough for real life. If the first rise goes a little long, the bread will usually survive. If your loaf is slightly uneven in the pan, it will still taste wonderful. If some oats fall off the top, congratulations, you have rustic charm. Homemade bread does not need to look like it came from a magazine cover. It needs to be baked through, sliced generously, and eaten with enthusiasm.
One of the best practical experiences is discovering how versatile the loaf becomes after baking. On day one, it is soft and perfect with butter. On day two, it makes excellent toast because the honey helps the surface brown beautifully. By day three, it can become French toast, breadcrumbs, croutons, or a grilled cheese sandwich with personality. Nothing goes to waste unless someone in the house discovers the loaf early and performs what can only be described as a “quality control inspection.”
If you bake this bread often, you will start adjusting it to match your taste. More honey for sweetness. More whole wheat flour for depth. A sprinkle of cinnamon for breakfast. A handful of seeds for crunch. That is the quiet joy of a dependable bread recipe: once you understand the foundation, you can make it your own.
Conclusion
This oats and honey bread recipe is soft, hearty, lightly sweet, and practical enough for everyday baking. The oats add texture and moisture, the honey gives the loaf warmth and color, and the simple method makes it approachable for beginners and satisfying for experienced bakers. Whether you slice it for toast, pack it into sandwiches, or serve it beside soup, this homemade honey oat bread brings comfort without fuss.
Best of all, it proves that great bread does not need to be complicated. A bowl of oats, a spoonful of honey, a little yeast, and some patience can turn into a loaf that makes the whole kitchen smell like good decisions.