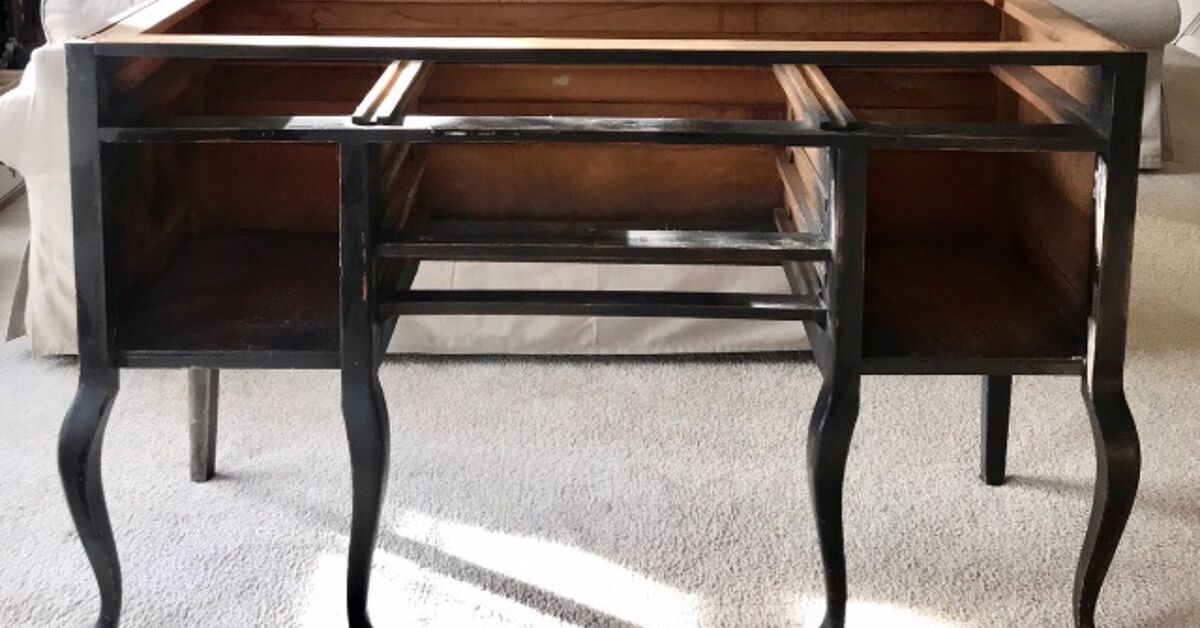
A coastal buffet can make a dining room feel lighter, calmer, and far more organizedwbines useful cabinet storage with a relaxed seaside look: clean lines, soft color, natural wood, woven texture, and just enough character to suggest ocean air without resembling a souvenir shop.
The plan below creates a freestanding buffet about 60 inches wide, 18 inches deep, and 34 inches high. It has two enclosed cabinets, an open center compartment, adjustable shelves, and a wood top. It is manageable for a confident beginner using a circular saw or table saw, drill, pocket-hole jig, sander, clamps, and basic measuring tools.
What Makes a Buffet Look Coastal?
Coastal style works best when it borrows from the shore rather than dressing up as the shore. Think warm white, pale blue, sea-glass green, driftwood gray, sandy beige, light oak, linen, rattan, and brushed metal. The goal is breezy and collected, not “pirate-themed seafood restaurant.”
Paint the cabinet body soft white or muted blue-green, then leave the top natural. Add cane webbing, Shaker trim, louver-inspired details, or simple brass pulls. One or two coastal elements feel polished; twelve seashell knobs may cause the furniture to request shore leave.
Choose a Design Direction
- Classic coastal: warm white cabinet, natural-wood top, aged brass hardware.
- Modern coastal: pale blue-gray paint, white oak top, slim black pulls.
- Coastal farmhouse: creamy paint, chunky top, subtle wear, cup pulls.
- Sea-glass coastal: muted aqua paint, cane inserts, brushed brass knobs.
Plan the Size and Layout
A finished size of 60 by 18 by 34 inches provides room for platters, glassware, linens, baskets, or small appliances. Divide the case into three sections: closed storage on the left and right, with an open center for baskets or display. A face frame hides plywood edges, while legs or a recessed base keep the piece visually light.
Measure the room before cutting. Leave enough space for dining chairs and walking paths. For a smaller room, reduce the width to 48 inches and narrow the compartments proportionally. Keep the depth around 16 to 18 inches so serving pieces fit without turning the buffet into a runaway kitchen island.
Materials and Tools
Suggested Materials
- Two sheets of 3/4-inch cabinet-grade plywood
- One sheet of 1/4-inch plywood for the back and optional door panels
- 1-by-2 and 1-by-3 boards for face frames, trim, and doors
- A hardwood project panel or joined boards for the top
- Four legs or material for a recessed base
- Four cabinet hinges, two pulls, shelf pins, and an anti-tip kit
- Pocket-hole screws, wood glue, brads, filler, caulk, primer, paint, stain, and clear finish
- Optional cane webbing, rattan mesh, or perforated decorative panels
Essential Tools
- Tape measure, square, pencil, level, and clamps
- Circular saw with guide or table saw
- Miter saw or handsaw for trim
- Drill/driver, pocket-hole jig, and shelf-pin jig
- Random-orbit sander, sanding sponges, brush, and small roller
- Eye, hearing, and respiratory protection
Measure the actual plywood thickness before finalizing cuts. Material labeled 3/4 inch is not always exactly 0.750 inch thick, and that small difference can create proud edges, uneven openings, and muttered vocabulary.
Example Cut List
Adjust these dimensions for your joinery and measured plywood thickness:
- Two side panels: 31 1/2 by 17 inches
- One bottom panel: 56 1/2 by 17 inches
- Two dividers: 29 3/4 by 17 inches
- Three top stretchers: 17 by 3 inches
- Four adjustable shelves, sized for the finished openings
- One 1/4-inch back panel, cut to fit after assembly
- Face-frame rails and stiles from 1-by stock
- Two doors, measured after the face frame is installed
- One top: approximately 60 by 18 inches
Do not cut the doors first. Build the case, attach the face frame, measure the real openings, and calculate the overlay or inset required by your hinges. This prevents two beautiful doors from fitting a cabinet that exists only in an alternate universe.
How to Build the Coastal Buffet
Step 1: Cut and Label the Parts
Cut the plywood with a sharp blade and straight guide, supporting the sheet so it cannot sag or pinch the blade. Label every part and mark its front and top edges. Apply edge banding to visible plywood edges that will not be covered by trim.
Step 2: Drill Joinery and Shelf Holes
Drill pocket holes on concealed faces of the bottom, dividers, and stretchers. Before assembly, use a jig to drill matching shelf-pin rows inside the closed compartments. Even spacing matters; eyeballing four rows independently is how shelves learn interpretive dance.
Step 3: Assemble the Carcass
Attach the bottom between the side panels with wood glue and pocket-hole screws. Add both vertical dividers, then install front, center, and rear top stretchers. Check with a square after every major connection and compare diagonal measurements. Equal diagonals indicate a square box.
Dry-fit before adding glue. Pocket screws are convenient, but they cannot negotiate with a divider installed backward.
Step 4: Square and Attach the Back
Place the case face down, adjust it until the diagonal measurements match, and attach the 1/4-inch plywood back with glue and brads or narrow staples. The back locks the case square and prevents side-to-side racking. Add cord-access holes first if the buffet will become a coffee or media station.
Step 5: Build the Face Frame
Cut straight rails and stiles from 1-by-2 or 1-by-3 stock. Assemble the frame on a flat surface, check it for square, then glue and clamp it to the cabinet front. Brads can hold it while the glue cures. Fill holes and sand the joints flush. A clean face frame makes ordinary plywood look like much more expensive furnitureone of woodworking’s nicest legal tricks.
Step 6: Add Legs or a Recessed Base
For an airy look, use tapered or square wood legs supported by mounting plates or a frame under the cabinet. For a more built-in appearance, construct a recessed plinth several inches behind the face frame. Confirm that all feet sit in the same plane. Adjustable levelers are useful on uneven floors and prevent guests from turning folded napkins into furniture shims.
Step 7: Make and Hang the Doors
The simplest doors are plywood panels trimmed to imitate a Shaker profile. For a more refined result, build rail-and-stile frames with plywood, beadboard, or cane inserts. If using natural cane, prepare it as directed by its supplier, stretch it evenly, secure it from the middle toward the corners, and cover the raw edges with retaining strips.
Match the hinges to the door style and overlay. Mark consistent hinge locations, drill pilot holes, and use a jig when available. Concealed hinges are beginner-friendly because they allow small height, side-to-side, and depth adjustments after installation.
Step 8: Add the Top
A natural hardwood or project-panel top adds warmth. Allow about 3/4 to 1 inch of overhang at the front and sides, and soften sharp edges. Attach a solid-wood top from below with hardware or elongated screw holes that permit seasonal movement. A plywood top can be screwed normally through the stretchers.
Create a Durable Coastal Finish
Prepare and Prime
Fill dents, nail holes, and small gaps. Sand painted surfaces to roughly 120 to 180 grit, vacuum the dust, and wipe everything clean. Prime raw wood, plywood edges, MDF, and filled areas. Thin coats create a smoother surface than one heroic coat applied like birthday-cake frosting.
Paint the Cabinet
Brush corners and roll broad surfaces with a small foam or microfiber roller. Apply two thin coats, allowing proper drying time and sanding lightly between coats when permitted. Warm white, oyster, pale blue-gray, muted aqua, foggy green, and soft navy all suit coastal furniture.
Test large paint samples in the room. Light can transform tasteful sea glass into hospital mint with surprising efficiency.
Finish the Top and Add Hardware
Use a clear matte or satin finish for a natural top, or apply a light gray-brown stain or whitewash for driftwood character. Follow with a durable protective topcoat and allow it to cure before loading the buffet.
Aged brass warms pale paint, black hardware sharpens blue tones, and wood knobs suit cane details. Add matching seagrass baskets only after measuring the finished opening. “Approximately 14 inches” has sent many innocent baskets back to the store.
Installation, Styling, and Safety
Move the buffet with help, level it, and secure it to a wall stud or properly rated wall anchors using an anti-tip restraint. Place heavy platters on lower shelves and lighter items above.
Style the top with a lamp, art or a mirror, a vase, and one tray. Vary heights and leave open space. Coastal design depends on visual breathing room; the buffet should look ready for dinner, not ready to open a gift shop.
Common Mistakes to Avoid
- Skipping square checks: An out-of-square case causes uneven doors and shelves.
- Using warped trim: Straight face-frame stock produces cleaner openings.
- Cutting doors early: Measure after the cabinet front is complete.
- Overdoing the theme: Texture and color communicate coastal style better than dozens of anchors and starfish.
- Rushing the finish: Paint may feel dry before it is hard enough for hardware and decor.
- Skipping the anti-tip kit: Stability is part of good furniture design.
My Practical Experience Making a Coastal Buffet DIY
The most useful lesson from building a coastal buffet is that the project succeeds or fails long before the paint can opens. My first plan looked simple: a white cabinet, two doors, open shelves, and a natural top. In practice, simple furniture is unforgiving. Clean lines expose uneven gaps, pale paint highlights rough edges, and minimal hardware leaves nowhere for sloppy alignment to hide.
I began by taping the proposed footprint on the dining-room floor. That five-minute test changed the design. A 20-inch depth looked handsome in a sketch but crowded the walkway once chairs were pulled out. Reducing it to 17 inches made the room comfortable while still fitting dinner plates, serving bowls, and folded linens. Cardboard and painter’s tape are not glamorous, but neither is repeatedly bumping your hip into furniture you built yourself.
Color was the next surprise. Bright white seemed like the obvious coastal choice, yet it looked harsh beside cream walls and an oak floor. A softer white with a slight beige undertone worked better. I painted the center compartment muted blue-gray, adding depth without turning the entire piece into a giant blue block. Large sample boards viewed in morning and afternoon light prevented an expensive repaint.
During assembly, the back panel became the quiet hero. The clamped case appeared square, but its diagonal measurements differed by nearly half an inch. I loosened the clamps, nudged the box until both measurements matched, and fastened the back. The cabinet immediately became rigid, and the doors later aligned with only minor hinge adjustments. Without that check, I would have blamed the hinges, the floor, the lumber, and possibly the moon.
I also learned to finish parts in a deliberate order. Painting the cabinet interior after installing the face frame made the rear corners awkward to reach. Next time, I would prime and apply the first coat to interior panels before final assembly, keeping glue areas bare. I would apply the final coat afterward so filled holes and seams look consistent.
The cane inserts delivered the largest visual reward and the most patience-testing hour. Centering the pattern and maintaining even tension mattered. Working from the center of each side toward the corners helped prevent distortion. As the cane dried, it tightened and looked crisp, making the cabinet feel lighter than solid doors would have.
Finally, I resisted heavily distressing the edges. A little hand sanding added character, but too much made the new piece look artificially battered. The best coastal effect came from soft paint, visible wood grain, cane texture, and restrained brass hardware. The buffet did not shout “beach.” It simply made the room feel calmer, brighter, and more relaxedwhich is what good coastal furniture should do.
Conclusion
A DIY coastal buffet begins with accurate measurements and a square, rigid cabinet. Build the plywood case, let the back panel stabilize it, size the doors after the face frame is complete, and create the coastal mood with a limited palette, natural wood, woven texture, and simple hardware.
The finished piece can serve as dining storage, a coffee bar, entry console, media cabinet, or living-room sideboard. Better yet, it fits your space instead of arriving from a catalog with a delivery fee the size of a small vacation.