Building a brick kiln sounds wonderfully old-school, like something a village potter, a backyard experimenter, and a very ambitious weekend warrior would all discuss over coffee. But a kiln is not just a stack of bricks with a dramatic personality. It is a heat chamber designed to dry, harden, and transform clay through controlled temperature, airflow, insulation, and cooling. Done thoughtfully, a small brick kiln can support pottery tests, handmade clay pieces, and educational firing projects. Done carelessly, it can become a smoke-belching dragon with bad manners.
This guide explains how to make a brick kiln in 15 safety-first steps. It focuses on planning, structure, airflow, materials, loading, monitoring, and responsible firing habits. It is written for readers who want a practical overview before talking with a qualified kiln builder, ceramics instructor, masonry professional, or local code office. Fire, high heat, fumes, and structural instability are real risks, so treat this article as educational guidance, not a substitute for expert supervision, permits, or professional design.
What Is a Brick Kiln?
A brick kiln is a heat-resistant chamber used to fire clay objects, bricks, tiles, or ceramic test pieces. The goal is to raise the temperature gradually so moisture leaves the clay, organic matter burns out, and the clay body becomes harder and more durable. In brickmaking, firing must be carefully controlled so clay particles bond and partially vitrify without melting into a sad ceramic pancake.
Small brick kilns are usually batch kilns, meaning the ware is loaded, fired, cooled, unloaded, and then prepared for another firing. Large industrial brick facilities often use tunnel kilns or other continuous systems, but backyard and studio-scale projects typically use simpler structures. Common designs include updraft kilns, downdraft kilns, crossdraft kilns, pit-style kilns, and sawdust kilns. Each design handles heat and exhaust differently.
Before You Start: Safety Comes First
A kiln deals with heat, smoke, combustion gases, sharp masonry, heavy materials, and sometimes toxic fumes from clay or glaze ingredients. That means safety is not the boring part of the project. It is the part that keeps the exciting part from turning into a neighborhood emergency.
Before building or firing any kiln, check local fire codes, zoning rules, burn restrictions, and environmental regulations. Use a noncombustible outdoor location with clear space around the kiln. Keep children, pets, paper, dry leaves, lumber, fuel containers, and curious relatives at a safe distance. Install carbon monoxide monitoring where appropriate, never fire in an enclosed space, and never leave a kiln unattended during critical heating or shutdown periods.
How to Make a Brick Kiln in 15 Steps
Step 1: Decide What the Kiln Is For
Start by defining the job. Are you firing small pottery experiments, handmade bricks, low-fire clay, test tiles, or decorative pieces? The kiln’s design depends on what you plan to fire. A tiny test kiln for small clay objects is very different from a kiln intended to harden construction bricks. If your goal is structural brick production, professional equipment and proper testing are strongly recommended.
For beginners, the safest path is to begin with a small educational kiln concept under adult expert guidance. Keep expectations modest. The first kiln should teach airflow, drying, loading, and firing behavior, not attempt to produce architectural-grade brick for a house. Your future wall deserves better than “I hope this worked.”
Step 2: Choose the Right Kiln Type
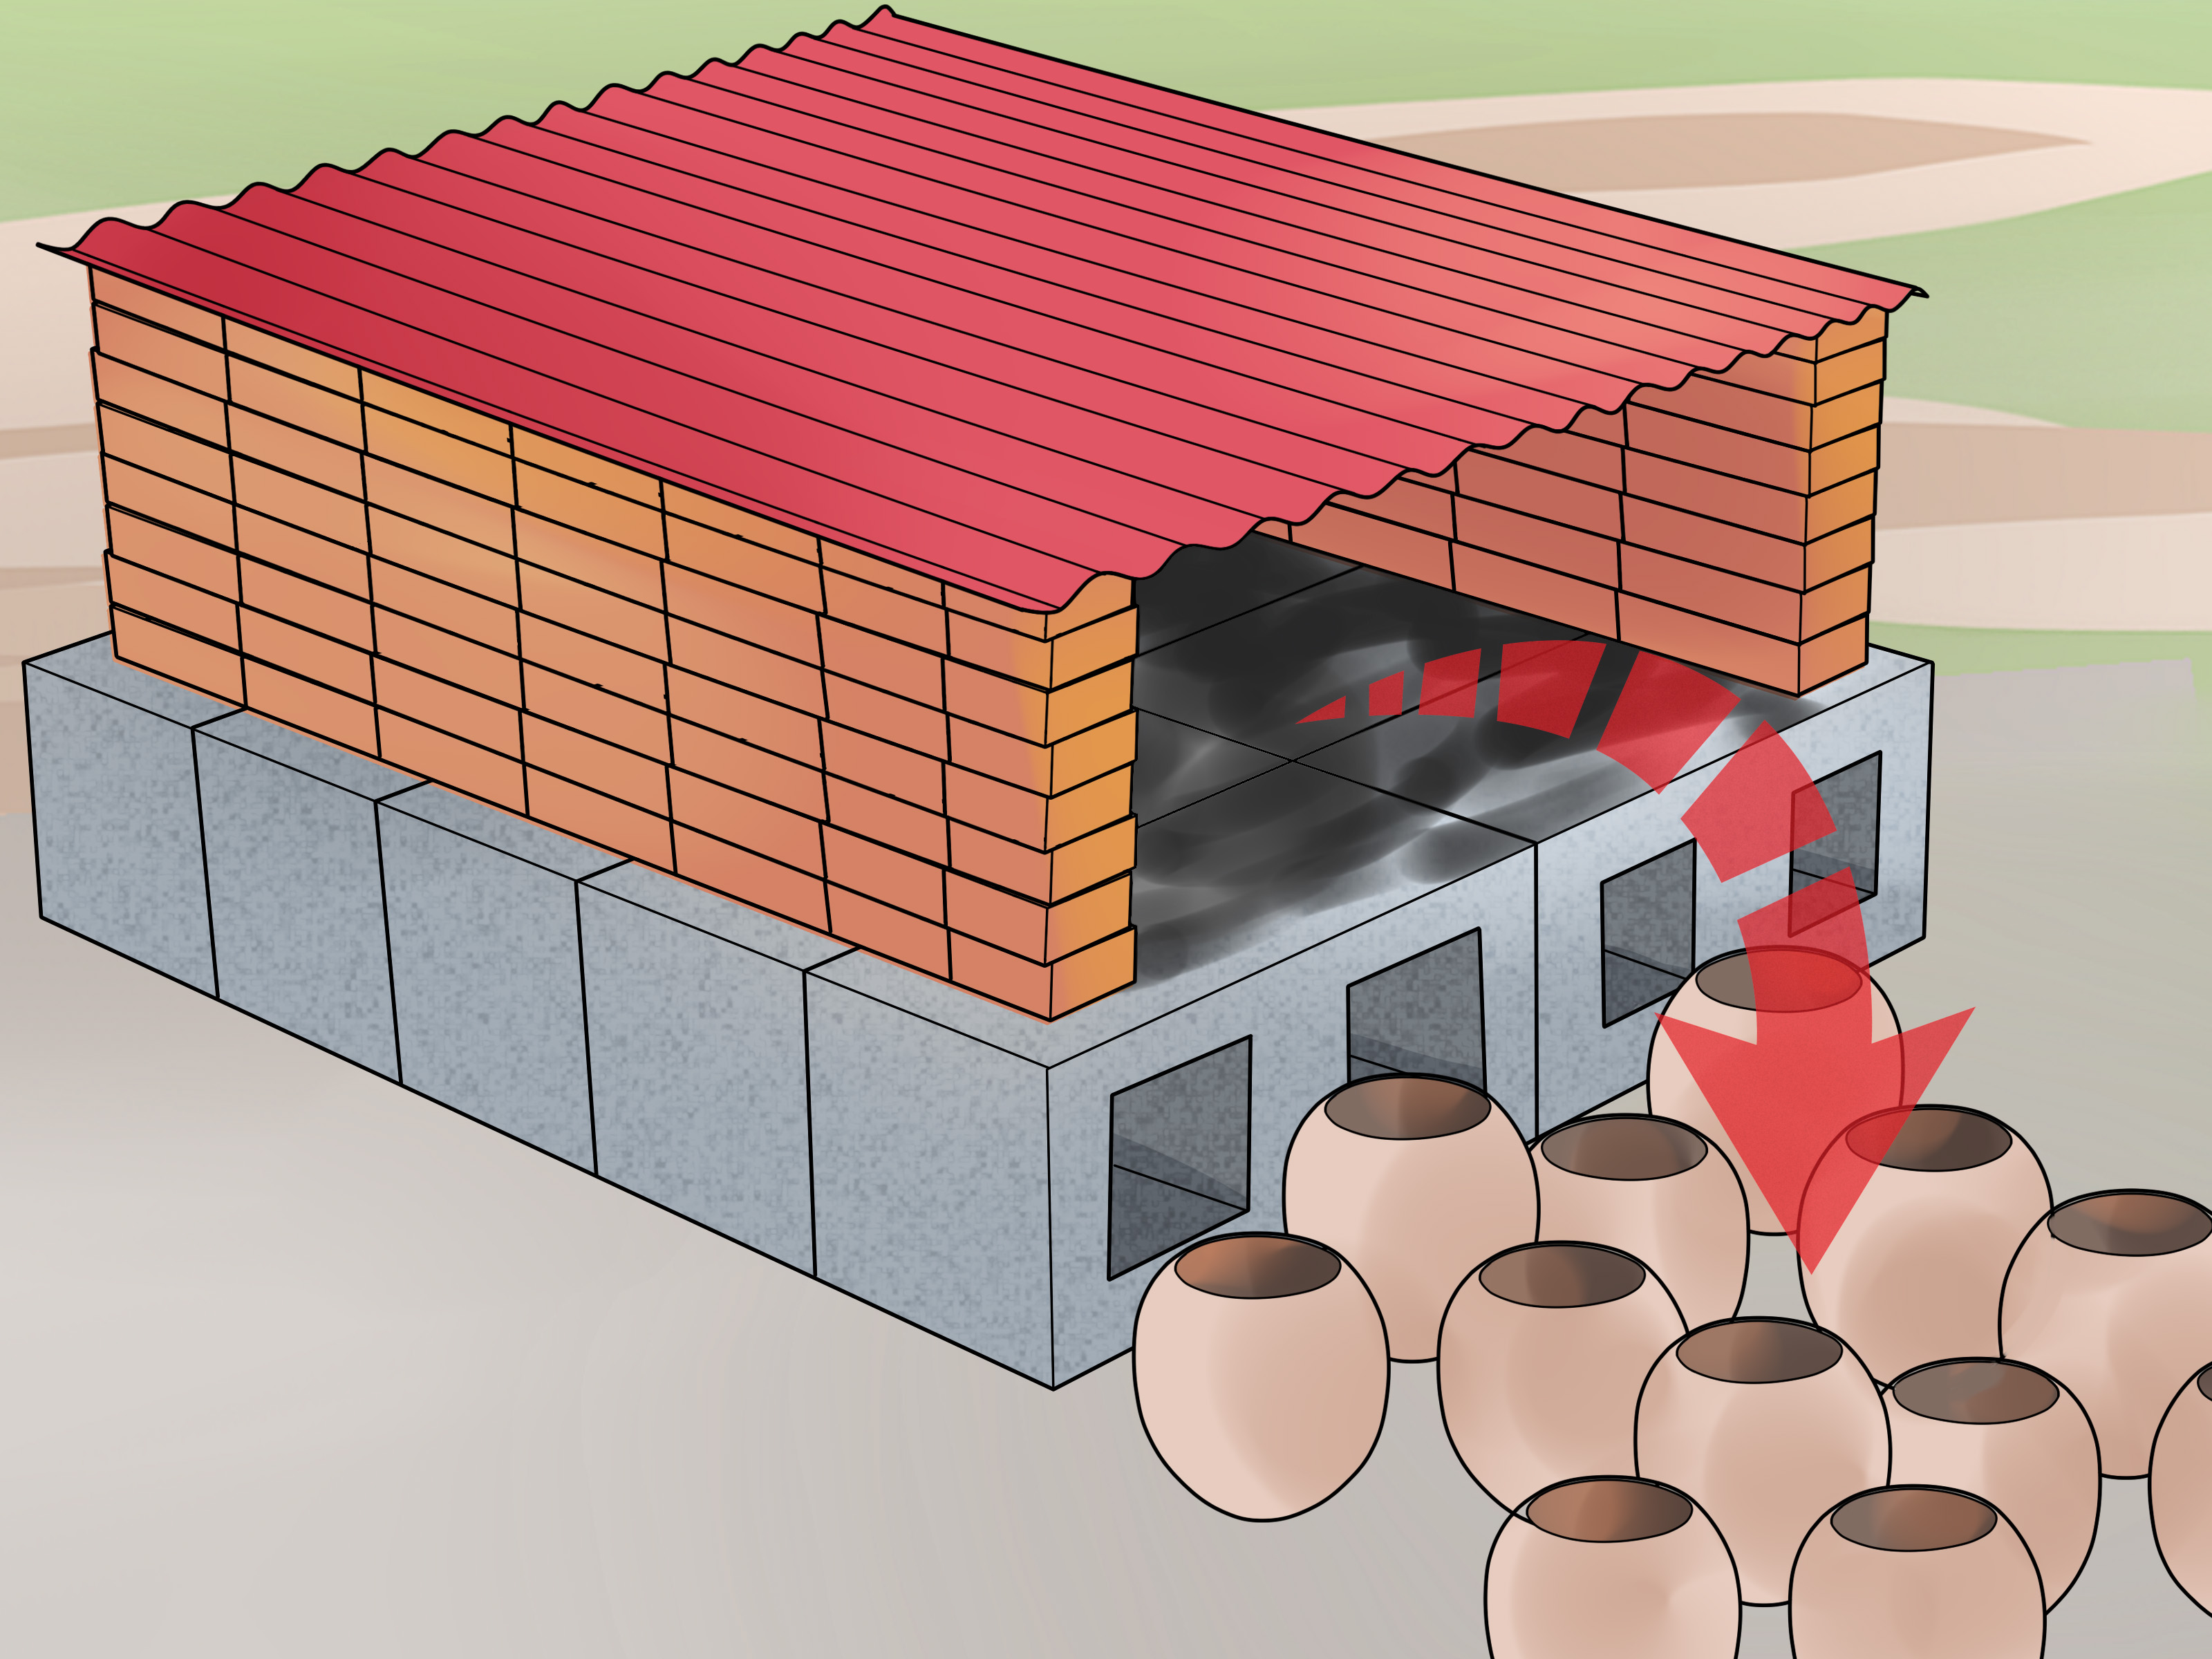
There are several kiln styles, but three basic airflow patterns matter most. In an updraft kiln, heat enters low and exits high, pulling flame and hot gases upward. In a crossdraft kiln, heat travels horizontally across the chamber toward a flue. In a downdraft kiln, heat moves up, circulates downward through the ware, and exits through a lower flue before entering the chimney.
For a first brick kiln, simple is usually better. A small updraft or carefully planned temporary brick kiln may be easier to understand than a complex downdraft design. Downdraft kilns can be more efficient and even, but they require more knowledge of chimney draw, flue sizing, chamber balance, and refractory construction. Translation: the kiln needs to breathe properly, not wheeze like an accordion in a sauna.
Step 3: Check Local Rules and Fire Restrictions
Before buying a single brick, contact your local fire department, building office, or zoning authority. Many areas restrict open burning, outdoor combustion, chimney construction, smoke production, or kiln placement. Some neighborhoods and homeowner associations may also have rules about outdoor structures, fuel use, or visible smoke.
This step is not glamorous, but it can save you from fines, complaints, shutdown orders, and awkward conversations that begin with “So, officer, technically it is art.” If rules are unclear, ask for written guidance. Keep documentation with your project notes.
Step 4: Select a Safe Outdoor Location
Place the kiln on stable, level, noncombustible ground. Concrete, compacted gravel, or a properly built masonry base may work depending on local rules and kiln size. Avoid wooden decks, grass, loose soil, enclosed patios, garages, basements, sheds, and areas near fences, trees, roof overhangs, dry brush, or stored materials.
Think about wind direction, smoke movement, emergency access, and neighbors. A kiln should not blow smoke toward open windows, outdoor dining areas, or the person next door who already thinks your hobbies are suspicious. Leave room for safe movement around the kiln, a clear exit path, and emergency equipment.
Step 5: Gather Heat-Safe Materials
The best kiln materials are chosen for heat resistance, stability, and insulation. Firebrick is commonly used inside kiln chambers because it is made to tolerate repeated heating. Hard firebrick is durable, while insulating firebrick is lighter and holds heat more efficiently but can be more fragile. Refractory mortar, kiln shelves, posts, and ceramic fiber products may also be used in some kiln designs.
Common red building brick may appear in very low-tech temporary kilns, but it is not the same as refractory brick. It can crack, spall, or fail under repeated high heat. Avoid unknown bricks, concrete blocks, stones that may contain moisture, and materials that could explode, melt, or release fumes. If you do not know what a material will do at kiln temperatures, do not put it in the kiln. Mystery materials belong in detective novels, not firing chambers.
Step 6: Plan the Foundation
A kiln needs a stable foundation because bricks shift as weight, heat, and cooling cycles work on the structure. The base should be level, noncombustible, and strong enough to support the kiln. A poorly supported kiln can lean, crack, or collapse, especially when heated.
For a temporary educational kiln, the base may be a prepared masonry surface. For a permanent kiln, professional foundation design is recommended. The foundation should keep the kiln dry, separated from combustible surfaces, and easy to inspect. Moisture under or inside a kiln is not your friend. When trapped water turns to steam, it can damage materials quickly.
Step 7: Sketch the Chamber, Door, Flue, and Chimney
Draw the kiln before stacking bricks. Your sketch should show the firing chamber, loading opening, door or closure system, air intake, fire area, flue path, and chimney location. Even a simple kiln needs a plan for how heat enters, how it circulates, and how exhaust leaves.
The chimney or flue is especially important. A kiln without proper draft may smoke badly, stall at low temperature, overheat in one area, or push fumes where they do not belong. Draft is the kiln’s breathing system. If the breathing system is wrong, the rest of the kiln will complain loudly and smokily.
Step 8: Dry-Stack the Bricks First
Before committing to mortar or a final arrangement, dry-stack the bricks. This lets you test the layout, check stability, align openings, and make sure the chamber size matches the pieces you want to fire. Dry-stacking also reveals wobbly corners, uneven ground, and awkward loading problems.
Keep the chamber small enough to heat evenly and safely. Oversized beginner kilns often require more fuel, more time, more skill, and more patience than expected. A small kiln teaches faster and makes mistakes cheaper. It also gives you fewer chances to say, “Well, that was educational,” while staring at cracked ware.
Step 9: Build the Walls with Stability in Mind
When stacking kiln walls, align bricks carefully and avoid weak vertical seams running straight through the structure. Staggered joints help distribute weight. Walls must be stable before heating, because thermal expansion can make small flaws worse. If using refractory mortar, follow the manufacturer’s instructions and allow proper curing time.
Do not rush this step. A kiln wall is not decorative garden edging. It must handle heat, expansion, cooling, and vibration from loading and unloading. Check that each course sits flat and that the structure does not rock. If anything feels unstable when cold, it will not become magically trustworthy when hot.
Step 10: Create a Functional Loading Opening
The loading opening should allow you to place ware inside without knocking pieces together or scraping the chamber walls. It also needs a closure method that can withstand heat. Some small brick kilns use a temporary brick door, while more advanced kilns may use hinged refractory doors or custom insulated closures.
A good door helps hold heat while still allowing safe access after cooling. Never open a hot kiln casually. Thermal shock can crack ware, sudden heat can burn skin, and fumes can escape. Kilns reward patience. They are basically ovens with ancient wisdom and a temper.
Step 11: Plan Air Intake and Exhaust
Airflow determines how well the kiln heats. Combustion requires oxygen, and exhaust gases need a clear route out. Too little airflow can create smoke, incomplete combustion, and carbon monoxide risk. Too much uncontrolled airflow can waste heat and produce uneven firing.
The safest beginner approach is to study proven kiln plans and consult someone experienced before firing. Do not improvise with blocked vents, sealed chambers, or indoor exhaust. A kiln must never be treated like a barbecue with walls. It is a heat system, and heat systems need controlled ventilation.
Step 12: Use Kiln Furniture Correctly
Kiln shelves and posts create levels inside the chamber and help keep pieces stable. They should be rated for the intended firing temperature. Arrange shelves so heat can move around the ware rather than trapping hot gases in one corner. Avoid overloading the kiln, because dense packing can cause uneven firing and poor airflow.
Leave space between pieces. Clay expands, releases moisture, and responds to heat. If pieces touch, they may fuse, crack, or mark each other. Nobody wants to unload the kiln and discover that three cups have become one modern sculpture titled “Oops.”
Step 13: Dry the Clay Thoroughly Before Firing
Clay must be completely dry before firing. Damp clay can crack or burst as internal moisture turns to steam. This is one of the most common beginner mistakes, and it is also one of the easiest to avoid. Let pieces dry slowly and evenly before they enter the kiln.
Thicker pieces need more drying time than thin pieces. Hollow forms should have appropriate venting, and handmade bricks should dry evenly to reduce warping. When in doubt, wait longer. Clay has no respect for impatience. It will punish rushing with cracks, pops, and dramatic little explosions.
Step 14: Fire Slowly and Monitor Carefully
Firing should be gradual, controlled, and supervised by someone who understands kiln operation. The early stage is especially important because remaining moisture and organic material leave the clay. Rapid heating can damage both ware and kiln materials.
Use proper temperature monitoring equipment such as pyrometric cones or a suitable pyrometer, depending on the kiln type and project. Do not rely on flame color, guesswork, or the ancient scientific method known as “that looks hot enough.” Keep emergency equipment nearby, maintain a clear area around the kiln, and never fire when weather, wind, local restrictions, or supervision conditions are unsafe.
Step 15: Cool the Kiln Slowly and Inspect Everything
Cooling is part of firing. Opening a kiln too soon can cause thermal shock, crack ware, and expose people to heat and fumes. Let the kiln cool naturally and completely before unloading. Once cool, inspect the chamber, bricks, door area, flue path, shelves, posts, and fired pieces.
Take notes after every firing. Record what worked, what cracked, what smoked, what heated unevenly, and what you would change. Kiln building improves through observation. The kiln is a teacher, though occasionally the kind that marks your paper in red ink and smoke.
Common Mistakes to Avoid
Using the Wrong Bricks
Not all bricks are kiln bricks. Standard building bricks may not tolerate repeated high temperatures. Concrete blocks are especially risky because trapped moisture and heat can cause failure. Use materials rated for heat whenever possible, and ask a ceramics supplier or kiln professional before substituting materials.
Building Too Big Too Soon
A large kiln looks impressive, but it also magnifies every beginner problem. It needs more fuel, more airflow planning, more structural strength, and more monitoring. Start small, learn how heat behaves, and scale up only when you understand the process.
Ignoring Ventilation
Kilns can release carbon monoxide, carbon dioxide, sulfur compounds, smoke, fine particles, and fumes from clay or glaze ingredients. Outdoor placement and proper exhaust are essential. Indoor firing without a professionally designed ventilation system is dangerous.
Firing Wet Clay
If clay still contains moisture, firing can lead to cracking or bursting. Drying is not the flashy part of ceramics, but it is the part that saves your work from becoming kiln confetti.
Practical Experiences and Field Notes
One of the most useful experiences in making a brick kiln is learning that heat is lazy and sneaky at the same time. It follows the easiest path, gathers where airflow is poor, and escapes through gaps you thought were harmless. Beginners often focus on the visible structurethe nice square walls, the tidy door, the satisfying stack of bricksbut the invisible path of hot gases matters just as much. A kiln that looks handsome can still fire unevenly if air enters badly or exhaust leaves too quickly.
A second lesson is that small tests are worth more than heroic first attempts. Many experienced potters test clay bodies, firing behavior, and kiln response with small loads before risking important pieces. This habit saves time and heartbreak. If a small batch shows uneven color, underfired clay, smoke problems, or cracking, you can adjust the loading pattern, drying time, or airflow plan before filling the kiln with a month’s worth of work.
Another practical lesson is that kiln notes are gold. Write down the date, weather, clay type, drying time, loading pattern, fuel behavior, temperature observations, cone results, firing duration, cooling time, and final results. At first, this may feel excessive. Later, those notes become the difference between “I have no idea what happened” and “The lower shelf cooled too fast after I opened the door early.” Kiln work is part craft, part science, and part detective story.
People also underestimate how much patience firing requires. Clay rewards slow, careful preparation. Pieces need even thickness, complete drying, and thoughtful placement. The kiln needs steady monitoring, not random bursts of attention between errands. The cooling period may feel especially long because the exciting part seems finished, but opening too soon can ruin otherwise successful work. In kiln life, impatience is expensive.
Finally, good kiln building is not about proving toughness. It is about respect for heat. Wear appropriate protective gear, keep the work area clean, avoid clutter, and invite experienced help. A calm, well-planned firing is better than a dramatic one. Drama belongs in novels, not beside a hot masonry chamber.
Conclusion
Learning how to make a brick kiln is really learning how to manage heat with respect. The bricks matter, but so do airflow, ventilation, drying, loading, monitoring, cooling, and local safety rules. A successful kiln is not simply hot; it is controlled. It lets clay transform without rushing, cracking, smoking excessively, or creating hazards for people nearby.
For small educational projects, start with a modest design, use heat-rated materials, work outdoors in a safe location, and involve a qualified adult, ceramics instructor, kiln builder, or masonry professional. For structural bricks, production work, or repeated high-temperature firing, professional kiln design and testing are essential. The best kiln is not the biggest or fiercest one. It is the one that fires predictably, safely, and gives you results worth bragging about without making the fire department part of the story.
Note: This article is for educational web content only. Brick kiln construction and firing involve fire, extreme heat, fumes, and structural risks. Always follow local laws, manufacturer guidance, and qualified professional supervision before building or operating any kiln.