Note: This publish-ready article synthesizes practical furniture-painting guidance from reputable U.S. paint brands, home improvement retailers, DIY publishers, and safety agencies, then rewrites it into original, reader-friendly content for web publication.
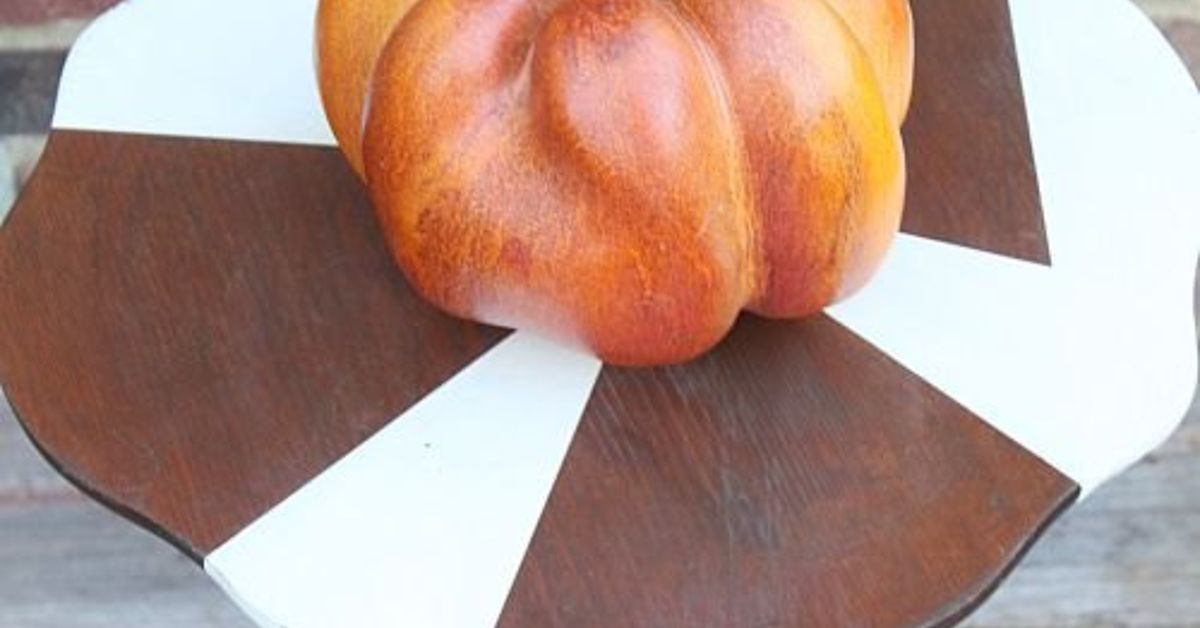
A geometric painted table top is the DIY equivalent of giving an old piece of furniture a confident new haircut. Suddenly, that plain coffee table in the corner is not “something you keep meaning to replace.” It is a modern statement piece. A thrift-store side table becomes a tiny art installation. A scratched dining table gets promoted from “please use a tablecloth” to “yes, I made that.”
The beauty of geometric painting is that it looks high-design without requiring you to be a professional artist. You do not need to freehand a mural, understand Renaissance perspective, or whisper encouraging words to a tiny detail brush for six hours. With painter’s tape, a straightedge, patience, and the right surface preparation, you can create crisp triangles, diamonds, stripes, chevrons, color blocks, or abstract shapes that make a table top feel custom and expensive.
This guide explains how to design, prep, paint, and seal a geometric painted table top so it looks polished and survives real life: coffee mugs, laptops, homework, takeout containers, board games, and that one person who refuses to use a coaster even though coasters are literally right there.
What Is a Geometric Painted Table Top?
A geometric painted table top is a table surface decorated with shapes such as triangles, squares, rectangles, diamonds, hexagons, stripes, arches, or angular abstract forms. The design can be bold and colorful, soft and neutral, minimalist, retro, bohemian, midcentury modern, or playful enough to make a breakfast nook feel like a boutique café.
Unlike a fully painted table, a geometric design often uses contrast. You might leave some wood visible and paint only certain sections. You might use three shades of the same color for a tonal look. You might create a black-and-white checkerboard pattern, a terracotta-and-cream desert palette, or a navy, gold, and white design that feels crisp and modern.
The technique works on coffee tables, dining tables, end tables, nightstands, desks, console tables, kids’ craft tables, outdoor patio tables, and even folding tables that deserve better than a life of storage closets and potluck casseroles.
Why Geometric Designs Work So Well on Tables
Table tops are naturally flat canvases. That makes them perfect for graphic patterns because the design is easy to see from above and at an angle. A geometric table top can also solve a common decorating problem: how to add personality without buying all-new furniture.
Geometric patterns are especially useful because they can hide flaws. Small scratches, stains, uneven tones, or worn veneer often become less noticeable once the surface has a bold pattern. Instead of fighting every imperfection, the design distracts the eye. It is not hiding damage; it is rebranding it.
Another advantage is flexibility. A single diagonal stripe can look elegant and minimal. A repeating triangle pattern can feel energetic. A patchwork of rectangles can use leftover paint from other rooms, which is both budget-friendly and oddly satisfying. Nothing says “responsible adult” like using up paint samples and making them look intentional.
Best Table Types for a Geometric Painted Table Top
Wood Tables
Solid wood is one of the best surfaces for a painted table top because it can usually be cleaned, sanded, primed, painted, and sealed with reliable results. If the table has an old clear coat, sanding helps dull the glossy surface so primer and paint can grip properly.
Laminate Tables
Laminate can also be painted, but it needs extra attention. Because laminate is slick and nonporous, a bonding primer is important. Light sanding with fine-grit sandpaper helps create a surface profile so the primer is not just sitting on top like a guest who refuses to leave.
MDF Tables
MDF, or medium-density fiberboard, can produce a smooth finish, but it absorbs moisture easily along raw edges. Sand lightly, seal exposed edges, use primer, and avoid soaking the surface with heavy coats of paint.
Outdoor Tables
For outdoor furniture, choose exterior-rated primer, paint, and topcoat. The sun, humidity, rain, and temperature swings are not gentle critics. Outdoor projects need products designed to handle weather exposure.
Tools and Supplies You Will Need
Before starting your geometric painted table top, gather everything in one place. This prevents the classic DIY tragedy of holding wet paint in one hand while searching for a missing brush with the other.
- Cleaning cloths or shop rags
- Mild soap or degreasing cleaner
- Sandpaper or sanding block, usually 120- to 220-grit
- Tack cloth or microfiber cloth
- Painter’s tape
- Measuring tape, ruler, or straightedge
- Pencil or chalk pencil
- Primer suitable for your table surface
- Furniture paint, acrylic enamel, chalk-style paint, or interior/exterior paint depending on use
- Small foam roller and quality paintbrush
- Clear protective topcoat such as water-based polyurethane, polycrylic, or another furniture-safe sealer
- Drop cloth
- Safety glasses, gloves, and a well-ventilated workspace
Step-by-Step Guide: How to Paint a Geometric Table Top
Step 1: Clean the Table Thoroughly
Start by cleaning the table top. Paint does not bond well to dust, grease, furniture polish, wax, food residue, or mystery stickiness from 2017. Use a mild cleaner or degreaser, then wipe the surface with a damp cloth and let it dry completely.
This step may feel boring, but it is the foundation of the project. If the table is not clean, even the most beautiful geometric pattern can peel or chip later. A good finish begins before the paint can is even opened.
Step 2: Sand for Better Adhesion
Lightly sand the table top to dull the existing finish and smooth rough areas. You do not always need to remove every bit of old paint or clear coat. The goal is usually to create enough texture for primer to grip. For many furniture projects, 120- to 220-grit sandpaper works well, depending on the condition of the surface.
After sanding, remove all dust with a tack cloth or microfiber cloth. Dust left behind can create bumps in the finish, and nothing ruins a sleek geometric table faster than texture that looks like it was seasoned with breadcrumbs.
Step 3: Check for Lead Paint on Older Pieces
If you are working with a very old painted table, especially one that may date from before 1978, be cautious. Older painted furniture may contain lead-based paint. Do not sand, scrape, or disturb suspicious old paint unless you know it is safe. Use a lead test kit or consult a professional when needed.
This is not the glamorous part of DIY, but it matters. Safety comes before style. A beautiful table is great; breathing hazardous dust is not part of the aesthetic.
Step 4: Apply Primer
Primer helps paint adhere and creates a more even base. For wood, a quality interior primer is usually enough. For laminate or glossy surfaces, use a bonding primer. For outdoor tables, choose an exterior-rated primer.
Apply a thin, even coat with a foam roller or brush. Let it dry according to the product instructions. If the surface feels rough after priming, lightly sand with fine-grit sandpaper, then remove dust again.
Step 5: Paint the Base Color
Many geometric table designs begin with a base color. White, cream, black, charcoal, navy, sage, and natural wood tones all work beautifully. The base can cover the entire top, or you can preserve the original wood as part of the design.
Apply paint in thin coats. Two thin coats are usually better than one thick coat because they dry more evenly and reduce brush marks. Let each coat dry fully before moving to the next step. Patience here pays off later when your painter’s tape comes off cleanly instead of dragging half the base coat with it.
Step 6: Plan the Geometric Pattern
Before taping, decide on your layout. You can sketch the table top on paper, use painter’s tape temporarily without pressing it down, or mark light pencil guidelines directly on the surface.
For beginners, a simple diagonal color-block design is a great starting point. Divide the table into large triangles or rectangles and use two or three colors. For a more advanced project, try repeating diamonds, a herringbone pattern, a checkerboard, or irregular abstract shapes.
Step 7: Tape the Design Carefully
Painter’s tape is the secret weapon of geometric furniture painting. Use a ruler or straightedge to keep lines crisp. Press the tape edges down firmly, especially where colors meet. For extra-sharp lines, some DIYers paint a thin layer of the base color along the tape edge first. This helps seal the edge, so the next color is less likely to bleed underneath.
Do not rush the taping stage. A geometric design is only as clean as its lines. This is where the table either becomes “custom modern furniture” or “I fought the tape and the tape won.”
Step 8: Paint the Shapes
Use a small foam roller for larger shapes and a brush for corners. Apply thin coats and avoid pushing too much paint against the tape edge. Heavy paint can seep underneath and create fuzzy lines.
If your pattern uses multiple colors, paint one color at a time and let it dry before taping over it. Labeling colors on your sketch can help prevent mistakes. Nobody wants to realize halfway through that the “random abstract pattern” has accidentally become “three nearly identical beige triangles arguing quietly.”
Step 9: Remove Tape at the Right Time
For many projects, removing painter’s tape while the final coat is still slightly wet can help reduce peeling. However, product instructions and paint type matter, so check the recommendations for your tape and paint. Pull the tape back slowly at an angle. If any paint starts lifting, use a craft knife to lightly score the edge before continuing.
Step 10: Touch Up the Lines
Even careful painters sometimes get tiny bleeds or gaps. Use a fine artist brush to touch up edges after the paint dries. Do not panic over one imperfect corner. Most guests will never notice it unless you point it out, circle it in red, and give a short lecture about your disappointment.
Step 11: Seal the Table Top
A table top needs protection. Unlike a painted wall, it gets touched, bumped, wiped, and used. A clear topcoat helps guard against scratches, moisture, scuffs, and everyday wear.
Water-based polyurethane or polycrylic is popular for painted furniture because it dries clear and is less likely to yellow light colors. Oil-based polyurethane is durable but can add an amber tone, which may be beautiful over warm wood but less ideal over bright white paint. Apply thin coats, let each coat dry, and lightly sand between coats if the product instructions recommend it.
Step 12: Let the Finish Cure
Dry paint and cured paint are not the same thing. A table may feel dry within hours, but the finish can take days or even weeks to fully harden depending on the paint, topcoat, humidity, and temperature. During the curing period, treat the surface gently. Use placemats, avoid heavy objects, and do not scrub aggressively.
Geometric Table Top Design Ideas
Modern Triangle Pattern
Create large triangles using painter’s tape and paint each section in a different color. Try charcoal, white, and walnut wood for a sophisticated look, or blush, terracotta, and cream for a softer modern style.
Checkerboard Table Top
A checkerboard design feels classic but trendy. Black and white is bold, while sage and cream feels calm and cottage-inspired. Measure carefully so the squares look even.
Color-Blocked Corners
Paint only one corner or one diagonal half of the table. This works well for minimal spaces where you want personality without visual chaos.
Midcentury-Inspired Shapes
Use mustard yellow, olive green, burnt orange, teal, or warm brown. Combine angular sections with one or two curved shapes for a retro look.
Monochrome Geometric Pattern
Choose three shades from the same color family, such as light gray, medium gray, and charcoal. This creates depth without overwhelming the room.
Kids’ Activity Table
Use cheerful colors and simple shapes. A sealed geometric painted table top can become a fun homework, puzzle, or craft surface. Just remember: glitter will still find a way to survive.
Choosing the Right Colors
The best color palette depends on where the table will live. In a neutral living room, a bold geometric table can become the focal point. In a colorful room, a softer palette may be better. Look at nearby rugs, curtains, pillows, wall color, and wood tones before choosing paint.
For a balanced design, use one dominant color, one supporting color, and one accent color. For example, a coffee table might use warm white as the base, muted green as the supporting color, and black as the accent. A desk might use navy, pale blue, and brass-gold paint for a crisp, creative workspace.
If you are nervous about color, start with neutrals. Black, white, gray, beige, and natural wood can still create strong geometric impact. The pattern itself provides the energy.
Common Mistakes to Avoid
Skipping Surface Prep
Skipping cleaning and sanding is the fastest way to get peeling paint. Prep may not be exciting, but it is what separates a lasting finish from a weekend fling.
Using the Wrong Primer
Laminate, glossy finishes, bare wood, and outdoor furniture may need different primers. Choose one that matches your surface and environment.
Applying Paint Too Thickly
Thick paint can bleed under tape, leave ridges, and take longer to dry. Thin coats create a smoother, more professional result.
Removing Tape Too Aggressively
Pull tape slowly and carefully. If the paint edge resists, score it lightly. This helps keep your beautiful lines intact.
Forgetting the Topcoat
A table top without a protective finish is vulnerable to scratches and stains. Seal it properly, especially if the table will be used often.
How to Maintain a Geometric Painted Table Top
Once your table is painted and cured, gentle maintenance will keep it looking fresh. Wipe spills quickly with a soft damp cloth. Avoid harsh scrubbers, abrasive cleaners, and soaking the surface. Use coasters under drinks and placemats under hot dishes.
If the finish gets a small scratch, touch it up with leftover paint and a small brush. For high-use dining tables or desks, consider adding another thin clear coat after a few years, especially if the surface begins to look dull or worn.
Real-World Experiences With a Geometric Painted Table Top
The first thing most people learn when painting a geometric table top is that the design phase feels much easier in your imagination. In your head, the lines are perfect. The triangles are balanced. The color palette belongs in a magazine spread next to a casually placed ceramic vase. Then you put tape on the table and realize geometry has opinions.
One helpful experience is to start with a loose sketch instead of taping randomly. On a small side table, for example, a design with three large diagonal sections is much easier to manage than twenty tiny triangles. Large shapes dry faster, need less tape, and look cleaner from across the room. If the table is going in a busy space, bigger shapes often look more intentional and less cluttered.
Another lesson: painter’s tape quality matters. Cheap tape can work for rough projects, but crisp geometric lines need clean edges. Press the tape down firmly with a fingernail, plastic scraper, or old credit card. Pay extra attention to corners where two strips overlap. Those intersections are where paint loves to sneak through like it paid rent.
Color testing also saves regret. Paint colors can look different on a horizontal table than they do on a wall. Light hits the surface differently, and nearby flooring can change how the color reads. A warm beige may look creamy in the can but oddly pink beside red-toned wood floors. A deep green may look elegant in daylight and nearly black at night. Testing small swatches on cardboard or the underside of the table helps you avoid repainting the entire top while muttering things you would not want printed on a throw pillow.
Dry time is another area where experience teaches patience. It is tempting to tape over the base coat as soon as it feels dry, but paint that has not hardened enough can lift when the tape is removed. Waiting longer usually gives better results. The same applies to the topcoat. A newly sealed table may feel ready, but placing a heavy plant pot on it too soon can leave a ring or dent. Give the finish time to cure before returning the table to full duty.
For dining tables, a satin or semi-gloss topcoat often feels practical because it is easier to wipe than a flat finish. For coffee tables, satin gives a soft, modern sheen without looking too shiny. Gloss can look dramatic, especially on bold patterns, but it also highlights dust, fingerprints, and surface imperfections. Choose the sheen based on how the table will be used, not just how it looks in a product photo.
One of the best experiences is seeing how forgiving geometric designs can be. If one line bleeds, you can touch it up. If a color feels too loud, you can paint over that shape. If the final pattern feels slightly imperfect, it often still looks handmade in the best way. The goal is not factory perfection. The goal is a table with personality, durability, and a story. And when someone asks where you bought it, you get the small but glorious satisfaction of saying, “Actually, I painted it.”
Conclusion
A geometric painted table top is one of the most rewarding furniture makeover projects because it combines creativity, function, and affordability. With basic tools, careful prep, painter’s tape, and a durable clear coat, you can turn an ordinary table into a bold custom piece that fits your home’s style.
The most important steps are simple: clean the surface, sand for adhesion, prime properly, plan the design, paint in thin coats, remove tape carefully, and seal the finished table. Whether you choose a subtle monochrome pattern or a bright modern design, the result can bring new life to furniture you already own.
In other words, before you drag that tired table to the curb, give it a chance to become the coolest thing in the room. It may only need a little geometry, a little paint, and a weekend where you decide to be brave with painter’s tape.