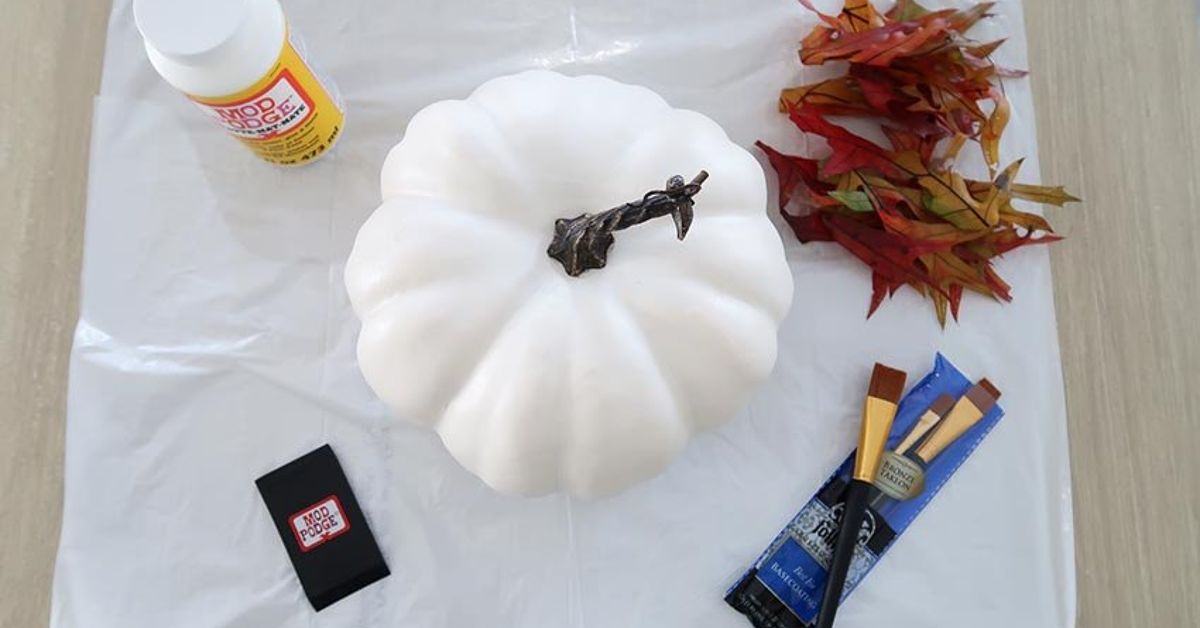
Some fall crafts require a toolbox, a tarp, three cups of coffee, and the emotional stability of a professional pumpkin carver. This is not one of those crafts. Learning how to découpage fall leaves on a pumpkin is one of the easiest ways to turn a plain pumpkin into a cozy autumn centerpiece without carving, drilling, or accidentally creating a lopsided jack-o’-lantern that looks like it just heard bad news.
This no-carve pumpkin decorating project uses pressed fall leaves, decoupage medium, and a real or faux pumpkin to create a warm, handmade decoration for porches, mantels, Thanksgiving tables, entryways, and kitchen counters. The finished look feels natural, elegant, and a little bit magicallike Mother Nature stopped by with a craft brush.
Best of all, decoupage pumpkin decorating is beginner-friendly, budget-friendly, and family-friendly. You can use real pressed leaves from your yard, preserved leaves from a craft store, tissue-paper leaves, faux autumn leaves, or photocopied leaf shapes. Whether your style is rustic farmhouse, cottagecore, modern minimal, or “I bought five pumpkins and now need a plan,” this project fits beautifully into fall home décor.
What Is Découpage?
Découpage is the art of decorating a surface by attaching paper, fabric, pressed leaves, or other thin materials with a glue-like medium, then sealing the design with a protective topcoat. In simple terms: you brush on glue, place something pretty, smooth it down, seal it, and suddenly everyone thinks you are craftier than you were yesterday.
For pumpkins, découpage works especially well because the curved surface creates a sculptural base. The ridges add texture, the leaves add color, and the decoupage medium gives everything a finished look. Unlike carved pumpkins, decoupaged pumpkins stay intact, which means they usually last longer and do not require cleaning out pumpkin seeds. That alone deserves applause.
Why Découpage Fall Leaves on a Pumpkin?
There are many ways to decorate pumpkins, from painting to glittering to dressing them up like tiny woodland animals. But fall leaf decoupage has a special charm. It uses the natural beauty of the season: maple leaves, oak leaves, birch leaves, fern fronds, pressed flowers, and warm autumn colors like amber, burgundy, gold, copper, and deep green.
This project also gives you a polished look without needing advanced artistic skills. You do not need to draw perfect vines or hand-paint tiny details. The leaves do most of the decorating for you. Your main job is to arrange them nicely and avoid gluing your sleeve to the pumpkin. A noble mission.
Benefits of This Fall Pumpkin Craft
- No carving required: Safer for kids and less messy for adults.
- Works with real or faux pumpkins: Use a fresh pumpkin for seasonal charm or a craft pumpkin you can reuse year after year.
- Customizable style: Choose bold leaves, subtle neutrals, metallic accents, or layered botanical designs.
- Affordable materials: Many supplies may already be in your home or yard.
- Great for fall décor: Perfect for Halloween, Thanksgiving, harvest parties, and autumn tablescapes.
Supplies You’ll Need
Before you start, gather everything in one place. Découpage is not difficult, but once your brush is sticky, you will not want to wander around looking for scissors like a confused raccoon.
Basic Materials
- One real or faux pumpkin
- Pressed fall leaves, preserved leaves, faux leaves, or paper leaf cutouts
- Découpage medium, such as matte, satin, or gloss Mod Podge
- Soft craft brush or foam brush
- Small scissors
- Paper towels or a clean cloth
- Wax paper, parchment paper, or a plastic table cover
- Tweezers for delicate leaves
- Optional acrylic paint for the pumpkin base
- Optional clear acrylic spray sealer for extra protection
Choosing the Right Pumpkin
A smooth pumpkin is easiest for beginners because leaves adhere more evenly to flatter surfaces. White pumpkins are especially popular for leaf decoupage because they make colorful foliage stand out beautifully. Orange pumpkins create a warmer, more traditional fall look. Green, blue-gray, or cream pumpkins can feel more modern and elegant.
Real pumpkins bring natural texture and seasonal character, but they will eventually soften and decay. Faux pumpkins are better if you want to keep your craft for future years. Foam, plastic, papier-mâché, or ceramic pumpkins can all work, though slick plastic surfaces may need light sanding or a base coat of paint to help the decoupage medium grip properly.
Best Leaves for Pumpkin Découpage
The best leaves for this project are thin, flexible, and flat. Thick or curled leaves can be stubborn on a curved pumpkin, especially around deep ridges. If a leaf behaves like it has strong opinions, save it for a wreath and choose a flatter one.
Good Leaf Choices
- Maple leaves for classic autumn shape and color
- Oak leaves for rustic texture
- Birch leaves for smaller, delicate designs
- Fern fronds for graceful botanical patterns
- Pressed flowers for a softer cottage-style pumpkin
- Paper or tissue leaves for bright, consistent color
If using real leaves, press and dry them first. Fresh leaves contain moisture, which can cause wrinkling, lifting, or mold. Place leaves between sheets of absorbent paper inside a heavy book for one to two weeks, or use already dried and preserved leaves from a craft store. For quicker crafting, faux leaves or printed paper leaves are excellent alternatives.
Step-by-Step: How to Découpage Fall Leaves on a Pumpkin
Step 1: Clean the Pumpkin
Wipe the pumpkin with a damp cloth to remove dust, dirt, and any mysterious autumn residue. If using a real pumpkin, dry it completely before applying anything. Moisture trapped under the decoupage medium can interfere with adhesion and may shorten the life of your design.
For faux pumpkins, check the surface. If it is glossy or slick, lightly rough it up with fine-grit sandpaper. You do not need to attack it like you are refinishing a dining table. A gentle scuff is enough.
Step 2: Paint the Base If Desired
This step is optional, but it can make a big difference. Painting an orange pumpkin white, cream, charcoal, sage green, or soft taupe creates a clean background for the leaves. Acrylic craft paint or chalk-style paint works well on most faux pumpkins. Use two thin coats rather than one thick coat, and let the paint dry fully.
If you want a natural look, skip the paint and let the pumpkin’s original color show through. Orange pumpkins with golden leaves look classic and festive, while white pumpkins with red and copper leaves feel more refined.
Step 3: Plan Your Leaf Design
Before brushing on decoupage medium, arrange the leaves on the pumpkin to test the layout. This is the “measure twice, glue once” part of the project. Try a cascading design from the stem, a wreath-like band around the middle, scattered leaves, or a single dramatic leaf on the front.
For a balanced design, vary leaf sizes and directions. Place larger leaves first, then fill gaps with smaller leaves. Let some leaves overlap slightly for a natural layered effect. If you prefer a minimalist pumpkin, use just a few leaves and leave plenty of open space.
Step 4: Apply Découpage Medium to the Pumpkin
Brush a thin, even layer of decoupage medium onto a small section of the pumpkin. Work in sections rather than coating the entire pumpkin at once. Decoupage medium dries quickly, and you do not want to race against a sticky pumpkin like it is a fall-themed game show.
Make the adhesive area slightly larger than the leaf you are about to place. This gives the edges something to grip and helps prevent lifting.
Step 5: Attach the Leaves
Place the leaf onto the wet decoupage medium. Start at the center of the leaf and gently smooth outward toward the edges. Use your fingers, a soft brush, or tweezers for delicate leaves. If the pumpkin has deep grooves, press the leaf carefully into the ridges so it follows the shape of the surface.
Do not worry if every vein and edge is not perfectly flat. A little texture adds character. However, if the leaf is popping up dramatically, trim small slits along the edges or choose a smaller leaf that can bend more easily.
Step 6: Seal the Top
Once the leaf is positioned, brush a thin layer of decoupage medium over the top. Be gentle, especially with real pressed leaves. Brush from the center outward and avoid overworking the surface. Too much brushing can tear delicate leaves or make paper leaves wrinkle.
Continue adding leaves one at a time until your design is complete. Let the pumpkin dry according to the product directions, then add a second thin topcoat if needed. A matte finish gives a soft, natural look. Satin adds a subtle glow. Gloss creates a shinier, more polished finish.
Step 7: Let It Cure Before Displaying
Your pumpkin may feel dry to the touch fairly quickly, but give it extra time before moving it to its final display spot. A few hours of drying is usually fine for light handling, while overnight drying is better before styling it on a mantel, porch, or dining table.
If you plan to display the pumpkin outdoors, keep it in a covered area away from rain and direct moisture. Découpage is durable for indoor decorating, but it is not invincible. It has many talents; surviving a thunderstorm is not one of them.
Design Ideas for a Leaf Découpage Pumpkin
Classic Autumn Pumpkin
Use red, orange, yellow, and brown maple leaves on a white or cream pumpkin. Arrange them in a loose cascade from the stem down one side. This style looks beautiful on a porch next to mums, lanterns, and a plaid throw blanket.
Modern Botanical Pumpkin
Choose green pressed leaves, fern fronds, and small neutral-toned flowers. Place them sparingly on a matte white, black, or sage pumpkin. The result feels calm, elegant, and less Halloween-specific, making it ideal for Thanksgiving décor.
Thanksgiving Centerpiece Pumpkin
Create a band of leaves around the middle of a medium pumpkin, then set it on a wooden tray with candles, mini gourds, pinecones, and eucalyptus. This makes a warm, low centerpiece that does not block conversation across the table.
Kids’ Craft Pumpkin
Use paper leaves or faux leaves instead of delicate pressed leaves. Let kids choose colors, arrange patterns, and brush on the decoupage medium. For younger children, pre-cut the leaves and supervise the glue. The finished pumpkin may not look like a magazine cover, but it will have the rare and priceless quality of being made with enthusiasm.
Common Mistakes and How to Fix Them
The Leaves Are Wrinkling
Wrinkles usually happen when the leaves are too wet, too thick, or brushed too aggressively. Use thinner leaves, apply less decoupage medium, and smooth gently from the center outward. If using paper leaves, avoid oversaturating them.
The Edges Are Lifting
Add a tiny bit of decoupage medium under the lifted edge, press it down, and hold for a few seconds. A second topcoat can also help seal edges. For stubborn real leaves, trim the edges or cut small relief slits so the leaf curves more naturally.
The Pumpkin Looks Too Busy
Step back and let the design breathe. You do not need to cover every inch. Negative space makes the leaves stand out. If your pumpkin starts looking like it fell into a leaf pile and gave up, remove a few pieces before they dry.
The Finish Is Streaky
Use thinner coats and brush in the same direction when possible. Foam brushes can create a smoother finish, while bristle brushes may leave texture. Matte finishes are more forgiving than gloss finishes.
How to Display Your Finished Pumpkin
A decoupaged fall leaf pumpkin works almost anywhere you want a seasonal touch. Place it on an entry table to welcome guests, group it with candles on a mantel, or use it as part of a Thanksgiving tablescape. Smaller pumpkins look charming on bookshelves, kitchen counters, bathroom shelves, and nightstands.
For a polished display, group pumpkins in odd numbers. Try one large leaf pumpkin with two smaller plain pumpkins, or mix a decoupaged pumpkin with natural gourds and dried flowers. Add texture with a woven tray, wood slice, linen runner, or copper candleholders.
How Long Will a Decoupaged Pumpkin Last?
A faux decoupage pumpkin can last for years if stored carefully. Wrap it in tissue paper or bubble wrap and keep it in a dry container away from heat and moisture. A real pumpkin will last as long as the pumpkin itself remains fresh. Choose an unblemished pumpkin with a firm stem, keep it dry, and avoid placing it in direct sun or wet weather.
Because the pumpkin is not carved, it usually lasts longer than a jack-o’-lantern. Still, real pumpkins are living produce, not permanent furniture. Enjoy them while they are fresh, and compost them when the season ends if the materials you used are safe to compost.
Experience Notes: What This Craft Teaches You Along the Way
The first thing you learn when making a fall leaf decoupage pumpkin is that leaves have personalities. Some are cooperative little angels. They lie flat, glow beautifully, and make you feel like a seasonal design genius. Others curl at the edges, refuse to follow pumpkin ridges, and behave like they have a union contract. That is part of the fun.
One helpful experience is to test your leaves before committing to the whole design. Press a few different types and try them on the back of the pumpkin. Maple leaves are stunning, but larger ones may need trimming to fit curved surfaces. Smaller leaves are easier to control and often create a more refined look. Ferns and delicate fronds can be surprisingly beautiful, especially on white pumpkins.
Another lesson: less glue is often better. Beginners tend to load the brush with too much decoupage medium, thinking more glue means stronger adhesion. In reality, heavy coats can make leaves slide around, wrinkle, or turn overly shiny. A thin layer under the leaf and a thin layer over the top usually works best. Think “smooth raincoat,” not “pumpkin in a glue swamp.”
It also helps to rotate the pumpkin as you work. Instead of trying to decorate the entire front while the pumpkin sits still, turn it slowly and view it from different angles. A design that looks perfect from one side may feel unbalanced from another. This matters if the pumpkin will sit on a dining table or kitchen island where people see it from all directions.
If you are crafting with kids, prepare for creative freedom. Children may place one giant leaf directly over the stem, stack six leaves in the same spot, or announce that the pumpkin needs googly eyes. Let them enjoy the process. For a more styled finished piece, set up two pumpkins: one “designer pumpkin” and one “anything goes” pumpkin. Everyone wins, and no one has to negotiate with a seven-year-old art director.
For adult crafting nights, this project pairs beautifully with warm cider, background music, and a table covered in supplies. It is easy enough to chat while doing, but hands-on enough to feel satisfying. Guests can bring their own faux pumpkin or choose from a shared pile of leaves. At the end, everyone leaves with a finished decoration instead of just vague plans to be more festive next year.
The most rewarding part is how personal each pumpkin becomes. A leaf from your backyard maple, a fern from a favorite walk, or colors chosen to match your Thanksgiving table can make the decoration feel meaningful. It is not just another store-bought pumpkin. It is a tiny seasonal memory wearing a coat of decoupage.
And if your first pumpkin is imperfect, congratulations: you made a handmade object. A few wrinkles, lifted edges, or uneven brush marks do not ruin the piece. They give it character. Fall décor is supposed to feel warm, layered, and lived-in. Perfectly imperfect is practically the official design language of autumn.
Conclusion
Learning how to découpage fall leaves on a pumpkin is a simple, creative way to celebrate autumn without carving tools or complicated supplies. With a clean pumpkin, pressed leaves, decoupage medium, and a little patience, you can create a no-carve pumpkin decoration that looks beautiful from early fall through Thanksgiving.
This project is flexible enough for beginners, kids, experienced crafters, and anyone who wants seasonal décor that feels handmade but not overwhelming. Use real leaves for a natural look, faux leaves for durability, or paper leaves for bold color. Keep the design minimal and modern, or layer it with rich fall texture. Either way, your pumpkin will look charming, personal, and ready for its close-up on the mantel.