Grout has a special talent: it can make a beautiful tile floor look like it has been through three breakups, two toddlers, and one spaghetti incident. Clean tile with grimy grout still looks dirty, which is why grout lines get so much attention in kitchens, bathrooms, mudrooms, and showers. The good news is that dingy grout is not always doomed. Sometimes it needs a deep clean. Sometimes it needs to retire with dignity and be replaced. And if you pick the right replacement grout and install it properly, you can get a surface that is far more stain-resistant and much easier to live with.
This guide walks through both sides of the project: how to clean grout the smart way and how to install new grout that resists stains instead of collecting them like souvenirs. We will also talk honestly about the phrase “won’t stain,” because the internet loves a miracle and your bathroom does not. No grout is magic. But some grout options are dramatically better than old-school porous grout, especially in high-moisture spaces.
Why Grout Gets Dirty So Fast
Most traditional grout is cement-based, which means it is naturally porous. That porosity lets it soak up water, soap residue, grease, body oils, cooking splatter, and the mysterious gray film that appears whenever life gets busy. In a shower, grout may also trap mildew and mineral buildup. On a kitchen backsplash, it can absorb oil and food stains. On floors, it collects tracked-in dirt like it is being paid for the job.
That is why cleaning method matters so much. If grout is only surface-dirty, cleaning can bring it back. If it is cracked, crumbling, deeply stained through the body of the grout, or missing in spots, cleaning alone will not fix the problem. At that point, regrouting is not a luxury project. It is the grown-up answer.
Should You Clean the Existing Grout or Replace It?
Start with a simple test: inspect the grout before you grab a bucket and declare war.
Clean it if:
- The grout is intact and firmly in place.
- The discoloration looks like surface dirt, soap scum, or light mildew.
- The joints are still full and not cracking apart.
- The tile itself is in good shape and not loose.
Replace it if:
- The grout is cracked, missing, powdery, or crumbling.
- Deep stains do not improve after a proper cleaning.
- You see repeated mildew problems caused by trapped moisture.
- The grout is uneven, patchy, or separating from the tile edges.
Think of grout like a toothbrush. If it is just messy, clean it. If it is falling apart and making everyone uncomfortable, it is time for a replacement.
How to Clean Grout Without Making It Worse
Before you clean grout, vacuum or dry sweep the area first. That removes loose dirt so you are not rubbing grit into the surface. Then choose the gentlest cleaner that matches the level of grime. Going straight to aggressive chemicals is the home-improvement equivalent of using a chainsaw to open a cereal box.
Step 1: Start with warm water and a nylon brush
For light dirt, scrub the grout with warm water and a medium nylon-bristle brush. This is often enough to lift surface grime, especially on recently sealed grout or in low-traffic areas. Avoid wire brushes, which can damage grout and scratch tile.
Step 2: Use a mild cleaner for routine buildup
If plain water does not cut it, move up to a pH-neutral tile cleaner or a simple paste of baking soda and water. Spread it over the grout lines, let it sit for a few minutes, then scrub gently and rinse well. This is a good first-line option for bathroom floors, backsplashes, and shower walls that are dirty but not tragic.
Step 3: Try a deeper-cleaning method for stubborn stains
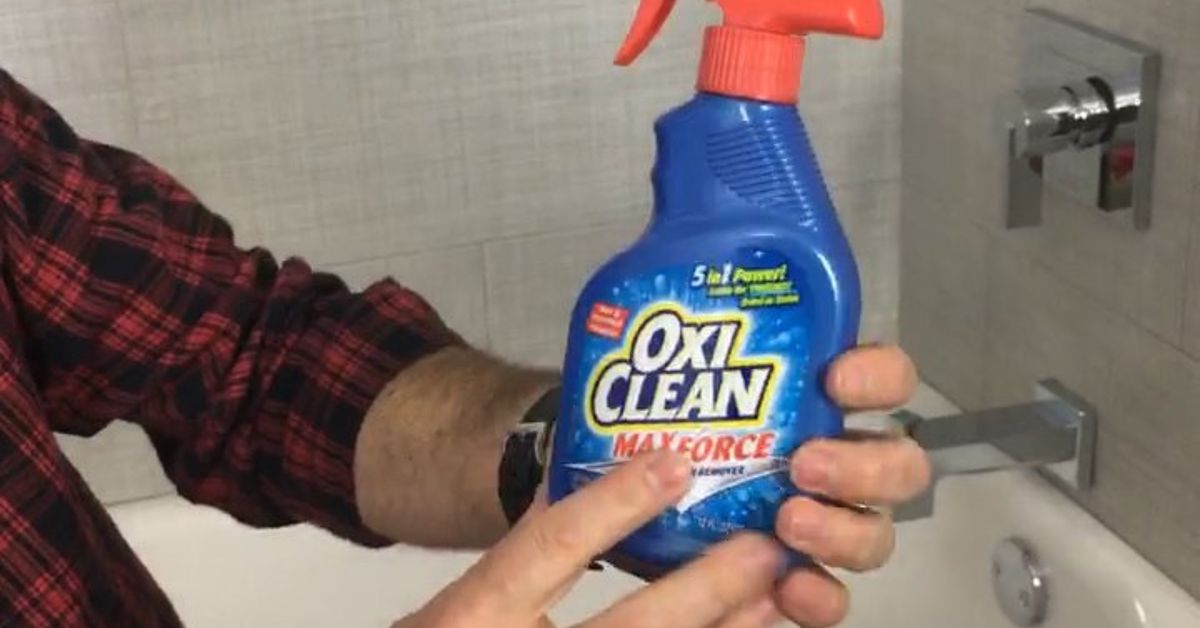
For heavier stains, many homeowners have good results with oxygen bleach solutions or a baking soda and hydrogen peroxide paste. These options can lift dingy discoloration without being as harsh as chlorine bleach. Apply the cleaner to a small section, let it sit briefly, scrub with a grout brush, then rinse thoroughly. Always test in an inconspicuous area first, especially if your tile is natural stone or has a specialty finish.
Step 4: Know what to avoid
This part matters. Do not mix bleach with ammonia or acidic cleaners. Do not assume vinegar is safe for every surface. Acidic cleaners can damage certain grout and etch natural stone. Do not use metal brushes. And do not soak the area so heavily that water sits in the joints for hours. Cleaning should remove grime, not create new moisture problems.
Step 5: Rinse and dry completely
After scrubbing, rinse the area with clean water and dry it with towels or a fan. Leaving cleaner residue behind can attract more dirt later. It can also interfere with sealer if you plan to reseal the grout afterward.
A Practical Deep-Clean Recipe That Works for Many Homes
If you want one realistic method for tired-looking grout, use this order:
- Vacuum the tile and grout lines.
- Spray warm water and scrub first.
- Apply a baking soda paste or pH-neutral cleaner.
- For stubborn areas, move to an oxygen-bleach solution or hydrogen peroxide paste.
- Rinse thoroughly and dry the area.
This approach is effective because it starts mild and escalates only when needed. That protects your grout, your tile, and your weekend mood.
How to Remove Old Grout Before Installing New Grout
If your grout is cracked, stained beyond rescue, or missing in places, the next move is removal. This is the dusty part of the project, so put on eye protection, gloves, and a dust mask. Cover nearby surfaces if you are working in a bathroom or kitchen.
Tools you may need
- Manual grout saw or carbide grout-removal tool
- Oscillating multi-tool with grout-removal blade
- Shop vacuum
- Utility knife for detail work
- Painter’s tape for delicate tile edges
Removal steps
- Work slowly and stay centered in the grout line.
- Remove the old grout to a consistent depth, taking care not to chip the tile edges.
- Vacuum debris often so you can see what you are doing.
- Use a hand tool for tight spots and corners.
- Clean the joints thoroughly when the grout is out.
The goal is not speed. The goal is clean, open grout joints ready for new material. Rushing this step is how people end up with chipped tile and a vocabulary lesson for the neighbors.
How to Choose New Grout That Resists Stains
This is the part that really determines whether your future self thanks you or resents you.
Option 1: Traditional cement grout
This is the most common and often the most budget-friendly choice. It works well, but it is porous and usually needs a penetrating sealer for better stain resistance. If you choose standard cement grout, sealing is not optional if you want easier maintenance.
Option 2: High-performance cement grout
Some modern cement-based grouts are denser, more color-consistent, and more stain-resistant than older formulas. They are a good middle ground for homeowners who want easier installation than epoxy but better performance than bargain-bin grout.
Option 3: Single-component or pre-mixed stain-resistant grout
These newer products are designed to be highly stain-resistant and often do not require sealing. They are convenient, color-consistent, and popular for many interior projects. They cost more than standard grout, but they can save time and reduce maintenance headaches.
Option 4: Epoxy grout
If your main goal is strong stain resistance, epoxy grout is one of the top performers. It is highly resistant to water and common household stains, which makes it especially attractive for showers, backsplashes, and busy kitchens. The trade-off is that installation can be fussier, cleanup timing matters, and the product usually costs more.
Here is the honest takeaway: if you want grout that is least likely to stain, go with epoxy or a high-quality single-component grout. If you choose cement grout, use a high-performance formula and seal it properly.
Match the Grout to the Joint Width
Do not skip this detail. Grout type should match the size of the joints between your tiles.
- Sanded grout: Best for joints wider than 1/8 inch.
- Unsanded grout: Best for joints 1/8 inch or less.
Sanded grout is stronger in wider joints, while unsanded grout is better for narrow spaces and delicate surfaces that can scratch. If you are working with glass, marble, or other scratch-prone tile, always double-check the product recommendations before choosing.
How to Install New Grout the Right Way
Step 1: Clean and dry the joints
After removing the old grout, vacuum the joints thoroughly. Wipe the tile clean. Let everything dry completely. New grout does not bond well to dust, leftover cleaner, or damp debris.
Step 2: Mix only what you can use
If you are using a powder grout, mix small batches according to the manufacturer’s instructions. Too much water weakens grout and can affect color. Too little water makes it difficult to spread. This is not the moment for improvisation or “close enough” chemistry.
Step 3: Pack grout into the joints
Use a rubber grout float to force grout diagonally across the tile and into the joints. Press firmly so the joints are completely filled. Work in small sections rather than trying to grout the entire room at once. Full joints are stronger, look better, and are less likely to trap dirt.
Step 4: Remove excess grout
Once the joints are packed, hold the float at an angle and scrape off the excess diagonally across the tile. Then use a damp, well-wrung sponge to wipe the tile surface. Rinse the sponge often, but do not flood the area. Too much water can weaken fresh grout and wash pigment out of the joints.
Step 5: Buff off the haze
After the grout firms up, use a soft dry cloth or microfiber towel to buff away the haze left on the tile face. This is the satisfying part where the project finally stops looking like a mistake.
Step 6: Handle corners correctly
Where horizontal and vertical surfaces meet, or in inside corners of showers and backsplashes, use a flexible color-matched caulk or silicone where appropriate instead of forcing rigid grout into movement-prone joints. This helps reduce cracking over time and gives the installation a cleaner finish.
How to Keep New Grout from Staining
Installation is only half the story. Maintenance is what keeps grout looking fresh.
If you used cement grout
Apply a penetrating grout sealer after the grout has cured according to the product directions. Some manufacturers recommend waiting at least 48 hours before sealing. Apply the sealer evenly, let it soak in for the recommended time, and wipe off excess from the tile surface so it does not leave a residue. In high-use areas, reapply sealer periodically as needed.
If you used epoxy or certain single-component grouts
You may not need a sealer at all. Many premium products are designed to resist stains without one. That said, “more stain-resistant” does not mean “never clean again.” Grease, soap scum, and hard-water buildup can still collect on the surface if ignored.
Build a simple maintenance routine
- Wipe shower walls and floors after use when possible.
- Clean spills quickly in kitchens and laundry areas.
- Use a pH-neutral cleaner for regular maintenance.
- Avoid harsh acidic cleaners unless the manufacturer specifically approves them.
- Keep bathroom ventilation running to reduce moisture buildup.
Common Regrouting Mistakes to Avoid
- Using the wrong grout for the joint width.
- Not removing enough of the old grout before regrouting.
- Leaving dust in the joints.
- Adding too much water to grout mix.
- Using a sponge that is too wet during cleanup.
- Skipping sealer on cement grout.
- Assuming “stain-resistant” means “maintenance-free.”
- Ignoring corner joints that need flexible sealant.
What the Best Long-Term Solution Really Looks Like
If your grout is structurally sound, clean it with the least aggressive method that gets results. If it is failing, replace it. And if your goal is grout that does not behave like a stain magnet, choose a better material this time around. In most homes, the best long-term outcome comes from one of these two paths:
- Budget-conscious route: High-performance cement grout plus a quality penetrating sealer and routine maintenance.
- Low-maintenance route: Epoxy or premium single-component grout installed carefully and cleaned consistently.
That is the real secret. It is not one magic cleaner. It is the combination of proper prep, proper product, proper installation, and a tiny bit of follow-through. Not glamorous, but wildly effective.
Real-World Experience and Lessons from Cleaning and Regrouting Tile
One of the biggest lessons people learn from grout projects is that appearance can be misleading. A floor that looks permanently filthy may only have a layer of soil and cleaner residue trapped on top of the grout. On the other hand, a shower that seems to need “just one more scrub” may actually have grout that is breaking down from years of moisture. The smartest DIYers do not guess. They test a small section first, then decide whether cleaning or replacement makes more sense.
Another common experience is realizing that grout color changes the entire mood of a room. Fresh grout can make an older tile installation look years newer, even when the tile itself never changed. Homeowners often describe the finished result as looking like a full remodel, even though the real work was just deep cleaning, regrouting, and resealing. That is one reason grout projects are so satisfying: the visual payoff is much bigger than the material cost.
People also learn very quickly that patience beats force. Aggressive scrubbing with the wrong brush can rough up grout lines. Using too much cleaner can leave residue behind. Applying fresh grout too fast can create pinholes, low spots, or haze that is harder to remove later. The projects that turn out best are usually the boring ones done in stages: remove the old grout carefully, vacuum often, mix small batches, wipe gently, then let the material cure properly before using the space again.
There is also a practical lesson about product selection. Many people choose traditional cement grout because it is familiar and affordable, then regret skipping the sealer. Others spend more on epoxy or a premium single-component grout and later feel relieved every time spaghetti sauce, coffee, shampoo, or shower grime wipes up without drama. The right choice depends on budget, location, and patience level. A guest bathroom and a daily-use family shower do not need the exact same strategy.
Experience also teaches that maintenance habits matter more than people want to admit. Even expensive stain-resistant grout looks tired if soap scum and hard-water deposits are allowed to build up month after month. The best routine is simple: wipe wet areas, use mild cleaners regularly, and do not wait until the grout turns into a science project. Small maintenance beats heroic restoration every time.
Finally, homeowners often say the most surprising part of the whole process is confidence. Once you understand what grout needs, the mystery disappears. You stop buying random miracle sprays. You stop blaming the tile. You start noticing whether the issue is dirt, damage, moisture, or the wrong product in the wrong place. That shift makes future cleaning easier and future installations smarter. In other words, grout becomes less of a villain and more of a high-maintenance roommate you finally know how to manage.
If you are tackling this job for the first time, the best mindset is to think like a careful craftsperson, not a demolition expert. Respect the tile, choose the right grout, keep your sponge under control, and remember that “good enough” on prep usually becomes “why does this look weird?” later. Done well, a grout refresh can be one of the most cost-effective upgrades in the house. Done poorly, it becomes a cautionary tale told while standing in a hardware aisle.
The upside is that grout is forgiving when you approach it with a plan. Clean what can be saved. Replace what cannot. Seal what needs protection. Choose stain-resistant grout where it matters most. And next time your tile starts looking tired, you will know whether it needs a gentle scrub, a better sealer, or a complete grout comeback tour.
Conclusion
Cleaning grout and installing new grout that resists stains is not about finding one miracle product. It is about diagnosing the problem correctly and using the right fix. Clean intact grout with safe, targeted methods. Replace failing grout with a stain-resistant material that matches the space and the joint size. Seal cement grout when required, maintain it regularly, and use flexible sealant in the right places. Do that, and your tile will stay cleaner, sharper, and much easier to live with for the long haul.