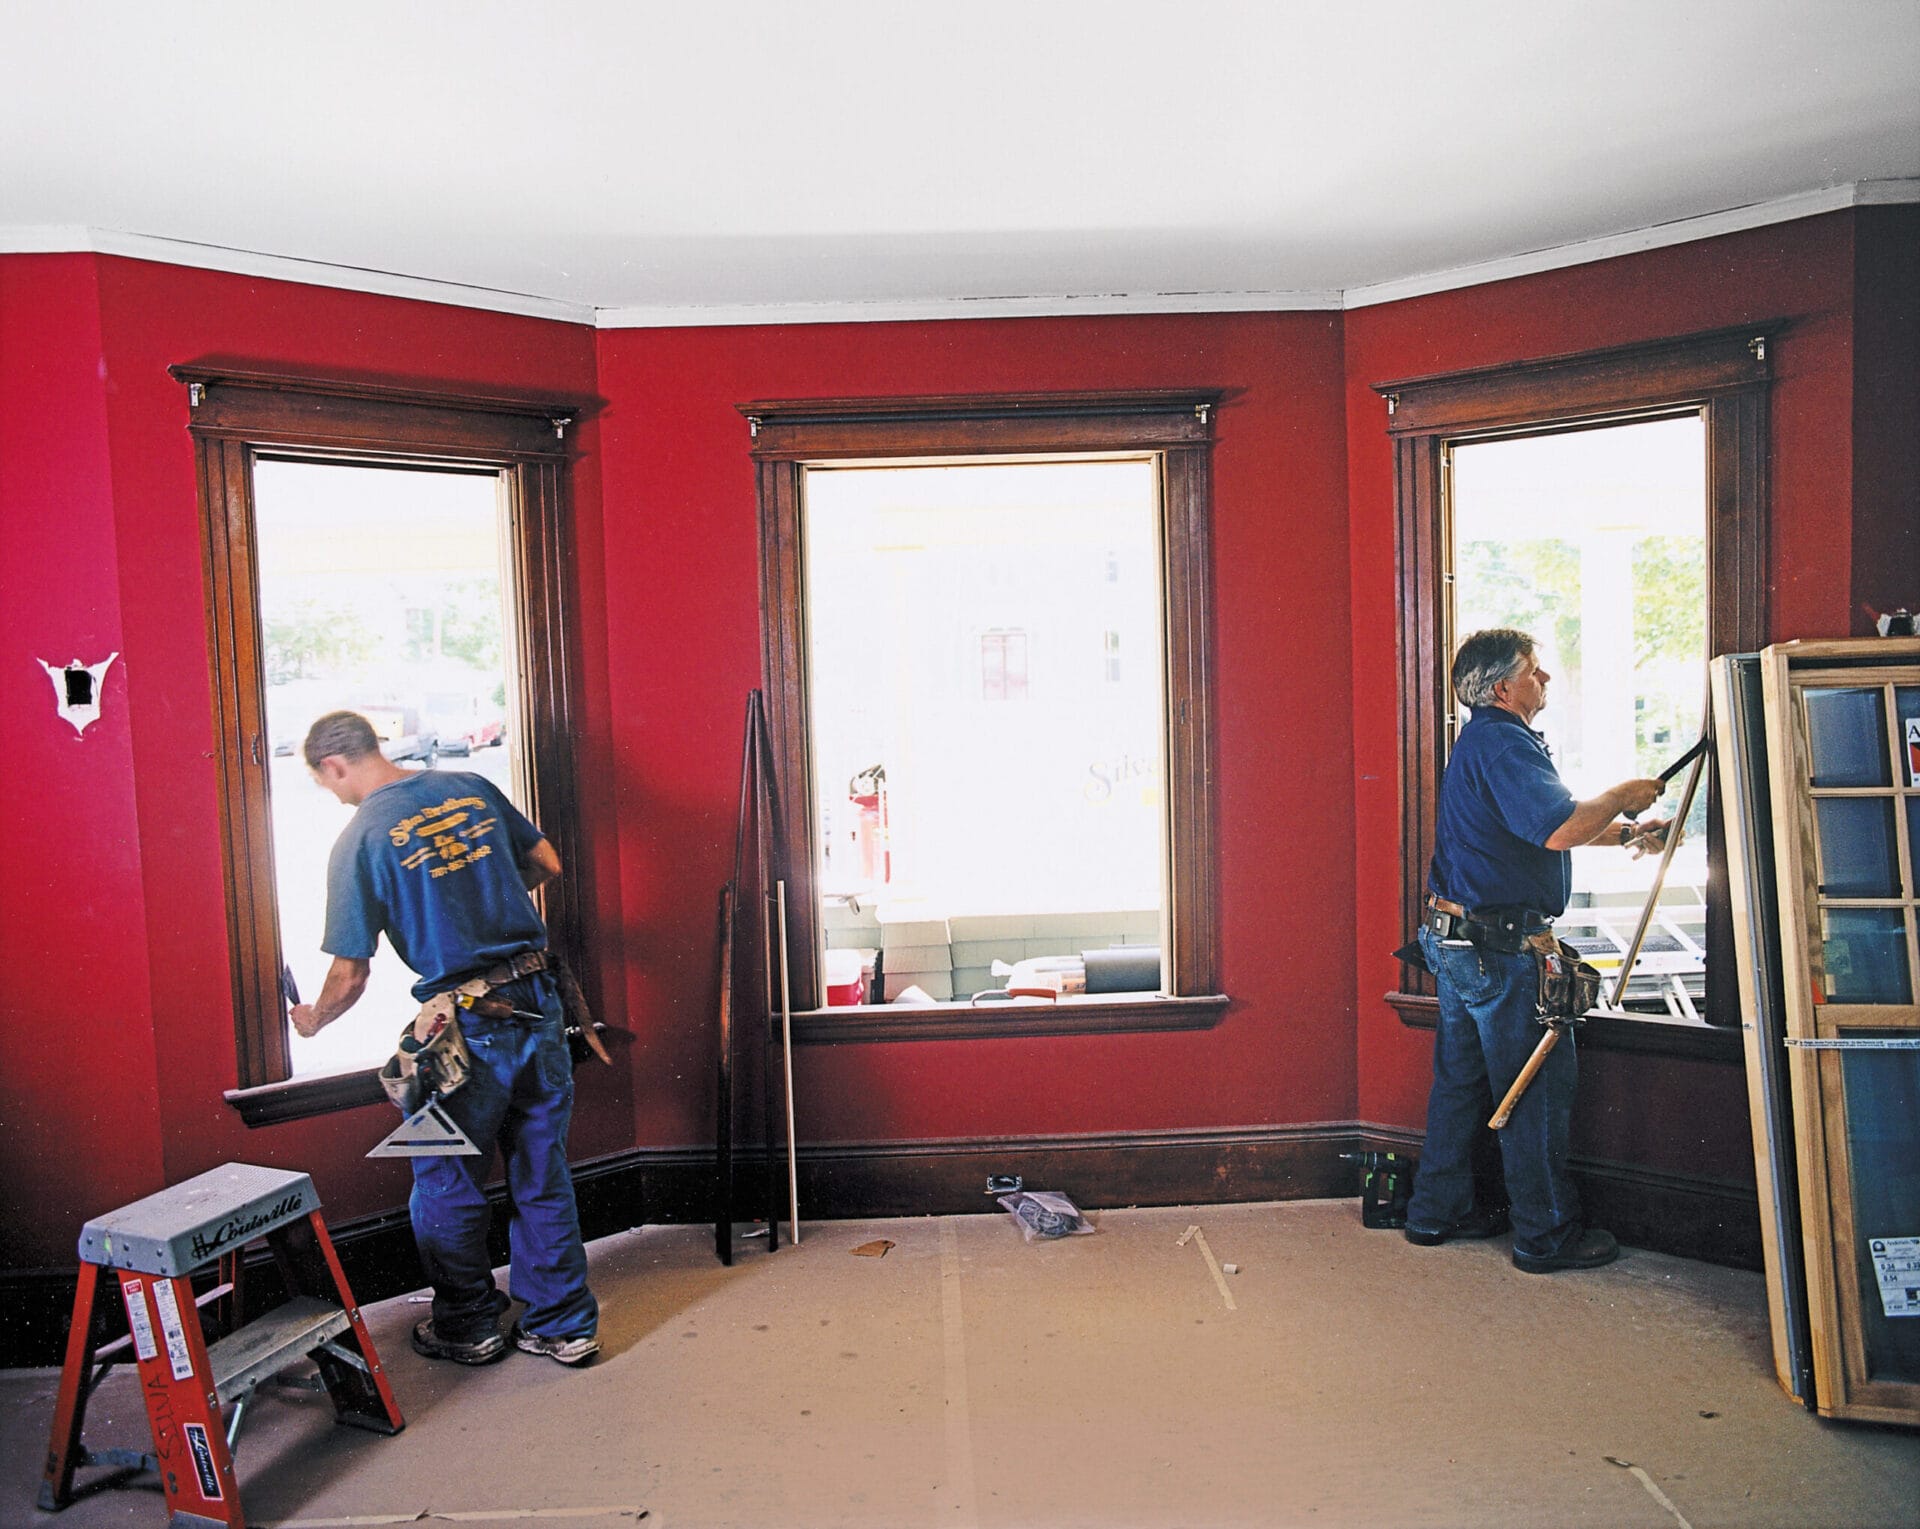
Replacing an old window can make a room quieter, brighter, easier to ventilate, and less vulnerable to drafts. It can also reveal that the “tiny stain” beneath the sill has been quietly running a moisture-based side business. The good news is that an insert, or pocket, replacement window is a manageable project for an experienced DIYer when the existing frame is solid, reasonably square, and free of serious water damage.
This guide explains window replacement in 13 steps, from choosing the correct installation method to sealing the final gap. It focuses on installing a replacement window inside an existing frame. A full-frame replacement is a different, more invasive project because it removes the old frame, sill, casing, and sometimes exterior siding or trim.
Before You Start: Is an Insert Window the Right Choice?
An insert replacement window fits inside the existing window frame after the old sashes, tracks, or liners are removed. This method usually preserves the interior casing and exterior trim, which reduces demolition and keeps the project moving. The trade-off is a modest reduction in visible glass area because the new frame sits inside the old one.
Choose a full-frame replacement instead when the old frame is rotten, severely out of square, leaking through failed flashing, or too damaged to anchor fasteners securely. Full-frame installation is also appropriate when changing the window’s size, shape, or operating style in a way the existing opening cannot support.
Tools and Materials
- Tape measure, level, square, and angle finder if the sill slope matters
- Utility knife, stiff putty knife, pry bar, hammer, and screwdrivers
- Drill or impact driver with manufacturer-approved installation screws
- Oscillating multi-tool for stubborn stops or concealed fasteners
- Wood shims, exterior-grade wood filler, primer, and paint
- Flashing tape compatible with the frame and sill materials
- High-quality exterior sealant, backer rod, and low-expansion window-and-door foam
- Safety glasses, cut-resistant gloves, hearing protection, and a dust mask or respirator appropriate for the work
How to Replace a Window in 13 Steps
Step 1: Inspect the Existing Window and Choose the Installation Type
Begin with a slow inspection rather than an enthusiastic pry bar. Open and close the window. Look for soft wood, peeling paint, staining, mold, failed caulk, loose exterior trim, and water marks below the sill. Probe suspicious wood gently with an awl or screwdriver. Solid wood resists pressure; rotten wood behaves more like a stale muffin.
Measure both diagonals of the frame to check for square. A small difference can often be corrected with shims, but a badly twisted opening may require full-frame replacement or framing repairs. Confirm that the frame is deep enough to receive the new unit and that there is sound material where installation screws must land.
Step 2: Measure the Opening Correctly
Measure the width of the pocket opening at the top, middle, and bottom. Then measure the height at the left, center, and right. Use the smallest width and smallest height when ordering, following the window manufacturer’s required deductions and measurement instructions. Do not assume every brand wants the same clearance.
Check the sill angle, frame depth, and diagonal measurements. Record everything clearly and label each opening by room and location. In a whole-house project, “bedroom left” becomes surprisingly philosophical after six nearly identical windows arrive.
Step 3: Order the Right Window for Your Climate and Opening
Match the new window to the opening, wall construction, exterior exposure, and local climate. Review the NFRC label rather than relying only on phrases such as “premium glass.” A lower U-factor indicates less heat transfer through the unit. The solar heat gain coefficient, or SHGC, indicates how much solar heat enters through the glazing; lower values generally reduce unwanted heat gain in cooling-dominated climates.
Consider low-e coatings, insulated glass, frame material, air-leakage performance, visible transmittance, hardware quality, egress requirements where applicable, and the manufacturer’s warranty. Keep the installation instructions for the exact model. Generic advice is useful, but the product manual is the referee when details differ.
Step 4: Verify the New Unit Before Removing the Old Window
Unpack the replacement window carefully and inspect the glass, corners, frame, weatherstripping, locks, screens, and accessories. Confirm the width, height, color, handing, grid pattern, and operating style. Measure the actual unit and compare it with the opening.
Whenever practical, perform a dry fit before committing to demolition. The window should enter the opening with a controlled gap for shimming, squaring, insulation, and sealant. If the unit is wrong, stop. A sunny opening with no window is a poor place to discover that “approximately 36 inches” was not an ordering dimension.
Step 5: Score Paint Lines and Remove Interior Stops
Use a sharp utility knife to score the paint and caulk joints around reusable stops. This reduces splintering and prevents layers of paint from tearing away from the casing. Slide a stiff putty knife behind the stop to protect the surrounding wood, then work a small pry bar along the length gradually.
Label each piece as it comes off so it returns to the same location. Old trim can be brittle, especially near nails. Patience costs less than milling a replacement profile that has not been sold since the neighborhood had hitching posts.
Step 6: Remove the Sashes, Liners, and Old Hardware
Remove the lower sash, upper sash, parting beads, jamb liners, balance systems, or tracks as required by the window type. Sash cords can be cut after the sash is controlled, but assume hidden weights will drop. Coil balances and springs may be under tension, so keep your face and fingers out of their path.
Preserve the exterior blind stops when the insert system relies on them. Remove protruding screws, nails, pulleys, and hardware that interfere with the new frame. Vacuum debris as you work instead of allowing chips and dust to migrate through the room.
Step 7: Clean, Repair, and Seal the Existing Frame
Scrape loose paint and old sealant from the pocket. Repair small holes with exterior-grade filler or epoxy suited to the substrate. Replace rotten wood rather than hiding it behind the new window. Fasteners need solid framing, and moisture damage does not become less ambitious merely because it is covered.
Correct the source of any leak before installation. Prime exposed wood and allow coatings to dry as directed. Check the sill for level and bowing. A replacement window installed over an uneven or decayed base may rack, bind, leak, or develop uneven sash reveals.
Step 8: Prepare the Sill and Insulate Empty Weight Pockets
If the old double-hung window used sash weights, remove the weights and insulate the empty cavities where accessible. Use a method that limits air movement without trapping water or interfering with the wall’s drainage path.
Clean the sill thoroughly and install compatible sill flashing tape when required by the window manufacturer or installation design. Press the membrane firmly into corners without punctures or fish-mouth wrinkles. Water management should direct incidental moisture outward. Do not block existing drainage paths or weep openings.
Step 9: Apply the Specified Sealant
Apply a continuous bead of compatible sealant where the replacement frame will contact the blind stops, exterior casing, sill, or other surfaces identified by the manufacturer. Gaps in the bead can become air and water pathways. Excessive sealant, however, can clog drainage features or create a spectacular mess on the glass.
Confirm compatibility among sealant, flashing tape, painted wood, vinyl, aluminum, and masonry. Some materials do not bond well together, and some sealants can stain or damage adjacent finishes. Tool placement matters more than drawing the world’s thickest caulk line.
Step 10: Set the Replacement Window in the Opening
With a helper for large or heavy units, place the bottom of the window on the sill and tip the top into position. Press the frame evenly against the prepared stops and sealant. Center it side to side while maintaining the required installation gap.
Install one temporary or loosely driven fastener at an approved location to hold the window while adjustments are made. Do not drive screws tight enough to distort the frame. Vinyl and fiberglass frames are strong in service but can be pulled out of shape by an overconfident impact driver.
Step 11: Shim the Window Plumb, Level, and Square
Place shims at manufacturer-designated fastening points, commonly near the corners, meeting rails, locks, and structural mullions. Check the sill for level, the jambs for plumb, and the frame for square by comparing diagonal measurements. Keep the frame straight rather than bowed inward or outward.
Operate the sashes repeatedly during adjustment. Look for even revealsthe visible gaps between sash and frame. Locks should align without forcing, and the sash should remain where expected. The goal is not merely to make the bubble level happy; the window must also operate smoothly.
Step 12: Fasten, Test, and Insulate Around the Frame
Drive the approved screws through the shims and into solid framing according to the installation instructions. Tighten them evenly and stop before the frame deforms. Recheck square, reveals, locking, and sash movement after every few fasteners because a single aggressive screw can undo careful alignment.
Fill the perimeter gap with low-expansion foam labeled for windows and doors, or use backer rod and sealant where specified. Apply foam in controlled amounts. Standard high-expansion foam can bow the jambs and turn a perfectly good window into a very expensive wall decoration. Keep insulation and sealant away from weep holes and drainage channels.
Step 13: Reinstall Trim, Caulk, Paint, and Perform Final Checks
Trim protruding shims without damaging the frame. Reinstall the interior stops, replace any removed casing, and add extension jambs or filler strips if required. Seal interior air gaps and exterior weather joints with products appropriate for each location. Follow the manufacturer’s drainage details; exterior caulk should not seal shut openings designed to release water.
Touch up primer and paint, clean the glass, install the screen, and remove labels only after recording warranty and product information. Open, close, lock, and unlock the window several times. Check that weep holes are clear. After the sealant cures, inspect the exterior during rain or use a controlled hose test when recommendednever blast the window with a pressure washer and call it building science.
Common Window Replacement Mistakes
- Ordering from one measurement: Openings are often narrower or shorter in one area.
- Using an insert over damaged framing: New glass cannot cure old rot or failed flashing.
- Skipping the dry fit: Demolition should wait until the replacement unit is confirmed.
- Overdriving screws: A bowed frame causes binding, poor locking, and uneven weather seals.
- Using ordinary expanding foam: Excess pressure can distort the jambs.
- Blocking weep holes: Drainage openings must remain clear.
- Ignoring manufacturer instructions: Fastener locations, sealant patterns, and flashing details vary.
Practical Experience: Lessons That Make Window Replacement Easier
The most useful window replacement experience often comes from the moments that nearly become mistakes. One recurring lesson is to measure twice, record once, and then verify the record before ordering. On a multi-window project, write the room name, wall direction, rough dimensions, final order dimensions, and window style on a dedicated sheet. Photograph the tape measure in each opening as a backup. That simple habit prevents a dining-room window from arriving for a bedroom opening that is similarbut not similar enough.
Another lesson is to schedule installation around weather, daylight, and realistic working speed. A first-time installer may spend most of a day on one window, especially when old stops split, sash-weight pockets need attention, or paint has glued every component together. Start early, but do not remove three windows at once to “save time.” One open wall is a project. Three open walls are an invitation for wind, insects, and a neighbor to ask whether the house is becoming a drive-through.
Dry fitting deserves its reputation as a project saver. Place the new unit in the prepared opening before applying the final sealant bead. Check the perimeter gap, sill support, exterior stop contact, and screw locations. This is also the moment to discover whether a forgotten pulley, nail head, or proud patch is preventing the frame from sitting flat. Once sticky sealant is involved, every adjustment becomes a slower, messier version of itself.
Experienced installers also treat shims as precision tools, not random wood confetti. A shim should support the frame where loads and fasteners occur without creating a hump. Paired shims inserted from opposite sides make controlled adjustment easier. After each change, operate the sash and inspect the reveal. A level frame can still be twisted, and a square frame can still be bowed. The window tells the truth when it opens, closes, and locks with light, even pressure.
Foam application is another area where restraint wins. Fill the gap in shallow passes and allow the product to expand. More foam does not mean more efficiency after the cavity is sealed; it mostly means more trimming and a greater chance of distorting the jamb. Keep a scrap of cardboard nearby for the nozzle, wear gloves, and protect finished surfaces. Cured foam has an impressive ability to remain on anything except the precise spot where you wanted it.
Finally, document the finished installation. Photograph the flashing, shims, fasteners, insulation, exterior sealant, product label, and serial number before trim hides the evidence. Save the invoice, warranty, paint color, sealant brand, and installation guide together. Months later, these records make warranty questions, maintenance, and matching another window far easier. A careful final inspection should include sash operation, locks, screen fit, drainage openings, interior air leaks, and exterior joints. Good window replacement is not defined by how quickly the old unit disappears; it is defined by how quietly the new one performs through heat, cold, wind, and rain.
Conclusion
A successful replacement window depends on decisions made before the new frame touches the opening. Choose the correct installation type, measure at multiple points, repair damaged wood, preserve drainage, and follow the exact product instructions. During installation, square and shim the unit carefully, tighten fasteners without distorting the frame, and use low-expansion insulation designed for windows and doors.
Done correctly, window replacement can reduce drafts, improve comfort, simplify operation, and refresh a room without removing all the surrounding trim. Done carelessly, it can produce leaks with excellent views. Respect the water-management details, test the sash throughout the process, and call a qualified professional when the opening is rotten, badly out of square, high above the ground, unusually large, or potentially contaminated with lead paint.