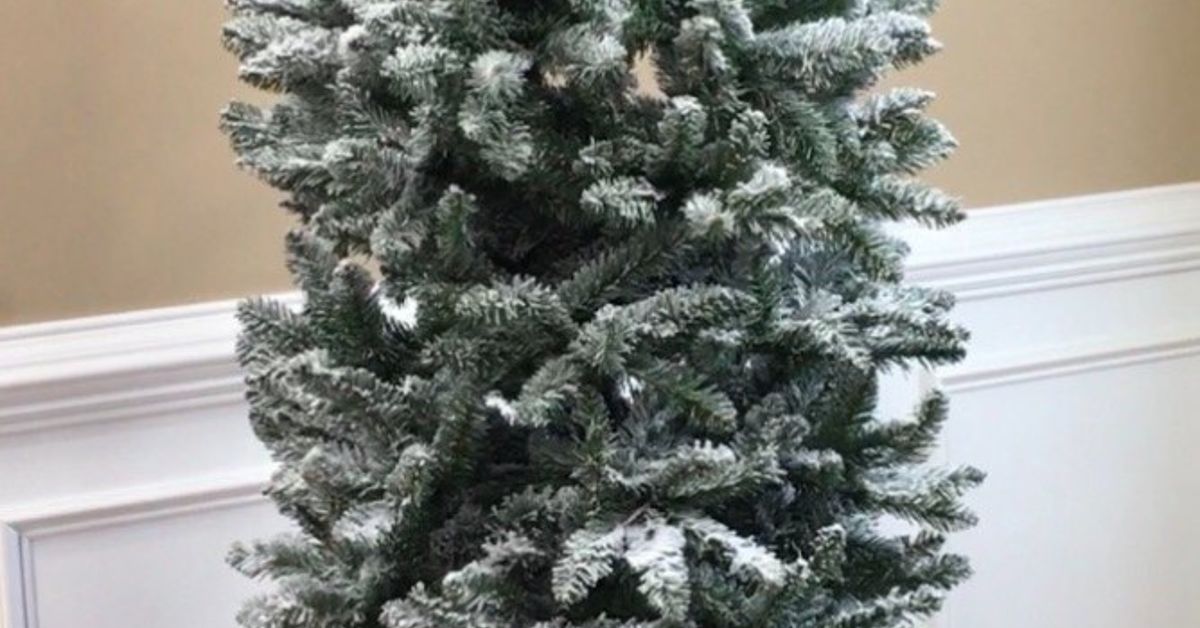
If you have ever looked at a flocked Christmas tree and thought, “Wow, that looks like a Hallmark movie had a budget,” you are not alone. A beautifully flocked tree can make even a regular living room feel like a snowy cabin retreat, minus the frozen driveway and questionable wildlife. The good news is that you do not need a professional decorating crew, a giant workshop, or magical elf credentials to make it happen at home.
Flocking a Christmas tree is simply the process of adding a snowy coating to the branches so the tree looks like it just strolled in from a peaceful winter forest. You can do it with powder, spray, or a kit, and you can use either a real tree or an artificial one. But here is the catch: the difference between “dreamy winter wonderland” and “why does my living room look like a powdered sugar explosion?” usually comes down to technique.
This guide breaks down the process into ten practical tips that will help you flock your Christmas tree at home without losing your patience, your flooring, or your holiday spirit. Along the way, you will also get decorating ideas, common mistakes to avoid, and real-world experience-based insights that make the whole project feel much more doable.
What Is a Flocked Christmas Tree, Exactly?
A flocked Christmas tree has a heavier snow-covered look than a lightly frosted tree. Instead of just dusting the branch tips, flocking creates a fuller, softer, more dramatic winter effect. Some people buy pre-flocked trees, which are convenient and usually less messy. Others do it themselves because they want more control over how light, heavy, natural, or theatrical the “snowfall” looks.
That freedom is part of the fun. You can go for a subtle alpine dusting, a thick snowy-lodge aesthetic, or something sparkling enough to make your ornaments feel underdressed. The trick is to control the process instead of letting the process control you.
10 Top Tips For Flocking a Christmas Tree at Home
1. Start with the right tree, not just the nearest one
Before you even think about faux snow, choose a tree that suits your room and your goals. If you are using an artificial tree, pick one with enough branch structure to hold flocking well. Thin, sparse trees can still work, but they usually need extra fluffing and clever decorating to look lush. If you are using a real tree, freshness matters. A healthy tree holds up better visually and is safer once it is indoors.
Also think about scale. A giant flocked tree in a tiny room can feel less “winter wonderland” and more “snowstorm with furniture.” Leave enough space between the tree and the ceiling, and make sure the final look fits your room instead of swallowing it whole.
2. Set up your workspace like you respect your floors
Flocking is not difficult, but it is gloriously messy. That means your best move is to work in a garage, covered patio, utility room, or another well-ventilated area where cleanup is not a dramatic life event. Put down plastic sheeting or a drop cloth before you begin. Cover the tree stand, nearby furniture, and anything else you do not want wearing a festive white coating.
This is one of those moments where five minutes of preparation can save you forty-five minutes of muttering while vacuuming corners. Protect the area first, and your future self will feel deeply grateful and slightly smug.
3. Fluff the branches before adding any flocking
If your tree is artificial, fluff it before you do anything else. Open every branch, spread the tips, and shape the tree fully so the flocking lands where it is supposed to. If you apply flocking to a tree that is still half-collapsed from storage, the powder or spray can settle unevenly. Then, once you fluff it later, you may end up with bare spots, clumps, or odd patches that look like snow gave up halfway through.
Take your time here. Work from the bottom up and from the inside out. Pull branch tips in different directions so the tree looks fuller and more natural. It is not glamorous work, but it is the secret handshake of good tree decorating.
4. Choose the flocking method that matches your patience level
Not all flocking methods behave the same way. Powder-based flocking usually gives you the most control and the most natural layered look, especially if you want a soft snowy finish. Spray flocking is faster and simpler, which makes it appealing for first-timers or anyone who wants less setup. There is no universal winner. It depends on how detailed you want to be and how much time you want to spend.
If you want a custom, dimensional finish, powder is often the better choice. If you want a quick upgrade without a longer process, spray can do the job nicely. Either way, test your product on a small hidden section first. A tiny test patch is much cheaper than a full-tree regret.
5. If you are using powder, mist lightly instead of soaking the tree
With powder flocking, the branches need a light mist of water so the material sticks. The keyword here is light. You are not bathing the tree. You are giving it just enough moisture to help the flocking cling evenly. If the branches get too wet, the powder can clump, slide, or create a slushy look that is less “fresh snowfall” and more “parking lot in late February.”
Use a spray bottle on a mist setting and work in sections. A gentle, even dampness creates the best surface. Once the branch tips are ready, apply the flocking slowly and build from there.
6. Apply flocking in thin layers for a better finish
This is where a lot of DIY projects go sideways. People get excited, dump on too much product at once, and then wonder why the tree looks like it survived an indoor blizzard. A lighter hand usually gives better results. If you are using powder, a mesh sifter can help distribute it more evenly. If you are using spray, use steady passes instead of blasting one spot into a polar ice cap.
Focus on the tops of branches first, because that is where real snow naturally settles. Step back often and look at the whole tree from a few feet away. The goal is balance, not branch-by-branch perfection. Build the look in layers until it feels finished. It is far easier to add more flocking than to undo an overcommitted snow moment.
7. Let the tree dry completely before decorating it
Patience is not the showiest holiday decorating skill, but it may be the most important one. Once your flocking is on, let the tree dry fully before adding lights, ribbon, or ornaments. This helps set the finish and reduces smearing, shedding, and finger-shaped gaps where your hard work used to be.
Trying to decorate too soon is like frosting a cake before it cools. Technically possible? Maybe. Wise? Absolutely not. Give the tree time, and you will get a cleaner result with fewer surprises.
8. Decorate with a plan, because snowy branches already did half the styling
A flocked tree is basically a neutral backdrop with excellent lighting potential. That means almost any style can work, but the best results usually come from having a clear direction. Warm colors like red and gold create a cozy, classic look. Silver, blue, green, and metallic accents lean more wintery and elegant. If you want a designer-style finish, limit yourself to a few main colors instead of throwing every ornament you own at the tree like confetti.
Ribbons, pinecones, berries, metallic ornaments, and glass pieces all look great against white branches. Large ornaments can fill space quickly, while medium and smaller ones create balance. Tuck some ornaments deeper into the tree for depth, and use ribbon or pinecones to disguise thin areas. A flocked tree does not need chaos to look impressive. It already arrived dressed for the occasion.
9. Treat live trees and lights with actual respect
If you are flocking a real tree, safety is not optional. Keep the tree watered daily, especially during the first several days indoors. Place it away from fireplaces, radiators, heat vents, candles, and other heat sources. Use lights in good condition, follow the manufacturer’s instructions, and turn the lights off before leaving the house or going to bed.
LED lights are a smart choice because they stay cooler than older incandescent styles. Also, avoid placing the tree where it blocks a doorway or exit. Holiday decorating should create memories, not emergency logistics.
10. Expect a little mess, then make cleanup and storage part of the plan
Even a well-flocked tree can shed a bit, especially when it is first moved, decorated, or packed away. That is normal. DIY flocking tends to be messier than pre-flocked trees, so do not judge your project by a few fallen flakes. The key is to minimize handling once the tree is done, vacuum or sweep up loose material, and store the tree carefully after the season.
If the tree is artificial, avoid crushing the branches during storage. A roomy storage bag or box helps preserve both the shape and the flocking. In other words, do not spend hours making your tree gorgeous only to body-slam it into a too-small bin in January.
Common Mistakes to Avoid
One of the biggest mistakes is trying to rush the project. Flocking looks easy on video because the editing does not show the setup, the waiting, or the cleanup. In real life, good results come from slowing down and working in sections.
Another common mistake is over-flocking the tree right away. Heavy application can look flat and artificial instead of airy and snow-like. Thin layers almost always create more depth and realism.
People also get into trouble by decorating a flocked tree the same way they would decorate a regular green tree. Because the branches are already visually bright, the ornaments do not need to work as hard. A little restraint often looks more luxurious than filling every inch of space.
And finally, some homeowners forget that a live tree is still a live tree, even if it is wearing faux snow. It still needs water, sensible placement, and safe lighting practices.
Simple Style Ideas for a Flocked Tree
If you love a classic Christmas look, use red ornaments, gold ribbon, warm white lights, and a textured tree skirt. It feels festive, familiar, and cozy without looking dated.
If you want a more elegant winter palette, try silver, champagne, icy blue, pearl, and glass ornaments. This style works especially well in rooms with neutral furniture or metallic accents.
For a farmhouse or rustic look, use cream-colored ornaments, bells, pinecones, berry picks, wood accents, and natural ribbon. This keeps the tree warm and charming instead of too glitter-heavy.
And if your personality is more “joyful chaos with excellent snack choices,” a flocked tree can also handle colorful ornaments beautifully. The snowy branches help even bright decorations feel intentional.
Final Thoughts
Flocking a Christmas tree at home is one of those projects that looks fancy but is actually very achievable once you understand the rhythm: prep well, apply lightly, dry fully, and decorate with purpose. The snowy finish instantly changes the mood of a room and gives your holiday setup a polished, cozy, wintry feel.
The best part is that it does not have to be perfect to be beautiful. A little variation makes it feel natural. A slightly uneven branch here and there can actually add charm. So take a breath, protect the floor, and embrace the holiday magic. Your tree does not need to look like it came from a luxury showroom. It just needs to look like the best version of your Christmas style.
Experiences People Commonly Have When Flocking a Christmas Tree at Home
One of the most common experiences people report after flocking a Christmas tree at home is surprise. Not bad surprise, necessarily, but a healthy, “Oh, this is messier than the internet made it look” kind of surprise. The first few minutes usually feel exciting and cinematic. The room smells festive, the tree is standing there full of potential, and the faux snow product looks innocent enough. Then the first puff of powder lands on the floor, the sleeves, the nearby box, and somehow a coffee mug that was not even close to the action. That moment is when beginners learn the first real lesson of flocking: the prep work is not optional decoration for the tutorial, it is the tutorial.
Another very common experience is realizing that branch fluffing makes a huge difference. A tree that looked average straight out of the box often becomes dramatically better once the branches are spread properly. People who skip that step usually notice later that the flocking emphasizes every gap and awkward bend. People who take the time to fluff first tend to be much happier with the finished result, because the snow effect settles more naturally and the tree looks fuller before the ornaments even go on.
Many homeowners also describe a shift in confidence about halfway through the project. At first, there is a lot of hesitation. They worry about ruining the tree, overdoing it, or making it look fake in the wrong way. But once the first section starts to come together, the process becomes more intuitive. They begin stepping back, adjusting the coverage, and seeing the tree as a whole rather than obsessing over every branch tip. That is usually the point where flocking stops feeling intimidating and starts feeling creative.
There is also the decorating phase, which often brings another pleasant surprise: a flocked tree does a lot of visual work on its own. People who are used to loading a green tree with endless ornaments often discover that a snowy tree looks better with fewer, better-chosen pieces. Metallic ornaments shine more. Red ornaments look richer. Ribbon feels softer and more intentional. Even a simple string of warm white lights can suddenly look expensive. In practical terms, that means you do not always need to buy more décor. Sometimes you just need a better backdrop.
Of course, there are also the tiny inconveniences everyone remembers. The hands get dusty. The floor needs vacuuming. Somebody in the house will absolutely ask if the tree is dry yet by poking it with one finger. A pet may become suspicious of the new snowy object in the corner. And when it is finally finished, people usually stand there longer than expected just admiring it from different angles like they personally invented winter.
That may be the most relatable flocking experience of all: the final reveal feels worth it. The tree glows differently. The room feels calmer, brighter, and a little more magical. Even with the mess and the trial and error, many people end up saying the same thing once it is done: next year, they would absolutely do it again, just with more drop cloths and maybe fewer overconfident first sprays.