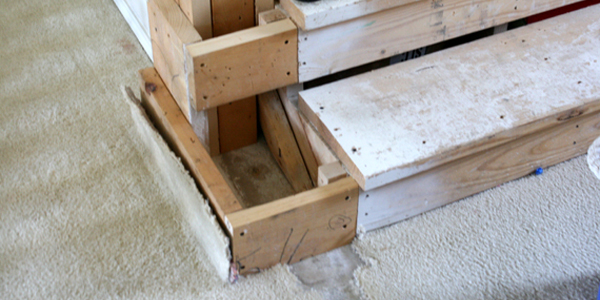
A staircase is one of the hardest-working architectural features in a home. It carries people, laundry baskets, pets, furniture, and the occasional child pretending the landing is a castle. Yet it is often treated like a hallway with ambition: necessary, visible, and ignored until the carpet frays or the railing starts wobbling.
A thoughtful staircase remodel project can improve safety, reduce noise, refresh an entryway, and connect two floors visually. The best results do not begin with a trendy stain color or a dramatic iron baluster. They begin with an honest inspection, accurate measurements, a realistic budget, and a plan that keeps the stairs usable while the work is underway.
Why a Staircase Remodel Is More Than a Cosmetic Upgrade
Because stairs are part of a home’s circulation system, small defects can create large problems. A loose tread may squeak today and shift tomorrow. A short handrail may look harmless until someone needs support on the last step. Dark landings, slippery finishes, inconsistent riser heights, and poorly secured runners can all make daily travel less comfortable.
Design still matters, of course. A staircase often occupies prime visual territory near the entry, living room, or central hall. Natural wood treads, painted risers, slim metal balusters, wall molding, wallpaper, and runners can turn it into a focal point rather than a beige vertical tunnel. Current remodeling guidance from major home-design publishers consistently treats stairs as both a functional structure and an opportunity for architectural character.
Step 1: Inspect Before You Decorate
Check the Structure
Walk the staircase slowly and pay attention to movement. Mark every squeak with painter’s tape. Test the handrail and newel posts for looseness. Look underneath the stairway, when accessible, for cracked stringers, separated joints, water stains, insect damage, missing fasteners, or makeshift shims. Examine each tread for cupping, splitting, or a worn front edge.
A cosmetic makeover is reasonable when the framing is sound and the main problems are worn finishes, dated carpet, or unattractive trim. Structural movement, significant rot, irregular geometry, or a railing that cannot be securely anchored calls for a qualified carpenter, stair specialist, engineer, or building official. This is not the moment to solve a framing problem with extra caulk and optimism.
Measure the Existing Staircase
Record the width, total rise, tread depth, individual riser heights, landing dimensions, headroom, handrail height, baluster spacing, and the direction nearby doors swing. Measure every tread and riser individually. Older stairs are rarely identical, even when they look identical from six feet away.
Commonly adopted residential benchmarks include a stair width of at least 36 inches above the handrail, treads of at least 10 inches when nosings are used, risers no higher than 7 3/4 inches, at least 6 feet 8 inches of headroom, and no more than 3/8 inch of variation among tread depths or riser heights. Local amendments can differ, so the applicable building department has the final word. Comfort matters as well: professional stair guidance emphasizes balancing rise and run so the stride feels natural instead of forcing users into tiny, awkward steps.
Think About the People Using the Stairs
A household with young children, older adults, pets, or anyone with limited mobility may benefit from continuous handrails, strong contrast between treads and risers, brighter lighting, secure runners, and slip-resistant surfaces. The U.S. Consumer Product Safety Commission recommends clear walking paths, improved lighting, and handrails as practical fall-prevention measures.
Step 2: Define the Remodel Level
Level One: Cosmetic Refresh
This is the fastest and least disruptive version of a staircase renovation. It can include cleaning, filling nail holes, repainting risers, staining or painting the handrail, adding wall molding, replacing decorative trim, or installing wallpaper on risers. These projects work best when the structure, tread geometry, and railing are already safe.
Level Two: Surface Replacement
A medium-scale remodel may involve removing carpet, installing retrofit hardwood treads, replacing riser faces, adding a runner, changing balusters, or rebuilding the handrail assembly. This level creates a major visual change without relocating the staircase or rebuilding the framing.
Level Three: Structural Reconstruction
A full staircase remodel may change the width, layout, landing, stringers, or opening between floors. It can also include floating treads, glass guards, custom steel, curved geometry, or under-stair structural work. This category usually requires permits, detailed drawings, professional fabrication, and careful coordination with framing, flooring, electrical, and finish trades.
Step 3: Build a Realistic Budget
Staircase costs vary wildly because the term “remodel” can mean a can of paint or a custom architectural installation. Recent U.S. cost guides place individual components across broad ranges: runners may cost hundreds to a few thousand dollars, tread-and-riser replacement can reach several thousand, and professionally installed railings can rise sharply with glass, metal, curves, landings, or custom fabrication. Permits, demolition, disposal, wall repair, structural correction, and finish carpentry are easy to overlook.
Create separate allowances for demolition, framing repairs, treads, risers, railing parts, finishing products, runner installation, lighting, permits, and a contingency fund. A 15 to 20 percent reserve is sensible in an older home because stairs enjoy hiding surprises under carpet. Those surprises usually have staples.
Step 4: Choose a Cohesive Design
The staircase should relate to the floors it connects. Matching every wood species perfectly is not always necessary, but undertones should cooperate. Warm oak beside cool gray laminate can look accidental. A medium-tone tread, white riser, and dark handrail is a dependable combination because it balances warmth, brightness, and contrast.
For a modern look, consider simple square newels, thin metal balusters, restrained trim, and a low-sheen finish. Traditional homes often suit turned balusters, stained handrails, painted risers, and detailed skirt boards. Farmhouse and transitional spaces work well with natural wood, black accents, and uncomplicated profiles. Design sources also suggest wallpapered risers, patterned runners, custom balusters, painted faux runners, and mixed wood-and-metal assemblies as ways to add personality without rebuilding the entire stair.
Step 5: Plan the Work in the Right Order
- Document the existing staircase. Photograph every connection and label reusable parts before demolition.
- Protect nearby rooms. Use floor protection, dust barriers, and a controlled debris route.
- Remove carpet, trim, or railing components carefully. Assume hidden staples are waiting for bare knees.
- Repair framing and eliminate movement. Loose treads and damaged stringers must be corrected before decorative work.
- Complete electrical changes. Add stair lights, switches, or wall fixtures before final finishes.
- Install risers and treads. Fit each piece individually and preserve consistent finished dimensions.
- Install newels, balusters, guards, and handrails. Railing layout should be planned with tread width and landing geometry, not improvised afterward.
- Finish paint and stain. Allow full drying and curing time.
- Add the runner last. Keep it protected until dusty work is complete.
Choosing Treads, Risers, Paint, and Runners
Wood Treads
Solid or engineered hardwood treads create a durable, classic surface. Oak is popular because it is widely available, hard-wearing, and compatible with many stains. Retrofit treads can cover an existing stair, but added thickness changes the finished height of the first and last risers. That detail must be calculated before installation, not discovered after someone trips at the top.
Prefinishing treads in a clean work area can improve consistency and reduce downtime. Use a coating intended for floors or other high-traffic wood surfaces, follow the manufacturer’s recoat and cure instructions, and avoid leaving a glassy, slippery surface. Durable floor-rated polyurethane products are designed to resist scratches and spills, while high-traffic floor enamels are formulated for wear and washability.
Painted or Decorative Risers
Risers are ideal for color because they do not receive the same direct foot traffic as treads. White keeps the staircase bright, charcoal hides scuffs, and muted colors can connect the stairs to nearby rooms. Peel-and-stick wallpaper or tile can add pattern, but the surface must be clean, smooth, and dry. Templates help because every riser may be slightly different.
Stair Runners
A runner softens footsteps, protects the center of wood treads, introduces pattern, and can improve traction when properly selected and securely installed. Dense, low-profile materials generally behave better than thick, plush carpet on stair edges. The runner should be centered consistently, tightly attached, and installed without loose edges or wrinkles. Both home-improvement retailers and remodeling publications emphasize accurate measuring and secure fastening.
Do Not Ignore Lead Paint in Older Homes
Removing old paint from treads, risers, skirt boards, or railings can generate a large amount of dust. In homes built before 1978, the U.S. Environmental Protection Agency warns that renovation, repair, or painting may disturb lead-based paint. EPA recommends determining whether lead is present, containing the work area, minimizing dust, using protective practices, and hiring a lead-safe certified contractor when appropriate.
Common Staircase Remodel Mistakes
- Starting with demolition before measuring. Once the old parts are gone, important reference points disappear.
- Changing tread thickness without recalculating riser heights. The first and last steps can become dangerously inconsistent.
- Buying all parts from appearance alone. Newels, handrails, fittings, balusters, and brackets must form a compatible system.
- Painting over glossy finishes without preparation. Cleaning, sanding, priming, and proper curing determine whether paint lasts.
- Using ordinary wall paint on treads. Walking surfaces need products rated for high traffic.
- Removing the only usable staircase at once. Plan access, especially when bedrooms and bathrooms are upstairs.
- Leaving railing decisions until the end. Railings affect clear width, landing details, anchoring, and code compliance.
Project Experience: What the Staircase Teaches You
The First Hour Is Usually Demolition Theater
On a typical carpet-to-wood staircase makeover, the opening hour feels wonderfully productive. The carpet peels back, the dated color disappears, and everyone briefly believes the project is nearly finished. Then the padding comes up and reveals the true population of the staircase: staples, tack strips, paint drips, construction adhesive, pencil marks, and at least one fastener installed at an angle known only to the original builder.
The useful lesson is to slow down. Cut carpet into manageable sections, wear gloves and eye protection, and use pliers rather than fingers to pull staples. Keep a magnet nearby to collect metal debris. Label trim pieces if they will be reused. A clean demolition phase makes every later step faster.
Templates Beat Confidence
The next discovery is that a staircase that looks square may have very few square parts. Walls bow. Skirt boards lean. Risers differ by fractions of an inch. Cutting twelve identical tread covers based on the first measurement is an efficient way to create twelve attractive mistakes.
Cardboard templates, a stair-tread measuring tool, or carefully scribed patterns solve the problem. Fit each tread dry before applying adhesive. Mark the front, left, right, and step number. This feels slower than production cutting, but it avoids gaps large enough to require decorative plants.
Finishing Requires a Traffic Plan
Paint and clear finish do not care that someone’s phone charger is upstairs. Before coating begins, gather clothes, medications, pet supplies, and anything needed overnight. Some DIYers finish alternating treads so limited access remains, but that method only works when the product instructions and household conditions allow it. Children and pets should not be asked to interpret a complicated “only step on the dry ones” system.
Prefinishing removable pieces can help. For installed treads, work from the top down when practical, maintain ventilation, and respect cure time rather than merely dry-to-touch time. A finish can feel dry while remaining vulnerable to socks, pet claws, and the one person who forgot the warning sign.
The Railing Changes the Room More Than Expected
Homeowners often focus on tread color, but the railing occupies the visual edge of the entire staircase. Replacing bulky turned balusters with simpler square wood or slim metal can make the stairway feel wider and brighter without changing the framing. Refinishing an existing handrail can also produce a strong result when the shape and anchoring are sound.
The experience-based caution is to mock up the design first. Tape thin strips of cardboard where new balusters will go, or photograph the stairs and sketch over the image. A railing that looks elegant in a showroom may appear busy when repeated thirty times in a narrow hall.
The Final Ten Percent Takes Patience
Once the major pieces are installed, the staircase may look finished from the bottom. Up close, the final work remains: filling nail holes, touching up riser edges, caulking trim, adjusting baluster alignment, cleaning adhesive, installing wall brackets, and repairing nearby paint. These details separate a remodel that merely looks new from one that looks intentional.
The most satisfying moment is not the last coat of stain. It is the first normal trip upstairs when nothing squeaks, the handrail feels solid, the lighting is better, and every step feels predictable. That is the real “next step” in a staircase remodel: turning a construction project back into an effortless part of daily life.
Conclusion
A successful staircase remodel project balances structure, safety, comfort, durability, and style. Inspect first, confirm local requirements, define the scope, budget for hidden repairs, and sequence the work so framing and railing decisions come before decorative finishes. Whether the final design uses stained oak, painted risers, a patterned runner, simple metal balusters, or restored traditional woodwork, the goal is the same: a staircase that looks connected to the home and feels secure under every footstep.
Note: Building codes, permit rules, product instructions, and accessibility needs vary by location and household. Verify requirements with the local building authority and use qualified professionals for structural, railing, electrical, or lead-related work when needed.