Note: This article is written in standard American English, synthesized from reputable woodworking safety, DIY, tool-use, and wood-finishing guidance, and prepared as clean body-only HTML for web publishing.
Woodworking has a magical way of making you feel both brilliant and humbled in the same afternoon. One minute, you are admiring a perfectly straight cut. The next, you are staring at a board that is somehow one-eighth of an inch too short, even though you measured it three times and gave it a motivational speech.
For beginners, mistakes are not just possible; they are practically part of the starter kit. The good news? Most beginner woodworking mistakes are predictable, preventable, and fixable. You do not need a professional cabinet shop or a grandfather who smells faintly of sawdust and wisdom to build better projects. You need patience, safety habits, accurate measuring, an understanding of wood behavior, and a willingness to test things before committing your best board to the blade.
This guide breaks down the 10 most common woodworking mistakes beginners make, why they happen, how they can ruin a project, and what to do instead. Whether you are building a bookshelf, coffee table, planter box, cutting board, or your first “it was supposed to be square” masterpiece, these woodworking tips will save you money, time, and possibly a few dramatic sighs.
1. Measuring Once and Hoping for the Best
The classic woodworking rule “measure twice, cut once” exists because wood does not come with an undo button. Beginners often rush the measuring and marking stage because it feels less exciting than cutting, drilling, assembling, or saying, “I made that.” But a tiny measuring error can multiply across a project. One shelf cut slightly short may be annoying. Four shelves cut slightly short can turn your bookcase into modern art.
Why It Happens
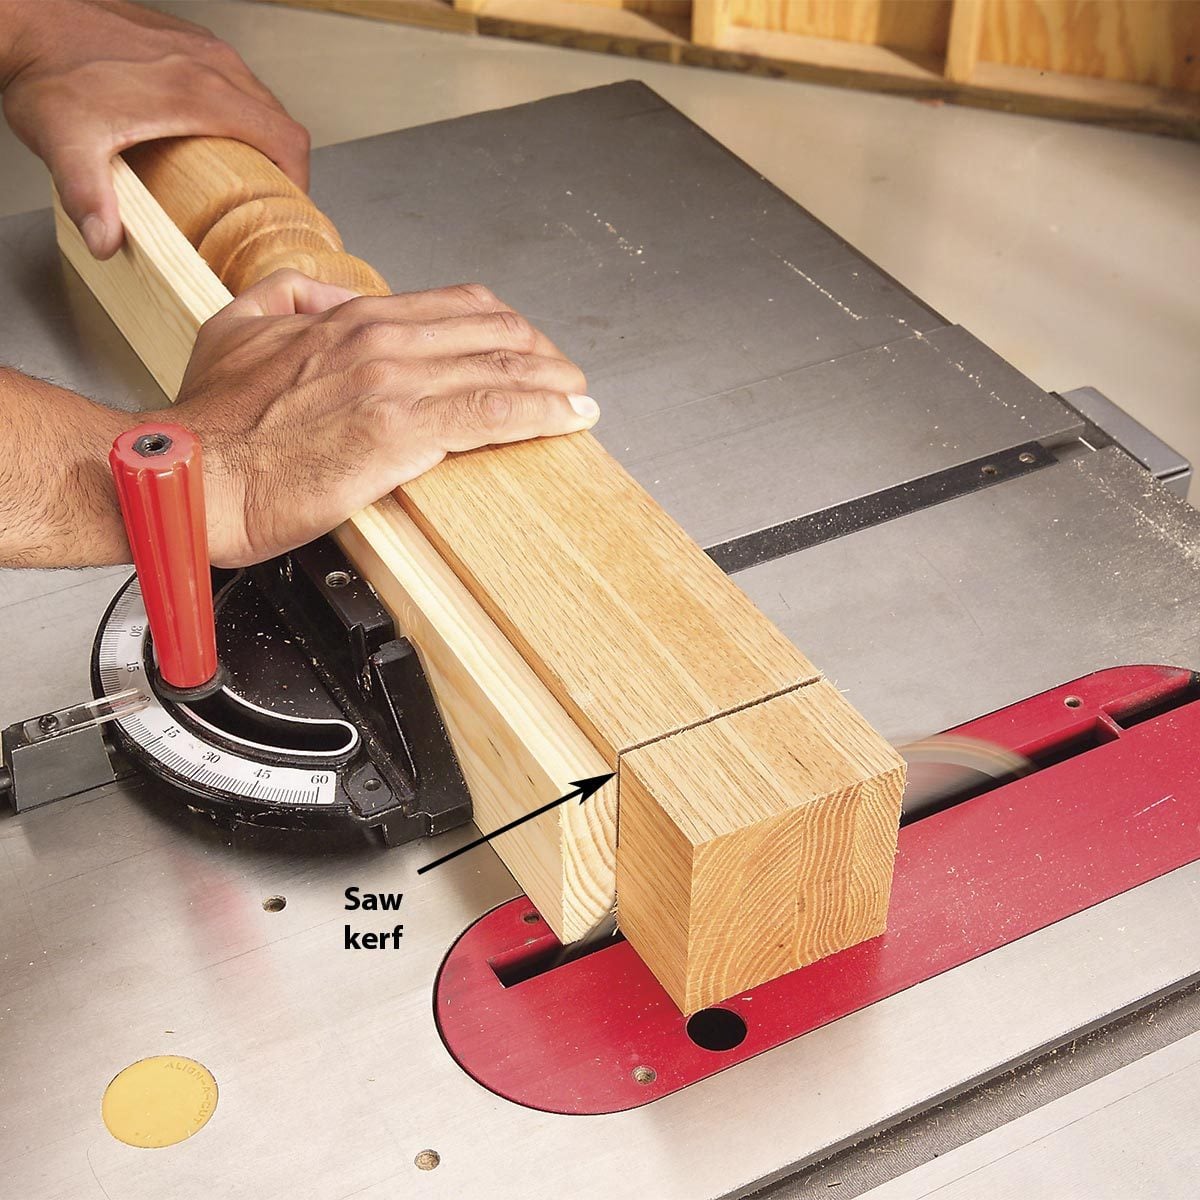
New woodworkers may rely on quick pencil marks, bendy tape measures, or rough estimates. They may also forget to account for blade kerf, which is the material removed by the saw blade during a cut. If you cut directly on the wrong side of the line, your carefully measured part can become too short.
How to Avoid It
Use the same measuring tool throughout the project. Mark clearly with a sharp pencil, marking knife, or fine mechanical pencil. Put an “X” on the waste side of the line so you know which side disappears. For repeat parts, use stop blocks or templates instead of measuring the same dimension over and over. In woodworking, repetition is where accuracy becomes your best friend.
2. Choosing the Wrong Wood for the Project
Not all wood is created equal. Pine, oak, maple, cedar, poplar, plywood, MDF, and walnut each behave differently. Beginners often choose wood based on price or appearance alone, then discover that the board dents easily, splits when screwed, warps after assembly, or drinks stain like it just crossed a desert.
Why It Happens
Wood choice can feel confusing at first. A pretty board at the home center may look perfect, but it might be too soft for a tabletop, too heavy for a wall shelf, or too unstable for a wide panel. Some boards also contain knots, checks, twists, or hidden moisture problems.
How to Avoid It
Match the wood to the job. Use harder species for surfaces that take abuse, such as tabletops, benches, and cutting surfaces. Use exterior-rated wood or properly protected lumber for outdoor projects. Choose cabinet-grade plywood for stable panels and shop projects where flatness matters. Before buying, sight down the board to check for bowing, cupping, twisting, and cracks. A board can be beautiful and still have the personality of a banana.
3. Ignoring Wood Movement
Wood moves. It expands and contracts as humidity changes. This is not a flaw; it is just wood being wood. Beginners often build as if wood were plastic or metal, locking wide solid boards tightly into frames with glue and screws. Then, when the seasons change, the panel cracks, buckles, or pulls the project out of square.
Why It Happens
Wood movement is invisible until it becomes a problem. A tabletop may look perfect in the shop, but months later, dry winter air can shrink it. Humid summer air can make it swell. Wide solid panels are especially vulnerable across the grain.
How to Avoid It
Allow solid wood panels to expand and contract. Use figure-eight fasteners, tabletop clips, elongated screw holes, frame-and-panel construction, or floating panels when needed. Avoid gluing solid wood across its full width into a rigid frame. When using plywood or engineered sheet goods, movement is usually less dramatic, which makes them helpful for cabinets, jigs, and beginner projects.
4. Cutting Before Planning the Whole Build
One of the sneakiest beginner woodworking mistakes is cutting parts before fully understanding how the project goes together. A cut list is helpful, but blindly chopping every piece first can create trouble if your real-world material is slightly different from the plan.
Why It Happens
Beginners want momentum. Cutting feels productive. Planning feels like homework wearing safety glasses. But woodworking rewards sequence. If one part determines the size of another, cutting both too early can lock you into a mistake.
How to Avoid It
Study the project before cutting. Identify which dimensions are critical and which can be adjusted during assembly. Build from reference edges and real measurements. Use dry fitting before glue-up. When possible, cut matching parts together so they are identical, even if they are not mathematically perfect. In many projects, consistency matters more than theoretical perfection.
5. Using Dull Tools and Blades
A dull blade does not make you safer. It makes you push harder, cut rougher, burn the wood, wander off the line, and increase the chance of kickback or loss of control. Dull chisels, plane irons, drill bits, router bits, and saw blades turn woodworking from craft into wrestling.
Why It Happens
Many beginners assume new tools are sharp enough forever. Others buy inexpensive blades and bits, then blame themselves when cuts are ragged. Sharpness is not a luxury in woodworking; it is part of accuracy and safety.
How to Avoid It
Replace or sharpen blades when cuts begin to burn, tear, chatter, or require extra force. Learn basic sharpening for chisels and hand planes. Use the correct blade for the material and cut type. A ripping blade, crosscut blade, fine-tooth plywood blade, and general-purpose blade all perform differently. Let the tool cut at the pace it was designed for. If you feel like you are forcing it, stop and inspect the setup.
6. Forgetting About Grain Direction
Wood grain is not just decoration. It affects cutting, planing, routing, sanding, staining, and strength. Beginners often work against the grain, which can cause tear-out, splintering, fuzzy surfaces, and uneven finishes.
Why It Happens
At first, grain can be hard to read. Boards may have reversing grain, knots, or cathedral patterns that change direction. Power tools can hide the issue until a router bit or planer lifts fibers and leaves a rough patch that looks like a tiny beaver attack.
How to Avoid It
Look closely at the wood fibers before cutting or planing. Whenever possible, cut, plane, scrape, and sand with the grain. Take lighter passes on tricky boards. Use sharp tools. For routing, pay attention to feed direction and use climb-cutting only when you fully understand the risks and have proper control. On visible surfaces, test your method on scrap from the same board before touching the project piece.
7. Skipping Pilot Holes and Proper Fastening
Screws seem simple until they split the board, strip out, sit crooked, or proudly stick above the surface like they are asking for attention. Beginners often drive screws directly into wood without pilot holes, countersinks, clamps, or an understanding of the wood’s density.
Why It Happens
Drilling pilot holes feels like an extra step. In softwood, you might get away with skipping it sometimes. In hardwood, near board ends, or with larger screws, skipping pilot holes is asking for cracks.
How to Avoid It
Drill pilot holes when fastening near edges or ends, working with hardwood, or using thick screws. Use countersink bits when you want screw heads to sit flush. Clamp pieces before driving screws so they do not shift. Choose the right screw length: long enough to hold, not so long it pokes through the other side and introduces itself to your hand.
8. Rushing Glue-Ups and Clamping
Glue-up is where calm projects sometimes become action movies. The glue is spreading, boards are sliding, clamps are missing, and suddenly you are using your elbow as a third hand. Beginners often apply too much glue, too little glue, uneven pressure, or no dry run at all.
Why It Happens
Glue-up has a time limit. Once glue is open, the clock starts. If your clamps, cauls, square, damp rag, and parts are not ready, panic joins the project team.
How to Avoid It
Always do a dry fit first. Assemble the project without glue to check alignment, clamp placement, square corners, and joint fit. Apply a thin, even layer of glue to mating surfaces. Use enough clamp pressure to close the joint, but do not crush the fibers or squeeze out every bit of adhesive. Clean glue squeeze-out before it hardens, especially if you plan to stain. Dried glue can block stain and leave pale blotches that scream, “Someone got excited with the bottle.”
9. Sanding Poorly or Skipping Surface Prep
Sanding is not glamorous. Nobody brags, “Come see my 180-grit progression.” But sanding and surface preparation often separate homemade-looking projects from clean, professional-looking ones. Beginners may skip grits, sand unevenly, round over crisp edges by accident, or fail to remove scratches before applying finish.
Why It Happens
Sanding feels repetitive, and after building the project, beginners are eager to see color and finish. Unfortunately, stain and clear coats do not hide flaws. They usually highlight them, sometimes with the enthusiasm of a spotlight.
How to Avoid It
Start with the grit needed to remove milling marks, scratches, glue residue, or tool marks. Then progress through finer grits without skipping too far. Sand with the grain on visible surfaces. Use a sanding block for flat areas so you do not create waves. Vacuum or wipe dust between grits. Before finishing, inspect the surface under bright raking light. If you can see scratches before finish, you will definitely see them after finish.
10. Treating Safety Like an Optional Accessory
Woodworking is fun, creative, and deeply satisfying, but it involves sharp tools, spinning blades, dust, noise, and finishes that require ventilation. Beginners sometimes skip eye protection, hearing protection, dust control, push sticks, guards, or basic machine setup because they are “just making one quick cut.” Famous last words usually begin with “just.”
Why It Happens
Safety gear can feel inconvenient. Some beginners also learn from videos where experienced makers move quickly and make complex tasks look casual. What viewers do not always see is the training, setup, muscle memory, and risk management behind the scenes.
How to Avoid It
Wear safety glasses. Use hearing protection around loud tools. Use dust collection, a properly fitted respirator, or both when sanding, sawing, or routing. Keep hands away from blades with push sticks, featherboards, clamps, and jigs. Stand out of the direct line of kickback when using a table saw. Keep guards and riving knives in place when appropriate. Read tool manuals and understand blade direction, feed direction, depth settings, and emergency shutoff locations. A good project is never worth a bad injury.
Bonus Mistake: Trying to Build Too Advanced Too Soon
Ambition is wonderful. Starting with a hand-cut dovetailed walnut secretary desk with curved doors and secret compartments may be less wonderful. Beginners sometimes choose projects far beyond their tools, space, budget, and skill level, then feel discouraged when the result does not match the inspiration photo.
Start with projects that teach core skills: a simple box, wall shelf, workbench, stool, picture frame, planter, or small cabinet. Each project should introduce one or two new techniques, not twelve. Confidence grows faster when your first builds are achievable, useful, and slightly forgiving.
Practical Beginner Woodworking Tips That Prevent Most Mistakes
Use Scrap Wood Like a Training Gym
Before cutting an expensive board, test the cut on scrap. Before staining the project, test the finish on an offcut. Before routing the decorative edge, practice the profile on a leftover piece. Scrap wood is not trash; it is tuition.
Build Jigs for Repeated Accuracy
Simple jigs help beginners become more consistent. A crosscut sled, stop block, drilling guide, spacer block, or sanding jig can make repeat tasks safer and more accurate. Jigs also reduce decision fatigue because they let the setup do the thinking.
Keep the Shop Clean Enough to Think
A messy shop leads to lost pencils, hidden screws, tripping hazards, scratched boards, and bad decisions. You do not need a showroom shop, but keep your work surface clear, sweep dust regularly, and return tools to predictable places. The best tool is always the one you can find before your glue dries.
Learn to Fix Mistakes Gracefully
Every woodworker makes mistakes. The difference is that experienced woodworkers know how to recover. A gap can become a design detail. A bad edge can be trimmed. A chip-out can be patched. A too-short board can sometimes be used elsewhere. Woodworking teaches problem-solving because the material rarely cares about your original plan.
Real-World Experience: Lessons Beginners Usually Learn the Hard Way
After spending enough time around beginner woodworking projects, one pattern becomes obvious: most mistakes happen before the tool touches the wood. The cut goes wrong because the mark was vague. The joint gaps because the board was twisted. The finish looks blotchy because glue squeeze-out was ignored. The shelf sags because the design was copied without thinking about load, span, or wood choice. Woodworking rewards preparation more than speed.
A helpful beginner habit is to pause before each major step and ask, “What could go wrong here?” That question sounds dramatic, but it is practical. Before cutting, check which side of the line is waste. Before drilling, check depth and screw length. Before gluing, check clamp positions. Before finishing, check scratches, dust, and glue residue. This small pause can save hours of repair later.
Another important lesson is that square matters more than beginners expect. If one assembly is slightly out of square, the problem may not show up immediately. But when drawers, doors, shelves, or frames are added, the error becomes obvious. Measure diagonals during assembly. If the two diagonal measurements match, the box or frame is square. If they do not match, adjust before the glue sets. Once glue cures, persuasion usually requires clamps, wedges, or language not suitable for a family woodworking blog.
Beginners also learn that clamps are not magical. Clamps hold parts in position, but they do not automatically fix bad joinery. If a joint needs extreme pressure to close, something is probably miscut, warped, or misaligned. Forcing the joint may create stress that later causes gaps, cracks, or twisting. A better approach is to stop, identify the interference, and correct it with careful trimming, sanding, planing, or recutting.
Finishing is another area where experience changes everything. Many beginners treat finish as the final decoration, but finish is actually a system. Surface prep, dust removal, stain testing, drying time, temperature, humidity, and application method all matter. A beautiful build can look disappointing if finish is rushed. A simple pine shelf can look surprisingly refined if it is sanded evenly, cleaned carefully, and finished patiently.
One of the best beginner experiences is building the same small project twice. The first version teaches you where the problems are. The second version teaches you how much you have improved. You will measure faster, cut cleaner, sand smarter, and assemble with less panic. This is why small projects are so valuable. They create a feedback loop without draining your wallet or turning your garage into a lumber-based crime scene.
Finally, the most useful attitude in woodworking is curiosity. When something fails, do not simply call it a disaster. Ask why it happened. Was the blade dull? Was the board cupped? Did the screw need a pilot hole? Did the stain reveal sanding scratches? Did the glue dry before the clamps were ready? Every mistake contains information. Beginners become better woodworkers when they stop hiding mistakes and start studying them.
Woodworking is not about never making errors. It is about building the skills to prevent the obvious ones, fix the surprising ones, and keep learning with every board. The sawdust on the floor is not just a mess; it is evidence that you are getting better.
Conclusion
The 10 most common woodworking mistakes beginners make are not signs that you are bad at woodworking. They are signs that you are new, human, and working with a material that has grain, moisture, movement, and opinions. By measuring carefully, choosing the right wood, respecting wood movement, planning your cuts, keeping tools sharp, following grain direction, drilling pilot holes, preparing for glue-ups, sanding properly, and taking safety seriously, you can build cleaner, stronger, safer projects from the start.
Beginner woodworking is a mix of craft, patience, and controlled chaos. You will still make mistakes. Everyone does. But with the right habits, those mistakes become smaller, less expensive, and occasionally funny enough to become shop stories. Build slowly, test often, respect the tools, and remember: every great woodworker has a pile of “learning experiences” somewhere in the shop.