Sparkling water has a funny way of making ordinary hydration feel like it put on a blazer. Plain water says, “I am responsible.” Sparkling water says, “I am responsible, but I also RSVP yes to brunch.” The good news is that you do not need to keep lugging cases of canned seltzer from the store like you are training for a very fizzy triathlon. With a CO2 cylinder and a home soda machine, you can make sparkling water at home in minutes.
This guide explains exactly how home carbonation works, how to use a soda maker safely, how to choose the right CO2 setup, how to add flavor without creating a countertop geyser, and how to keep every glass crisp, cold, and bubbly. Whether you call it sparkling water, seltzer water, soda water, fizzy water, or “the only reason I drink enough water,” the process is simple once you understand the basics.
What You Need to Make Sparkling Water at Home
At-home sparkling water requires only a few pieces of equipment. The classic setup includes a soda machine, a compatible CO2 cylinder, a carbonating bottle, cold water, and optional flavorings. That is it. No laboratory coat, no bubbling cauldron, no dramatic thunderclap required.
1. A Soda Machine or Sparkling Water Maker
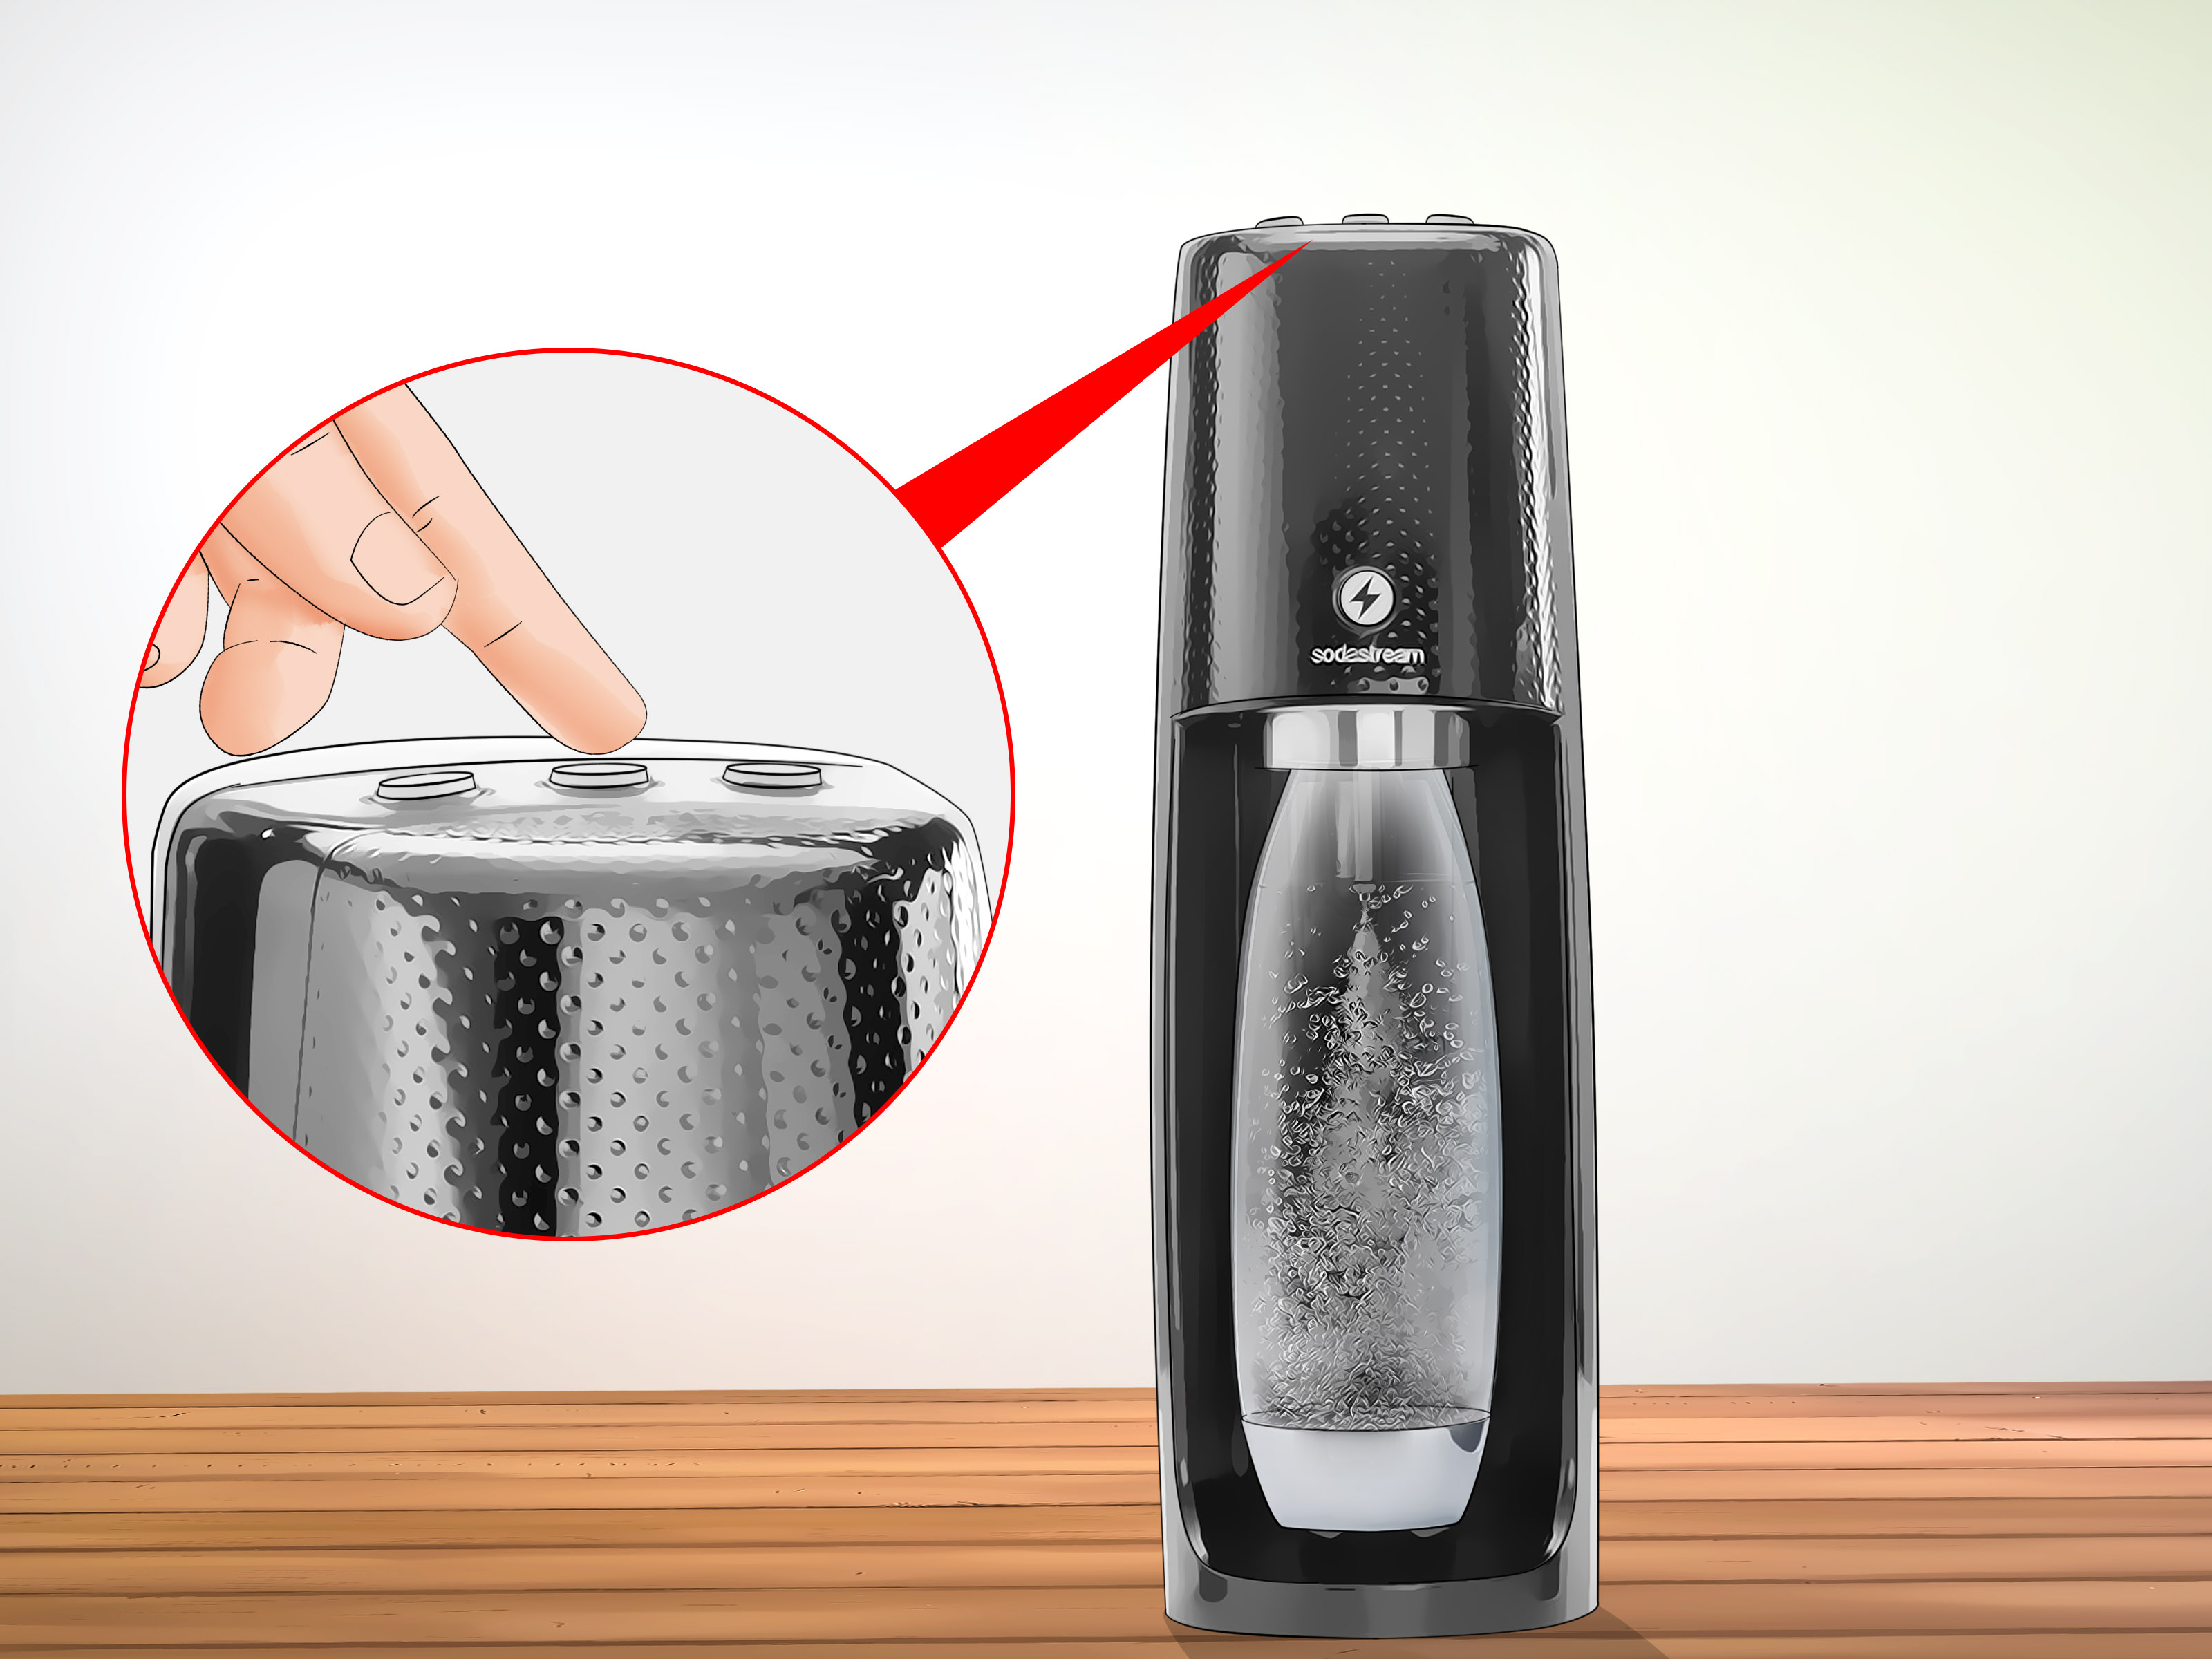
A soda machine is the countertop device that pushes carbon dioxide into water under pressure. Popular home carbonation brands include SodaStream, Drinkmate, Aarke, Breville, Ninja, and several other soda maker systems. Some machines are manual, meaning you press a button or lever yourself. Others are electric and offer preset carbonation levels.
For most households, a manual soda maker is more than enough. It does not require a plug, takes up less space, and gives you direct control over bubble intensity. Electric machines are convenient if you want one-touch operation, but they are not automatically better. The best sparkling water maker is the one you will actually use after the “new kitchen gadget honeymoon” ends.
2. A Compatible CO2 Cylinder
The CO2 cylinder is the metal canister that supplies the bubbles. Most common home soda machines use small exchangeable cylinders designed for food and beverage use. These cylinders are often labeled by capacity, such as “60L,” meaning they can carbonate up to about 60 liters of water under ideal or moderate-use conditions.
Compatibility matters. Some machines use screw-in cylinders, while newer models may use quick-connect cylinders. The valve type must match your machine. Trying to force the wrong cylinder into a soda maker is a little like trying to charge your phone with a spaghetti noodle: creative, but not recommended.
3. A Carbonating Bottle
The carbonating bottle is not just a water bottle. It is designed to handle pressure during carbonation. Many are made from BPA-free PET plastic, while some premium machines use glass bottles inside a protective chamber. Always use the bottle made for your machine, follow the fill line, and check the expiration date printed on plastic bottles.
Do not carbonate in ordinary glass bottles, mason jars, travel mugs, or random containers from the back of the cabinet. Carbonation creates pressure, and pressure deserves respect. Your sparkling water should pop with bubbles, not with flying kitchen shrapnel.
How CO2 Turns Still Water Into Sparkling Water
Carbonation happens when carbon dioxide gas dissolves into water under pressure. When you press the button or pull the lever on a soda machine, CO2 is injected into cold water inside a sealed bottle. The pressure helps the gas dissolve. When you release the bottle and pour the drink, pressure drops, and some of that dissolved CO2 escapes as bubbles.
Cold water carbonates better than warm water because colder liquids hold gas more effectively. That is why your best homemade seltzer starts in the refrigerator. If you carbonate room-temperature water, you may still get fizz, but it often tastes softer and loses bubbles faster. The simple rule: chill first, fizz second, sip triumphantly.
Step-by-Step: How to Make Sparkling Water With a Soda Machine
Step 1: Chill the Water
Fill your carbonating bottle with clean drinking water and refrigerate it until cold. Filtered water is optional but helpful if your tap water has chlorine notes, mineral flavors, or that mysterious “old apartment pipe” personality. Cold, neutral-tasting water makes brighter, cleaner sparkling water.
Step 2: Fill Only to the Fill Line
Every carbonating bottle has a maximum fill line. Respect it. Leaving headspace gives CO2 room to enter and helps prevent overflow. Overfilling can cause water to spray, leak, or foam during carbonation. The fill line is not a suggestion from a shy engineer; it is part of the safety design.
Step 3: Install the CO2 Cylinder
Open the back or base of your soda machine according to the manual. Remove the seal and cap from the CO2 cylinder, then attach it using the correct method for your model. Screw-in cylinders should be tightened securely by hand. Quick-connect cylinders usually lock into place with a lever or clamp. Do not use tools unless your manufacturer specifically says to; overtightening can damage the connection.
Step 4: Insert the Bottle
Attach the filled carbonating bottle to the machine. Some models require twisting the bottle into place, while others use a snap-lock or bayonet-style system. Make sure the bottle is seated correctly and upright. If it feels crooked, loose, or wobbly, stop and reattach it before carbonating.
Step 5: Carbonate in Short Bursts
Press the carbonation button or lever in short bursts. For light fizz, one or two presses may be enough. For medium sparkle, try three presses. For assertive, “tiny fireworks in a glass” bubbles, use additional bursts, but stay within your machine’s instructions. Many soda makers make a sound when excess pressure vents. That sound means the machine has reached its pressure limit, not that you should challenge it to a duel.
Step 6: Release and Remove the Bottle
Once carbonated, release the bottle as directed by the manufacturer. Some machines vent automatically. Others require a slow release, especially systems designed to carbonate beverages beyond water. Remove the bottle carefully, cap it, and tilt it gently if you want to distribute bubbles evenly.
Step 7: Drink Plain or Add Flavor
For most standard soda machines, add flavor only after carbonation. Pour sparkling water into a glass, then add lemon, lime, fruit juice, herbs, bitters, cucumber, ginger, or a syrup designed for carbonated drinks. If you add syrup directly to the bottle, pour slowly and recap gently to avoid foam climbing out like it has urgent business elsewhere.
Can You Carbonate Juice, Wine, Tea, or Cocktails?
It depends on the machine. Many popular soda makers are designed to carbonate water only. Carbonating juice, wine, tea, cocktails, or sugary drinks in a water-only machine can clog the nozzle, create sticky foam, damage the unit, or void the warranty. In other words, it may turn your soda maker into a very expensive lesson.
Some systems, such as certain Drinkmate or Breville models, are specifically built to carbonate more than water. These machines often use a special pressure-release cap or fizz infuser to control foaming. If your goal is to sparkle lemonade, cold brew tea, mocktails, flat beer, or wine, choose a machine designed for that job and follow its release instructions carefully.
Choosing the Right CO2 Setup
Standard Exchange Cylinders
Standard exchange cylinders are the easiest choice for beginners. When empty, you exchange the cylinder through the brand’s website, participating retailers, or local stores. This keeps the process simple and reduces the need to handle larger gas tanks. For most homes, this is the cleanest and most convenient route.
Spare Cylinders
A spare CO2 cylinder is worth having. Nothing humbles a sparkling water fan faster than filling a bottle, pressing the button, and hearing the sad whisper of an empty tank. Keep one full cylinder ready so your hydration routine does not collapse into still-water despair.
Larger CO2 Tanks and Adapters
Some enthusiasts connect soda machines to larger food-grade CO2 tanks using adapters. This can reduce long-term costs, especially for heavy users, but it is not the best first step for everyone. Large tanks require proper storage, compatible fittings, leak checks, and safe handling. If you go this route, use beverage-grade or food-grade CO2 from a reputable supplier and never improvise with unknown gas sources.
Safety Tips for Homemade Sparkling Water
Making sparkling water at home is generally simple and safe when you follow the instructions. The biggest risks come from using the wrong bottle, ignoring expiration dates, overfilling, exposing bottles or cylinders to heat, or carbonating liquids in machines not designed for them.
- Use only manufacturer-approved carbonating bottles.
- Check plastic bottle expiration dates and replace old bottles.
- Never carbonate in ordinary glass bottles unless your machine is specifically built for glass bottles with a protective chamber.
- Fill water only to the marked fill line.
- Keep CO2 cylinders away from heat, stoves, cars, and direct sun.
- Do not freeze carbonating bottles or CO2 cylinders.
- Inspect bottles for cracks, cloudiness, warping, or damage before use.
- Use water-only machines for water only, then flavor afterward.
Also, pay attention to product recalls. Carbonating bottles are pressure vessels, and recalls should be taken seriously. If a bottle model or date range is recalled, stop using it immediately and follow the replacement instructions from the manufacturer or safety agency.
How to Get Stronger, Longer-Lasting Bubbles
If your homemade sparkling water tastes flat too quickly, the problem is usually temperature, technique, or storage. Start with very cold water. Carbonate in short, firm bursts. After carbonating, cap the bottle quickly. Store sparkling water in the refrigerator and avoid repeatedly opening the bottle. Every open-and-close cycle releases some pressure, and pressure is where the sparkle lives.
Mineral content also affects taste. Some people prefer filtered water because it tastes cleaner. Others like mineral drops or a pinch of mineral salt for a club-soda style finish. Be careful with salt: a tiny pinch can add pleasant structure, but too much turns your drink into ocean cosplay.
Easy Flavor Ideas for Homemade Sparkling Water
Citrus Classics
Add a squeeze of lemon, lime, grapefruit, or orange to a glass of sparkling water. Citrus is bright, simple, and nearly impossible to mess up. For a more polished flavor, use a strip of zest and let it sit for a minute before drinking.
Fruit and Herb Combos
Try strawberry and basil, cucumber and mint, blackberry and lime, peach and thyme, or pineapple and ginger. Muddle fruit lightly in the glass, add ice, pour sparkling water over it, and stir gently. The goal is flavor, not fruit salad with a drinking problem.
Mocktail-Style Sparkling Water
For a grown-up zero-proof drink, combine sparkling water with a splash of tart cherry juice, pomegranate juice, cranberry juice, or unsweetened iced tea. Add bitters if you enjoy a cocktail-like edge. Finish with citrus and a fancy glass. Suddenly your Tuesday water has a reservation at a rooftop bar.
Homemade Soda
To make soda at home, carbonate plain water first, then add syrup slowly. You can use commercial soda syrups or homemade simple syrup infused with ginger, vanilla, citrus peel, berries, or herbs. Stir gently to preserve fizz. Aggressive stirring is where bubbles go to retire.
Cleaning and Maintenance
Rinse carbonating bottles after each use, especially if you add flavor directly to the bottle after carbonation. Wash according to the bottle label. Some bottles are dishwasher-safe; others must be hand-washed. Never assume. Heat can deform non-dishwasher-safe plastic bottles and weaken their pressure performance.
Wipe the soda machine with a damp cloth as needed. Do not submerge it in water. If syrup or juice accidentally gets into the nozzle area, clean it promptly according to the manual. Sticky residue attracts dust and can interfere with carbonation. A soda maker should smell like nothing, not like a haunted lemonade stand.
Is Making Sparkling Water at Home Worth It?
For frequent sparkling water drinkers, a soda machine can be worth it for convenience alone. You control the bubble level, flavor, bottle waste, and storage space. Instead of buying cans or plastic bottles every week, you refill reusable bottles and exchange CO2 cylinders as needed.
The savings depend on how much sparkling water you drink, the cost of CO2 exchanges, the machine price, and whether you usually buy premium canned seltzer or budget store-brand bottles. Heavy users often see the biggest value. Casual drinkers may care less about savings and more about convenience, customization, and the joy of pressing a button that makes water dramatically more interesting.
Common Mistakes to Avoid
Using Warm Water
Warm water does not hold carbonation as well. Chill it first for sharper bubbles and better flavor.
Adding Flavor Before Carbonation
Unless your machine is designed for other beverages, carbonate only plain water. Add flavor after. This one rule prevents most messes.
Ignoring the Fill Line
Overfilling can cause leaks and poor carbonation. The fill line is your fizzy friend.
Keeping Old Bottles Forever
Plastic carbonating bottles have expiration dates because materials age. Replace them on schedule and anytime they show damage.
Expecting Every Machine to Do Everything
Some soda makers are excellent for plain sparkling water. Others are designed for juices, cocktails, and more adventurous drinks. Choose based on your real habits, not your fantasy life as a carbonated beverage wizard.
Real-Life Experience: What It Is Actually Like to Make Sparkling Water at Home
The first week with a soda machine usually goes the same way for many people: total enthusiasm, mild over-carbonation, and at least one moment of standing in the kitchen whispering, “Wait, I can make this whenever I want?” That is the real appeal. At-home sparkling water removes friction. You no longer need to plan your fizzy water supply like a household logistics manager. You fill, chill, fizz, and drink.
In daily use, the biggest improvement comes from keeping two bottles of cold water in the refrigerator. One bottle is ready to carbonate, while the other is chilling. This tiny habit makes the machine feel effortless. If you fill the bottle only when you are thirsty, you may be tempted to carbonate room-temperature water, and the result is never quite as satisfying. Cold water gives the bubbles that crisp, snappy texture people expect from good seltzer.
Another practical lesson is that flavor works best in the glass, not always in the bottle. A wedge of lime, a few mint leaves, or a splash of cranberry juice can transform sparkling water without making the carbonating bottle sticky. If you enjoy syrups, add them slowly. Pouring syrup into fresh sparkling water too quickly can create a foam volcano. It is not dangerous in a normal glass, but it is dramatic enough to make you reconsider your life choices while wiping the counter.
Carbonation preference is personal. Some people like a gentle sparkle, the kind that politely taps the tongue. Others want aggressive bubbles that feel like the water is applauding internally. Most machines let you experiment. Start with moderate carbonation, taste, and adjust. After a few days, you will know your household’s preferred number of presses. This becomes strangely satisfying, like learning the secret handshake of your own kitchen.
There is also a storage benefit that does not sound exciting until you experience it. Cases of canned sparkling water take up space. They crowd pantries, closets, garages, and fridge shelves. A soda maker reduces that clutter to a slim machine, a couple of bottles, and a CO2 cylinder. If your home has limited storage, this feels like winning a tiny domestic lottery.
The main annoyance is running out of CO2. It always seems to happen when you are most committed to a cold, bubbly drink. Keeping a spare cylinder solves the problem. When one empties, swap it and put the empty cylinder in your return bag or near the door. This system prevents the dreaded flat-water emergency, which is not a real emergency, but emotionally, let us not minimize it.
Over time, homemade sparkling water tends to change drinking habits. Many people drink more water because it feels less boring. Others reduce sugary soda because they can make citrusy, herbal, or lightly fruity drinks with far less sugar. The machine does not magically turn anyone into a wellness influencer, but it does make better choices easier. And sometimes that is enough.
The best part is the control. You decide how fizzy, how cold, how flavored, how sweet, and how fancy the drink becomes. Want plain seltzer with dinner? Done. Want cucumber-mint sparkling water in a tall glass with ice? Easy. Want a ginger-lime mocktail that looks like it costs twelve dollars? Also easy. The soda machine is not just a gadget; it is a small permission slip to make everyday water more fun.
Conclusion
Learning how to make sparkling water at home is simple: use cold water, fill to the line, attach the correct CO2 cylinder, carbonate in short bursts, and add flavor after fizzing. The details matter, especially bottle safety and machine compatibility, but the routine quickly becomes second nature. A good soda machine can save storage space, reduce single-use packaging, and turn ordinary hydration into something you actually look forward to drinking.
Whether you love plain seltzer, citrus sparkling water, homemade soda, or low-sugar mocktails, a CO2 soda maker gives you control over the bubbles. Start with the basics, follow the manual, keep a spare cylinder nearby, and enjoy the small luxury of fresh fizz on demand. Your tap water just got promoted.