An old picture frame may look like it has reached the end of its decorating career, especialdealers politely call “character.” Before sending it to the donation pile, however, give it one more audition. With greenery, flowers, ribbon, and a little strategic glue, that forgotten frame can become a rustic wreath that looks charming on a front door, fireplace, entryway wall, or covered porch.
A picture frame wreath is easier to customize than a traditional round wreath. The open center keeps the design visually light, while the straight edges create a natural place for floral clusters, bows, signs, bells, or seasonal accents. Better yet, the frame already provides a sturdy structure, so you do not need to wrestle grapevines into submission or discover that floral wire has somehow tied itself to your sleeve.
This tutorial explains how to select and prepare an old frame, create a balanced rustic arrangement, attach decorations securely, hang the finished project safely, and update it throughout the year. The result is an affordable piece of farmhouse-style décor that looks intentional rather than like something rescued from the attic five minutes before guests arrived.
Why an Old Picture Frame Makes a Great Wreath Base
Traditional wreaths are usually built on grapevine, wire, foam, or wooden rings, but a rectangular or square frame offers a refreshing alternative. Designers and craft publications frequently use vintage frames, window frames, embroidery hoops, and other open structures as foundations for seasonal displays. The same basic principle applies here: the frame establishes the shape, and the decorations create movement, texture, and personality. e wreath also supports several decorating styles. A weathered wooden frame works beautifully in a rustic, farmhouse, cottage, woodland, or vintage-inspired room. An ornate gold frame can become an elegant holiday wreath. A simple black frame can lean modern, while a chipped white frame fits a shabby-chic look. The project is less about following one rigid formula and more about allowing the original frame to guide the design.
Materials and Tools
You do not need every item listed below. Choose materials that suit the season, the frame, and the location where the wreath will be displayed.
- One empty wooden or lightweight composite picture frame
- Soft cloth, small brush, and mild cleaning solution
- Fine-grit sandpaper, if the finish is known to be safe
- Chalk-style paint, acrylic craft paint, stain, or clear sealer
- Faux eucalyptus, olive branches, boxwood, pine, fern, or seasonal greenery
- Faux flowers, dried flowers, berries, seed pods, or wheat stems
- Pine cones, small wooden ornaments, bells, or miniature pumpkins
- Floral wire
- Wire cutters
- Hot-glue gun and glue sticks
- Burlap, linen, velvet, plaid, or wired ribbon
- Twine, jute cord, or picture-hanging wire
- Optional wooden sign, monogram, or seasonal greeting
- Felt pads or rubber bumpers for the back
Floral wire and hot glue are commonly used together in wreath making. The wire provides structural support, while glue prevents lightweight flowers and leaves from shifting. Relying on wire first is especially helpful for outdoor pieces because hot glue can soften in extreme heat and become brittle in very cold conditions. 1: Choose the Right Old Frame
Start with a frame that is sturdy enough to support decorations. Check the corners by gently twisting the frame. A tiny amount of movement may be repairable with wood glue or corner braces, but a frame that bends dramatically or sheds pieces whenever you look at it sternly is not an ideal candidate. Remove the glass, backing board, photographs, staples, swiveling tabs, and loose hardware. Save the hanging hardware if it is secure and positioned correctly. Otherwise, plan to install new picture wire, D-rings, or a strong ribbon hanger. Frames between 11 by 14 inches and 18 by 24 inches are generally easy to decorate and hang. Smaller frames work well on cabinets, interior doors, or gallery walls. Oversized frames can make dramatic porch decorations, but they require stronger hardware and more greenery to maintain visual balance. Use a dry paintbrush or soft cloth to remove dust from carvings and corners. Follow with a barely damp cloth and a small amount of mild soap if necessary. Avoid soaking the wood, particularly if joints are loose or decorative layers appear fragile. Before sanding a genuinely old painted frame, consider the possibility of lead-based paint. The Environmental Protection Agency warns that scraping or sanding old lead paint can create hazardous dust. If the frame’s age or finish is uncertain, avoid aggressive sanding. Preserve the existing surface under a compatible clear sealer, use a lead test kit according to its directions, or choose a newer thrift-store frame instead. 3: Create a Rustic Finish
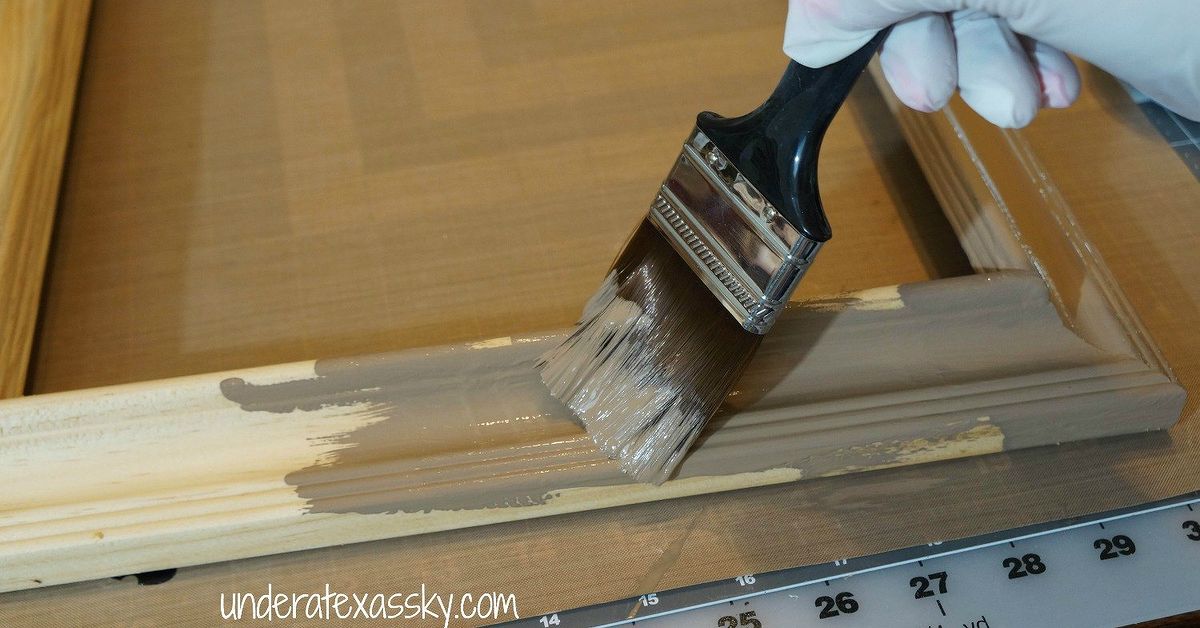
If the frame already has an attractive worn finish, leave it alone. Authentic scratches, faded edges, and uneven color often provide more rustic charm than a freshly manufactured “distressed” finish that tried very hard all afternoon. For a plain frame, consider one of these treatments: Dip the tips of a dry brush into white, cream, sage, gray, or muted blue paint. Wipe most of the paint onto a paper towel, then lightly drag the brush over raised areas. This produces a soft, weathered appearance without completely covering the original color. Apply a dark base coat, let it dry, and add a lighter topcoat. Once dry, gently rub selected edges with fine-grit sandpaper so the darker layer shows through. Focus on corners and raised details where natural wear would normally occur. Home improvement guides commonly recommend contrasting paint layers to imitate the look of aged, faded wood. al Wood Finish
If the frame is unfinished wood, apply a warm brown or gray stain. Wipe away excess stain promptly to prevent blotches. A matte clear coat can protect the surface while preserving a natural appearance. Place the frame flat on a table and arrange the decorations without attaching them. Take a quick photo once you like the layout. This simple step can save considerable frustration when a carefully arranged floral bundle suddenly rolls onto the floor and takes your favorite berry sprig with it. For a classic rustic frame wreath, create one main cluster in a lower corner. Let the greenery extend horizontally along the bottom and vertically up one side. This asymmetrical arrangement feels relaxed and keeps much of the frame visible. You can also decorate the top center with a bow, create matching clusters in opposite corners, or wrap greenery loosely around the entire perimeter. Leaving some negative space usually makes the project look more sophisticated and allows the shape of the old frame to remain part of the design. Trim faux greenery into manageable branches. Begin with the longest stems and place them so they point away from the main cluster. Add medium-length pieces over them, then use shorter stems to conceal the cut ends. Gather two or three stems into a small bundle and wrap the base tightly with floral wire. Position the bundle on the frame and wrap another length of wire around both the stems and the frame. Twist the wire at the back and bend sharp ends inward with needle-nose pliers. Repeat this process while alternating the direction and angle of the greenery. The goal is not perfect symmetry. Rustic arrangements benefit from slight irregularity, provided the overall shape remains balanced. Once the greenery is secure, add the largest focal flower first. Place it near the point where the horizontal and vertical greenery sections meet. Then add smaller flowers, berries, seed heads, wheat, or pine cones around it. Use odd-numbered groupings when possible. Three flowers often look more natural than two, while five small berries or seed pods can create rhythm without appearing overly formal. Vary the heights so every element does not sit on the same flat plane. Secure heavier accents with wire. Use small amounts of hot glue to stabilize flower heads, leaves, and lightweight details. Hold each piece in place until the glue sets, and keep fingers away from fresh glue unless you would like the project to include an unexpected lesson in thermodynamics. A bow can soften the corners of the frame and hide attachment points. Burlap creates a casual farmhouse look, while linen, velvet, or plaid ribbon can make the wreath feel more seasonal. For a simple bow, form two loops with even tails, cross the loops, and tie them together. Adjust the size before trimming the tails. Wired ribbon is especially useful because the loops can be shaped after the bow is attached. the bow with floral wire rather than glue alone. Thread the wire through the knot and twist it around the frame or greenery bundle. A small wooden “Welcome,” “Hello,” or family-name sign can be suspended in the open center with jute cord. Keep the sign lightweight so it does not pull the wreath forward. Turn the wreath over and inspect the back. Clip long wire ends, fold sharp points inward, and cover scratchy sections with felt if necessary. Add small rubber bumpers or felt pads near the bottom corners to prevent the frame from tapping or scraping the door. This approach is also recommended for other handmade door decorations. original frame hardware is strong, use it. Otherwise, screw two small D-rings into the back and connect them with picture wire. For a softer look, loop a length of wide ribbon around the top of the frame and tie it securely. Test the hanger over a padded surface before placing the wreath on a door. Combine eucalyptus, fern, lavender, white daisies, and pale pink flowers. Add a small nest or speckled eggs for a subtle Easter variation. Bright faux flowers are especially effective because the empty center of the frame prevents the arrangement from becoming visually crowded. Use olive branches, lemon accents, sunflowers, chamomile, or small white blossoms. A striped linen bow can create an easy porch-friendly look without turning the wreath into a full patriotic parade float. Choose rust-colored leaves, wheat, dried hydrangeas, mini pumpkins, acorns, and dark berries. Natural textures look particularly good against distressed wood, burlap, or an antique bronze frame. Layer cedar-style greenery, pine cones, red berries, bells, and a velvet or plaid ribbon. A loose arrangement of evergreens on a vintage frame can produce a minimal, Scandinavian-inspired holiday display. Round Neutral
Use eucalyptus, olive leaves, cream flowers, and a natural linen bow. Add seasonal pieces with removable floral wire rather than permanent glue. This lets one wreath move from spring to fall with a few small changes instead of requiring its own storage unit. Hot glue may not grip a dusty, glossy, or uneven frame. Wrap the stems with floral wire first, tightening the wire around a corner or decorative groove. Use glue only as a secondary stabilizer. Extend a few longer greenery stems in the opposite direction or add a small bow to another corner. You do not need matching decorations on both sides; you only need enough visual weight to keep the composition from appearing ready to tip over. Add a dry-brushed finish, stencil a small pattern, attach a wooden monogram, or wrap part of the frame with jute. Avoid covering every inch. The frame itself should remain recognizable. Add felt pads or clear rubber bumpers to the back. Check for exposed floral wire and cover sharp points with felt, tape, or a small dab of glue. Display the wreath on a covered porch or sheltered door. Direct sunlight, rain, and temperature swings can fade faux flowers, weaken natural materials, and shorten the life of adhesives. Bring the wreath indoors during severe weather. Dust the wreath with a soft brush, microfiber cloth, or cool air from a hair dryer set to low. Avoid pulling on flowers when cleaning. Before storing the wreath, inspect the wire and glue joints and repair anything loose. Place the wreath in a sturdy box that is slightly larger than the frame. Support the decorated corner with crumpled tissue paper so heavy flowers do not sag. Store the box flat in a dry, temperature-controlled area. Label the box clearly, unless you enjoy opening seven mystery containers every December before discovering that the Christmas decorations were in the first one. The first time I made a rustic wreath from an old picture frame, I assumed the project would take about 20 minutes. The frame was already weathered, the greenery was sitting in a craft bin, and the hot-glue gun looked unusually cooperative. Naturally, the project took most of an afternoon. The first lesson was that frame condition matters more than appearance. My original choice had a gorgeous chipped finish, but one corner was held together by what appeared to be hope and a single rusty staple. Once I added greenery, the extra weight widened the joint. I had to remove everything, repair the corner with wood glue, clamp it, and continue the next day. Since then, I always test all four corners before decorating. The second lesson involved scale. I initially used flowers that looked delicate in the store but enormous once placed on a 12-by-16-inch frame. The arrangement quickly began resembling a floral hat worn by the frame rather than a wreath. Replacing two oversized blooms with one medium focal flower and several smaller accents made the design feel lighter and more balanced. I also learned not to underestimate floral wire. On my earliest projects, I relied heavily on hot glue because it was fast. The wreath looked secure until a warm afternoon softened several glue joints. One flower slowly rotated toward the floor, followed by a pine cone that made a surprisingly dramatic exit. Now I wire every important bundle to the frame and treat glue as backup. Another useful discovery was the value of arranging everything before attaching anything. I place the frame on the floor, build the entire composition, and photograph it from directly above. The photo becomes a visual map. Without it, I tend to keep adding decorations long after the wreath is finished, which is how tasteful greenery can evolve into a botanical traffic jam. One of my favorite versions began with a scratched brown thrift-store frame. I dry-brushed it with warm white paint, leaving the darker wood visible around the edges. In the lower-left corner, I layered faux eucalyptus, wheat stems, cream flowers, and a few muted orange berries. A narrow burlap ribbon covered the wire connections. The finished wreath looked calm, rustic, and far more expensive than its modest collection of recycled and discounted materials. A later Christmas version taught me that the frame does not need to be completely covered. I used evergreen branches on only the lower edge and right side, then added three pine cones, red berries, and a small brass bell. The exposed upper-left corner gave the arrangement breathing room. It also made the old carved details visible, which turned out to be the most interesting part of the frame. Hanging methods required experimentation too. A ribbon hanger looked attractive but allowed one wreath to swing whenever the door opened. Picture wire held the frame closer to the surface, while clear bumpers stopped it from knocking against the door. On an interior wall, however, a wide linen ribbon worked beautifully because there was no wind or constant movement. The best experience-related advice is to stop before the project feels completely full. Set the wreath upright, step back several feet, and view it from the angle guests will see. Small gaps often disappear at a distance, while excess flowers become more obvious. Rustic style depends on texture and imperfection, not on attaching every unused stem from the craft drawer. Finally, I learned that these wreaths make excellent gifts because they are easy to personalize. A frame can be painted to match someone’s home, decorated with flowers from a wedding color palette, or finished with a family initial. The project feels thoughtful without requiring advanced woodworking, professional floral training, or the ability to tie a bow while maintaining inner peace. Making a rustic wreath from an old picture frame is an easy way to combine upcycling, seasonal decorating, and personal style. The strongest designs begin with a sturdy frame, use greenery to create movement, feature one clear focal area, and leave enough open space for the frame itself to remain visible. Work slowly during the planning stage, secure major elements with floral wire, and use hot glue for smaller details. Add protective pads to the back, choose hardware suitable for the wreath’s weight, and display delicate materials in a sheltered location. With those practical details handled, the project becomes wonderfully flexible. The same frame can welcome spring flowers, summer greenery, autumn berries, or Christmas evergreens with only a few changes. Most importantly, do not worry about making the wreath perfectly symmetrical or showroom flawless. A few weathered edges, irregular branches, and hand-tied details are exactly what give rustic décor its warmth. Your old frame has already spent years holding a picture. Now it gets to become one. Note: Use caution with very old painted frames. Avoid sanding an unknown vintage finish until it has been assessed for lead, and keep wreaths made with delicate flowers, natural materials, or standard hot glue away from direct rain and extreme heat.Best Frame Sizes
Step 2: Clean and Inspect the Surface
Dry-Brushed Paint
Layered Distressing
Step 4: Plan the Wreath Design Before Gluing
Step 5: Build the Greenery Base
Step 6: Add Flowers and Textural Accents
Step 7: Add a Rustic Bow or Sign
Step 8: Finish the Back and Create a Hanger
Seasonal Rustic Picture Frame Wreath Ideas
Spring
Summer
Fall
Winter and Christmas
Common Problems and Easy Fixes
The Floral Cluster Keeps Sliding
The Wreath Looks Too Heavy on One Side
The Frame Is Too Plain
The Wreath Scratches the Door
The Decorations Fade Outdoors
Care and Storage
Real-World Experience: What I Learned While Making Picture Frame Wreaths
Conclusion