A DIY upholstered headboard is one of those magical home projects that looks expensive, feels luxurious, and secretly does not require you to own a workshop, a truck, or a mysterious uncle named Bob who “knows woodworking.” With plywood, foam, batting, fabric, and a staple gun, you can turn a plain wall behind your bed into a soft, stylish focal point that says, “Yes, I have my life together,” even if there is laundry hiding behind the bedroom door.
The best part? A custom upholstered headboard lets you control everything: the size, shape, fabric, height, softness, and overall vibe. Want cozy linen? Go for it. Moody velvet? Absolutely. A neutral hotel-style panel that makes your bedroom feel like a boutique suite? Bring on the fluffy pillows. This guide walks you through how to make a DIY upholstered headboard from start to finish, including measurements, material choices, step-by-step instructions, design upgrades, common mistakes, and real-world tips from the land of crooked staples and triumphant reveals.
Why Make Your Own Upholstered Headboard?
A store-bought upholstered headboard can be beautiful, but it often comes with two tiny problems: the price tag and the lack of customization. Making your own fabric headboard gives you a high-end look for less money, especially if you shop fabric sales, use leftover plywood, or choose a simple rectangular design.
Another major advantage is comfort. A padded headboard makes reading, scrolling, sipping coffee, or pretending to read while actually shopping for throw pillows much more pleasant. Unlike a hard wood or metal headboard, an upholstered version adds softness, absorbs a little sound, and makes the bed feel visually anchored.
It is also beginner-friendly. You do not need advanced sewing skills. In fact, most simple upholstered headboards are no-sew projects. If you can measure, cut, wrap fabric around a board, and staple it neatly, you can do this. The process is basically gift wrapping, except the present is enormous and you may say “Where did I put the scissors?” eleven times.
Materials and Tools You Will Need
Before starting, gather everything in one place. Upholstery projects become much easier when you are not crawling around under the bed searching for staples halfway through the job.
Materials
- One sheet of 1/2-inch, 5/8-inch, or 3/4-inch plywood
- 1-inch or 2-inch upholstery foam
- Quilt batting or extra-loft batting
- Upholstery-weight fabric, linen, velvet, canvas, boucle, or durable cotton blend
- Spray adhesive suitable for foam and fabric
- Heavy-duty staples, often 3/8 inch for many basic headboard projects
- French cleat, D-rings, wall-mounting hardware, or legs for bed-frame attachment
- Optional: buttons, nailhead trim, decorative molding, or piping
Tools
- Tape measure
- Pencil or marker
- Straight edge or level
- Circular saw, jigsaw, or store-cut plywood service
- Utility knife or electric carving knife for foam
- Sharp fabric scissors
- Heavy-duty staple gun or electric stapler
- Drill and screws
- Stud finder if mounting to the wall
- Iron or steamer for fabric wrinkles
Step 1: Choose the Right Headboard Size
The first step in making a DIY upholstered headboard is deciding how wide and tall it should be. A standard headboard usually matches the mattress width or extends a few inches beyond it for a more dramatic designer look.
Common headboard widths are approximately 41 inches for a twin bed, 56 inches for a full bed, 62 inches for a queen bed, and 80 inches for a king bed. If you want a wall-to-wall upholstered headboard, measure the entire wall or the space between nightstands instead of only the mattress.
Height is more flexible. A simple headboard may rise 24 to 30 inches above the mattress. A tall statement headboard may reach 40 to 60 inches above the floor. Before cutting plywood, use painter’s tape on the wall to outline the size. Step back and look at it from the doorway. If it feels too short, too wide, or like it is preparing to swallow the room, adjust before cutting.
Step 2: Cut the Plywood Base
Your plywood base is the skeleton of the upholstered headboard. It does not need to be beautiful because it will be covered, but it does need to be sturdy and accurately cut. For a classic rectangular queen headboard, a plywood panel around 62 inches wide and 30 to 36 inches tall works well.
If you do not own a saw, most home improvement stores can cut plywood to size. Bring exact measurements, double-check them, and then check them again. DIY wisdom says: measure twice, cut once, and still somehow briefly panic.
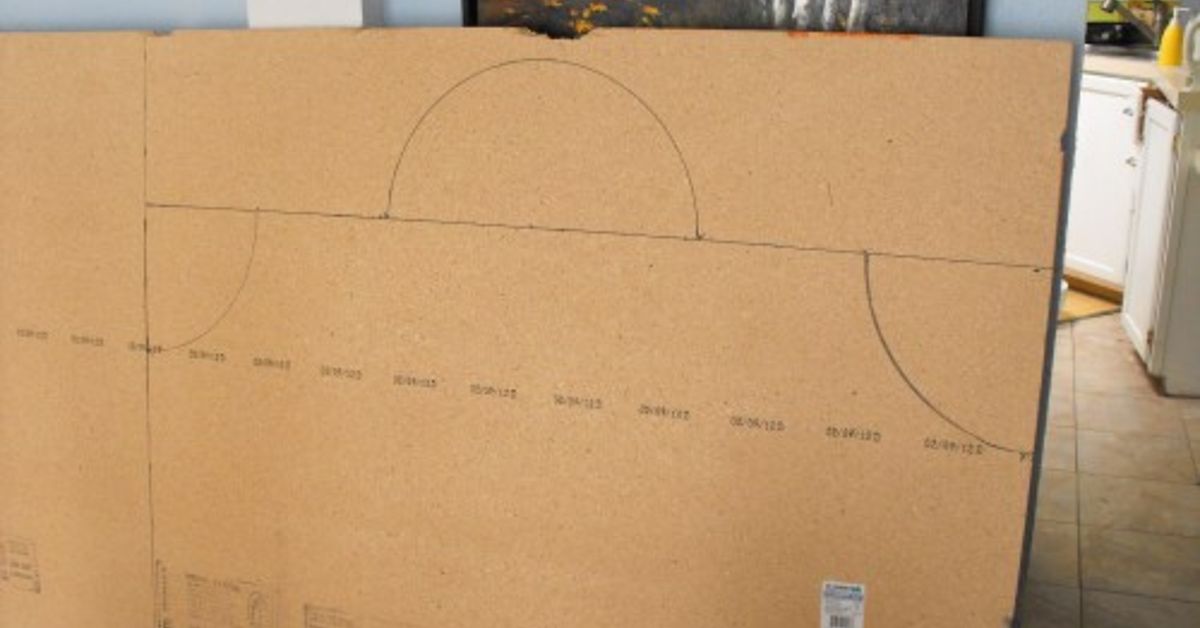
If you want a shaped headboard, such as an arch, scallop, or curved top, draw the shape on the plywood first. Use a jigsaw to cut slowly along the line, then sand the edges so the foam and fabric do not snag.
Step 3: Cut and Attach the Foam
Foam gives the headboard its cushioned, lean-against-me comfort. One-inch foam is usually enough for a clean, tailored look. Two-inch foam feels plusher and more luxurious, especially if you plan to sit up in bed often.
Lay the foam on the floor, place the plywood on top, and trace around it. Cut the foam with a sharp utility knife, long serrated knife, or electric carving knife. Keep the blade vertical so the edges stay neat. If the foam is slightly imperfect, do not worry. Batting and fabric are forgiving, like good friends and dim lighting.
Spray adhesive onto the plywood in a well-ventilated area. Carefully place the foam on top, align all edges, and press it down. Let the adhesive set according to the product directions. This keeps the foam from sliding while you wrap the batting and fabric.
Step 4: Wrap the Batting
Batting softens the foam edges and creates that smooth upholstered look. Without batting, the headboard can look flat or boxy. Cut the batting so it extends at least 3 to 6 inches beyond the plywood on all sides. More overhang makes it easier to pull and staple.
Place the batting on a clean floor or worktable. Lay the plywood foam-side down on top of it. Start at the center of the top edge. Pull the batting snug, not aggressively tight, and staple it to the back of the plywood. Then move to the center of the bottom edge, followed by the center of each side.
Continue stapling from the center toward the corners, alternating sides to keep the tension even. This prevents wrinkles and bunching. At the corners, fold the batting like wrapping a present. Trim bulky excess so the corners stay smooth, then staple securely.
Step 5: Prepare and Position the Fabric
Your fabric is the star of the show, so take a few minutes to treat it like royalty. Iron or steam it before attaching. Wrinkles that look small on the floor can become surprisingly dramatic once stretched across a headboard.
Choose upholstery-weight fabric when possible. Linen blends, velvet, performance fabric, canvas, tweed, boucle, and heavy cotton are popular options. Avoid very thin fabric unless you add a lining underneath, because foam color or batting texture may show through.
If your fabric has a pattern, center it carefully. Stripes, checks, florals, and geometric prints can look fantastic, but they will also tell on you if they are crooked. Lay the fabric right-side down, place the batting-covered headboard on top, and adjust until the pattern is straight.
Step 6: Staple the Fabric Smoothly
Start stapling the fabric the same way you stapled the batting: center first, then work outward. Pull the fabric taut enough to remove wrinkles, but not so tight that it distorts the pattern or compresses the foam unevenly.
Staple the top center, bottom center, left center, and right center. Then continue around the headboard, adding staples every few inches. Keep flipping the headboard over to check the front. This may feel repetitive, but it is easier to fix a wrinkle after five staples than after fifty.
For corners, fold neatly and consistently. A simple gift-wrap fold works well for square corners. For rounded or arched headboards, make small relief cuts in the fabric overhang so it can curve smoothly around the shape. Do not cut too close to the staple line.
Step 7: Add Optional Design Details
A plain upholstered headboard is timeless, but you can customize it further if you want more personality.
Tufted Headboard
For a tufted upholstered headboard, mark button placement on the plywood before adding foam. Drill holes large enough for an upholstery needle to pass through. After wrapping the headboard, use covered buttons and strong upholstery thread to pull the fabric inward. Diamond tufting requires careful spacing, but the result is elegant and expensive-looking.
Nailhead Trim
Nailhead trim adds a classic, tailored border. Use individual nailheads for a traditional look or nailhead trim strips for faster installation. Mark a straight guideline first, because nailheads have a special talent for wandering off course when you blink.
Channel Headboard
A channel headboard uses vertical or horizontal padded sections. This style is modern, plush, and dramatic. It requires more planning than a single-panel headboard, but it can make a bedroom feel custom-designed.
Slipcovered Headboard
If you like changing decor seasonally, consider making a removable slipcover. This is slightly more advanced because it may involve sewing, but it is practical for kids’ rooms, guest rooms, or anyone who changes their mind about fabric as often as they change pillow covers.
Step 8: Mount the Headboard
There are two common ways to install a DIY upholstered headboard: attach it to the wall or attach it to the bed frame.
Wall mounting is often sturdier and gives a clean floating look. A French cleat is a strong option because one piece attaches to the wall and the matching piece attaches to the back of the headboard. Always anchor into wall studs when possible, especially for large or heavy headboards.
Bed-frame attachment works well if you add legs to the headboard. Use wood boards as legs and bolt them to the frame through the existing headboard slots. Make sure the headboard sits at the right height once the mattress and pillows are in place.
For renters, consider a lighter headboard, removable wall-safe mounting solutions where appropriate, or a freestanding design wedged securely between the bed and wall. Safety matters: the headboard should not wobble, lean dangerously, or rely on hope and decorative pillows for structural support.
Common Mistakes to Avoid
Choosing Fabric That Is Too Thin
Thin fabric can wrinkle, tear, or reveal the layers underneath. Upholstery fabric is more durable and easier to pull smoothly.
Skipping the Batting
Foam alone may leave harsh edges. Batting rounds the corners and gives the headboard a softer, professional appearance.
Pulling Unevenly
If you pull one side much tighter than the other, the fabric may twist. Staple from the center outward and alternate sides.
Ignoring Wall Studs
A large headboard needs solid support. If wall mounting, use a stud finder and proper hardware.
Forgetting Fabric Overhang
Always buy enough fabric to wrap around the back. A few extra inches can save the project; too little fabric can turn a relaxing DIY afternoon into a dramatic mini-series.
How Much Does a DIY Upholstered Headboard Cost?
The cost depends on bed size, fabric choice, foam thickness, and whether you already own tools. A basic DIY upholstered headboard can often be made affordably with plywood, batting, fabric, and staples. Premium velvet, thick foam, nailhead trim, or oversized wall-to-wall designs will raise the budget.
To save money, look for fabric remnants, use coupons at craft stores, repurpose a curtain panel, or choose a simple rectangular shape. The biggest splurge is usually fabric, but because the headboard is a major visual feature, it is also the place where a beautiful textile can make the whole room look upgraded.
Cleaning and Maintenance Tips
Vacuum the headboard regularly with an upholstery attachment to remove dust. For stains, follow the cleaning code for your fabric. Performance fabrics are great for homes with pets, kids, or late-night snacks that occasionally miss their destination.
If you have pets, choose a tighter weave rather than a loose boucle that may attract claws. If your bedroom gets strong sunlight, consider fade-resistant fabric or a color that will age gracefully. A DIY headboard should not just look good on reveal day; it should still make you happy months later.
Real-World Experience: What Making a DIY Upholstered Headboard Actually Feels Like
Making a DIY upholstered headboard sounds simple on paper, and honestly, it is simple. But simple does not always mean perfectly graceful. The real experience usually begins with confidence, continues through a brief phase of “Why is the fabric doing that?” and ends with you standing back proudly, wondering why you did not do this sooner.
The first lesson is that floor space matters. You need more room than you think. A queen or king headboard takes up a surprising amount of space when laid flat with fabric and batting spread around it. Clear the room before starting. Move nightstands, lamps, shoes, baskets, and that random cardboard box you have been meaning to recycle since last winter. A clean workspace makes the entire process calmer.
The second lesson is that fabric has a personality. Solid fabric is forgiving. Patterned fabric is gorgeous but bossy. If you use stripes or checks, take your time aligning the print before stapling. Check the front often. Do not assume the pattern stayed straight just because it looked straight ten minutes ago. Fabric can shift quietly, like it has a secret agenda.
The third lesson is that an electric staple gun can feel like a luxury tool even on a budget project. A manual staple gun works, but if you are upholstering a large headboard, your hand may begin filing complaints. Electric staplers make the job faster and more consistent, especially when working through several layers of fabric and batting.
Another practical experience: corners decide whether the headboard looks homemade in a charming way or homemade in a “we tried our best” way. Spend extra time folding, trimming bulk, and stapling corners neatly. If one corner looks lumpy, remove a few staples and redo it. Staples are not marriage vows. You can back them out and try again.
Mounting is the final moment of truth. The headboard may look light when it is lying on the floor, but lifting it into position can be awkward. Ask another person to help, especially with larger sizes. Use a level, mark the wall carefully, and make sure the mounting hardware is secure. Once it is up, place the bed back, add pillows, and enjoy the transformation. A DIY upholstered headboard has a way of making the entire bedroom feel finished, even if the rest of the room still contains a laundry chair with a full-time job.
The biggest takeaway is that this project rewards patience more than perfection. You do not need professional upholstery skills. You need good measurements, enough fabric, steady stapling, and the willingness to pause before rushing through the visible details. The finished headboard will feel custom because it is custom. You chose the fabric, the height, the softness, and the style. Every time you lean back against it, you get the quiet satisfaction of knowing you made something useful, beautiful, and probably much better than the overpriced version you almost bought online.
Conclusion
Learning how to make a DIY upholstered headboard is one of the most rewarding bedroom upgrades because it combines style, comfort, and customization in a project most beginners can handle. With a plywood base, upholstery foam, batting, fabric, and a staple gun, you can create a soft, polished focal point that fits your exact bed size and decor style.
The key is to measure carefully, choose durable fabric, keep your layers smooth, staple from the center outward, and mount the finished headboard securely. Whether you prefer simple linen, plush velvet, nailhead trim, tufting, or a dramatic wall-to-wall design, this project gives you the freedom to create a bedroom centerpiece that looks custom without requiring a custom-furniture budget.