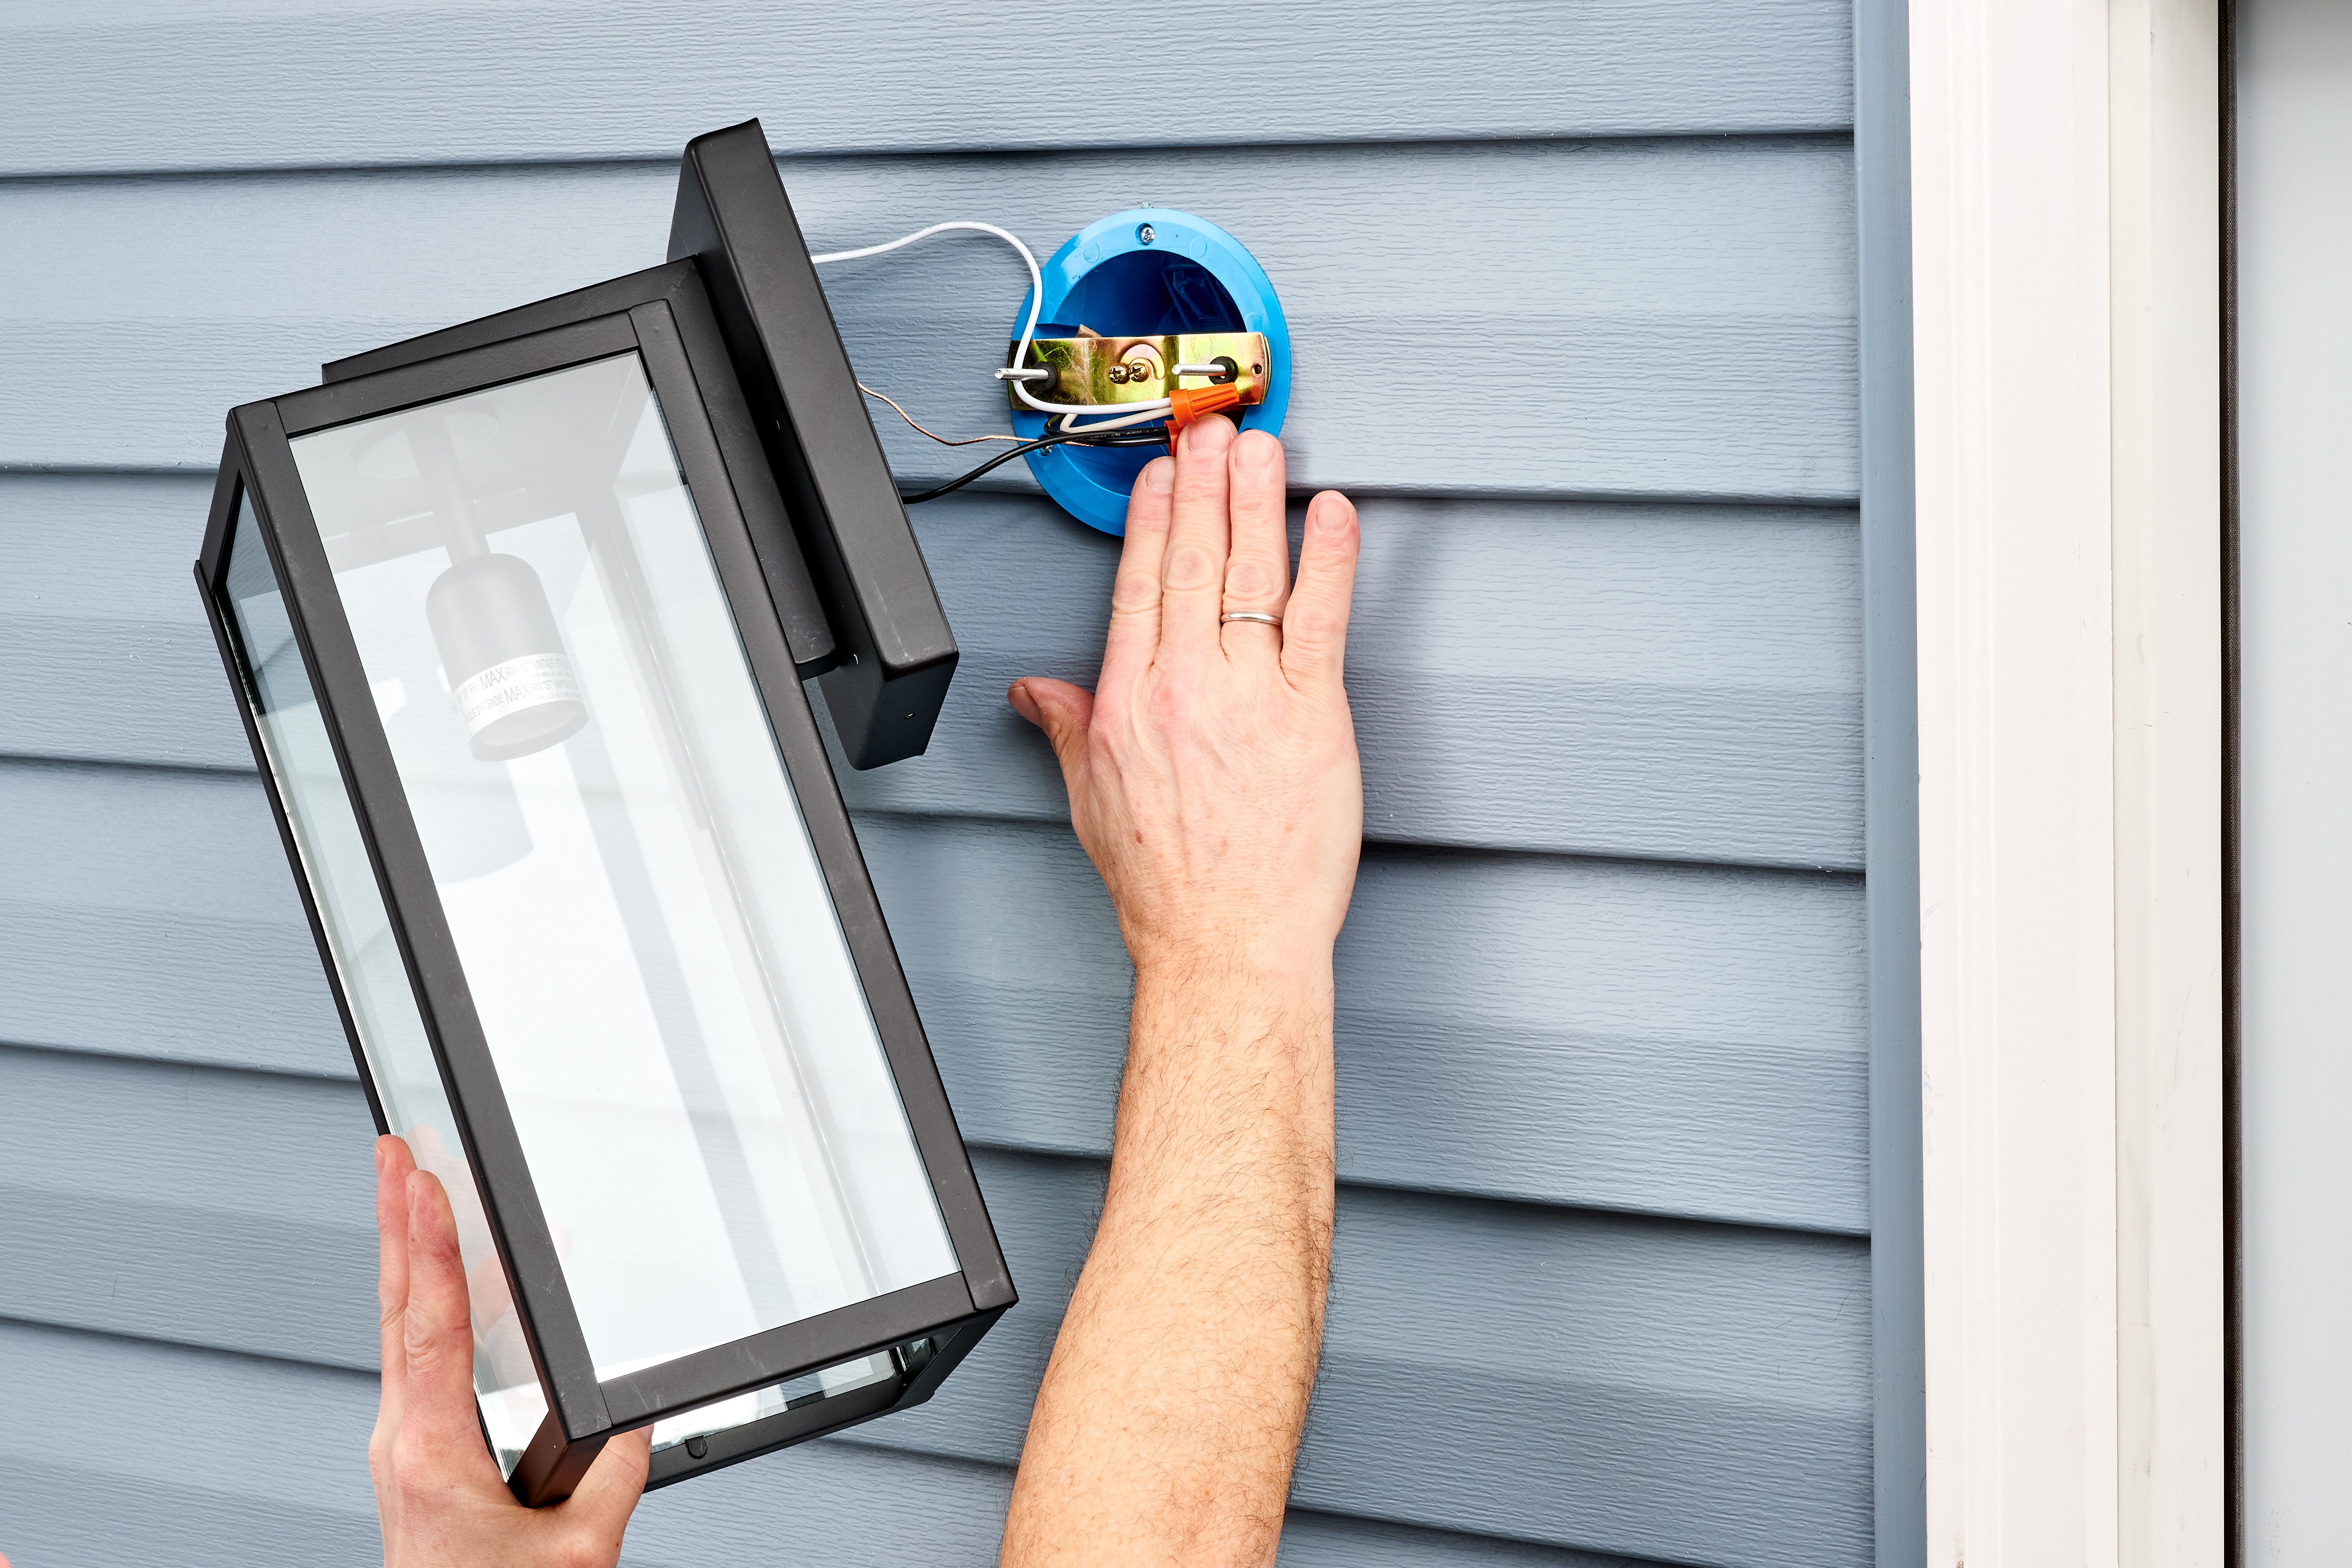
A porch light is the handshake of your house. It says “Welcome!” to guests, “Not today!” to tripping hazards,
and “Move along, moths” to whatever is currently hosting an insect convention near your front door.
The good news: if you’re replacing an existing porch light (not running brand-new wiring),
this is a very doable DIY project for many homeownersif you take safety seriously and work carefully.
This guide walks you through porch light installation step by step, with practical tips on wiring an outdoor wall sconce,
weatherproofing the mounting plate, and troubleshooting the most common “Why is it doing that?” moments.
Quick Reality Check: Replacement vs. New Install
There are two very different projects that get called “install a porch light”:
-
Replacing an existing porch light: You already have a working electrical box on the wall and a switch inside.
This article focuses on that scenario. -
Adding a brand-new porch light location: You’ll be cutting into walls, routing cable, drilling through studs,
possibly installing a new junction box, and pulling permits in many areas. That’s often a “call an electrician” job.
Safety First (Because Electricity Doesn’t Do Second Chances)
Before you touch anything, commit to doing the safety steps like they’re part of the wiring diagrambecause they are.
1) Turn off the power at the breaker
Flip the correct circuit breaker to OFF. Don’t rely on the wall switch. A switch can be wired incorrectly,
and even when it’s correct, the electrical box may still contain live wires depending on the setup.
2) Verify power is off (every single time)
Use a non-contact voltage tester at the fixture and inside the electrical box. Then use a multimeter if you have one.
If you’re not confident in your testing, stop and hire a licensed electrician. “I think it’s off” is not a safety plan.
3) Choose the right ladder
Use a stable ladder and avoid metal ladders for electrical work. A fiberglass ladder is a smarter choice.
Also: don’t do this during rain, heavy fog, or when the wall surface is wet. Outdoor electrical work and moisture are a messy duo.
4) Know when to walk away
Pause and call a pro if you see any of the following:
- Brittle, cracked, or cloth-covered insulation that crumbles when touched
- Aluminum branch wiring (common in some older homes)
- No grounding conductor present where one should be
- Scorched wires, melted wire nuts, signs of moisture damage inside the box
- Too-short wires that don’t safely reach the new fixture connections
Tools and Materials Checklist
Gather everything first so you’re not doing the “one-hand-on-the-ladder, one-hand-on-the-screwdriver, third-hand-needed” dance.
Tools
- Non-contact voltage tester (and ideally a multimeter)
- Phillips and flathead screwdrivers
- Wire strippers/cutters
- Lineman’s pliers (helpful for twisting wire ends neatly)
- Drill/driver (optional but convenient)
- Small level (to keep the light from looking permanently judgmental)
- Utility knife (for old caulk/gasket cleanup)
Materials
- New porch light fixture rated for damp or wet locations (as appropriate)
- Wire connectors (wire nuts) sized for your wire gauge
- Electrical tape (optional, for extra security on wire nuts if desired)
- Exterior-grade silicone sealant (or a manufacturer-recommended outdoor sealant)
- New mounting bracket/backplate (usually included with the fixture)
- Outdoor-rated bulbs or integrated LED fixture (follow fixture instructions)
- If needed: a siding mounting block or box extender (especially on vinyl siding)
Step-by-Step: How to Install a Porch Light
Step 1: Shut off the breaker and confirm zero voltage
Turn off the circuit breaker and verify the fixture is not energized using your voltage tester.
Test near the fixture wires and in the electrical box. If the tester shows voltage, stop and locate the correct breaker.
Step 2: Remove the old porch light fixture
- Remove the bulbs (if present) and any decorative covers.
- Support the fixture with one hand while loosening mounting screws with the other.
- Gently pull the fixture away from the wall to expose the wiring connections.
- Take a quick photo of the wire connections before disconnecting anything (future-you will be grateful).
Step 3: Disconnect the wires
Most porch lights connect house wiring to fixture wiring using wire nuts:
black to black (hot), white to white (neutral), and bare/green to ground.
Remove the wire nuts by twisting them off, then separate the wires.
Step 4: Inspect the electrical box (this is where problems reveal themselves)
With the fixture removed, look closely at the electrical box and wiring:
- Box condition: It should be secure, not cracked, not loose, and appropriate for exterior use.
- Wire condition: Insulation should be intact; no scorching or corrosion.
- Grounding: You should see a bare copper or green ground wire, or a properly bonded metal box (depending on the wiring method).
- Wire length: Enough length to make connections without tension. If wires are too short, pigtails may be required.
Step 5: Install the new mounting bracket
Most fixtures come with a mounting bracket that attaches to the electrical box.
Thread the mounting screws into the bracket as directed so they’ll line up with the fixture base.
Use a level before tightening everything down. A slightly crooked porch light can make your entire entryway look like it’s tilting into a mystery novel.
Step 6: Connect the ground wire first
Grounding helps protect you if a fault occurs. Typical setups include:
- Bare copper/green house ground wire: connect to the fixture ground wire (green/bare) and/or the green ground screw on the bracket.
- Metal electrical box: it should be bonded to the grounding conductor properly. Often this means a ground screw and a pigtail to the fixture/bracket.
If you don’t see a ground wire and you’re unsure how the box is grounded, that’s a strong reason to call an electrician.
Step 7: Connect neutral and hot wires
Now make the main connections:
- Neutral: connect house white to fixture white.
- Hot: connect house black (or sometimes red) to fixture black.
To make a solid connection:
- Strip insulation to the length recommended by the fixture instructions (commonly around 1/2 inch, but follow the manual).
- Hold wire ends together evenly and twist the wire nut on until snug and secure.
- Gently tug each wire to confirm it’s held firmly by the connector.
- If you have multiple wires in one connector (common with pigtails), ensure the connector is rated for that number and gauge.
Step 8: Tuck wires neatly into the box
Carefully fold the wires back into the junction box so they aren’t pinched.
Keep wire nuts oriented upward if possible and avoid sharp bends right at the connector.
Step 9: Mount the fixture to the bracket
Place the fixture base over the mounting screws and tighten the decorative nuts/screws.
Don’t overtightenespecially if the fixture has a gasketbecause overtightening can warp parts and create gaps.
Step 10: Weatherproof the installation
Outdoor wall lights live in the splash zone. Even a “covered” porch gets wind-driven rain and humidity.
Use these best practices:
- Use the provided gasket if your fixture includes one.
- Seal the top and sides of the backplate with exterior-grade silicone to help block water intrusion.
- Leave the bottom unsealed (or use a small weep gap) so any moisture that gets behind the fixture can escape.
- Make sure the box/fixture is appropriate for the location: damp-rated under cover; wet-rated if exposed.
Step 11: Install bulbs (or configure the LED fixture) and restore power
Install the recommended bulb type and wattage (or finish any setup steps for an integrated LED fixture).
Restore power at the breaker and test the light from the switch.
Choosing the Right Porch Light (So You Don’t Reinstall It Next Month)
Damp vs. wet location ratings
This matters more than people think. If your porch light is under a deep roof and not directly exposed to rain, you may only need a damp-rated fixture.
If it’s exposed to rain or heavy splash, choose a wet-rated fixture. When in doubt, go tougher.
Fixture size and style: quick guidelines
- Scale: A tiny light on a wide front entry looks like it’s whispering. Choose a size that fits your door and trim.
- Brightness: For a typical porch, many homeowners like the equivalent of roughly 800–1600 lumens, depending on area and preference.
- Color temperature: Warm white (around 2700K–3000K) looks inviting; cooler temps can feel more “security spotlight.”
- Bug strategy: Warmer bulbs often attract fewer insects than cooler, bluer light. (You’ll still get moths. Moths do what moths do.)
Common Porch Light Wiring Scenarios (and What They Usually Mean)
You see black, white, and bare copper
This is the most common setup: hot, neutral, and ground. Match like colors: black-to-black, white-to-white, ground-to-ground/green screw.
You see a red wire
Red is often used as a switched hot in some wiring configurations. Treat it as a hot conductor and connect it as the switched hot to the fixture’s hot lead.
If you’re unsure which conductor is switched, stop and troubleshoot with a meter (with proper safety precautions) or call an electrician.
You see multiple whites or multiple blacks bundled together
That may indicate the circuit continues onward to another device (a feed-through). You may need a pigtail so the bundle stays intact
while still providing a lead to your fixture. If this is new to you, it’s worth bringing in a prothis is where DIYers accidentally “break” a circuit.
Troubleshooting: When the Porch Light Doesn’t Behave
The light won’t turn on
- Confirm the breaker is on and the bulb works (test the bulb in another lamp).
- Check the wire nuts: loose connections are common.
- Confirm you connected the switched hot (sometimes red) to the fixture hot.
- If the fixture has a built-in photocell or motion sensor, test at night or cover the sensor briefly to see if it triggers.
The breaker trips immediately
- Turn power off and re-check for a short: exposed copper touching the metal box, pinched wires, or crossed hot/neutral connections.
- Inspect the fixture wires for damage during installation.
- If it keeps tripping, stop and call an electricianrepeated trips can indicate a serious fault.
The light flickers or works “sometimes”
- Loose wire nuts or a weak connection can cause intermittent power.
- LED bulbs and some dimmers/sensors can be incompatiblecheck ratings.
- Moisture inside the fixture can also cause strange behavior over time.
Easy Upgrades While You’re Up There
If you’re already installing a new outdoor light fixture, consider leveling up:
- Dusk-to-dawn: A photocell turns the light on at sunset automatically.
- Motion sensor: Great for hands-full entry moments and extra security.
- Smart porch light: Scheduling, app control, and sometimes motion alerts (make sure the device is outdoor-rated and compatible with your setup).
- Better weather sealing: A quality gasket and careful silicone sealing can extend fixture life significantly.
When to Call an Electrician (No Shame, Only Wisdom)
Call a licensed electrician if:
- You’re installing a brand-new porch light location (new wiring or new switch)
- The electrical box is missing, damaged, or not rated for exterior conditions
- You find aluminum wiring, deteriorated insulation, or scorch marks
- Grounding is unclear or absent
- The circuit trips repeatedly or you suspect a deeper wiring issue
Real-World Porch Light Installation Experiences (500+ Words of “Learn From This”)
Below are the kinds of porch light installation experiences homeowners and DIYers commonly reportlittle surprises that don’t always show up on the fixture box.
Consider this the “street smarts” section of porch light wiring.
The Wobbly Box Surprise
One of the most common first-time shocks (the emotional kind) is discovering the electrical box isn’t firmly attached to anything.
The old fixture may have been “holding it in place” with hope and two tired screws. When you remove the light, the box shifts,
the wires pull, and suddenly your simple porch light replacement turns into a mini structural investigation.
The fix is usually straightforwardtighten the box mounting, replace a cracked box, or add a box extender so the fixture sits flush.
But it’s also a reminder: if the base isn’t solid, even the prettiest outdoor wall sconce will look crooked and invite water in.
The Mystery Third (or Fourth) Wire
People often expect exactly three wires: black, white, ground. Then they open the box and see a red wire, or multiple blacks bundled together,
or an extra white tied into a wire nut party. That’s when panic Googling begins.
In many cases, it’s just a feed-through (power continues to another device), or the red is a switched hot.
The best “experience-based” advice here is simple: take clear photos before disconnecting anything and label wires if needed.
If the existing connections look complicatedor if you can’t confidently explain what each bundle is doingpause.
The cost of an electrician visit is usually cheaper than the cost of accidentally knocking out half the circuit and spending your Saturday
learning new words you can’t say in front of children.
The Bug Hotel Behind the Backplate
Outdoor fixtures attract bugs like a porch swing attracts unsolicited life advice from neighbors.
Many DIYers report removing an old fixture and finding a charming little ecosystem behind it: dead insects, spider webs,
and sometimes enough debris to qualify as “compost.” Cleaning the area and sealing properly (especially along the top and sides)
makes a real difference. The experience most people share is that a careful silicone bead isn’t just about waterit’s about discouraging
the annual “Let’s all move into the light fixture” migration.
The Vinyl Siding Gap That Never Looked Right
If your house has vinyl siding, mounting a flat light fixture base directly to wavy siding often leaves gaps you can’t unsee.
Homeowners commonly end up with a fixture that looks slightly lifted on one cornerlike it’s trying to hear a secret.
A siding mounting block (or properly shaped mounting surface) solves this by creating a flat, sealed plane.
Many people say this was the single step that made their porch light installation look professional instead of “DIY-ish.”
And yes, you can sometimes “caulk your way out of it,” but it’s better to mount it correctly than to rely on a heroic quantity of sealant.
The Motion Sensor That Went Disco
Motion sensor porch lights are greatuntil they aren’t. A frequent experience is false triggering:
waving tree branches, passing cars, or even a determined moth can turn your entryway into a strobe-lite.
The fix is usually adjusting sensitivity, aim angle, and range, or moving to a better-quality sensor/fixture.
If you’re installing a motion fixture, people often recommend taking five extra minutes to read the adjustment section carefully
and testing the settings before declaring the light “possessed.”
The “I Did Everything Right” Troubleshoot
Sometimes the light doesn’t turn on and you swear you followed every step.
Common real-life culprits: the breaker you flipped wasn’t the right one, the bulb was dead out of the box,
the photocell needed darkness to activate, or a wire nut felt tight but wasn’t actually biting the conductors securely.
The experienced approach is calm, systematic troubleshooting: power off, re-check connections, confirm switched hot, test the bulb,
and verify the box is dry and intact. The best part? Once you solve one “mystery,” you’ll be dramatically more confident the next time.
The overall theme from real porch light installation experiences is that the wiring is usually the easy partprep is the boss fight:
a solid box, a flush mount, correct outdoor ratings, and smart sealing. Nail those, and your new porch light will look great,
work reliably, and stop auditioning as a luxury condo for insects.