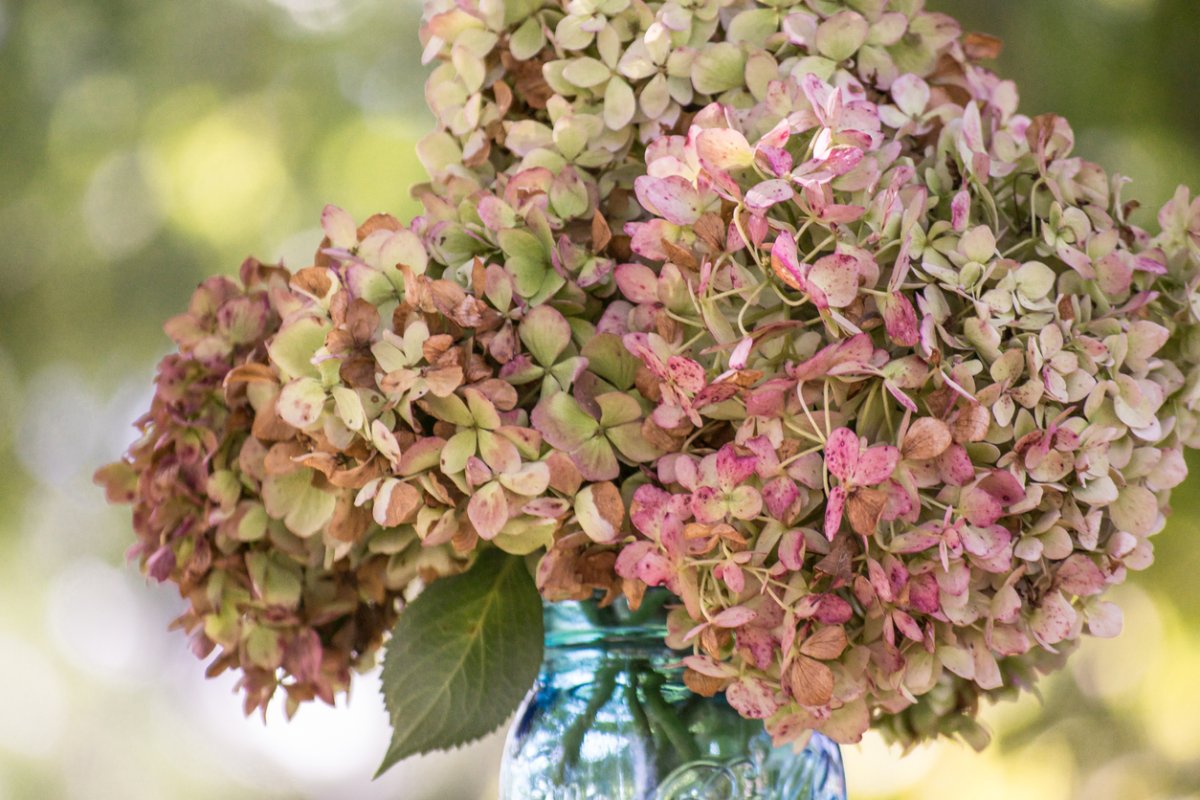
Hydrangeas are the overachievers of the summer garden. They grow enormous flower heads, change color as the season progresses, and somehow make even an ordinary backyard look ready for a magazine photo shoot. The only disappointing part is that their fresh blooms do not last forever.
Fortunately, learning how to dry hydrangeas is surprisingly easy. Unlike delicate flowers that collapse the moment conditions become less than perfect, mature hydrangea blooms can retain their rounded shape, muted color, and papery texture for months or even years. The most reliable method does not require a dehydrator, complicated chemicals, or a degree in floral engineering. You simply harvest mature blooms, prepare the stems, and place them in a vase containing a small amount of water.
Yes, the easiest way to dry hydrangeas involves putting them in water. Gardening occasionally enjoys a plot twist.
This step-by-step guide explains when to cut hydrangeas for drying, how to recognize a mature bloom, how much water to use, and how to prevent the flowers from turning brown or drooping. It also covers alternative preservation methods and practical lessons that can help your dried hydrangea arrangements look full, natural, and intentionally rustic rather than accidentally forgotten.
Why Hydrangeas Are Excellent Flowers for Drying
Hydrangeas are especially suitable for dried flower arrangements because their mature flower heads contain relatively sturdy sepals arranged in dense clusters. As the blooms age naturally on the shrub, they gradually lose moisture and develop a firm, papery texture. If harvested at the right stage, they can continue drying indoors without dramatically losing their shape.
Their colors also become more complex as they mature. Bright summer blues may fade into smoky blue-green, pink blooms can develop burgundy or antique rose tones, and white panicle hydrangeas often shift toward green, blush, or tan. These faded colors are not flaws. They are the reason dried hydrangeas work so well in fall centerpieces, winter wreaths, cottage-style interiors, and neutral home decor.
Bigleaf, smooth, panicle, mountain, and oakleaf hydrangeas may all produce flowers suitable for drying. Dense mophead varieties create dramatic rounded arrangements, while lacecap and panicle varieties offer lighter, more sculptural shapes. Several university extensions and major horticultural organizations identify hydrangeas as useful cut or dried flowers, and established gardening publications generally recommend harvesting them after the blooms have matured and begun to feel dry.
When to Cut Hydrangeas for Drying
Timing is the most important part of the entire process. A perfect vase and flawless pruning shears cannot rescue a flower that was harvested too early.
Do not cut the newest, softest, most vividly colored hydrangea blooms. Fresh flowers contain too much moisture and are more likely to wilt, wrinkle, or collapse instead of drying into a firm flower head. Wait until the blooms have remained on the shrub long enough to begin aging naturally.
Signs That a Hydrangea Is Ready to Dry
A suitable flower head should meet most of the following conditions:
- The petals or sepals feel slightly dry, firm, or papery rather than soft and juicy.
- The bloom has begun changing from its brightest summer color to a muted green, rose, burgundy, lavender, or tan.
- Most of the small florets in the cluster have opened.
- The flower head holds its shape when lightly touched.
- The stem feels fairly sturdy rather than tender and flexible.
- The bloom has few brown patches, damaged sections, or missing petals.
In many regions, the ideal harvest window occurs in late summer or early fall. The exact date depends on the hydrangea species, local climate, and weather conditions. Instead of relying strictly on the calendar, trust the texture of the bloom. A hydrangea does not own a planner, and it has no intention of consulting yours.
Garden experts commonly recommend waiting until the flower heads have matured on the shrub. Blooms that are firm and papery are much more likely to preserve their structure than newly opened flowers.
Tools and Materials
You probably already own everything required for the water-drying method:
- Clean bypass pruning shears or sharp scissors
- A bucket or basket for collecting blooms
- A vase, jar, pitcher, or other stable container
- Clean room-temperature water
- Pliers or a small mallet, if you want to crush woody stem ends
- Floral wire or twine for arranging the finished flowers
- Silica gel, optional for preserving brighter colors
- A light floral sealant or unscented hairspray, optional
Clean your cutting tools before harvesting. Dirty blades can transfer plant diseases between shrubs, while dull blades may crush or tear the stems. A quick wipe with an appropriate disinfectant followed by drying is usually sufficient.
How to Dry Hydrangeas in 6 Simple Steps
Step 1: Choose Mature, Healthy Blooms
Inspect the shrub from several angles and select flower heads that are mature but still attractive. Look for full clusters with a papery texture and developed color. Avoid blooms that are wet, heavily browned, insect-damaged, moldy, or already crumbling.
Do not worry if every flower is not identical. Slight variations in color and shape make a dried arrangement look more natural. A mixture of green, dusty rose, faded blue, and cream blooms can be more interesting than a vase of perfectly matched flowers.
It is wise to harvest a few extra stems. Some blooms may dry less successfully than others, and having backups gives you more freedom when arranging them later. Just avoid removing so many flowers that the shrub looks as though it has received an enthusiastic but poorly supervised haircut.
Step 2: Harvest on a Dry Morning
Cut hydrangeas after the morning dew has evaporated but before the hottest part of the day. Midmorning is often ideal. The flower heads should be completely dry when harvested because trapped surface moisture can encourage discoloration, mildew, and misshapen petals.
Avoid cutting immediately after rain. If the weather has been humid, give the shrub time to dry thoroughly. Select a stem approximately 12 to 18 inches long, depending on the vase or project you have planned.
Use clean shears to make a neat cut at roughly a 45-degree angle. Cut just above a healthy leaf node or pair of leaves when possible. Although the angle is not what dries the flower, a clean, thoughtful cut reduces unnecessary damage to the living shrub.
Step 3: Remove the Leaves and Inspect the Flowers
Strip all leaves from the harvested stems. Hydrangea leaves usually do not dry as attractively as the flower heads. They tend to curl, turn brown, or develop a tired appearance that says “compost pile” rather than “timeless botanical decor.”
Examine each bloom before bringing it indoors. Gently shake the cluster and check beneath the petals for spiders, aphids, mites, beetles, or other tiny residents. Remove insects outdoors with a soft brush or a gentle puff of air. Avoid washing the flower heads because additional moisture will slow the drying process.
Trim away isolated brown florets with small scissors if necessary, but do not overwork the cluster. Mature hydrangea blooms are sturdy, not indestructible.
Step 4: Prepare the Woody Stems
Fresh hydrangea stems can be woody and may contain sap that affects water movement. For the gradual vase-drying method, lightly crushing the bottom inch of each stem with pliers or a small mallet can expose more internal tissue.
This step is optional, especially when the blooms are already mature and papery. However, it can help the stems take up enough water during the first stage of the process. Another option is to make a short vertical split in the bottom of a thick stem with clean pruning shears.
Do not smash the entire stem into something resembling celery after an argument. A small amount of crushing at the base is enough.
Step 5: Place the Hydrangeas in a Small Amount of Water
Add approximately 1 to 2 inches of room-temperature water to a clean vase. Arrange the hydrangea stems loosely so air can circulate between the flower heads. The blooms should not be packed so tightly that they trap moisture against one another.
Place the vase in a cool or comfortably dry room with good airflow. Keep it away from direct sunlight, heating vents, fireplaces, steamy bathrooms, and excessively humid kitchens. Direct sun can bleach the blooms or give pale flowers an unwanted yellow tone.
Now leave the arrangement alone while the water gradually evaporates. Do not keep refilling the vase as though you were maintaining fresh flowers. The small amount of water slows moisture loss just enough to help the blooms retain their shape and color while they dry.
Depending on the flower size, room humidity, and maturity of the blooms, the process may take about one to three weeks. The water-vase technique is recommended by several established gardening and home publications because it allows hydrangeas to dry slowly in an upright position.
Step 6: Test, Finish, and Store the Dried Blooms
Once the water has completely evaporated, touch the flower heads carefully. Properly dried hydrangeas should feel papery and crisp rather than soft, cool, or flexible. The stems should also feel dry.
If the blooms remain slightly supple, add about an inch of water and allow it to evaporate again. Do not rush the process by placing the vase in harsh sunlight or directly in front of a heater. Fast drying can produce brown edges, faded color, or brittle flowers that shed easily.
When the hydrangeas are fully dry, display them in an empty vase. No additional water is needed. For extra protection, apply a very light coat of floral sealant or unscented aerosol hairspray from several inches away. Test the spray on one bloom first because some products may darken or alter pale colors.
Keep finished arrangements away from humidity, strong sunlight, and areas where people regularly brush past them. Dried hydrangeas can last a long time, but they are not interested in participating in contact sports. Horticultural and home publications also note that gentle sealing may help reduce shedding.
Alternative Ways to Preserve Hydrangeas
Air-Drying Hydrangeas Upside Down
Remove the leaves, gather a few stems into a loose bundle, and secure them with a rubber band or twine. Hang the flowers upside down in a dark, dry, well-ventilated area. Keep the bundles small so air can reach every bloom.
This traditional method is easy, but gravity may slightly change the shape of the flower heads. It works best with mature blooms that already feel dry. Hanging immature flowers will not magically persuade them to cooperate.
Drying Hydrangeas in an Empty Vase
Very mature, firm blooms may dry successfully in an empty vase. This is one of the simplest methods, particularly in a cool room with low humidity. However, flowers that still contain substantial moisture may shrivel or brown because they dry too quickly.
Using Silica Gel
Silica gel is useful when preserving more of the hydrangea’s original color is a priority. Place a trimmed flower head in an airtight container and carefully pour flower-drying silica around and over the petals until the bloom is supported and covered.
Follow the product instructions for timing and safe handling. Large hydrangea heads require a sizable container and a generous amount of silica. The method is faster than slow vase drying, but careless removal can damage the petals. Bob Vila and other flower-preservation guides identify silica gel as an effective option for large, multi-petaled blooms.
Common Hydrangea-Drying Mistakes
Cutting the Flowers Too Early
This is the most common reason hydrangeas wilt. A fresh, flexible bloom may look spectacular outdoors but contain too much moisture to preserve its shape. Wait until the cluster feels firm and papery.
Harvesting Wet Blooms
Rainwater and dew can become trapped inside dense flower heads. That moisture may cause spotting, mildew, or uneven drying. Harvest only after the blooms have dried naturally.
Using Too Much Water
The vase should contain only a small amount of water. Filling it to the top keeps the stems hydrated for too long and delays drying. One or two inches is usually sufficient.
Placing the Vase in Direct Sunlight
Strong sunlight can fade blue and pink pigments, bleach the flowers unevenly, and turn pale blooms yellowish. Bright indirect light or a shaded room is safer.
Crowding the Flower Heads
Dense arrangements restrict airflow and allow the blooms to press against one another. Use a wide container or divide a large harvest among several vases.
Handling the Finished Flowers Too Often
Dried petals become fragile. Arrange the flowers once, place them somewhere protected, and resist the urge to fluff them every time you walk past.
How to Decorate With Dried Hydrangeas
Dried hydrangeas are large enough to create an impressive arrangement without requiring dozens of stems. A few blooms in a ceramic pitcher, glass jar, metal container, or woven basket can become a complete centerpiece.
For an autumn display, combine antique pink or green hydrangeas with dried grasses, seedpods, preserved eucalyptus, or bare branches. During winter, pair cream-colored blooms with pinecones and evergreen cuttings. Blue-green hydrangeas work particularly well in coastal, farmhouse, and vintage-inspired interiors.
You can also attach individual flower heads to grapevine wreaths using floral wire. Smaller florets may be used for garlands, place cards, framed botanical art, gift wrapping, or seasonal ornaments. When making crafts, work over a table covered with paper because a few petals will inevitably fall. Hydrangeas are generous like that.
Practical Experience: What Actually Helps Hydrangeas Dry Beautifully
The most valuable lesson when drying hydrangeas is that patience matters more than equipment. It is tempting to cut the flowers at their brightest point because that is when they look most impressive in the garden. In practice, those young blooms are often the least cooperative. Their stems bend, the petals wrinkle, and the entire flower head may droop within a day.
A mature bloom may initially seem less exciting because its color has started to fade. Yet that slightly weathered flower usually becomes the better dried specimen. Once indoors, the muted green, dusty lavender, faded cranberry, or antique blue develops a sophisticated appearance that fresh flowers cannot duplicate. The goal is not to freeze the bloom at its summer peak. It is to preserve the beauty of its natural transition.
Another useful habit is to harvest flowers in small batches instead of cutting everything on one afternoon. Hydrangea heads on the same shrub do not always mature simultaneously. Blooms on the sunnier side may become papery before those growing in shade. Cutting three or four stems, testing the drying process, and returning later for another group often produces better results than conducting one dramatic garden raid.
Container choice also makes a noticeable difference. A narrow-necked vase can support long stems, but it may force the flower heads together. A wide, heavy vase gives the blooms more breathing room and is less likely to tip under their weight. Hydrangea heads are surprisingly top-heavy; a lightweight container can surrender without warning.
Room conditions matter as well. In an air-conditioned dining room, flowers may dry quickly and evenly. In a humid basement or laundry room, the same flowers can remain soft for much longer. If the water has evaporated but the petals still feel flexible, moving the vase to a drier room is usually more effective than adding heat.
It is also helpful to observe each flower rather than applying a rigid schedule. One arrangement may be ready in ten days, while another needs three weeks. A small mophead generally dries faster than a massive, densely packed cluster. The flower is finished when it feels dry, not when a calendar notification says it should be.
Color changes should be expected. Bright blue rarely remains electric blue, and hot pink rarely stays hot pink. Dried hydrangeas usually become softer, earthier versions of their original colors. This transformation is part of their appeal. Anyone expecting the flowers to look freshly cut six months later may be disappointed; anyone hoping for graceful, vintage color will probably be delighted.
Finally, prepare the display location before moving the finished flowers. Dried hydrangeas are easiest to damage during unnecessary rearranging. Place the empty vase where you want it, add the tallest stems first, and fill the sides with shorter blooms. Rotate the vase rather than repeatedly pulling stems in and out. Once the arrangement looks balanced, stop. Floral design has an important final step that is rarely mentioned: knowing when to leave the flowers alone.
Frequently Asked Questions
How long does it take to dry hydrangeas?
Most hydrangeas dry in approximately one to three weeks using the gradual vase-water method. Timing varies with bloom size, maturity, airflow, temperature, and indoor humidity.
Why did my hydrangeas wilt instead of drying?
They were probably harvested too early. Soft, newly opened blooms contain more moisture and may collapse. Select flower heads that feel firm and papery and have begun developing muted, late-season color.
Can hydrangeas dry naturally on the shrub?
Yes. Many hydrangea flowers remain on the plant and gradually dry, sometimes providing winter interest. However, indoor vase drying often gives you more control over color, shape, weather exposure, and insect damage.
Should dried hydrangeas be sprayed with hairspray?
A light application may help reduce shedding, but it is optional. Use an unscented aerosol product in a well-ventilated area, spray from a distance, and test one flower first. Heavy application can leave a sticky or unnatural finish.
How long will dried hydrangeas last?
They may remain attractive for a year or longer when kept dry, shaded, and protected from physical contact. Their color will continue fading gradually, but many arrangements become more appealing as they develop neutral, antique tones.
Can brown dried hydrangeas be painted?
Yes. Fully dried flowers can be lightly spray-painted for craft projects or seasonal decor. Work outdoors or in a properly ventilated workspace, apply several thin coats, and avoid saturating the fragile petals.
Conclusion
Drying hydrangeas is one of the simplest ways to preserve the character of a summer garden. The process requires very little equipment, but it rewards careful timing. Wait until the blooms feel mature and papery, harvest them on a dry morning, remove the leaves, prepare the stems, and place them in a vase with only an inch or two of water.
As the water evaporates, the flowers dry gradually while maintaining much of their natural shape and softly aged color. Keep them out of direct sunlight, provide reasonable airflow, and allow the process to unfold without constant interference. In a few weeks, you can have a long-lasting arrangement that carries the garden into fall, winter, and beyondwithout watering, fertilizing, or apologizing to another houseplant.
Note: This original article synthesizes established flower-drying and hydrangea-care guidance from Bob Vila, university extension services, Missouri Botanical Garden, Better Homes & Gardens, Martha Stewart, Southern Living, Garden Design, and other reputable U.S. horticultural resources.