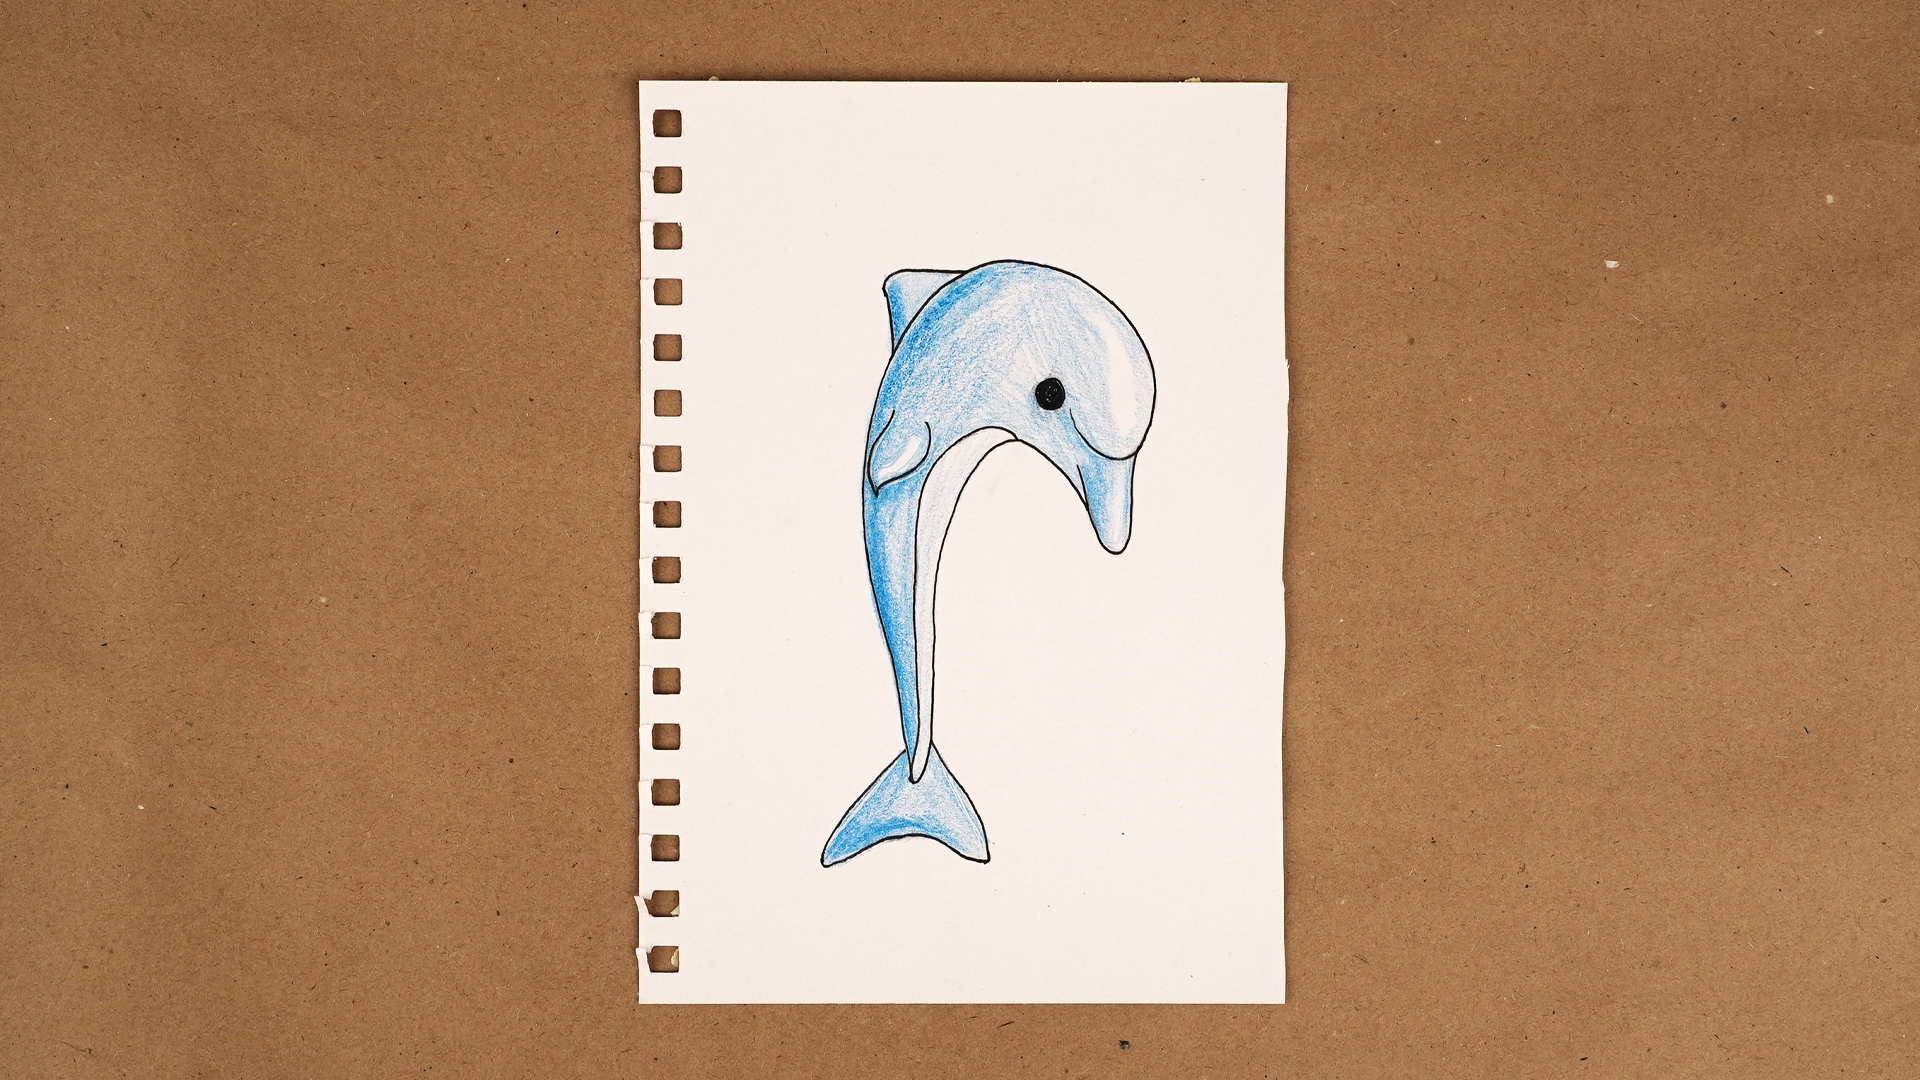
Learning how to draw a dolphin is one of those art projects that looks fancy until you realize the entire animal is basically a graceful banana with fins. That is not disrespectful to dolphins. Dolphins are intelligent, athletic marine mammals with streamlined bodies, expressive faces, and tail flukes built for powerful swimming. But for artists, especially beginners, the secret is simple: draw the motion first, then build the body around it.
In this guide, you will learn two simple ways to draw a dolphin: a cute cartoon dolphin and a more realistic jumping dolphin. The first method is perfect for kids, classroom art, sketchbook warmups, and anyone who wants a cheerful sea creature without needing a marine biology degree. The second method adds more natural body proportions, better fins, light shading, and a splash of movement. Both methods use basic shapes, soft curves, and easy steps, so your dolphin will look like it belongs in the oceannot like a confused cucumber wearing a fin hat.
Before we begin, grab a pencil, eraser, paper, and something for coloring, such as colored pencils, crayons, markers, or digital brushes. A light pencil is best for the first sketch because dolphins are all about smooth curves, and smooth curves sometimes require a few “let’s pretend that line never happened” moments.
Why Dolphins Are Fun and Easy to Draw
Dolphins are ideal drawing subjects because their bodies are made from clear, flowing shapes. The top of the body forms one long curve from the forehead to the tail. The belly follows a softer curve underneath. The snout, also called the rostrum, extends forward like a small beak. The dorsal fin sits on the back, the pectoral fins sit on the sides, and the tail ends in two horizontal flukes.
That means you do not need to begin with tiny details. In fact, you should not. Start with the big gesture linethe curve that shows how the dolphin moves. Then add the body, nose, fins, tail, eye, and simple shading. This approach works because dolphins are streamlined animals. Their shape is built for movement, and your drawing will instantly look better if the body feels like it is gliding through water.
Materials You Need
You do not need expensive supplies to create a good dolphin drawing. A simple No. 2 pencil, a clean eraser, and plain paper are enough. If you want to color your dolphin, use gray, blue-gray, light blue, white, and a touch of dark gray for shadows. A black pen can help outline the final drawing, but wait until you are happy with the pencil sketch before inking anything. Ink is dramatic. It remembers your mistakes forever.
Simple Way 1: How to Draw a Cute Cartoon Dolphin
This first method is the easiest way to draw a dolphin. The proportions are rounded, friendly, and slightly exaggerated. It is a great choice for younger artists, greeting cards, stickers, classroom worksheets, or a quick ocean-themed doodle.
Step 1: Draw the Main Body Curve
Start with a long curved line, like a stretched rainbow leaning forward. This line will become the dolphin’s back. Make the curve smooth and confident. Do not press too hard. The dolphin should look like it is swimming or jumping, not lying on a couch after eating too many sardines.
Step 2: Add the Nose and Belly
At the front of the curve, draw a small rounded snout. Dolphins have a beak-like rostrum, so let the mouth area stick out gently. Then draw a second curved line underneath the body to create the belly. The body should be thick near the middle and narrower near the tail.
Step 3: Draw the Tail Flukes
At the back of the dolphin, draw two small leaf-like shapes for the tail flukes. Dolphin tails are horizontal, not vertical like many fish tails. This is an important detail. If the tail looks like a fish tail, your dolphin may quietly file a complaint with the ocean.
Step 4: Add the Dorsal Fin
Draw a curved triangular fin on top of the dolphin’s back, slightly behind the middle of the body. The dorsal fin helps dolphins stay stable while swimming, so it should look balanced, not random. Make it curve backward a little for a natural look.
Step 5: Add the Pectoral Fin
Now draw one pectoral fin on the side of the body. Place it below the head area, pointing backward. For a cartoon dolphin, the fin can look like a soft triangle or a curved teardrop. If you want extra cuteness, make it slightly oversized.
Step 6: Draw the Eye and Smile
Add a small round eye above the mouth line. Then draw a gentle smile along the snout. Dolphins naturally appear to have a smiling expression because of the shape of their mouths, which makes them perfect for cheerful drawings. Keep the mouth line simple. One curved line is enough.
Step 7: Clean Up and Color
Erase any extra construction lines. Outline the final shape with a darker pencil or pen. Color the top of the dolphin gray or blue-gray and leave the belly lighter. Add a few curved water lines underneath if you want the dolphin to look like it is leaping above the sea.
Simple Way 2: How to Draw a More Realistic Jumping Dolphin
The second method is still beginner-friendly, but it creates a more natural dolphin. This version focuses on body flow, proportion, and shading. It is a strong choice for school projects, nature journals, ocean posters, or anyone who wants a drawing that says, “I know what a dorsal fin is, and I am not afraid to use it.”
Step 1: Start With a Line of Motion
Draw one sweeping curve from the nose area to the tail. This is your line of motion. A jumping dolphin usually forms a gentle arc, with the head higher than the tail or the whole body curving upward. Think of the line as the dolphin’s swimming path. If this line looks graceful, the final drawing will feel alive.
Step 2: Build the Body With an Oval
Sketch a long oval around the middle of the motion line. The oval should be thick in the center and narrow toward both ends. Dolphins have fusiform, or torpedo-like, bodies that reduce drag in water. For drawing purposes, that means the body should not look boxy. Avoid sharp corners unless your dolphin is secretly made of office furniture.
Step 3: Shape the Head and Rostrum
At the front of the oval, sketch the rounded forehead. This area is called the melon. Then extend the rostrum forward. The rostrum should be narrower than the head and slightly rounded at the tip. Draw the lower jaw with a shorter curved line beneath it.
Step 4: Narrow the Tail Stock
From the back of the body, taper the shape into a narrow tail stock, also called the peduncle. This part connects the body to the flukes. Make it slim but strong. A realistic dolphin should look powerful enough to swim fast, not like its tail was added at the last minute during a lunch break.
Step 5: Draw the Tail Flukes
Add two horizontal flukes at the end of the tail. Each fluke should curve gently and taper to a soft point. The middle where the two flukes meet has a small notch. Keep the flukes symmetrical, but not stiff. Nature likes balance, not copy-and-paste perfection.
Step 6: Place the Dorsal Fin
Draw the dorsal fin on the back, near the center of the dolphin. In many bottlenose dolphins, the dorsal fin curves backward in a falcate shape. It should rise smoothly from the body and return smoothly into the back. Avoid making it look like a shark fin. Dolphin fins are usually softer and more curved.
Step 7: Add the Pectoral Fins
Draw the visible pectoral fin below and slightly behind the head. It should be long, narrow, and curved backward. If you want to show the far-side fin, draw only a small part of it on the opposite side. This creates depth and helps the dolphin feel three-dimensional.
Step 8: Add the Eye, Mouth, and Blowhole
Place the eye near the front of the head, above the mouth line. Keep it small. A common beginner mistake is drawing a giant cartoon eye on a realistic dolphin. Cute? Yes. Realistic? Not unless the dolphin just saw its seafood bill. Add a curved mouth line along the rostrum, then place a small blowhole on top of the head behind the melon.
Step 9: Refine the Outline
Go over the final outline with smooth, confident strokes. Erase the oval and motion guidelines. Pay attention to the transition between the head, back, and tail. The dolphin should look like one continuous shape. Sharp breaks can make the animal look stiff.
Step 10: Add Shading and Water
Shade the upper body slightly darker and leave the underside lighter. Many bottlenose dolphins are darker near the top and lighter on the belly, which helps your drawing feel natural. Add a soft shadow under the pectoral fin and along the lower body. For water, draw curved splash lines below the dolphin or simple waves in the background.
Common Mistakes When Drawing a Dolphin
Making the Body Too Short
Dolphins have long, streamlined bodies. If your dolphin looks too round, stretch the body and taper the tail. A short dolphin often starts looking like a cheerful whale calf, which is adorable but not the assignment.
Drawing a Vertical Tail
Dolphin tail flukes are horizontal. Fish tails are usually vertical. Remembering this one detail instantly makes your dolphin drawing more accurate.
Placing the Dorsal Fin Too Far Forward
The dorsal fin usually belongs near the middle of the back, not directly on the head. If it is too far forward, the dolphin may look like it borrowed a party hat from a shark.
Using Too Many Straight Lines
Dolphins are built from curves. Even the fins and tail should have a soft flow. If your sketch feels stiff, redraw the main body using longer, smoother strokes.
Easy Coloring Ideas for Your Dolphin Drawing
For a simple cartoon dolphin, use light blue, sky blue, or gray with a white belly. Add pink cheeks if you want a playful style. For a realistic dolphin, use blue-gray on top, medium gray on the sides, and pale gray or white underneath. Blend gently so the color transition feels smooth.
You can also add an ocean background. Try a sunset, bubbles, coral, waves, or a few small fish. Keep the background lighter than the dolphin so the main subject stands out. If you are creating a poster or web illustration, leave some white space around the dolphin to make the composition cleaner.
Practice Tips to Improve Faster
Practice the dolphin’s body curve several times before drawing the full animal. Fill one page with simple arcs, then turn the best arcs into dolphins. This trains your hand to capture motion. Another useful exercise is drawing dolphins from basic shapes: oval for the body, wedge for the rostrum, triangles for fins, and leaf shapes for the tail flukes.
When using a reference photo, study the big shapes first. Notice where the widest part of the body sits, how the back curves, and how the belly tapers toward the tail. Do not copy every tiny detail at the beginning. Details are dessert. Structure is dinner.
Experience Notes: What I Learned While Practicing Dolphin Drawings
The first time many beginners try to draw a dolphin, they usually start with the head. That feels logical because faces are fun. But with dolphins, the body movement matters more than the face. A dolphin can have a perfectly cute eye and smile, but if the body curve is stiff, the whole drawing looks awkward. After practicing different sketches, the biggest improvement usually comes from starting with one long motion line instead of separate parts.
Another helpful experience is learning to draw lightly. Dolphins have deceptively simple shapes, but tiny adjustments make a big difference. Moving the dorsal fin slightly backward can make the animal look more natural. Making the tail stock thinner can add speed. Lifting the head a little can turn a swimming dolphin into a jumping one. These changes are easy when the sketch is light and frustrating when the pencil lines are carved into the paper like ancient sea-creature law.
Coloring also teaches a lot. A flat gray dolphin can look unfinished, while a little shading under the belly and fins gives the body volume. The best approach is to keep the top darker and the underside lighter. This simple contrast makes the dolphin feel round and smooth. Even a cartoon dolphin benefits from a pale belly patch or a soft highlight along the back.
One surprisingly useful trick is to draw the water last. If you draw waves first, you may accidentally force the dolphin into an odd position. When the dolphin is finished, you can place waves, splashes, bubbles, or a horizon line exactly where they support the pose. A few curved splash marks under the belly can make the dolphin look like it just leaped from the ocean. Too many splash marks, however, can make the page look busy. Water should support the dolphin, not steal the spotlight like an overexcited background actor.
It also helps to compare cartoon and realistic versions side by side. The cartoon dolphin allows bigger eyes, rounder fins, and a sweeter smile. The realistic dolphin needs better proportions, a smaller eye, a more accurate rostrum, and careful fin placement. Practicing both styles builds confidence because you learn what can be exaggerated and what should stay anatomically believable.
Finally, the best dolphin drawings usually come from repetition, not perfection. Draw one small dolphin every day for a week. Make one jumping, one swimming underwater, one facing left, one facing right, one cartoon, one realistic, and one silly version wearing imaginary sunglasses if your sketchbook permits nonsense. By the end, your hand will understand the curve, and the dolphin shape will feel natural. That is the quiet magic of drawing: the subject stops being a mystery and becomes a rhythm.
Conclusion
Learning how to draw a dolphin becomes much easier when you stop thinking of it as a complicated animal and start seeing it as a flowing shape. Begin with the motion line, build the body with simple curves, add the rostrum, fins, flukes, eye, and smile, then finish with shading or color. The cartoon method gives you a cute, friendly dolphin in minutes, while the realistic jumping method helps you understand anatomy, movement, and proportion.
Whether you are drawing for school, a blog, a coloring page, a digital illustration, or pure sketchbook fun, the same rule applies: keep the lines smooth. Dolphins are ocean athletes. Their shape should feel fast, light, and graceful. And if your first dolphin looks more like a potato with ambition, congratulationsyou have officially started the artistic process.