A doughnut bun is one of those hairstyles that looks like it belongs to someone who owns a labeled drawer for hair tools, wakes up with perfect lighting, and never loses a bobby pin. The good news? You do not actually need a foam doughnut, a sock bun maker, or a tiny beauty-supply miracle to get the look. With the right ponytail, a little twisting, strategic pinning, and a calm relationship with flyaways, you can create a full, rounded bun using only your own hair.
This guide explains how to do a doughnut bun without a doughnut in 10 clear steps. It works for everyday school or work, ballet class, weddings, brunch, errands, and those mysterious moments when your hair simply refuses to participate in society. The goal is a bun that looks polished but not painfully tight, structured but not helmet-like, and elegant without requiring a professional stylist standing behind you whispering, “Trust the process.”
Below, you will learn how to prep your hair, build volume without a bun maker, secure the shape with bobby pins, and adjust the style for thick, fine, curly, layered, or slippery hair.
What Is a Doughnut Bun Without a Doughnut?
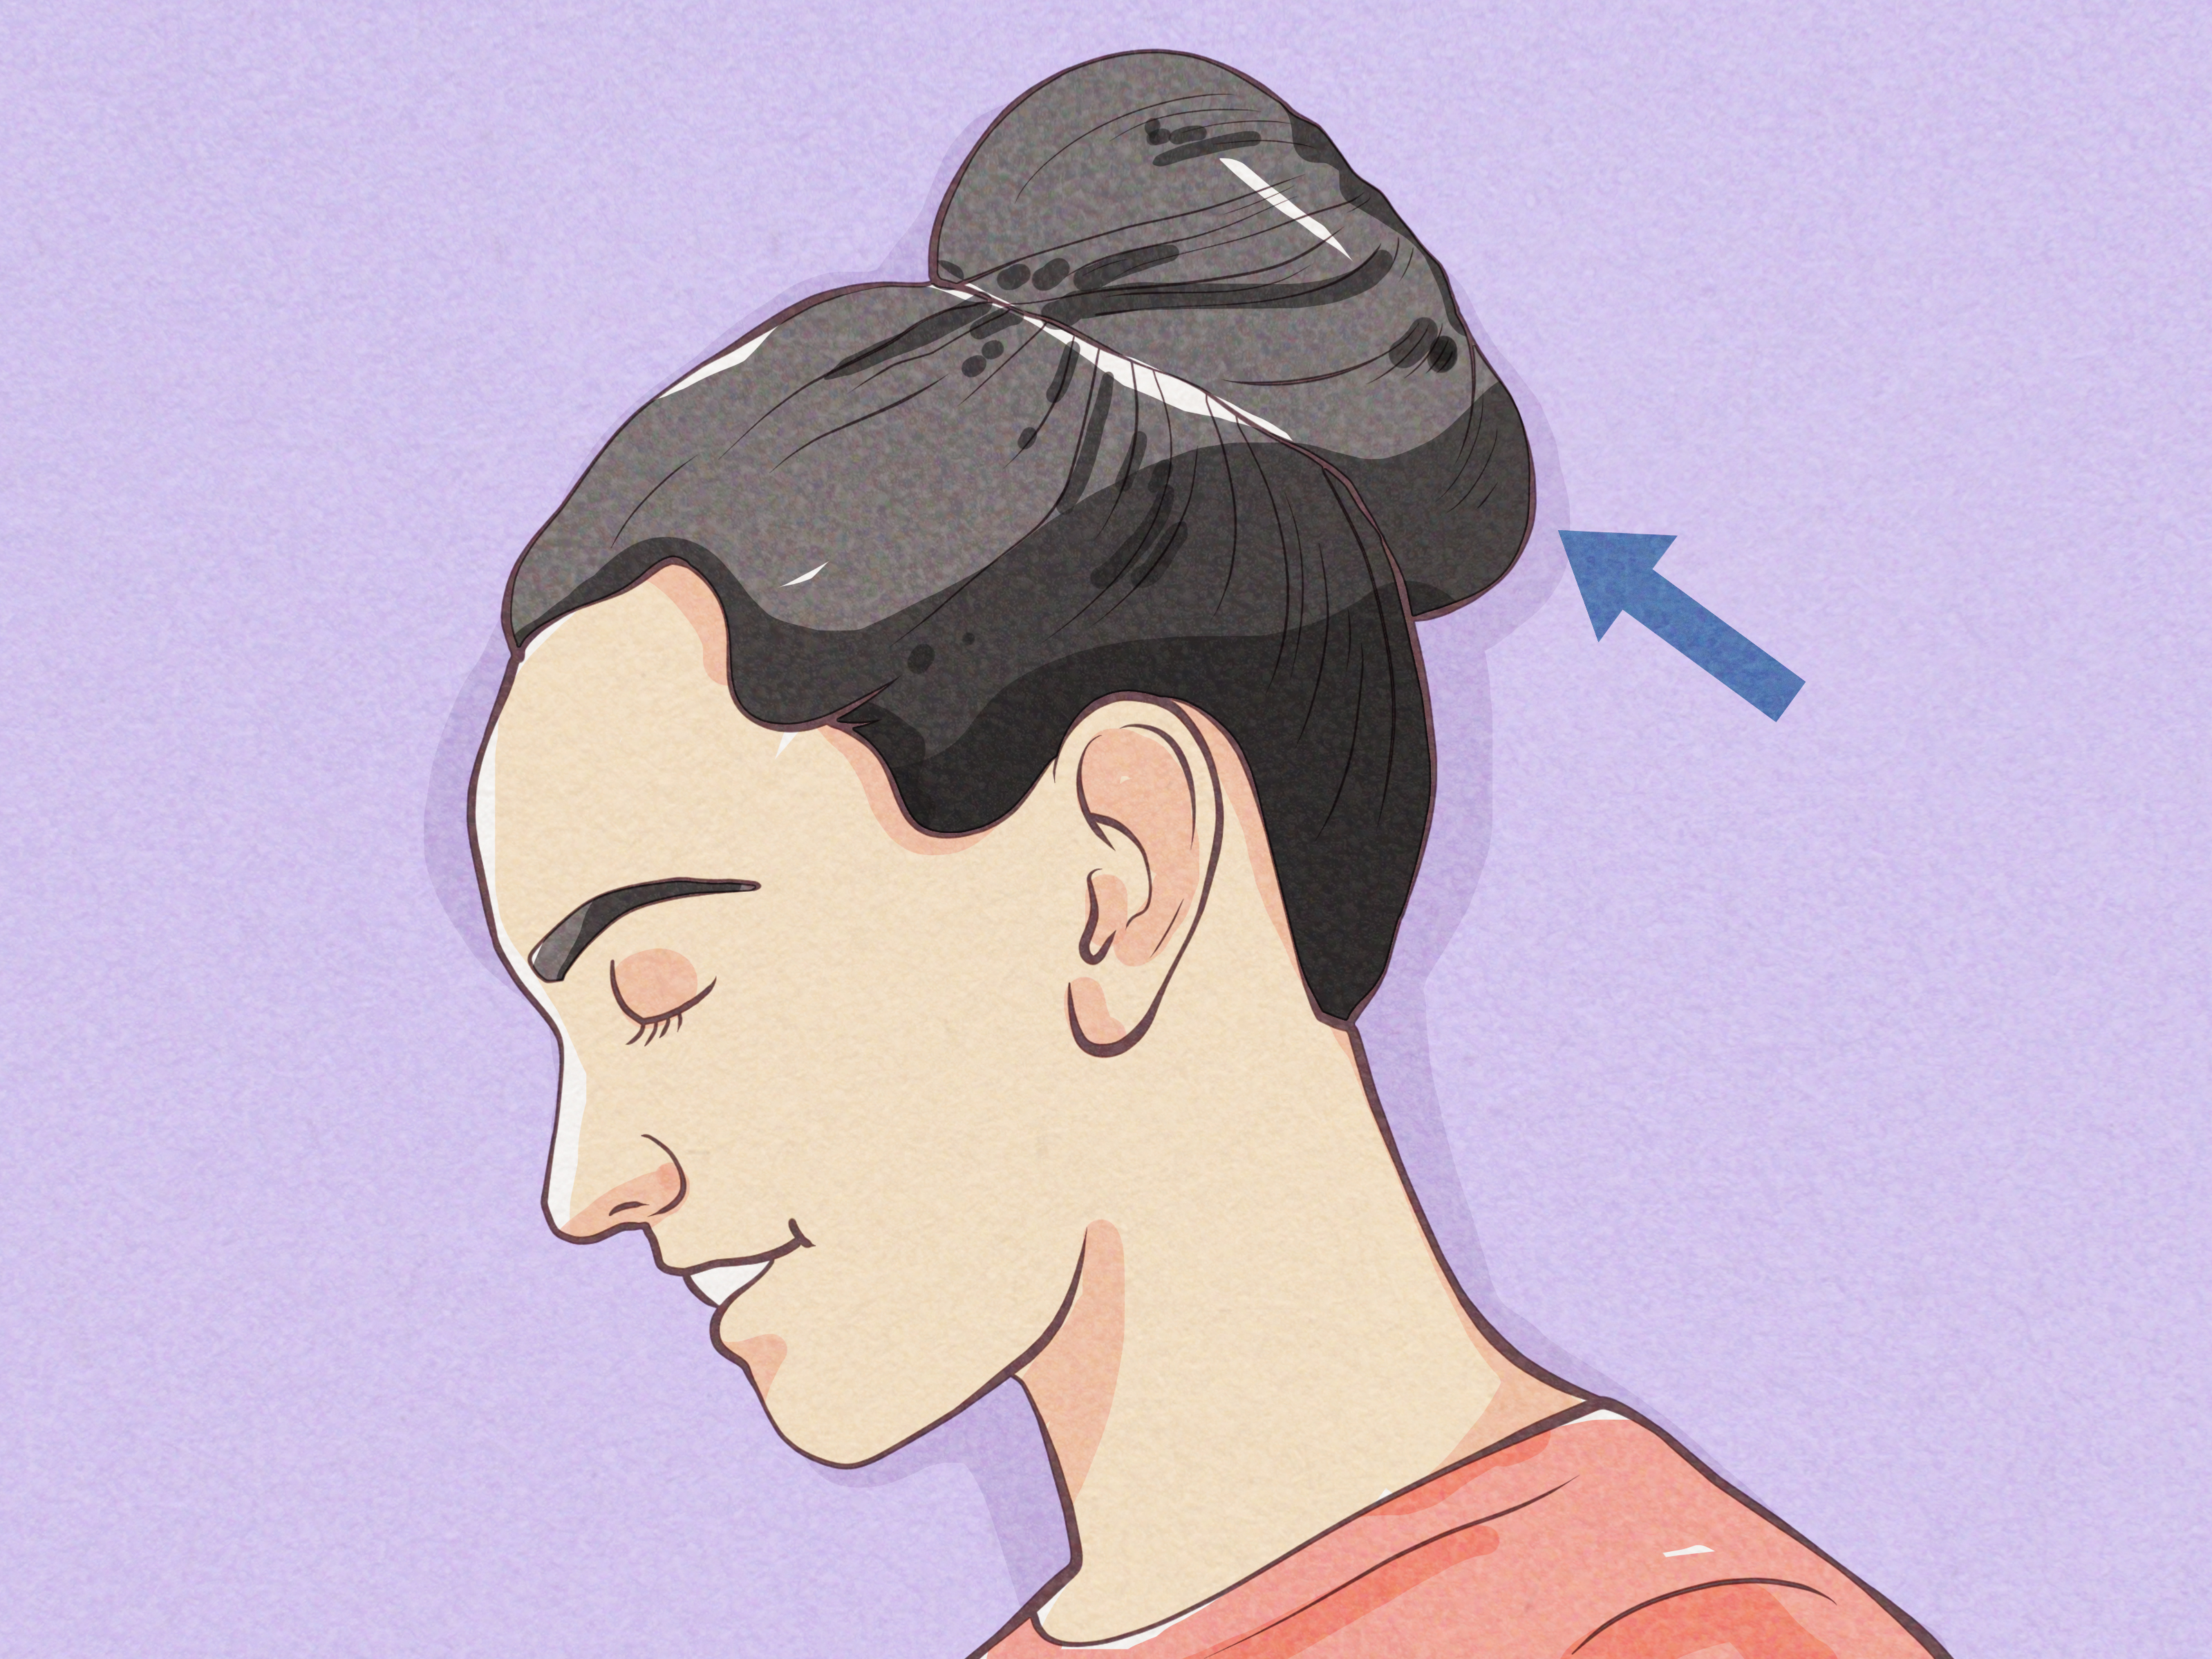
A traditional doughnut bun uses a round foam accessory to create a smooth, circular shape. Your hair is spread over the doughnut, tucked underneath, and pinned into place. A doughnut bun without a doughnut creates the same rounded effect by using your own ponytail as the structure. Instead of relying on foam, you twist, fan, wrap, and pin the hair around the ponytail base until it forms a balanced circle.
The finished look can be sleek and ballet-inspired, soft and romantic, or slightly messy and casual. The main trick is distribution. If all your hair is wrapped in one tight rope, the bun may look small or lopsided. If you gently spread the hair around the base before pinning, you can fake the fullness of a bun maker without using one.
What You Need Before You Start
You do not need a complicated kit. In fact, the best no-doughnut bun usually comes from simple tools used well.
- A brush or wide-tooth comb
- One strong hair elastic
- Four to eight bobby pins or U-shaped hair pins
- A fine-tooth comb for smoothing, optional
- Light hairspray, texture spray, or styling cream
- A toothbrush or edge brush for flyaways, optional
- A scrunchie, ribbon, claw clip, or decorative pins, optional
Second-day hair often holds this style better than freshly washed hair because it has more grip. If your hair is very clean or silky, add a small amount of texture spray or dry shampoo before styling. If your hair is curly or coily, use your favorite moisturizing cream or gel to smooth the ponytail while keeping your natural texture intact.
How to Do a Doughnut Bun Without a Doughnut: 10 Steps
Step 1: Brush and Detangle Your Hair
Start by gently brushing or combing your hair to remove knots. A smooth foundation makes the bun easier to shape and helps prevent random bumps from appearing halfway through the process like tiny hair mountains. If you want a sleek bun, brush your hair back firmly. If you prefer a softer look, detangle first, then use your fingers to gather the hair so it does not look too polished.
For curly hair, avoid brushing dry curls if it causes frizz. Instead, lightly mist your hair with water or leave-in conditioner and use your fingers or a wide-tooth comb. The bun does not have to erase your texture; it should work with it.
Step 2: Choose the Bun Placement
Decide where you want the bun to sit. A high doughnut bun feels fresh, playful, and ballet-inspired. A mid-height bun at the back of the head looks classic and works well for everyday wear. A low bun near the nape of the neck feels elegant and is usually easier if your hair is layered or shorter.
Use your face shape, outfit, and comfort as a guide. If you will wear the bun for several hours, avoid pulling it so tight that your scalp feels sore. A beautiful bun should not feel like a small workout for your hair follicles.
Step 3: Make a Secure Ponytail
Gather your hair into a ponytail at your chosen height and secure it with a strong elastic. This ponytail is the foundation of the entire bun, so take a few extra seconds to get it right. If it is loose, the bun may sag. If it is painfully tight, loosen it slightly and save your scalp from unnecessary drama.
For a sleek finish, use a brush to smooth the sides before tying the elastic. For a relaxed finish, allow a little volume at the crown and leave out a few face-framing pieces. If your hair is heavy, wrap the elastic one more time so the ponytail feels stable.
Step 4: Add Volume to the Ponytail
To mimic the fullness of a doughnut bun, add volume before wrapping. Hold the ponytail straight up and gently backcomb the underside with a fine-tooth comb. You do not need to create a nest. A little teasing near the base is enough to give the bun more body.
If you dislike teasing, split the ponytail into two or three sections and lightly twist each section instead. Another option is to braid the ponytail loosely, pancake the braid by tugging the edges outward, then wrap it into a bun. This creates a rounded shape with texture and hold.
Step 5: Spread the Ponytail Around the Base
Let the ponytail fall around the elastic like a fountain. Use your fingers to spread the hair evenly in a circle around the ponytail base. This is the key step that makes the bun look like a doughnut even though no doughnut is involved.
Imagine you are covering the elastic with your hair from all directions: top, bottom, left, and right. If one side has more hair than the other, shift the sections until the shape looks balanced. Do not worry if it looks strange for a moment. Many good buns have an awkward middle phase. So do many good hair days.
Step 6: Begin Wrapping the Hair Around the Ponytail
Take the ends of your ponytail and start wrapping them around the base in one direction. Keep the hair spread slightly as you wrap so the bun stays wide and rounded instead of turning into a skinny coil. If your hair is long, continue wrapping until you reach the ends. If your hair is medium-length, tuck the ends under the fullest part of the bun.
For a smoother doughnut effect, use your palm to flatten and guide the bun as you wrap. For a messier look, twist more loosely and allow small pieces to peek out naturally.
Step 7: Pin the Bun at Four Main Points
Secure the bun with bobby pins or U-shaped pins. A reliable method is to pin the bun at four points, like a clock: top, right, bottom, and left. Slide each pin through the outer edge of the bun, catch a small amount of hair near the scalp, then push the pin inward toward the center.
If you use bobby pins, place the wavy side down so it grips better. If your hair is thick, use larger pins or U-shaped pins. If your hair is fine, use smaller pins and crisscross two pins where extra hold is needed. The goal is to secure the shape without making the pins the star of the show.
Step 8: Tuck Loose Ends Under the Bun
Find any visible ends and tuck them under the bun. Pin them discreetly so they do not pop out later like they have a separate appointment. If your hair is layered, you may need more pins around the perimeter. Use a small amount of styling cream on your fingertips to smooth shorter pieces before tucking.
For a casual bun, you can leave a few ends loose on purpose. For a formal bun, keep tucking and pinning until the outline looks clean and rounded.
Step 9: Adjust the Shape
Once the bun is pinned, gently pull the edges outward to make it fuller. This is where the “doughnut” illusion really appears. Work slowly and adjust one section at a time. If one side looks flat, loosen it slightly and pin it again. If the bun feels too wide, press it closer to your head and add another pin.
Look at the bun from the front, sides, and back if possible. A hand mirror helps, but your phone camera can also reveal the truth with brutal honesty. Make small corrections instead of rebuilding everything from scratch.
Step 10: Smooth, Spray, and Finish
Finish the style with a light mist of hairspray. For a sleek bun, smooth flyaways with a toothbrush sprayed lightly with hairspray or touched with a tiny amount of gel. For a soft bun, pull out a few pieces near your temples or ears. Add a ribbon, scrunchie, pearl pins, or a minimalist clip if you want the style to look more intentional.
Give your head a gentle shake. If the bun moves a little but stays secure, you are good. If it feels wobbly, add pins at the base. If it feels too tight, loosen the ponytail slightly or choose a lower placement next time.
Best Variations for Different Hair Types
For Fine Hair
Fine hair can still create a full doughnut bun without a doughnut. Use texture spray or dry shampoo before styling, tease the ponytail lightly, and pull the bun outward after pinning. A loose braid wrapped into a bun can also make fine hair appear thicker.
For Thick Hair
Thick hair may need extra pins and a stronger elastic. Split the ponytail into two sections, twist each section, and wrap them around the base in opposite directions. This distributes the weight and prevents the bun from feeling like it is slowly migrating south.
For Curly or Coily Hair
Curly and coily textures create beautiful volume naturally. Smooth the ponytail base with cream or gel if desired, then wrap the curls loosely around the elastic. Avoid forcing every curl flat. Let the texture make the bun look full, dimensional, and soft.
For Layered Hair
Layered hair may have shorter pieces that slip out. Use a lower bun placement, add light styling cream, and pin in smaller sections. A braided ponytail can help keep layers together before you wrap the bun.
Common Mistakes and How to Fix Them
The bun looks too small: Add texture, tease the ponytail, spread the hair wider before wrapping, or loosen the outer edges after pinning.
The bun keeps falling: Tighten the ponytail base, use stronger pins, and anchor pins into both the bun and the hair close to your scalp.
The elastic is showing: Spread the ponytail more evenly around the base before wrapping. You can also wrap a small section of hair around the elastic first.
The bun looks lopsided: Remove one or two pins from the fuller side, redistribute the hair, and pin again. A bun is sculpture, not a math exam.
Your scalp hurts: The ponytail is too tight or too high. Take it down and redo it more gently. Repeated tight hairstyles can stress the hair and scalp, so comfort matters as much as style.
Experience Notes: What Makes This No-Doughnut Bun Work Better in Real Life
The biggest lesson with a doughnut bun without a doughnut is that perfect symmetry is overrated. The first attempt may look slightly uneven, especially if you are used to relying on a foam bun maker. That is normal. A no-doughnut bun depends on how your hair naturally bends, how thick your ends are, and how much grip your strands have. Once you stop expecting the bun to look like it came from a packaging photo, the process becomes much easier.
In real-life styling, second-day hair is often the winner. Freshly washed hair can be too soft and slippery, especially if conditioner was applied heavily from roots to ends. A small amount of dry shampoo at the roots and through the ponytail gives the hair more grip. It also helps the bun stay round instead of collapsing into a flat cinnamon roll. A very glamorous cinnamon roll, perhaps, but still not the goal.
Another useful experience-based tip is to pin less at first. Many people start by adding ten bobby pins immediately, then wonder why the bun feels stiff and uncomfortable. Start with four well-placed pins around the bun. Shake your head gently. If a section moves, pin only that section. This keeps the bun lighter and makes it easier to adjust the shape. More pins do not always mean better hold; smarter pins usually do.
For long hair, the challenge is usually bulk. Wrapping all the hair in the same direction can create one heavy side. Splitting the ponytail into two sections solves this beautifully. Wrap one section clockwise and the other counterclockwise, then tuck the ends underneath. The bun looks more balanced, and the weight is spread evenly around the elastic.
For medium hair, the challenge is coverage. You may not have enough length to wrap several times, so focus on fanning the hair around the base before pinning. The bun will look fuller if the hair is spread wide instead of twisted too tightly. For shorter layers, tiny clear elastics can help keep pieces together before wrapping.
For curly hair, the best results usually come from respecting the curl pattern. Instead of brushing everything into a super-smooth sheet, define the curls lightly, gather them into a ponytail, and let the texture create volume. Curly buns often look fuller with less effort because the shape already has body. A few intentional face-framing curls can make the style feel relaxed rather than unfinished.
One final experience note: do not judge the bun before the final adjustment. The style often looks questionable right after wrapping and before shaping. Once you pull the edges slightly, tuck the ends, smooth the front, and add a finishing mist, it suddenly becomes a hairstyle instead of a hair experiment. The magic is not in one perfect step. It is in the small corrections.
Conclusion
Learning how to do a doughnut bun without a doughnut is mostly about building shape with your own hair. Start with a secure ponytail, add grip or volume, spread the hair around the base, wrap it carefully, and pin it in balanced sections. Once you understand those basics, the style becomes surprisingly flexible. You can wear it sleek, messy, high, low, braided, curly, polished, or casual.
The best part is that you do not need a foam accessory hiding in your drawer. Your hair, a good elastic, and a few reliable pins can create the same rounded effect. And if the first try is not perfect, congratulations: you have met the ancient tradition of bun troubleshooting. Adjust, pin, fluff, and carry on.
Note: This article is written for web publishing and synthesizes practical hairstyling guidance from reputable beauty, hair-care, and dermatology-informed sources without including source links in the body copy.