Building a router table is one of those woodworking projects that feels like a shop upgrade and a confidence badge at the same time. One day your router is a handheld tool that occasionally tries to behave like a caffeinated squirrel. The next day, it is mounted securely under a flat work surface, ready to cut clean profiles, dadoes, rabbets, grooves, raised panels, and decorative edges with far better control.
A good DIY router table does not need to be fancy enough to make your neighbors whisper. It needs to be flat, sturdy, safe, accurate, and easy to adjust. That is the whole magic trick. Commercial router tables can be excellent, but building your own gives you the freedom to size it for your shop, choose your own fence design, add dust collection, and spend your money where it matters most: the insert plate, the fence, and the tabletop surface.
In this guide, you will learn how to build a router table from practical, proven woodworking principles. We will cover materials, tabletop construction, router mounting, fence design, dust collection, safety, setup, and the small improvements that turn a simple table into a loyal shop companion. No fluff, no mystery, and no dramatic music required.
What Is a Router Table and Why Build One?
A router table is a woodworking station that holds a router upside down beneath a tabletop, allowing the bit to protrude through an opening. Instead of moving the router across the wood, you move the workpiece across the table and against a fence. That change makes many routing jobs more stable, repeatable, and precise.
Router tables are especially useful for edge profiles, small moldings, joinery, pattern routing, stopped cuts, box joints, rabbets, and shaping long narrow boards. They also make it safer and easier to use larger bits that would be awkward or risky in a handheld router. The table supports the work, the fence guides it, and your hands can stay farther from the spinning bit with push blocks and featherboards.
DIY Router Table vs. Store-Bought Router Table
A store-bought router table may include a precision-machined top, a professional fence, a router lift, and integrated dust collection. That is wonderful if your budget is wearing a tuxedo. A shop-built router table, however, can perform beautifully for far less money if you pay attention to the essentials.
The best homemade router tables focus on four things: a dead-flat tabletop, a rigid fence, a flush insert plate, and a stable base. You can add upgrades later, such as T-track, a miter slot, storage drawers, casters, or a router lift. Start with a solid foundation, then let your future self get fancy.
Tools and Materials You Will Need
The exact materials depend on your design, but the following list works well for a strong, practical router table suitable for most home woodworking shops.
Recommended Materials
- 3/4-inch MDF or Baltic birch plywood for the tabletop core
- High-pressure laminate, hardboard, or melamine for a smooth top surface
- 3/4-inch plywood for the cabinet or stand
- Router insert plate or router lift plate
- Leveling screws or insert plate levelers
- Hardwood edging for the tabletop
- 3/4-inch plywood or MDF for the fence
- T-track, miter track, knobs, bolts, and washers
- Dust port for the fence
- Wood glue, screws, threaded inserts, and finish
Recommended Tools
- Table saw or circular saw with a straightedge guide
- Drill and bits
- Jigsaw or plunge router for cutting the insert opening
- Clamps
- Square, tape measure, straightedge, and marking knife or pencil
- Flush-trim bit or pattern bit
- Sander
- Safety glasses, hearing protection, and dust mask
If you do not own every tool listed above, do not panic. Woodworking has a way of making every project look like an audition for a tool catalog. The essentials are accurate measuring, clean cutting, secure assembly, and careful setup.
Step 1: Decide on the Router Table Size
A common router table top size is around 24 inches by 32 inches, which gives enough support for most cabinet parts, trim, shelves, and small furniture components. A compact benchtop version can be smaller, while a cabinet-style router table can be larger and include storage below.
For most home shops, a tabletop between 24 by 30 inches and 27 by 36 inches is practical. The table should be deep enough to support work on both sides of the bit, wide enough for a useful fence, and not so huge that it becomes a plywood aircraft carrier in the middle of your garage.
Height Matters More Than You Think
A comfortable working height is usually similar to a table saw or workbench height, often around 34 to 36 inches. If you frequently work with small pieces and detailed profiles, a slightly higher table can reduce bending. If you will move long boards across the surface, matching the height of nearby shop surfaces can help with support.
Step 2: Build a Flat, Rigid Tabletop
The tabletop is the heart of the router table. If it sags, flexes, or twists, every cut becomes an argument. A simple and reliable method is to make a laminated “sandwich” top using MDF as the core and hardboard, laminate, or melamine as the top and bottom skins.
MDF is popular because it is flat, dense, and affordable. However, MDF alone can sag over time, especially under the weight of a router. Laminating both faces helps balance the panel and keep it stable. Adding hardwood edging protects the edges and gives the top a finished look.
How to Make the Top
- Cut two layers of 3/4-inch MDF or one MDF core with hardboard skins to your desired size.
- Spread glue evenly across the mating surfaces.
- Clamp the layers flat or weigh them down on a known-flat surface.
- Trim the edges flush after the glue dries.
- Add hardwood edging around the perimeter.
- Apply laminate, melamine, or a slick finish to reduce friction.
A smooth tabletop helps workpieces slide consistently. That consistency matters because routing is not just cutting wood; it is convincing wood to behave while a high-speed bit removes material. A slick, flat table makes the conversation much more polite.
Step 3: Choose and Install the Router Insert Plate
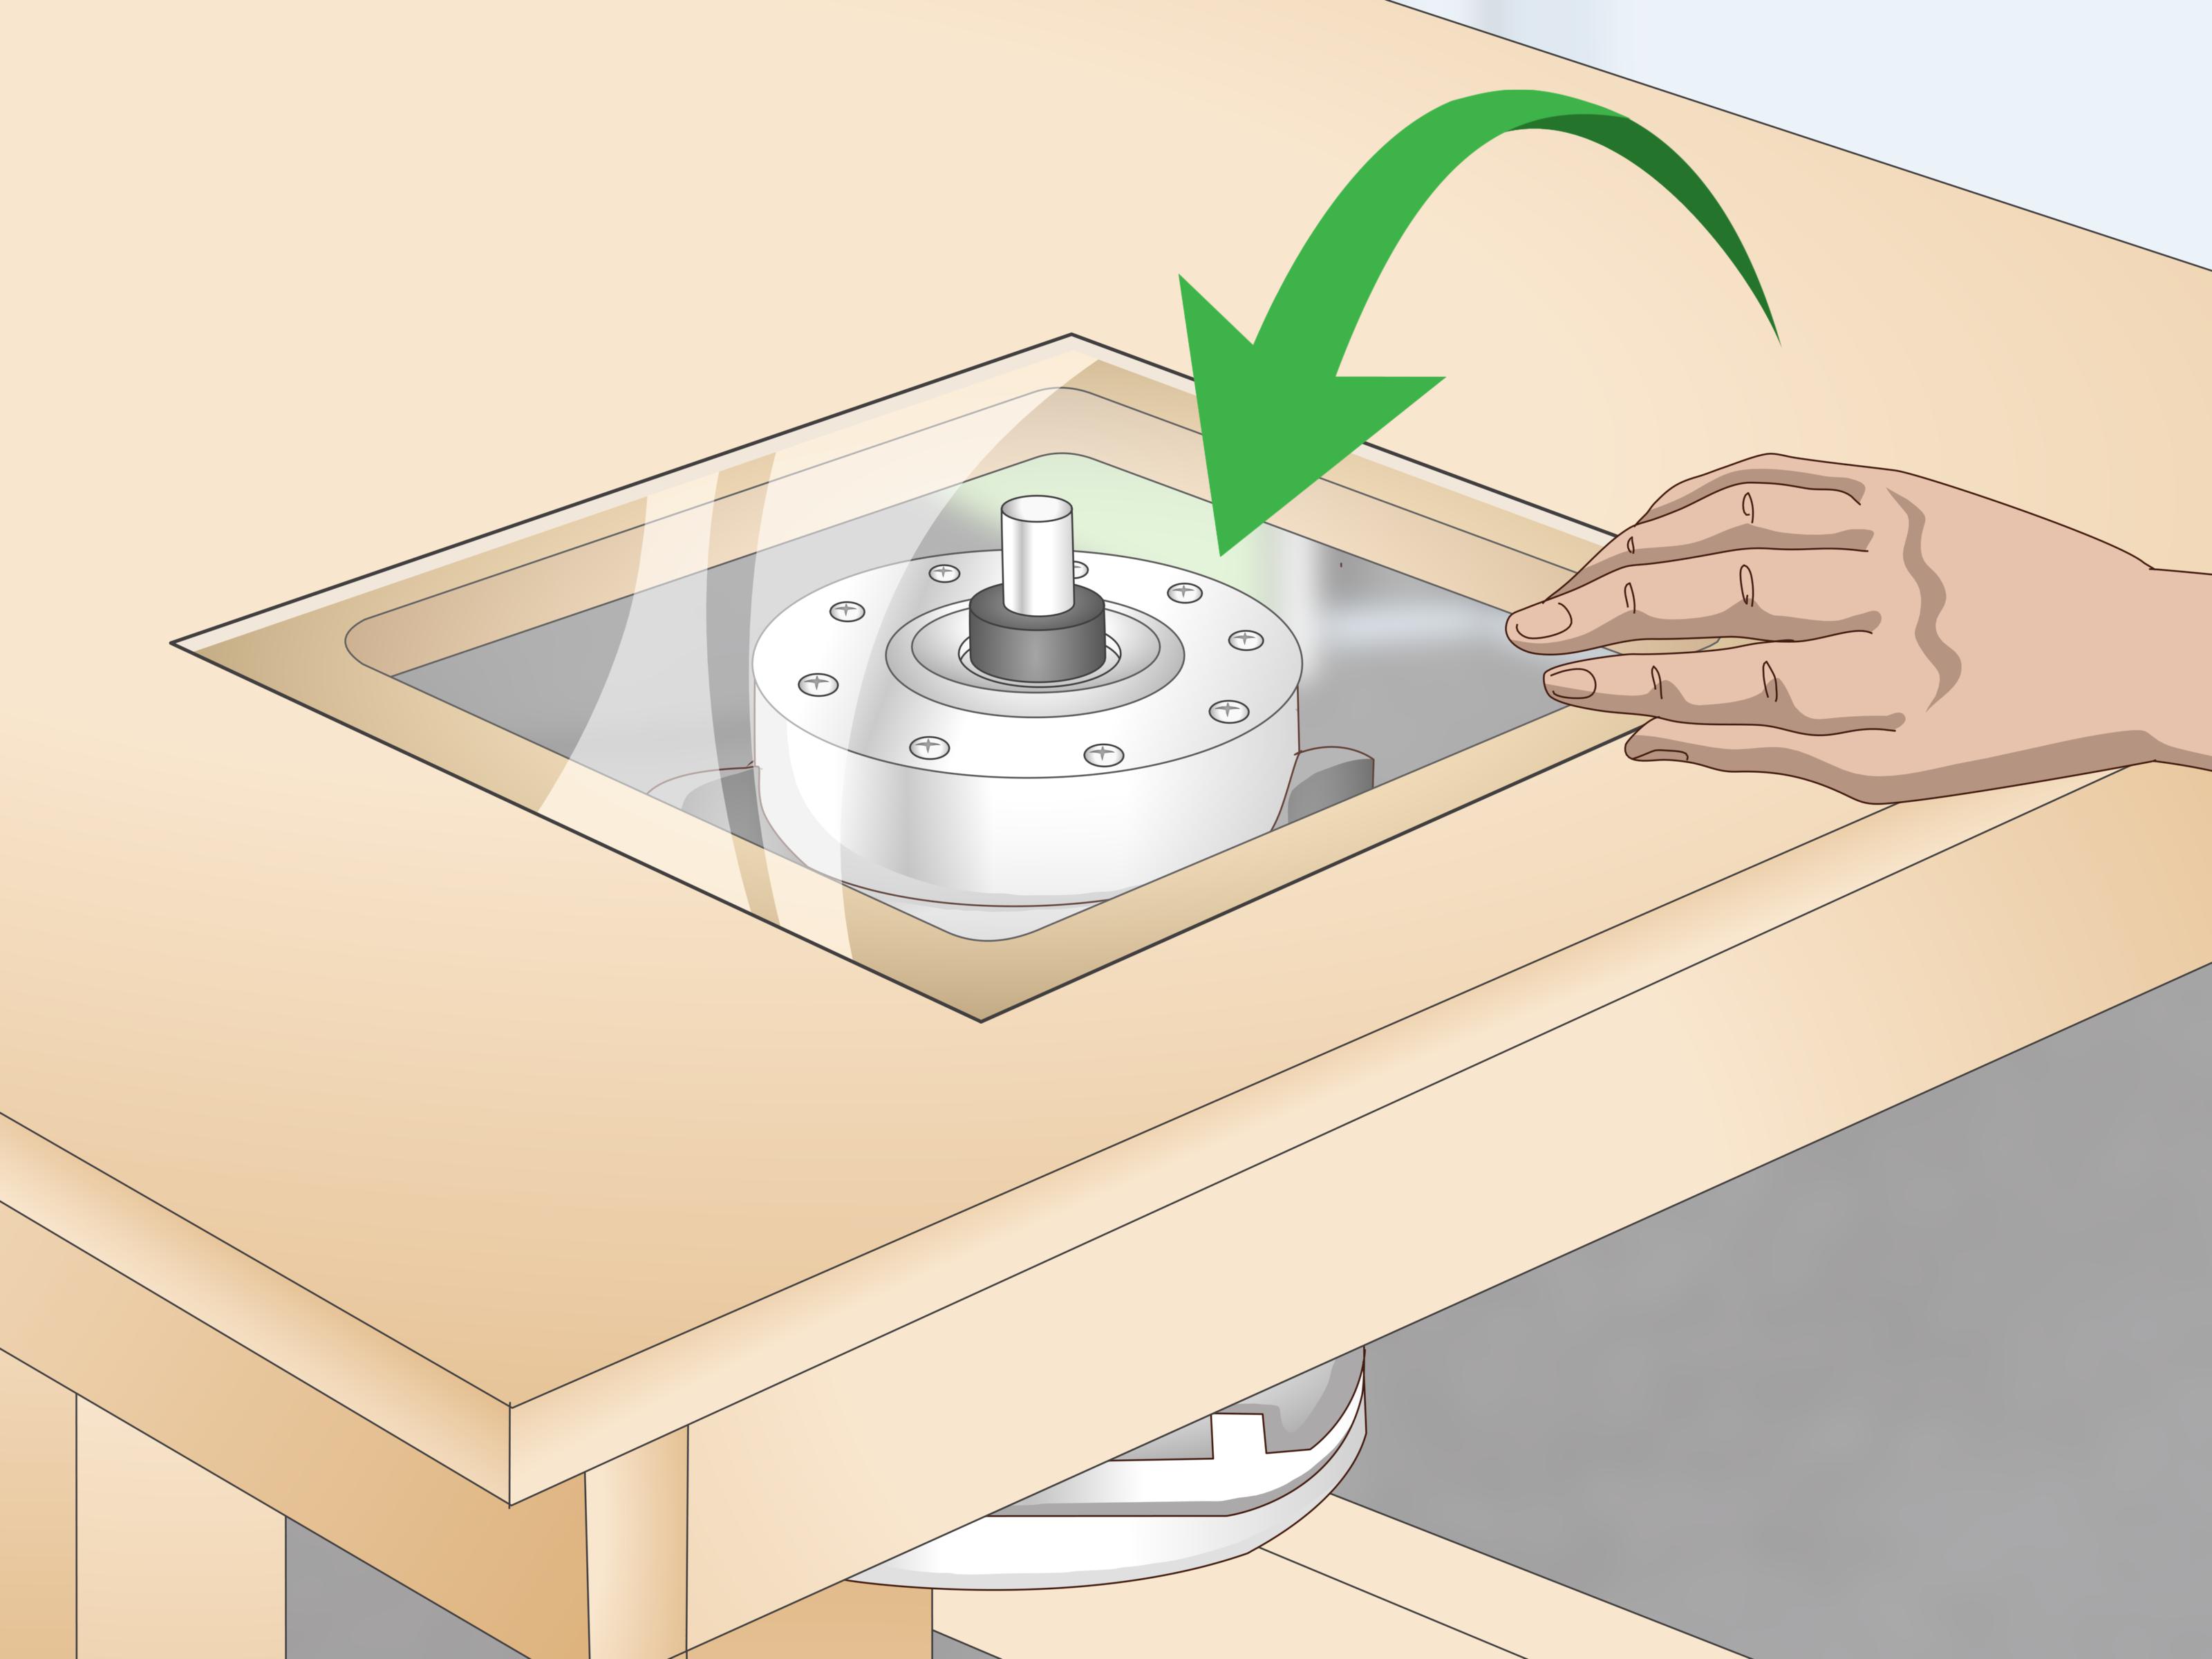
The router insert plate is the removable plate that supports the router and sits inside a recessed opening in the tabletop. It must be flat, rigid, and flush with the surrounding surface. If the plate is proud, your workpiece may catch. If it sits low, your workpiece can dip near the bit. Either problem can affect accuracy and safety.
Good insert plates are commonly made from phenolic, aluminum, or steel. Phenolic is stable and affordable. Aluminum is strong and durable. A router lift is the premium option because it allows above-table height adjustment and easier bit changes, but it is not required for a good homemade router table.
Cutting the Insert Opening
Use the insert plate as a template and mark its location on the tabletop. Most woodworkers place the bit opening slightly forward of center, leaving more support behind the bit where the fence will sit. This also gives you better access from the front of the table.
- Mark the plate outline carefully.
- Create a template or guide frame for the router.
- Rout a shallow rabbet so the plate can sit flush.
- Cut out the center opening with a jigsaw or router.
- Install leveling screws or plate levelers at the corners and sides.
- Test the plate with a straightedge until it is perfectly flush.
Take your time here. A flush plate is one of those details that separates a satisfying router table from a machine that makes you mutter things your clamps should not have to hear.
Step 4: Mount the Router Securely
Once the insert plate fits correctly, mount the router to the underside of the plate. Remove the router’s plastic sub-base and use it as a drilling template when possible. If the plate is undrilled, center the router carefully so the bit aligns with the insert ring opening.
Before drilling, make sure the router handles, power switch, speed control, and height adjustment are accessible from the front of the table. This small planning step can prevent future acrobatics under the table, which are rarely elegant and never fun.
Router Mounting Tips
- Use machine screws recommended for your router base.
- Make sure screw heads sit flush or below the plate surface.
- Check that the router is centered in the bit opening.
- Confirm that the collet can be accessed for bit changes.
- Unplug the router before mounting, adjusting, or changing bits.
If your router supports above-table adjustment, align the adjustment access hole toward the front. If it does not, you can still make excellent cuts; you will simply adjust height from below. Consider leaving the cabinet front open or adding a large door for easier access.
Step 5: Build a Stable Base or Cabinet
The router table base must resist vibration and keep the top steady. You can build a simple open stand from plywood, a cabinet with storage, or a benchtop design that clamps to an existing workbench. Cabinet-style bases are popular because they add mass, reduce vibration, and create storage for bits, wrenches, featherboards, and other accessories.
Simple Cabinet Design
A practical router table cabinet can be built from 3/4-inch plywood. Make two side panels, a bottom panel, a back panel, and stretchers at the top. Add a door or drawer if desired. Leave enough ventilation for the router motor, and provide room for dust collection.
If you add casters, choose locking casters and keep the table low enough to remain stable. A router table that rolls around during a cut is not mobile convenience; it is a wooden shopping cart with ambition.
Step 6: Build a Straight, Rigid Router Table Fence
The fence is the second most important part of the router table after the top. It guides the workpiece and controls the cut. A good fence should be straight, square to the tabletop, easy to adjust, and strong enough that it does not flex under pressure.
A simple L-shaped fence works well. Use one vertical face and one horizontal base joined at a perfect 90-degree angle. Reinforce the back with triangular braces or corner blocks. Add adjustable fence faces if you want to close the gap around different bit sizes.
Fence Features Worth Adding
- Adjustable split faces to support the work close to the bit
- T-track for featherboards and stops
- A clear bit guard
- A dust collection port behind the bit
- Knobs or clamps for fast positioning
You can secure the fence with T-track in the tabletop, slots in the fence base, or clamps at both ends. A pivoting fence is also an option: one end pivots on a bolt while the other end adjusts with a clamp. This simple design allows surprisingly fine adjustments because a tiny movement at one end creates a smaller movement near the bit.
Step 7: Add Dust Collection
Routing creates chips, dust, and tiny wood confetti that somehow finds its way into every corner of the shop. A dust port in the fence is one of the easiest and most effective upgrades. Place the port directly behind the bit opening so the vacuum or dust collector captures debris as it leaves the cut.
For better collection, you can also add an enclosed box or lower cabinet port beneath the router. A two-point system, with collection above at the fence and below at the cabinet, performs better than either one alone. Keep airflow in mind: a fully sealed cabinet can restrict cooling, so include vents or openings that allow air to move.
Step 8: Add T-Track, Miter Track, and Accessories
T-track is not mandatory, but it makes a router table much more flexible. Install it in the fence for featherboards, stops, and guards. You can also install track in the tabletop for hold-downs and jigs.
A miter track can be useful for coping sleds, box-joint jigs, and guided cross-grain cuts. However, it must be parallel to the bit path and positioned where your jigs can use it safely. Do not add a miter slot just because it looks professional. Add it if you will actually use it.
Helpful Router Table Accessories
- Featherboards for consistent pressure against the fence or table
- Push blocks to keep hands away from the bit
- Coping sled for routing rail ends safely
- Stop blocks for repeat cuts
- Insert rings sized closely to the bit diameter
- Bit guard for visibility and protection
Step 9: Level, Square, and Test the Router Table
After assembly, do not rush into your first “real” cut. Test the table like you are interviewing it for a job. Check the insert plate with a straightedge. Confirm the fence is square to the tabletop. Make sure the fence locks firmly. Verify that the router is secure and the bit spins freely without touching the insert ring.
Use scrap wood for test cuts. Start with a simple roundover or chamfer. Make light passes instead of trying to remove too much material at once. Heavy cuts can cause burning, chatter, tearout, or kickback. Multiple shallow passes usually produce cleaner results and are much kinder to both the router and your nerves.
Router Table Safety: Non-Negotiable Rules
A router table is useful because it provides control, but it still uses a fast-spinning cutter. Respect the tool every time. Wear eye and hearing protection. Use dust collection and respiratory protection when needed. Keep hands away from the bit with push blocks, featherboards, and guards.
Feed the workpiece against the bit rotation, usually from right to left when the fence is in front of you. Avoid climb cutting unless you are highly experienced and using a controlled setup designed for it. Never trap a workpiece between the bit and fence in a way that can pull the board forward unexpectedly. For small parts, use a jig or sled instead of holding the piece by hand.
Before Every Cut
- Unplug the router before changing bits or making major adjustments.
- Confirm the bit is properly seated and tightened in the collet.
- Set the correct router speed for the bit size.
- Use the smallest insert ring that safely clears the bit.
- Make sure the fence is locked and the workpiece is stable.
- Take light passes and test on scrap first.
If you are new to routers or building this in a school, family garage, or shared shop, work with an experienced adult or qualified instructor. A router table rewards patience. It does not reward guessing, rushing, or saying, “This will probably be fine,” which are famous last words in many workshops.
Common Mistakes When Building a Router Table
Using a Weak or Sagging Top
A thin tabletop can sag under the router’s weight. Use a laminated top, add support underneath, and choose a rigid insert plate. Flatness is not a luxury; it is the table’s job description.
Installing the Insert Plate Poorly
If the plate is not flush, your cuts will suffer. Use leveling screws and check with a straightedge from several directions. A few extra minutes here can save hours of frustration later.
Building a Fence That Flexes
A fence that bends during a cut changes the depth of cut. Reinforce it with braces, use stable material, and keep the face straight and square.
Ignoring Dust Collection
Dust collection is not just about cleanliness. It improves visibility, reduces airborne dust, and helps keep chips from packing around the bit. Even a basic shop vacuum connected to the fence port is better than letting the router table create its own indoor weather system.
Smart Upgrades for a Better DIY Router Table
Once your basic router table is working, you can add upgrades based on how you actually use it. A router lift is one of the most convenient improvements because it allows precise above-table height adjustment. A better fence with micro-adjustment can make joinery and edge profiles more accurate. Storage drawers keep bits organized and protected.
You can also add a power switch mounted on the front of the table. This makes it easier to shut off the router quickly without reaching under the tabletop. Choose a switch designed for power tools and follow electrical safety rules. When in doubt, ask a qualified professional.
Real Workshop Experience: Lessons From Building and Using a Router Table
The first thing you learn when building a router table is that flat beats fancy. A shiny fence, premium knobs, and a heroic amount of T-track will not rescue a tabletop that dips around the insert plate. The table does not care how impressive it looks in photos. It cares whether the wood slides smoothly and stays supported through the cut.
One practical lesson is to make the insert opening carefully and sneak up on the fit. It is tempting to cut quickly and “adjust later,” but later often arrives wearing a frown. A router plate should drop into the recess without forcing, while still having enough support around the edges. Leveling screws are worth the effort because seasonal shop changes, humidity, and vibration can affect the setup over time.
Another lesson is that fence design matters more than beginners expect. A simple straight fence works, but a fence with adjustable faces is much better for clean cuts. When the opening around the bit is too wide, narrow pieces can lose support right where they need it most. Adjustable faces let you close that gap and reduce tearout. Add a dust port behind the bit, and suddenly your router table feels less like a sawdust volcano.
Storage is also underrated. At first, you may think, “I only need the table.” Then come the bits, collet wrenches, insert rings, featherboards, setup blocks, push pads, coping sled, spare knobs, and that one mysterious washer you are afraid to throw away. A cabinet base with drawers keeps everything close. More importantly, it keeps sharp router bits from rolling around like tiny expensive land mines.
Use scrap wood generously. Every new bit, fence position, or height setting deserves a test cut. Scrap testing teaches you how the router behaves with different grain directions, profiles, and feed rates. It also prevents the heartbreaking moment when a beautiful workpiece becomes “practice material” against your will.
Light passes are another habit worth building early. Trying to remove too much wood in one pass can cause burning, chatter, rough edges, and unsafe handling. A router table performs best when it is allowed to work gradually. Think of it like shaving wood, not attacking it with a tiny helicopter blade, even though that is basically what is happening.
Finally, build the table for your actual shop, not an imaginary dream shop with cathedral ceilings and unlimited wall space. If your workspace is small, consider a benchtop router table or a cabinet on locking casters. If you already use a table saw, a router table extension wing may save space. If you make cabinets, prioritize a large flat top and a precise fence. If you mostly round over shelves and small projects, keep it simple and easy to store.
The best router table is the one you trust enough to use often. When it is flat, stable, safe, and convenient, it stops being a special setup and becomes part of your normal woodworking rhythm. That is when the project really pays off.
Conclusion: Build a Router Table That Works as Hard as You Do
Learning how to build a router table is one of the smartest upgrades a woodworker can make. A well-built table improves control, accuracy, repeatability, and safety. It turns a handheld router into a more versatile woodworking station capable of clean edges, accurate joinery, decorative profiles, and reliable production work.
Start with a flat tabletop, install a flush insert plate, mount the router securely, build a rigid fence, and add dust collection. Keep the design simple at first, then upgrade as your skills and projects grow. A homemade router table does not need to be complicated. It just needs to be honest, sturdy, and accurate. In woodworking, that combination wins more often than fancy hardware and dramatic tool reviews.
Note: Always follow your router manufacturer’s manual, use proper protective equipment, and get guidance from an experienced adult or qualified instructor if you are new to power tools.