Welcome back to the furniture painting series, where old dressers get second chances and questionable thrift-store finds become the main character in someone’s living room. In Part 4, we are talking about The Real Milk Paint Company and its traditional powdered milk painta favorite among furniture painters who want a finish with depth, character, and just enough unpredictability to keep things interesting.
Real Milk Paint is not the same thing as every product wearing a “milk paint” label. This is a true powdered paint made with natural ingredients such as milk protein, lime, and pigment. You add water, mix it yourself, and decide whether your project will look smooth and polished, lightly weathered, or gloriously chippy like it survived three generations of farm life and one very dramatic barn renovation.
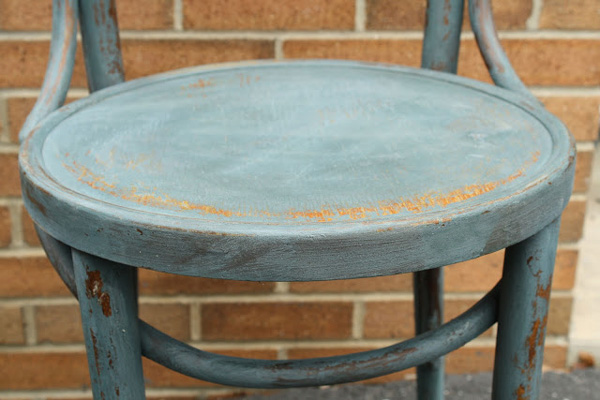
The beauty of this furniture paint is that it does not try to make every project look factory-perfect. Instead, it works with the surface beneath it. On raw wood, it can create a durable, velvety matte finish. On sealed or previously painted furniture, it may chip and flake in a way that looks naturally aged rather than artificially distressed. That difference is exactly why Real Milk Paint has a loyal following among furniture flippers, restoration lovers, DIY decorators, and people who believe that new furniture has far too much confidence.
Why The Real Milk Paint Company Stands Out
It Is a True Powdered Milk Paint
The Real Milk Paint Company offers paint in dry powder form rather than a ready-to-use liquid. That might sound inconvenient at first, especially if you are used to opening a can, stirring twice, and declaring yourself a professional. But the powdered format gives you real control.
You can mix only what you need for a small side table, a chair, a picture frame, or a full dresser. You can also adjust the thickness. A thinner mix creates a wash that allows wood grain to show through. A thicker mix provides stronger coverage and more visible brush texture. Instead of being stuck with one consistency, you can tailor the paint to the furniture piece and the look you want.
Because the paint is mixed fresh, the dry powder can be stored much longer than leftover liquid paint. That is especially useful for DIY projects, because most furniture painters have at least three “future projects” sitting in the garage waiting for motivation, better weather, or a sudden burst of confidence at 10 p.m.
The Finish Has Personality
Real Milk Paint dries to a matte, soft-looking finish with subtle depth. Unlike some modern furniture paints that sit heavily on top of the surface, milk paint can feel more connected to the wood underneath. On unfinished wood, it tends to absorb beautifully and create a classic painted-furniture look.
On previously finished furniture, the paint may resist certain areas and chip in others. That is not necessarily a failure. In fact, many people choose milk paint specifically because they want that unpredictable, worn-in effect. It can make a newer piece look like it spent decades in a country kitchen, survived several family holidays, and possibly witnessed a pie-related argument.
When Real Milk Paint Is the Right Choice
Real Milk Paint works especially well when you want an authentic, handmade finish rather than a flawless showroom surface. It is ideal for:
- Raw wood furniture
- Vintage dressers and sideboards
- Wooden chairs and stools
- Farmhouse-style furniture
- Rustic cabinets and shelves
- Decorative accent pieces
- Furniture with intentional distressing or patina
- Wood pieces that need a color wash instead of opaque paint
It can also be used on previously painted, stained, sealed, metal, glass, or plastic surfaces, but those projects often require more preparation or a bonding additive. The main question is simple: Do you want the paint to bond tightly and stay smooth, or do you want the possibility of natural chipping?
What You Need Before Painting Furniture With Real Milk Paint
Before you begin, gather everything in one place. This prevents the classic DIY moment where one hand is covered in paint and the only clean paintbrush is mysteriously located in another room.
- Real Milk Paint powder
- Clean water, preferably distilled for more consistent mixing
- A mixing jar, container, or shaker bottle with a lid
- Measuring cups or scoops
- Paintbrushes, foam brushes, or a small roller
- Fine-grit sandpaper or a sanding sponge
- A lint-free cloth or tack cloth
- A non-residue cleaner or degreaser
- Ultra Bond Adhesion Promoter for slick or sealed surfaces
- A fine mesh strainer if you want an ultra-smooth finish
- Your chosen topcoat, wax, finishing cream, or protective sealer
How to Mix Real Milk Paint
The standard starting point is a 1:1 ratio of milk paint powder to water. For example, mix one cup of powder with one cup of water. The goal is a consistency similar to pancake batter: thick enough to cover well, but fluid enough to move smoothly from brush to furniture.
Step 1: Add Water and Powder
Pour the water into a container, then add the powder. Stir, shake, or use a small electric mixer until the paint begins to blend. A shaker jar works well for small batches because you can put on the lid, shake with enthusiasm, and pretend you are making a very questionable smoothie.
Step 2: Let the Paint Rest
Allow the mixture to rest for about 15 to 20 minutes. This gives the powder time to hydrate and helps foam settle. Stir again before applying paint. During a longer project, stir occasionally because pigments can settle at the bottom of the container.
Step 3: Adjust the Consistency
If the paint feels too thick, add a small amount of water. If it seems too thin, add a little more powder. For a color wash, use more water. For stronger coverage, keep the mixture slightly thicker. Test the paint on the back or underside of the furniture before committing to the entire piece.
Preparing Furniture for Milk Paint
Milk paint is forgiving, but furniture preparation still matters. A clean surface gives the paint a much better chance of behaving the way you want. Dirt, wax, silicone furniture polish, grease, and mystery residue from the 1980s can interfere with adhesion.
Painting Raw Wood
Raw, unfinished wood is the dream surface for Real Milk Paint. Lightly sand rough spots, remove dust, and paint directly onto the wood. The paint can soak into the grain and create a rich, natural finish with excellent character.
For raw wood furniture, you usually do not need a bonding agent. This is also the surface where Real Milk Paint tends to be most durable and predictable.
Painting Stained or Sealed Furniture
For furniture with varnish, polyurethane, lacquer, shellac, or factory finish, clean the surface thoroughly first. Then lightly scuff-sand it to give the paint something to grip.
If you want a controlled, even finish with little or no chipping, add Ultra Bond Adhesion Promoter to the mixed paint. The manufacturer recommends mixing one part Ultra Bond with four parts liquid milk paint for the first coat. After that first bonding coat dries, later coats can usually be applied without extra bonding additive.
If you want a naturally distressed result, you can skip the bonding agent and let the paint decide where it wants to chip. This is the charming version of surrendering control. Test a hidden area first, because “beautifully chippy” and “why is the paint falling off in sheets?” are very different design directions.
Painting Veneer, Laminate, Metal, or Glass
These slick surfaces require extra attention. Clean them carefully, scuff-sand lightly, and use a bonding agent if you want a stable finish. Milk paint can work on nonporous materials, but the surface needs help if you expect it to survive regular use.
Four Furniture Finishes You Can Create With Real Milk Paint
1. Smooth and Modern
For a smoother, more contemporary finish, use a soft synthetic brush or foam brush. Add Ultra Bond when painting sealed furniture, apply thin coats, and lightly sand between coats with fine-grit sandpaper. Finish with a protective clear topcoat for better durability.
This method works well for nightstands, side tables, cabinets, and furniture that needs a softer matte look without dramatic flaking.
2. Naturally Chippy
This is the finish that made many DIY painters fall in love with true milk paint. Apply the paint directly over a clean but previously finished surface without bonding additive. As the paint dries, some areas may resist while others adhere. Light sanding can reveal additional chipping around edges, corners, drawer fronts, and raised details.
The goal is not to make every edge look damaged. Realistic distressing happens where furniture would naturally wear: handles, feet, corners, drawer edges, and raised trim.
3. Color Wash or Pickled Wood
Thin the milk paint with additional water and brush it over raw wood. Wipe back some paint with a clean cloth before it dries. This creates a soft washed effect that lets the grain remain visible.
A pale gray, soft white, muted blue, or dusty green wash can make orange-toned wood look calmer and more current without hiding everything underneath. It is a good option when you want the furniture to look refreshed rather than completely repainted.
4. Layered Vintage Patina
For a layered finish, apply one milk paint color as the base coat and allow it to dry. Add a second contrasting color on top. Once the top layer is dry, gently sand or wipe selected areas to reveal the lower color.
For example, a muted mustard base beneath a weathered blue topcoat can create an aged European cabinet look. A warm cream base beneath charcoal or deep green can create a more refined antique finish. The trick is restraint. Furniture should look aged, not like it lost a fight with a belt sander.
How Many Coats of Milk Paint Do You Need?
Most furniture projects need two thin coats. The first coat may look uneven or slightly translucent, especially on dark wood. Do not panic. Milk paint often looks dramatically better after the second coat.
Allow each coat to dry before adding another. Drying time can vary depending on humidity, temperature, surface type, and paint thickness. Thin coats usually dry faster and create a stronger-looking finish than one heavy coat.
If you apply too much paint too quickly, you may see cracking, uneven texture, or a finish that feels thicker than you intended. Milk paint likes patience. It is old-fashioned paint, and old-fashioned paint has opinions.
Do You Need to Seal Real Milk Paint?
For decorative pieces, low-use furniture, and intentionally distressed projects, you may choose to leave milk paint unsealed. The matte finish will remain soft and porous, and it may continue to develop wear over time.
For tabletops, kitchen furniture, cabinets, children’s furniture, bathroom pieces, or anything exposed to fingerprints, spills, and regular cleaning, a protective finish is strongly recommended.
Wax
Furniture wax adds a soft sheen and can deepen the color of milk paint. It is a popular choice for vintage-style furniture, especially dressers, sideboards, and decorative cabinets. However, wax may not be the best choice for heavily used tabletops or kitchen surfaces because it requires periodic maintenance.
Finishing Cream or Clear Topcoat
A clear topcoat creates a more washable, durable surface. This is usually the better choice for tables, cabinets, bathroom furniture, and high-touch surfaces. Apply thin coats and allow each layer to dry fully.
Oil Finishes
Oil finishes can add warmth and depth, particularly on raw wood projects. However, test the finish first because oils may alter the paint color or deepen it more than expected. Always use the specific finish according to its manufacturer instructions and allow enough curing time before heavy use.
Common Real Milk Paint Problems and How to Fix Them
The Paint Is Lumpy
Small particles are normal with powdered milk paint, but large lumps can affect the finish. Mix more thoroughly, let the paint rest, and strain it through a fine mesh sieve before brushing it onto furniture.
The Paint Is Too Thick
Add water a little at a time. Thick paint can drag, create brush marks, and make it difficult to get even coverage. It is easier to add water than to rescue paint that has become soup, so make small adjustments.
The Paint Is Chipping Too Much
Chipping usually happens when milk paint is applied to a nonporous or previously finished surface without enough mechanical adhesion. Remove loose paint, lightly sand the surface, clean it thoroughly, and use a bonding agent for the next coat. Then seal the final finish if you want to prevent future flaking.
The Finish Looks Uneven
Uneven color can happen if the paint settles in the container, the surface absorbs paint differently in different areas, or the first coat is too thin. Stir frequently, apply a second coat, and lightly sand between layers if needed.
Real Milk Paint vs. Chalk Paint
Milk paint and chalk-style paint are often compared because both can create matte, vintage furniture finishes. However, they behave differently.
Real Milk Paint begins as a powder that you mix with water. It offers more flexibility in consistency, color intensity, and finish effects. It can create an authentic chippy look, especially over sealed furniture.
Chalk-style paint is generally sold ready to use. It is often thicker, easier for beginners to apply straight from the container, and more predictable on previously painted furniture. But it usually does not create the same naturally irregular patina that true milk paint can produce.
Choose milk paint when you want a finish with depth, movement, and old-world character. Choose a ready-mixed furniture paint when you need a very controlled result and do not want to mix anything more complicated than coffee.
Who Will Love Real Milk Paint?
Real Milk Paint is especially appealing to people who enjoy the process of furniture painting, not just the final before-and-after photo. It is for the person who notices wood grain, loves old hardware, saves interesting chair legs “just in case,” and understands that an imperfect finish can look more beautiful than a perfectly smooth one.
It may not be the best choice for someone who wants a flawless, high-gloss, factory-style result. But for furniture painters who want a matte finish, a rustic look, a layered patina, or authentic distressing, it is one of the most creative paints available.
Experience Notes: Painting a Thrifted Nightstand With Real Milk Paint
The following is a composite workshop experience based on common Real Milk Paint furniture-painting methods and outcomes.
The project started with a small thrifted nightstand that had good bones, which is furniture-flipper language for “the drawers worked, and nobody had used it as a planter.” It was solid wood, slightly scratched, and covered in an orange-toned varnish that made it look like it had been living under fluorescent lights since 1987.
The original plan was simple: paint it a soft blue-gray, add new brass hardware, and turn it into a calm, modern bedside table. Naturally, the project became less simple the moment the paint started doing what true milk paint does best: having a personality.
First, the nightstand was cleaned carefully to remove dust, polish residue, and whatever mysterious sticky substance had been hiding near the drawer pulls. The finish was lightly scuff-sanded with fine-grit sandpaper. Because the goal was a smooth, even finish rather than a distressed one, a bonding additive was mixed into the first coat of Real Milk Paint.
The paint was mixed at approximately one part powder to one part water. At first, the mixture looked slightly foamy and thinner than expected. After resting for about 20 minutes and stirring again, it became smoother and easier to work with. The texture was not exactly like conventional latex paint. It felt lighter, more fluid, and more responsive to the brush.
The first coat looked uneven. Very uneven. The top of the nightstand absorbed paint differently from the drawer fronts, and the side panels had a few places where the original finish still seemed suspiciously proud of itself. This is the moment when many beginner furniture painters begin questioning every life decision that led them to a paintbrush.
But after the first coat dried, the nightstand already had a softer, more interesting appearance. The second coat made a dramatic difference. The color became more consistent, the brushstrokes softened, and the furniture began to look intentional instead of accidental.
One drawer edge showed a tiny patch of unexpected chipping. Instead of treating it like a disaster, the edge was lightly sanded to blend it into the design. That little imperfect area ended up becoming one of the best details on the piece. It looked natural, subtle, and far more believable than artificially distressed furniture often does.
After the paint dried overnight, the surface was lightly buffed with fine sandpaper. A clear protective topcoat was then applied because nightstands deal with water glasses, phones, candles, books, and the occasional snack that somehow becomes part of the bedtime routine.
The final result was not glossy, perfectly smooth, or indistinguishable from factory furniture. It was better than that. The milk-painted nightstand had a soft matte finish, faint texture, and a depth that made the piece look older, calmer, and more expensive than it actually was.
The biggest lesson from the project was that Real Milk Paint works best when you stop trying to force it into behaving exactly like modern paint. It rewards preparation, thin coats, patience, and a willingness to let the finish have a little character. In furniture painting, that is often the difference between a piece that looks merely painted and one that looks like it has a story.
Final Thoughts
The Real Milk Paint Company gives furniture painters something increasingly rare: a finish that can be controlled without becoming sterile. You can mix it smooth, thin it into a wash, build it into rich color, distress it gently, or let it chip naturally over time. The result can be rustic, elegant, playful, weathered, or quietly modern.
For your next furniture makeover, start with a test board or an inconspicuous spot. Learn how the paint reacts to the surface, decide whether you want chipping or adhesion, and choose a sealer based on how the furniture will be used. Then let the paint do what it does best: turn an ordinary piece of furniture into something that looks collected, loved, and entirely more interesting than it was before.