Shooting a soccer ball looks simple until you try to do it under pressure, with a defender breathing down your neck, a goalkeeper waving like an inflatable tube man, and your teammates shouting helpful advice such as “Shoot!” as if that had never occurred to you. The good news is that learning how to shoot a soccer ball is not about having superhero legs. It is about using the right technique for the right moment.
There are many types of soccer shots, but most players can dramatically improve their finishing by mastering three core methods: the instep drive, the inside-of-the-foot placement shot, and the chip shot. These three shooting techniques cover power, accuracy, and creativity. Together, they give you a practical toolkit for scoring from distance, finishing calmly in the box, and punishing a goalkeeper who wanders too far off the line.
This guide breaks down each method step by step, explains when to use it, highlights common mistakes, and gives you simple drills to practice. Whether you are a beginner learning soccer shooting basics or a serious player trying to improve finishing, these techniques will help you strike the ball with more confidence, control, and purpose.
Why Soccer Shooting Technique Matters
A powerful shot is exciting, but power without control usually creates a souvenir for someone sitting behind the goal. Good soccer shooting technique helps you control the ball’s direction, height, speed, and spin. It also protects your body from unnecessary strain because you are striking through the ball efficiently instead of swinging like you are chopping firewood.
Great finishers do not use the same shot every time. They read the situation. If the goalkeeper leaves space at the far post, they may use a placed shot. If defenders are backing away, they may unleash a driven laces shot. If the goalkeeper rushes forward, they may gently chip the ball over them with the emotional calm of someone ordering coffee.
The Basic Shooting Principles
Before learning the three ways to shoot a soccer ball, keep these universal principles in mind:
- Plant foot placement: Your non-kicking foot should usually land beside the ball and point toward your target.
- Locked ankle: A firm ankle creates a cleaner strike and prevents the ball from wobbling unpredictably.
- Eyes on the ball: Look up before the shot to choose your target, then keep your head steady as you strike.
- Body position: Leaning too far back sends the ball high. Getting your chest over the ball helps keep shots lower.
- Follow-through: Your kicking leg should continue toward the target or through the ball, depending on the shot type.
Now let’s get into the three most useful soccer shooting techniques every player should know.
1. The Instep Drive: Shoot With Power
The instep drive, often called the laces shot, is the classic power shot in soccer. This is the technique players use when they want to hit the ball hard from distance, finish with authority, or make the goalkeeper suddenly reconsider their career choices.
Despite the nickname “laces shot,” the strike should not be floppy or loose. You are not casually tapping the ball with your shoelaces. You are using the firm upper part of your foot, keeping the ankle locked, and driving through the center of the ball.
When to Use the Instep Drive
Use the instep drive when you have space to swing your leg and need more power. It works well for long-range shots, rebounds outside the box, breakaway finishes when the goalkeeper is set, and situations where the ball is rolling nicely in front of you.
This shot is also useful when the keeper is positioned well and you need pace to beat them. A placed shot may be too slow in that situation, but a clean instep drive can force a save, create a rebound, or fly into the corner if your aim is sharp.
How to Shoot With the Instep
- Approach the ball at a slight angle. A small angle gives your leg room to swing naturally.
- Place your plant foot beside the ball. Keep it about six inches away, with your toes pointing toward the target.
- Lock your ankle. Point your toes down and keep the foot firm.
- Strike the center of the ball. Hit through the middle using the upper part of your foot.
- Keep your chest slightly over the ball. This helps stop the ball from launching into low orbit.
- Follow through strongly. Let your kicking leg continue forward through the shot.
Common Instep Drive Mistakes
The biggest mistake is leaning back too much. If your shoulders are behind the ball at contact, the ball will rise. A little height is fine. Sending it over the fence is less ideal, especially if the neighbor already dislikes soccer.
Another common mistake is striking with a relaxed ankle. A loose foot absorbs energy and makes the shot weak or unpredictable. Think of your foot as a firm striking surface. The ball should feel like it pops off your foot, not like it gets slapped by a wet noodle.
Players also often forget to aim. Power is fun, but goalkeepers are usually not polite enough to dive out of the way. Pick a corner before shooting, then focus on clean contact.
Simple Drill for the Instep Drive
Place five balls outside the penalty area or about 18 to 22 yards from goal. Take one touch forward and strike each ball with your laces. Start at 60 percent power and focus on clean contact. Once your shots stay low and on target, increase the power.
For extra challenge, aim at specific zones: low left corner, low right corner, high left corner, high right corner, and straight down the middle. This builds both power and accuracy.
2. The Inside-of-the-Foot Shot: Shoot With Accuracy
The inside-of-the-foot shot is the reliable, calm, “I did my homework” version of soccer shooting. It is not always flashy, but it is extremely effective. Instead of blasting the ball, you use the inside of your foot to guide it into a specific area of the goal.
This shot is sometimes called a placed shot because placement matters more than raw power. It is especially useful near the goal, in one-on-one situations, and when the goalkeeper leaves a clear opening.
When to Use the Inside-of-the-Foot Shot
Use this shot when accuracy is more important than speed. If you are inside the penalty area and have time to pick your spot, the inside-foot finish is often the smartest choice. It is also excellent for aiming across the goalkeeper into the far corner.
For example, imagine you are approaching from the left side of the box with the goalkeeper guarding the near post. Instead of smashing the ball directly at them, you can open your body and pass the ball firmly into the far corner. It looks simple, but simple goals count exactly the same as dramatic ones. The scoreboard is not giving bonus points for thunder.
How to Shoot With the Inside of the Foot
- Look up early. Check the goalkeeper’s position before you strike.
- Plant your non-kicking foot next to the ball. Point it toward your chosen target.
- Open your hips slightly. This helps you guide the ball with the inside surface of your foot.
- Turn your kicking foot outward. Use the flat inside area from the arch toward the big toe.
- Strike through the middle of the ball. Keep the contact smooth and controlled.
- Follow through toward your target. Your foot should finish in the direction you want the ball to travel.
Common Inside-Foot Shot Mistakes
One common mistake is making the shot too soft. A placed shot should still be firm. You are not rolling a polite invitation to the goalkeeper. You are passing the ball into the goal with purpose.
Another mistake is opening the hips too much and dragging the shot wide. If your body faces away from the target, the ball will usually follow. Keep your plant foot, hips, and follow-through connected to the direction of the shot.
Players may also stare at the goalkeeper too long and forget the ball. Scan first, then focus on contact. The ball cannot be trusted to behave if you ignore it at the critical moment.
Simple Drill for the Inside-Foot Shot
Set up two small target gates in the corners of the goal using cones, shoes, or training markers. Start about 12 yards out. Pass the ball into each corner using the inside of your foot. The goal is not maximum power; the goal is repeatable accuracy.
Progress by adding a moving ball. Have a teammate pass to you from the side, take one touch, and finish into a corner. Then try first-time finishes. In real games, the ball rarely sits still and politely waits for your masterpiece.
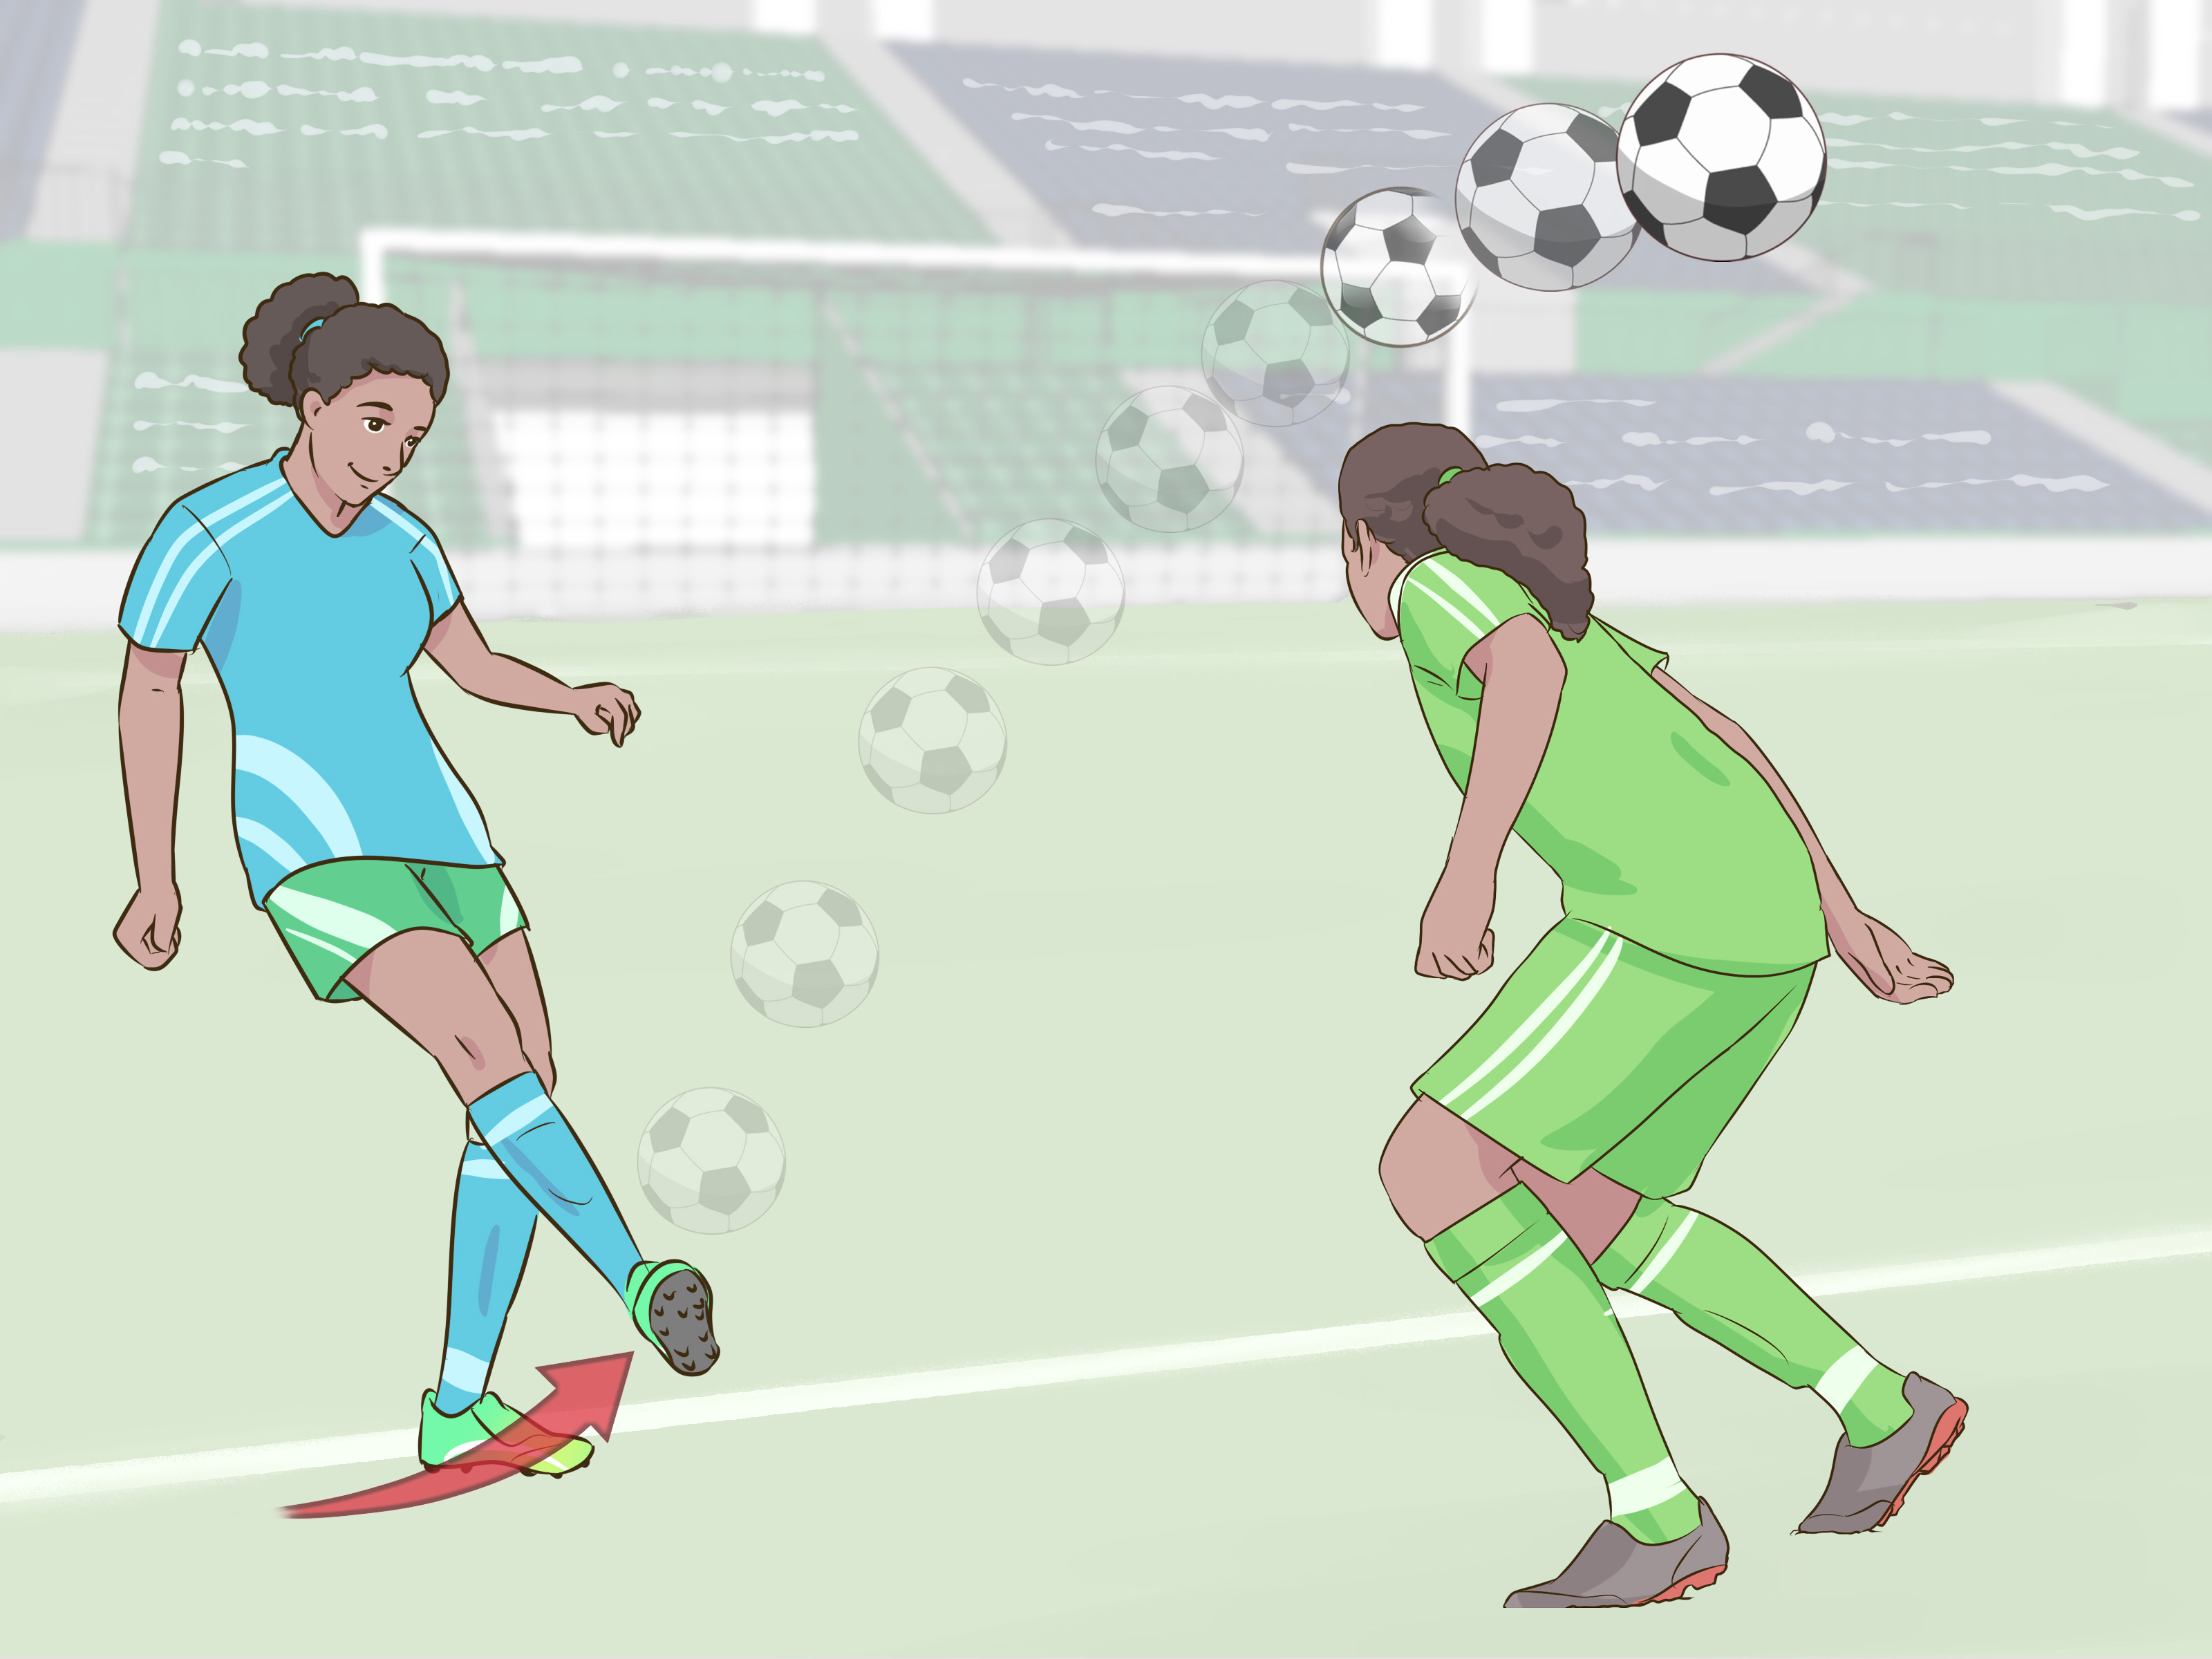
3. The Chip Shot: Shoot With Touch and Creativity
The chip shot is the clever little cousin of the power shot. Instead of driving the ball through the goalkeeper, you lift it over them. A good chip shot requires timing, confidence, and touch. A bad chip shot often looks like a pass to the keeper, followed by the shooter pretending they meant to do that.
A chip is not just a weak kick that accidentally goes upward. It is a controlled shot where you strike under the ball to create lift. In many cases, the ball rises quickly, travels in an arc, and drops behind the goalkeeper.
When to Use the Chip Shot
The chip shot is most useful when the goalkeeper comes off the line or goes to ground too early. If the keeper rushes toward you, the space behind them becomes the target. Instead of trying to shoot through their body, you lift the ball over them.
It can also work when defenders block low shooting lanes. A chip over a sliding defender or a crowded penalty area can create a surprising finish. However, this is a higher-risk technique, so use it when the moment is right. Chipping from 30 yards while your coach screams “Keep possession!” is not always the path to long-term team harmony.
How to Shoot a Chip Shot
- Approach under control. You need balance more than speed.
- Place your plant foot slightly beside and behind the ball. This helps you get under it.
- Lean back slightly, but not wildly. A small backward lean helps lift the ball.
- Strike below the center of the ball. Use the top or front part of your foot to scoop upward.
- Use a short, sharp motion. The chip is about touch, not a giant backswing.
- Finish with a controlled upward follow-through. The ball should rise quickly and drop into space.
Common Chip Shot Mistakes
The most common mistake is using too much power. A chip should float over the goalkeeper and drop into the goal. If you smash it, the ball may travel over the crossbar, over the fence, and possibly into another zip code.
Another mistake is waiting too long. If the goalkeeper is already close enough to block the ball, you may not have enough room to lift it over them. The best chip shots happen early, right as the keeper commits forward.
Players also sometimes hit too low on the ball without enough control, causing it to pop straight up. That gives the goalkeeper time to recover, catch it, and silently judge your decision-making.
Simple Drill for the Chip Shot
Place a cone, bag, or small hurdle about six yards in front of you. Practice chipping the ball over the object and landing it in a target area behind it. Start close and focus on soft lift. As you improve, increase the distance and try chipping into a small goal.
To make the drill more game-like, have a teammate act as a passive goalkeeper who starts on the goal line and then steps forward. Your job is to recognize the movement and chip at the right moment.
How to Choose the Right Shot in a Game
The best players do not decide on a shot before the situation develops. They read the goalkeeper, the defenders, the ball position, and their own body shape. Shooting is part technique and part decision-making.
Choose the Instep Drive When You Need Power
Use the instep drive when you are farther from goal, when you have space, or when the goalkeeper is set and needs to be beaten with pace. This shot is also strong for rebounds, loose balls, and moments when defenders are closing but have not blocked your swing.
Choose the Inside-Foot Shot When You Need Accuracy
Use the inside-foot shot when you are close enough to guide the ball into a corner. It is ideal when the goalkeeper is leaning one way, when you can aim across goal, or when you want a calm finish instead of a dramatic blast.
Choose the Chip Shot When the Goalkeeper Moves Forward
Use the chip when the keeper leaves the goal line and creates space behind them. It is not the safest shot, but when executed correctly, it can be one of the most satisfying finishes in soccer.
Body Mechanics That Improve Every Soccer Shot
No matter which shooting method you use, your body mechanics matter. The ball responds to your foot, but your foot is controlled by your hips, core, balance, and timing. In other words, shooting is a whole-body action, not just a leg swing.
Balance Comes First
Players often miss because they are off balance before they shoot. A rushed shot from a falling body is hard to control. Use your arms naturally for balance, keep your head steady, and avoid jumping backward unless your goal is to recreate modern art with the flight path of the ball.
Your Plant Foot Is the Steering Wheel
Your plant foot has a huge influence on shot direction. If it points at the corner, the shot has a better chance of going there. If it points toward the hot dog stand, do not be shocked when the ball follows its dreams.
Contact Point Controls Height
Striking through the center of the ball generally keeps it more direct. Hitting below the center creates lift. Hitting too far under the ball creates a balloon. For low shots, keep your chest over the ball and strike through it. For chips, get under the ball intentionally.
Practice Plan: Improve All 3 Soccer Shots
A good soccer shooting practice should include repetition, realistic movement, and decision-making. Do not just stand still and shoot 50 balls. That can help contact, but games are messy. You need to practice receiving, dribbling, adjusting your feet, and shooting under light pressure.
15-Minute Shooting Routine
- Minutes 1–5: Instep drives from outside the box. Focus on clean contact and low shots.
- Minutes 6–10: Inside-foot finishes from 10 to 14 yards. Aim for corners.
- Minutes 11–15: Chip shots over a cone or passive goalkeeper. Focus on timing and touch.
Repeat this routine two or three times per week, and track your results. Count how many shots hit the target, how many go into specific corners, and how many chips land in the target zone. Progress becomes easier to see when you measure it.
Extra Experience: Lessons From Practicing 3 Ways to Shoot a Soccer Ball
One of the biggest lessons from practicing these three soccer shooting techniques is that improvement rarely feels dramatic at first. The first few sessions may feel awkward. Your laces shot may fly too high, your placed shot may roll gently into the goalkeeper’s arms, and your chip may look less like Lionel Messi and more like a confused clearance. That is normal. Shooting is a skill built through repetition, adjustment, and patience.
When practicing the instep drive, many players discover that power is not really the first problem. Contact is. A player who swings at 100 percent but strikes the wrong part of the ball will not shoot as well as someone who swings at 70 percent with clean technique. A useful experience is to spend an entire practice session shooting at half speed. At first, this feels boring. Then something clicks. The foot starts finding the center of the ball. The ankle stays firm. The ball begins traveling straighter. After that, adding power becomes much easier.
The inside-foot shot teaches a different lesson: calm is a weapon. In small-sided games, players often rush near the goal because they feel pressure. But when you practice placed finishing, you learn that a quick glance at the goalkeeper can change everything. If the keeper is guarding the near post, the far corner may be open. If the keeper is leaning left, a right-side finish may be available. This shot rewards players who think before they panic. And honestly, that is useful in soccer and in group projects.
The chip shot teaches humility. It looks beautiful when it works and hilarious when it does not. Many players try to chip with too much force because they are afraid the ball will not travel far enough. The better approach is to focus on touch and timing. During practice, start close to goal and chip over a cone. Then move farther away. Then add a goalkeeper who steps forward. Over time, you begin to recognize the exact moment when the goalkeeper is vulnerable. That recognition is more important than the technique itself.
Another valuable experience is learning to shoot after movement. In a real game, you usually do not receive a perfectly still ball with no defenders nearby. Practice taking one touch out of your feet before shooting. Practice shooting after a sprint. Practice finishing a pass that comes slightly behind you. These messy repetitions make game situations feel familiar.
It also helps to practice with both feet. Your weaker foot may feel like it belongs to a baby giraffe at first, but even basic improvement can make you much harder to defend. A player who can only shoot with one foot becomes predictable. A player who can place the ball with either foot has more options and needs less time to finish.
Finally, remember that confidence comes from preparation. The player who has practiced the instep drive, the inside-foot finish, and the chip shot will not need to guess in front of goal. They will recognize the situation and choose the right tool. That is the real value of learning three ways to shoot a soccer ball. You are not just learning kicks; you are learning decisions.
Conclusion
Learning how to shoot a soccer ball well starts with mastering the right technique for the right situation. The instep drive gives you power, the inside-of-the-foot shot gives you accuracy, and the chip shot gives you creativity when the goalkeeper steps forward. Together, these three soccer shooting methods can make you a more complete and dangerous attacking player.
Start slowly, focus on clean contact, and practice with intention. Do not chase power before technique. Do not ignore accuracy because blasting the ball feels more exciting. And do not save the chip shot only for highlight reels; practice it until it becomes a real option. With time, repetition, and a little patience, your shots will become sharper, smarter, and much more likely to make the net move instead of the parking lot.
Note: This article is written in clean body-only HTML for web publishing and is based on established soccer coaching principles, practical shooting drills, and real training concepts.