A diaper cake is one of those baby shower gifts that looks like it required a professional party planner, a secret craft degree, and possibly a tiny construction crew. The truth? You can make a beautiful, sturdy, gift-worthy diaper cake without rolling a single diaper. Yes, really. No rubber-banding 72 individual diapers. No chasing runaway diaper burritos across the table. No wondering why your “cake” looks like a leaning tower of panic.
This no-roll diaper cake method is simple, clean, and surprisingly elegant. Instead of rolling each diaper into a tube, you layer diapers in a circular moldusually a cake pan, mixing bowl, springform pan, or round containerso they fan around the center like a soft, practical, baby-ready layer cake. Once secured with ribbon, twine, or large rubber bands, the tiers stack beautifully and can be decorated with baby items, flowers, toys, washcloths, socks, pacifiers, or themed toppers.
The best part is that a no-roll diaper cake keeps the diapers flatter and easier for the parents to use later. After all, the goal is not just to impress Aunt Linda at the baby shower. The goal is to give the parents something adorable that does not create extra work at 3 a.m. when the baby decides sleep is optional.
What Is a No-Roll Diaper Cake?
A no-roll diaper cake is a baby shower centerpiece made from disposable or cloth diapers arranged in tiers without individually rolling each diaper. Traditional diaper cakes often require each diaper to be rolled tightly and secured with a small rubber band. That method works, but it takes time and can leave diapers curled or creased.
The no-roll version uses a mold to shape diapers into round layers. You place diapers around the inside edge of a pan or container, slightly overlapping them until they form a full circle. Then you secure the layer, remove it from the mold, and repeat the process with smaller containers for the upper tiers. The result is smooth, polished, and much faster than the classic rolled style.
This technique is ideal for beginners, last-minute baby shower planners, and anyone who wants a Pinterest-worthy gift without sacrificing an entire afternoon to diaper origami.
Why Choose the No-Roll Method?
It Saves Time
Rolling dozens of diapers one by one can turn a sweet DIY project into a hand-cramping marathon. With the no-roll method, you shape an entire tier at once. A three-tier diaper cake can usually be assembled in under an hour once your supplies are ready.
It Looks Cleaner
No-roll diaper cakes often have a smooth, layered appearance because the diapers fan neatly around the tier. The sides look more like a real cake, especially after you add wide ribbon around each layer.
The Diapers Stay More Usable
Because the diapers are not tightly curled, they are easier for parents to remove and use. That matters. A diaper cake should be cute, but it should also be practical. New parents need diapers more than they need a mysterious sculpture that takes ten minutes to disassemble.
It Is Easier to Customize
The flatter layers make it easy to tuck in baby socks, pacifiers, bibs, washcloths, travel-size baby care products, or small toys. You can match the nursery theme, baby shower colors, season, or personality of the parents.
Supplies You Need
Before you start, gather everything on a clean table or kitchen counter. A diaper cake is not food, but it is still a baby item, so clean hands and a clean surface are important.
Basic Supplies
- 50 to 75 diapers, depending on the size of the cake
- Three round containers in different sizes, such as cake pans, mixing bowls, or springform pans
- Large rubber bands, string, twine, or clear elastic cord
- Wide ribbon for covering the bands
- A sturdy cake board, cardboard circle, tray, or cake stand
- One cardboard tube, paper towel roll, baby bottle, or dowel for center support
- Double-sided tape, glue dots, or removable adhesive
- Scissors
Optional Decorations
- Baby socks
- Pacifiers
- Teething rings
- Small board books
- Washcloths
- Baby lotion or shampoo
- Stuffed animal topper
- Artificial flowers or greenery
- Name tag, letter charm, or baby shower sign
- Mini rattles or soft toys
For diapers, Size 1 is often a smart choice because many babies outgrow newborn diapers quickly. However, if the parents specifically requested newborn diapers, cloth diapers, sensitive-skin diapers, or a certain brand, follow their preference. The best diaper cake is the one the parents can actually use.
How Many Diapers Do You Need?
The exact number depends on the size of your containers and how full you want each tier to look. As a general guide, plan on about 30 to 40 diapers for the bottom tier, 15 to 25 for the middle tier, and 8 to 15 for the top tier. A small two-tier cake may use around 35 to 45 diapers, while a large three-tier cake may need 70 or more.
If you are unsure, buy a little more than you think you need. Extra diapers can be added to a gift basket, tucked around the cake base, or simply given to the parents. There is almost no such thing as “too many diapers” in a house with a newborn. That phrase belongs in the same fantasy category as “too much sleep.”
Step-by-Step Guide: How to Make a Diaper Cake without Rolling
Step 1: Prepare Your Base
Start with a sturdy base such as a cake board, serving tray, or thick cardboard circle covered in wrapping paper. The base should be wider than your bottom tier so the cake feels balanced. If you plan to transport the diaper cake, choose something strong enough to support the weight without bending.
Place a cardboard tube, paper towel roll, baby bottle, or wooden dowel in the center of the base. This center support helps keep the tiers aligned. A baby bottle is a fun option because it becomes part of the gift, but a paper towel roll works perfectly if you are keeping the project budget-friendly.
Step 2: Choose Your Mold
Select a large round container for the bottom tier. A 10-inch cake pan, large mixing bowl, or springform pan works well. The container acts as your guide so the diapers form a neat circle.
For the middle and top tiers, choose smaller containers. You might use an 8-inch cake pan for the middle tier and a 6-inch bowl for the top. The exact sizes do not have to be perfect. The cake just needs to taper upward so it looks balanced.
Step 3: Fan the Diapers Around the Mold
Place the first diaper inside the mold with the folded edge facing upward or outward, depending on the look you prefer. Add the next diaper slightly overlapping the first. Continue adding diapers around the inside of the container so they fan in the same direction.
Think of it like arranging flower petals or cards in a circular pattern. Each diaper should overlap the previous one just enough to create a smooth ring. Keep going until the mold is full and the diapers feel snug.
If the center looks hollow, place a baby bottle, rolled blanket, or small pack of wipes in the middle. This gives the tier structure and adds another useful gift item.
Step 4: Secure the Tier
Once the diapers are arranged, wrap a large rubber band, twine, or clear elastic cord around the entire tier while it is still inside the mold. This is the only slightly tricky part, so move slowly. If you are using a springform pan, you can secure the diapers first and then release the side of the pan.
The band should be snug enough to hold the diapers together but not so tight that it bends or crushes them. Remember, we are making a diaper cake, not training for a wrestling match.
Step 5: Remove the Tier from the Mold
Carefully lift the diaper tier out of the container. If it feels loose, adjust the diapers and tighten the band slightly. Set the bottom tier onto your prepared base, sliding it over the center support if you are using one.
Make sure the tier sits flat. If one side is higher, gently press and adjust until the layer looks even. Small imperfections are normal and will be hidden by ribbon and decorations.
Step 6: Repeat for the Middle and Top Tiers
Use the same method to create the second and third tiers. Arrange diapers in a smaller mold, secure the ring, remove it carefully, and stack it on top of the previous layer. Each tier should be centered over the one below it.
If your center support is tall enough, slide each tier down over it. If not, you can use a short dowel or straw between layers for extra stability. For a cake that will travel in a car, center support is highly recommended. Baby showers are exciting enough without a diaper landslide in the back seat.
Step 7: Add Ribbon
Wrap wide ribbon around each tier to cover the rubber bands or twine. Secure the ribbon with double-sided tape, glue dots, or a small dab of hot glue applied only to the ribbon, never directly to the diapers. Parents should be able to use every diaper without peeling off craft glue like they are restoring ancient pottery.
You can layer ribbons for a more polished look. For example, use a wide satin ribbon as the base and a thinner patterned ribbon on top. Burlap ribbon works well for rustic themes, while pastel satin feels classic and soft.
Step 8: Decorate the Cake
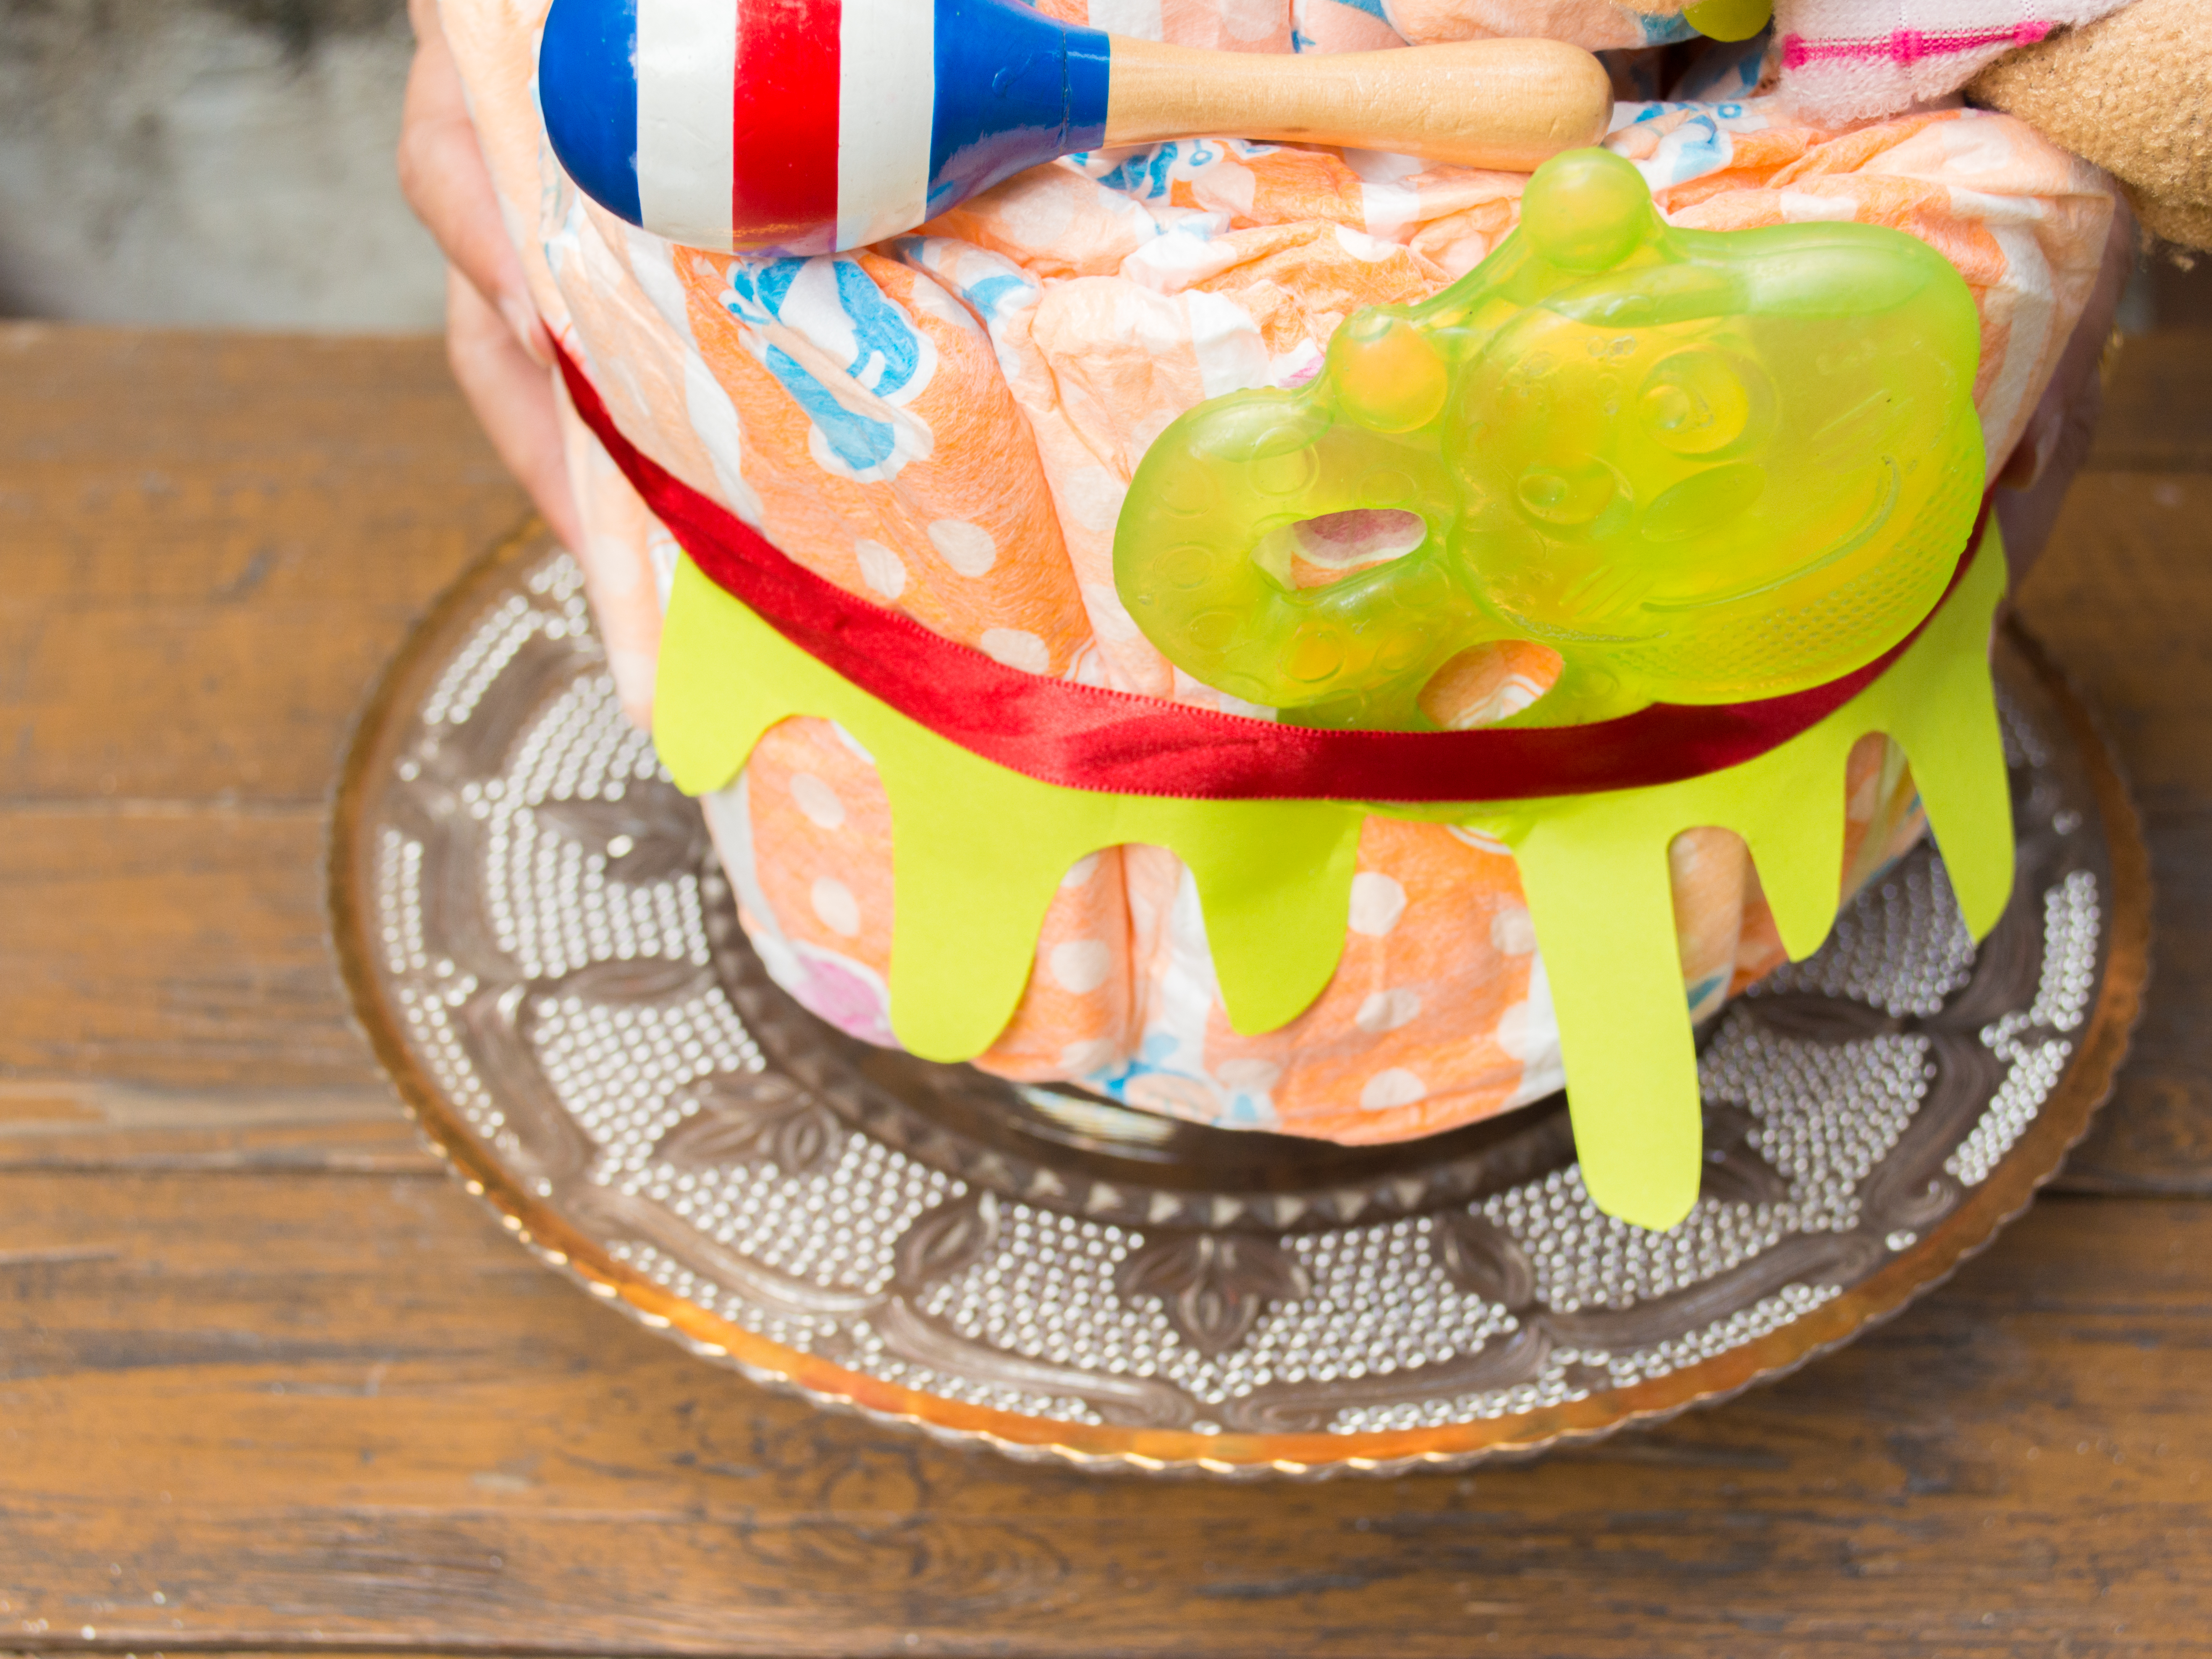
Now comes the fun part. Add small baby gifts around the tiers. Tuck baby socks into the ribbon, clip pacifiers onto the sides, place washcloth “flowers” around the base, or add teething rings as colorful accents.
Choose decorations based on the shower theme. For a woodland theme, add faux greenery, tiny stuffed animals, and neutral ribbon. For a princess theme, use blush ribbon, soft florals, and a sparkly topper. For a nautical theme, navy ribbon, white rope, and a small plush whale can look adorable. For a minimalist modern shower, stick to cream, sage, tan, and simple wooden accents.
Step 9: Add a Topper
The topper gives the diaper cake personality. A small stuffed animal is always a safe choice. You can also use baby shoes, a bow, a small book, a rubber duck, a plush moon, or a custom name sign.
Keep the topper lightweight. If it is too heavy, the top tier may sink or lean. Cute is good. Cute with structural integrity is better.
Step 10: Wrap for Transport
If you are taking the diaper cake to a baby shower, wrap it in clear cellophane and tie the top with ribbon. This keeps everything clean and helps hold the decorations in place. Place the cake on a flat surface in the car, preferably in a box or basket so it does not slide around.
No-Roll Diaper Cake Design Ideas
Classic White and Gold
Use white diapers, ivory ribbon, gold accents, and a neutral stuffed animal. This design works beautifully for elegant baby showers and gender-neutral celebrations.
Boho Baby Cake
Choose tan, cream, rust, or sage ribbon. Add dried-look artificial flowers, wooden beads, and a small macramé-style topper. This style photographs well and feels modern without trying too hard.
Storybook Theme
Use a small board book as the topper and decorate with characters, soft toys, or printed tags inspired by favorite bedtime stories. This is perfect for parents who are building a baby library.
Bath-Time Theme
Add baby wash, lotion, hooded towels, washcloths, and a rubber duck topper. It is practical, cheerful, and very easy to shop for.
Little Adventure Theme
Use forest animals, mountains, stars, or travel-inspired decorations. Add a tiny plush bear or fox on top. This theme works especially well for outdoor-loving parents.
Common Mistakes to Avoid
Using Too Few Diapers
A sparse diaper cake can look wobbly or unfinished. If a tier feels loose, add more diapers until the circle is firm and full. The mold should feel packed but not crushed.
Skipping the Center Support
A small two-tier cake may survive without support, but a three-tier cake benefits from a center column. It helps the cake stay straight, especially during transport.
Gluing Decorations to Diapers
Avoid attaching anything directly to the diapers with hot glue or strong adhesive. Use ribbon, clips, removable glue dots, or decorative picks instead.
Ignoring the Registry
If the parents have a diaper brand, size, or material preference, follow it. Some babies need fragrance-free, hypoallergenic, or specific diaper styles. A pretty cake is nice, but a useful cake wins.
Overdecorating
It is tempting to add every tiny baby item in the store. Try to keep the design coordinated. Too many colors, patterns, and dangling objects can make the cake look busy. A diaper cake should say “thoughtful gift,” not “baby aisle explosion.”
How to Make the Cake Look Professional
The secret to a polished no-roll diaper cake is consistency. Face the diapers in the same direction. Keep each tier centered. Use ribbon wide enough to hide the securing bands. Choose a simple color palette with two or three main colors. Add decorations in clusters instead of scattering them randomly.
For example, if you are making a sage green and cream diaper cake, use cream diapers, sage ribbon, white artificial flowers, and one soft beige stuffed animal. That is enough. You do not need glitter, balloons, rattles, six bows, and a tiny banner unless the theme calls for maximum party energy.
Another professional trick is to decorate in layers. First, add the ribbon. Second, add medium decorations such as washcloths or socks. Third, add small accents such as tags or pacifiers. Finally, add the topper. This keeps the design balanced and prevents the cake from becoming lopsided.
Can You Make a No-Roll Diaper Cake with Cloth Diapers?
Yes, you can make a no-roll diaper cake with cloth diapers, but the look will be slightly different. Cloth diapers are usually thicker than disposable diapers, so you may need fewer per tier. They may also require a larger mold because they do not fan as tightly.
Use soft elastic or ribbon to secure the tiers without stretching or damaging the fabric. Cloth diaper cakes are especially thoughtful for parents who plan to use reusable diapering products. You can add cloth wipes, wet bags, diaper cream, or baby-safe laundry items as extra gifts.
Budget-Friendly Tips
A diaper cake can look expensive without actually being expensive. Start with diapers from the parents’ preferred brand, then use affordable decorations strategically. Ribbon from a craft store, a cardboard base wrapped in paper, and a simple stuffed animal can go a long way.
Instead of buying many small decorations, choose useful baby items that double as décor. Baby socks can look like flowers. Washcloths can be folded into rosettes. A bottle of baby lotion can become the center support. A board book can serve as both topper and gift.
You can also coordinate with another shower guest. One person buys diapers, another buys baby care items, and another buys decorations. The finished cake can be a group gift that looks generous without one person carrying the entire cost.
How to Store a Diaper Cake Before the Shower
Once assembled, keep the diaper cake in a clean, dry place away from pets, smoke, cooking odors, and moisture. If possible, cover it loosely with cellophane or place it in a large clean bag. Do not store it in a humid bathroom or garage.
Make the cake a few days before the shower rather than weeks in advance, especially if you are using scented decorations, fresh flowers, or items that may gather dust. Artificial flowers are safer and easier than fresh flowers because they will not wilt or leak moisture onto the diapers.
Personal Experience: What I Learned Making No-Roll Diaper Cakes
The first time I made a diaper cake, I used the traditional rolling method. I had a bag of diapers, a pile of rubber bands, and the kind of optimism people have before they realize they are about to roll 60 tiny paper clouds by hand. About halfway through, I understood why craft tutorials always show a smiling person at the beginning and never the part where they are surrounded by supplies, questioning their life choices.
The no-roll method changed everything. Instead of rolling each diaper, I used cake pans as molds. The bottom tier came together quickly because the pan did most of the shaping work. I placed the diapers around the inside edge, overlapped them slightly, and watched the circle form almost by itself. It felt less like crafting and more like discovering a cheat code.
One practical lesson is that the mold matters. A straight-sided cake pan usually creates a cleaner tier than a bowl with sloped sides. A springform pan is even better because you can release the side gently instead of lifting the whole diaper ring out and hoping it behaves. If you only have mixing bowls, they can still work, but you may need to adjust the diapers after removing the tier.
Another lesson is to use more diapers than you think you need. A full tier looks expensive and sturdy. A loose tier looks like it has been through a small emotional crisis. When the diapers are packed neatly, the ribbon sits smoothly and the cake holds its shape better.
Ribbon is also more important than beginners expect. Thin ribbon can disappear or make the cake look unfinished. Wide ribbon hides the support bands and instantly makes the project look intentional. I like using a wide base ribbon with a thinner decorative ribbon layered on top. It is a simple detail, but it makes the cake look like it came from a boutique instead of a kitchen table at midnight.
Decorations should be useful whenever possible. I once added baby socks, a pacifier, a small bottle of baby wash, and a plush animal topper. The parents loved that everything could be used later. That is the beauty of a diaper cake: it can be decorative for the party and practical after the party. Unlike a regular cake, it will not be eaten in twelve minutes by guests who claim they are “just having a small slice.”
Transportation is the final test. A diaper cake may look perfect at home, but the car ride can expose weak construction. I learned to place the cake in a shallow box and surround the base with tissue paper or towels so it does not slide. Clear cellophane helps keep the decorations in place and makes the whole gift feel finished.
The biggest takeaway is that a no-roll diaper cake is forgiving. If a tier looks uneven, you can shift the diapers. If the ribbon looks crooked, you can rewrap it. If one decoration feels too bold, remove it. There is no frosting to smear, no oven involved, and no risk of anyone asking whether the cake is gluten-free. It is a low-stress, high-impact DIY gift that makes the baby shower table look adorable while giving new parents something they will absolutely need.
Conclusion
Learning how to make a diaper cake without rolling is a smart shortcut for anyone who wants a beautiful baby shower gift without spending hours on repetitive crafting. By using round molds, overlapping diapers, securing each tier, and decorating with thoughtful baby items, you can create a centerpiece that looks polished and feels personal.
The no-roll method is faster, cleaner, and easier for parents to take apart later. It works for classic showers, modern themes, rustic parties, gender-neutral celebrations, and last-minute gifts. With the right diapers, sturdy support, pretty ribbon, and a few useful decorations, your diaper cake can become the star of the gift tablewithout making you roll diapers until your hands file a formal complaint.
Note: This original article was written for web publication and synthesized from real U.S. parenting, baby registry, diaper brand, and DIY craft guidance, with source links intentionally omitted as requested.