Every December, Christmas tins appear in American kitchens like tiny, festive magicians. One minute they are full of butter cookies, peppermint bark, chocolate truffles, or Grandma’s mysterious “holiday mix.” The next minute, they are empty, stacked in a cabinet, and somehow multiplying like they attended a secret tin convention.
Before you toss them into the recycling bin, pause. Those colorful metal boxes are not clutter. They are storage containers wearing holiday sweaters. With a little cleaning, a dash of creativity, and maybe a label or two, recycled Christmas tins can become practical organizers for craft supplies, office tools, pantry packets, sewing kits, ornaments, batteries, gift wrap accessories, and all the tiny household items that normally vanish into the Bermuda Triangle of the junk drawer.
This guide shows you how to turn old Christmas cookie tins into smart, charming, budget-friendly DIY storage. The best part? You do not need to be a professional crafter. If you can wash a tin, peel a sticker, and resist eating the last cookie “for project research,” you are already qualified.
Why Recycled Christmas Tins Make Brilliant DIY Storage
Christmas tins are sturdy, reusable, stackable, and often decorative before you do a single thing to them. Unlike flimsy cardboard boxes, metal tins can handle years of opening, closing, moving, labeling, and being shoved onto shelves by someone who swears they are “organizing.”
They also support a simple sustainability habit: reuse before buying new. Instead of purchasing another plastic bin set, you can give an existing container a second life. That saves money, reduces waste, and makes your home feel more personal. A red-and-gold tin holding sewing thread has more personality than a generic storage box named “Container 4.” No offense, Container 4.
What You Can Store in Recycled Christmas Tins
The secret to successful tin storage is matching the tin size to the contents. Small tins are perfect for tiny objects. Deep tins work well for bulkier supplies. Flat tins are excellent for layered items that need protection.
Craft Supplies
Christmas tins are ideal for buttons, beads, stickers, embroidery floss, washi tape, glue sticks, pom-poms, ribbon scraps, and paint markers. If you craft often, sort supplies by category and label each tin clearly. Your future self will thank you when you find the googly eyes in ten seconds instead of three emotional business days.
Office and Desk Organization
Use tins for paper clips, binder clips, rubber bands, sticky notes, charging cables, stamps, push pins, spare pens, and business cards. A shallow tin can sit inside a desk drawer as a divider, while a taller tin can become a pencil cup if you leave the lid off.
Sewing and Mending Kits
Cookie tins have a long history of becoming sewing kits, and honestly, they were born for it. Add needles, thread, spare buttons, safety pins, fabric patches, a measuring tape, small scissors, and a needle threader. Bonus points if the tin still smells faintly like shortbread. That is not required, but it is emotionally supportive.
Holiday Decoration Storage
Flat tins are great for fragile ornaments, gift tags, ornament hooks, ribbon pieces, small garlands, mini lights, and spare bulbs. Add tissue paper or felt scraps inside to protect delicate items. Label the outside so you do not open six tins next December looking for the tiny brass hooks.
Pantry and Kitchen Storage
Clean tins can hold wrapped tea bags, sealed cocoa packets, cookie cutters, cupcake liners, birthday candles, reusable straws, cloth napkins, and small kitchen gadgets. For direct food contact, use caution: only store dry, wrapped, or packaged foods unless the tin is clearly food-safe and in good condition. If the interior is scratched, rusty, sticky, or mysterious, let it retire from food duty and become a craft organizer instead.
Garage, Tool, and Utility Storage
Use sturdy tins for screws, nails, washers, picture hangers, Allen keys, zip ties, furniture pads, and small repair parts. To avoid confusion, label the top and side. A tin labeled “tiny metal things” may feel accurate, but it will not help when you need one specific shelf bracket at 9:47 p.m.
How to Prepare Christmas Tins for Storage
Before decorating or filling your tins, give them a proper reset. Holiday tins often contain sugar, oils, crumbs, paper liners, or sticky residue. Clean tins last longer, smell better, and are less likely to attract pests.
Step 1: Empty and Inspect
Remove all crumbs, liners, tape, stickers, and old labels. Check the tin for rust, dents, sharp edges, loose hinges, or peeling coatings. If the tin is rusty inside, avoid using it for food, fabric, or anything delicate. It can still be useful for garage storage if the rust is minor and dry.
Step 2: Wash Gently
Wash the tin with warm water and mild dish soap. Use a soft sponge rather than steel wool, which can scratch the finish. Dry it immediately and thoroughly, especially around seams and lid edges. Metal and lingering moisture are not best friends.
Step 3: Remove Odors
If a tin smells like peppermint, chocolate, or “holiday attic,” place a small bowl of baking soda inside overnight. You can also air it out with the lid off for a day. Avoid soaking tins for long periods because water can creep into seams and encourage rust.
Step 4: Smooth Any Rough Edges
Most Christmas tins have rolled edges, but inspect carefully. If any area feels sharp, cover it with decorative tape, adhesive felt, or a thin strip of craft foam. Safety is part of the project. A cute organizer should not require a bandage.
Easy DIY Storage Ideas Using Recycled Christmas Tins
Now for the fun part: turning tins into storage that looks intentional instead of “I hid clutter in the nearest cookie container.” These ideas range from five-minute fixes to weekend craft projects.
1. The Labeled Stack System
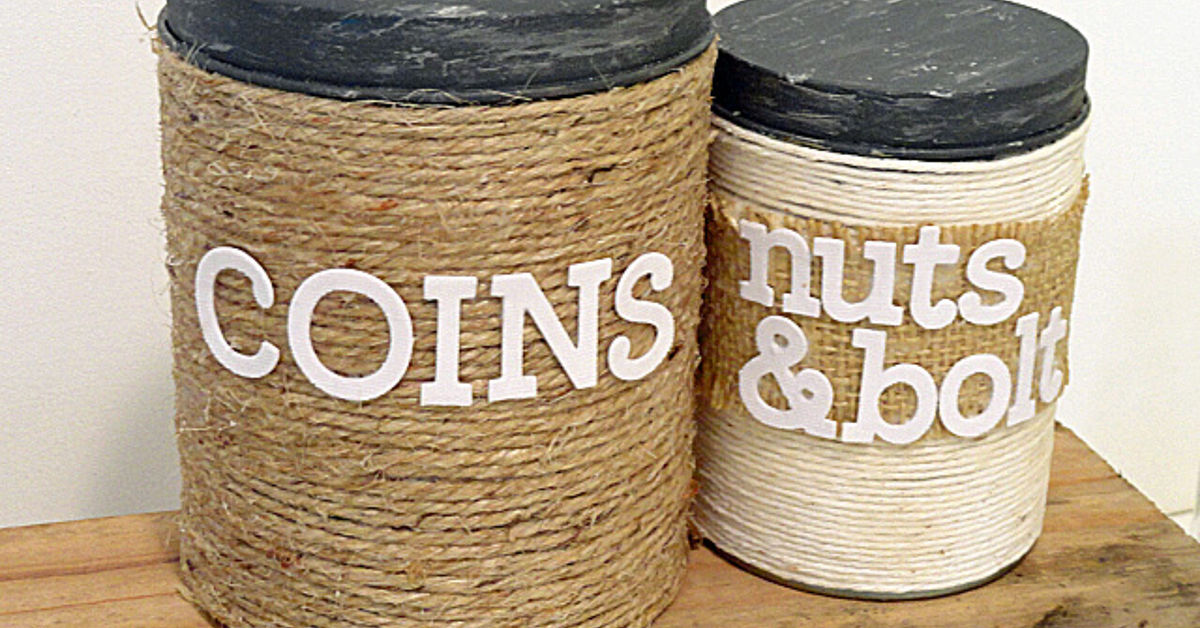
This is the simplest and most practical method. Choose tins of similar shapes, clean them, and label each one by category: batteries, gift tags, ribbon, sewing, markers, receipts, hardware, or spare keys. Stack them on a closet shelf, craft cart, pantry shelf, or garage cabinet.
For a cleaner look, use matching adhesive labels or chalkboard labels. If the tins are wildly different colors, embrace the chaos and call it “vintage eclectic.” That phrase has saved many decorating decisions.
2. Drawer Divider Tins
Shallow rectangular tins can work as drawer organizers. Use them inside kitchen, bathroom, office, or craft drawers to separate small items. Place one tin for clips, one for cords, one for stamps, and one for the mystery key you are afraid to throw away because it probably opens something important.
To keep tins from sliding, add small adhesive felt pads underneath or place a nonslip drawer liner below them.
3. Mini Craft Kits
Create themed craft kits in separate tins. One tin can hold watercolor supplies, another can hold embroidery materials, and another can hold paper-crafting tools. This system is especially helpful for kids because each activity has a contained home.
Add a contents card inside the lid so cleanup is easier. For example: “Watercolor Tin: paint set, brush, mini palette, paper scraps, cloth.” It is like a tiny inventory manager, but less bossy.
4. Gift Wrap Command Center
Use recycled Christmas tins to store gift tags, bows, mini tape rolls, scissors, ribbon scraps, twine, and sticker labels. Keep the tins inside a larger bin with wrapping paper. When birthdays, weddings, or last-minute “oops, I forgot” gifts appear, your supplies are ready.
A flat tin works beautifully for gift tags because it prevents bending. A taller tin can hold ribbon spools upright.
5. Memory Tin Boxes
Turn special holiday tins into memory boxes for cards, photos, children’s drawings, concert tickets, travel keepsakes, or family recipes. Add a label with the year or theme: “Christmas 2026,” “Family Recipes,” “Kids’ Holiday Art,” or “Tiny Things I Refuse to Explain.”
This idea works especially well with decorative tins that already feel sentimental. Instead of hiding memories in random envelopes, give them a proper little home.
6. Magnetic Tin Storage
For lightweight items, attach strong magnets to the back of small tins and place them on a metal board, refrigerator side, filing cabinet, or workshop surface. Use them for pens, clips, push pins, sewing notions, or small craft tools.
Choose tins that are not too heavy and test the magnet strength before loading them. Gravity is a ruthless editor.
7. Portable Repair Kit
Fill a medium tin with household repair basics: mini screwdriver, tape measure, picture hooks, felt pads, zip ties, small flashlight, utility blade, and spare batteries. Keep it in a kitchen drawer or entry closet for quick fixes.
This prevents the classic household ritual of searching the garage for a screwdriver while holding a wobbly chair leg and questioning every life choice.
8. Kids’ Treasure Tins
Give children their own decorated storage tins for small toys, trading cards, crayons, stickers, LEGO pieces, hair clips, or “very important rocks.” Let them choose labels or decorate the lids. When kids help create the system, they are more likely to use it.
Keep categories simple. “Cars,” “Crayons,” and “Stickers” work better than “Assorted Creative Development Materials.” Children are organized by instinct, not corporate filing language.
How to Decorate Recycled Christmas Tins
Some Christmas tins are already adorable. Others look like they were designed during a festive committee meeting in 1986. If the pattern does not fit your home, you can update it with easy materials.
Painted Tin Makeover
Lightly scuff the surface with fine-grit sandpaper, wipe away dust, and apply a primer suitable for metal. Then use spray paint or craft paint designed for metal surfaces. Work in a well-ventilated area and follow the product directions. For indoor projects, low-odor or low-VOC paint options are worth considering.
Let the paint cure fully before stacking or labeling. Dry to the touch is not always the same as ready for real life.
Contact Paper or Peel-and-Stick Wallpaper
For a fast update, wrap tins with contact paper, peel-and-stick wallpaper, or decorative vinyl. This works especially well on square and rectangular tins. Round tins require more patience, scissors, and a peaceful heart.
Decoupage
Use paper scraps, old maps, book pages, wrapping paper, or printed patterns to decoupage the outside of the tin. Apply a thin layer of decoupage medium, smooth the paper down, and seal the top. The result feels custom, artistic, and far more expensive than “container that once held fudge.”
Fabric-Wrapped Tins
Wrap tins in fabric using spray adhesive or craft glue. This is a lovely option for sewing rooms, bedrooms, and nurseries. Add ribbon trim around the lid for a finished look.
Minimalist Labels
If you like a clean style, skip the full makeover and simply add modern labels. White labels on colorful vintage tins can look surprisingly polished. The label says, “I have a system.” The cookie Santa underneath says, “But I still know how to party.”
Best Rooms for Christmas Tin Storage
Craft Room
Use tins to sort beads, embroidery floss, paper punches, stamps, ink pads, glue sticks, stickers, ribbon, and small cutting tools. Stack tins by project type or color family.
Kitchen
Store wrapped tea, coffee pods, cookie cutters, measuring spoons, birthday candles, and cupcake liners. Keep food safety in mind and avoid using damaged tins for unpackaged food.
Home Office
Organize desk supplies, tech accessories, receipts, flash drives, mail stamps, and spare chargers. A tin for “charging cords that actually work” can be life-changing.
Bathroom
Use tins for hair ties, cotton rounds, travel toiletries, nail tools, backup toothbrushes, and makeup samples. Avoid storing wet items inside metal tins because trapped moisture can lead to rust.
Garage or Workshop
Sort hardware, hooks, bits, small tools, tape, and repair supplies. Use clear labels on both the lid and side so you can identify tins when stacked.
Common Mistakes to Avoid
Using Tins Without Cleaning Them
Crumbs attract pests, and sticky residue attracts dust. Always wash and dry tins before reusing them.
Overfilling
If you need to sit on the lid to close it, the tin is not organized. It is under pressure. Remove extras or use a larger container.
Skipping Labels
Decorative tins are cute, but without labels, they become a guessing game. Label the top, side, or both.
Storing Damp Items
Metal tins and moisture do not mix well. Store dry items only, and dry the tin completely before closing it.
Keeping Too Many Tins
Reusing is smart. Hoarding every tin since 2004 is a lifestyle documentary waiting to happen. Keep the best sizes and shapes, then recycle the rest according to local rules.
of Real-Life Experience: What Actually Works With Recycled Christmas Tins
After using recycled Christmas tins for storage, one lesson becomes clear very quickly: the best tin is not always the prettiest tin. The best tin is the one that fits the job. A gorgeous round tin with a Victorian Santa may look charming on a shelf, but if it is too deep, it can swallow small items. You open it for one button and end up excavating like an archaeologist with a glue gun. For tiny supplies, shallow tins are better because everything stays visible.
Labels make the biggest difference. At first, it is tempting to rely on memory. You think, “Of course I will remember that the blue snowflake tin holds spare batteries.” You will not. Three weeks later, you will open it expecting batteries and find birthday candles, a screwdriver bit, and one lonely googly eye. A simple label turns a cute container into a real organizing system.
Another practical discovery: group tins by location, not just category. If you wrap gifts in the dining room, keep the gift tag tin near the wrapping paper, not in a distant craft closet. If you mend clothes in the laundry room, store the sewing tin there. Storage only works when it matches the way you actually live. Otherwise, it becomes a museum exhibit titled “Good Intentions in Metal Boxes.”
Stacking is wonderful, but only up to a point. Three tins stacked neatly? Beautiful. Nine tins stacked in a leaning tower? Suspenseful. For tall stacks, choose tins with flat lids and similar footprints. Put heavier items on the bottom and lighter items on top. If you use tins in a closet, label the sides so you do not have to unstack everything just to find ornament hooks.
Christmas tins are especially useful for seasonal rotation. One tin can hold Thanksgiving place cards, another can hold Christmas ornament hooks, another can hold Valentine’s ribbon, and another can hold birthday candles. This keeps small seasonal supplies from scattering across drawers. When the holiday returns, you pull out the tin and feel like a person who has their life together. This feeling may last only seven minutes, but still, enjoy it.
For kids, recycled tins work best when they are easy to open and not too precious. Let children decorate their own tins with stickers, markers, or washi tape. A child who helped design the crayon tin is far more likely to put crayons back into it. Maybe not every time. Let’s remain realistic. But more often than if the system was designed by an adult with a label maker and unrealistic dreams.
The final experience-based tip is to leave a little empty space. A tin packed to the rim becomes frustrating. A tin with breathing room stays useful. Good storage should feel easy to use, not like solving a puzzle box guarded by holiday elves.
Conclusion
DIY storage from recycled Christmas tins is one of the easiest ways to organize your home without buying more bins, baskets, or plastic containers. These festive metal boxes are sturdy, charming, versatile, and ready for a second life long after the cookies disappear. Use them for craft supplies, office tools, gift wrap items, sewing kits, ornaments, pantry packets, hardware, and memory keepsakes.
The formula is simple: clean the tin, match it to the right contents, add a clear label, and store it where you naturally use those items. Decorate it if you want a custom look, or let the original holiday artwork shine. Either way, you are turning clutter into function and waste into something useful.
So the next time someone offers you cookies in a Christmas tin, accept graciously. You are not just receiving dessert. You are receiving future storage with snacks included.