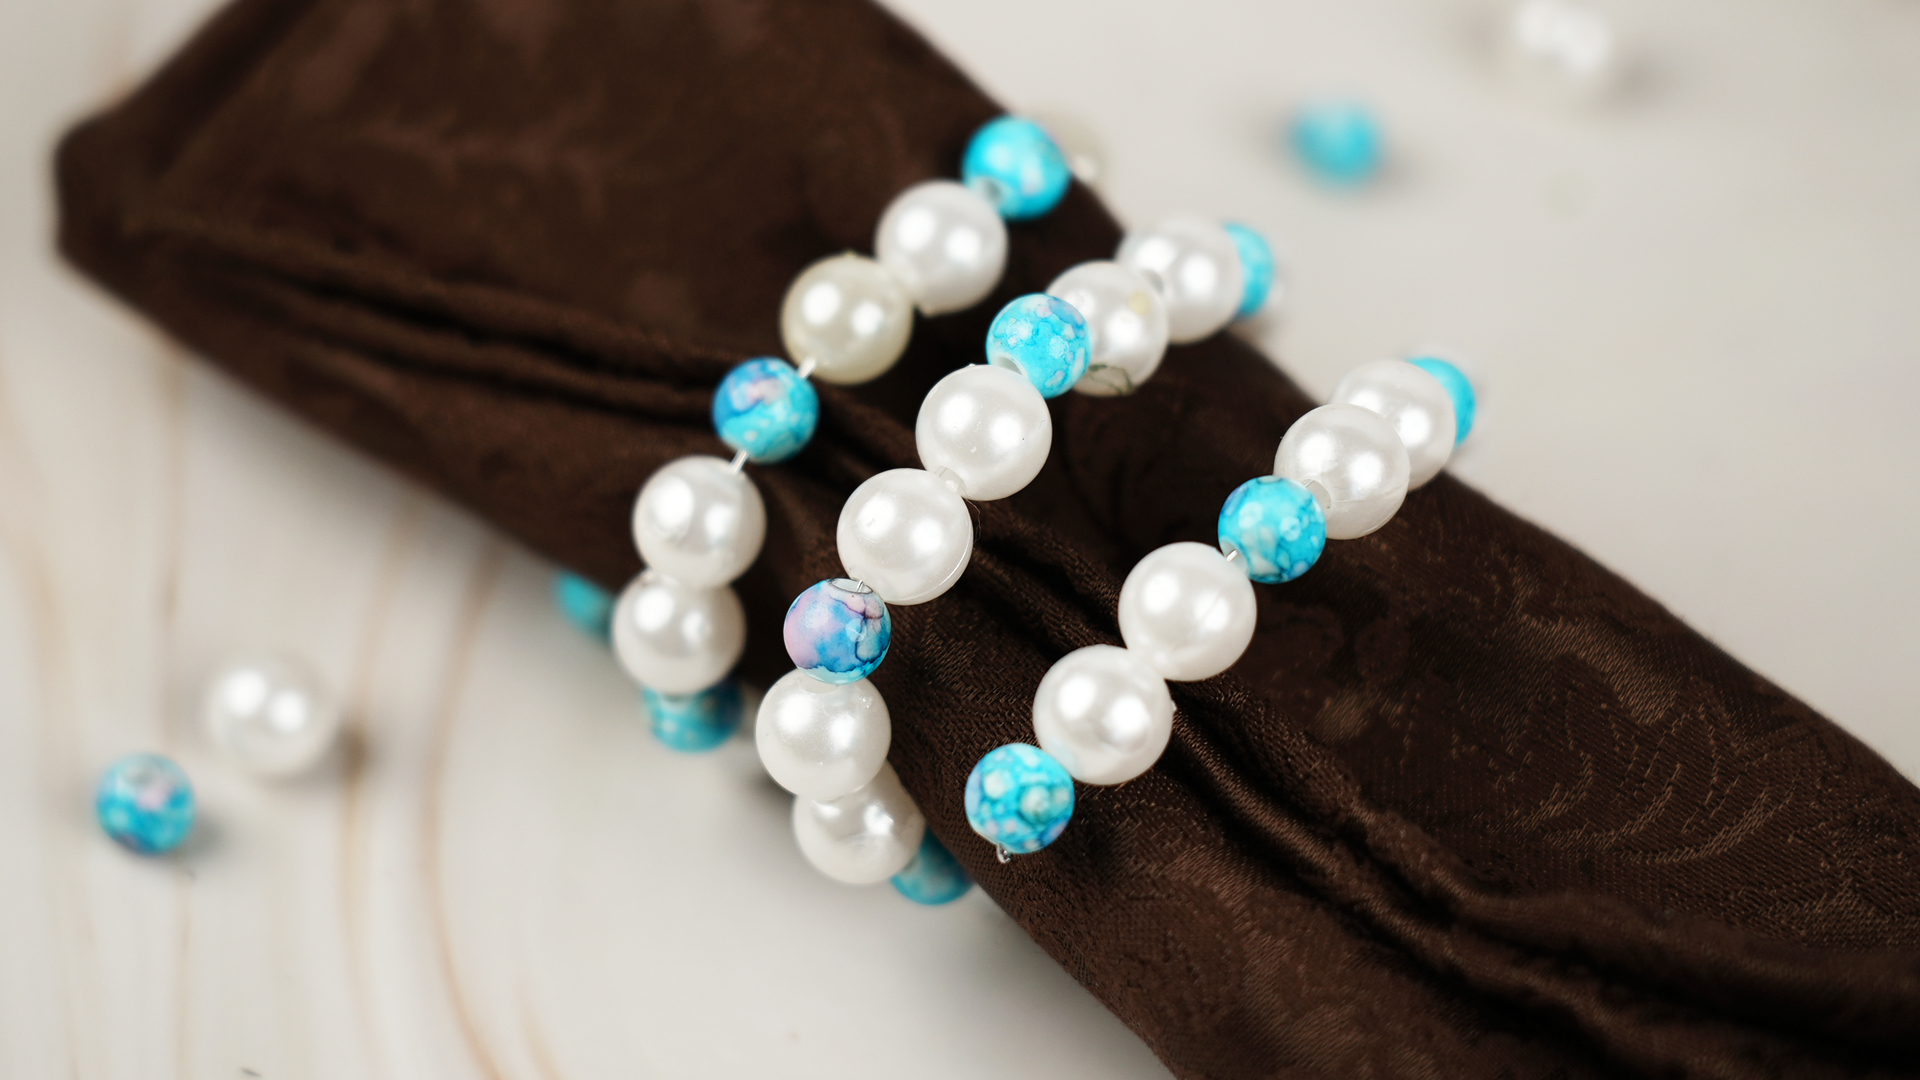
A great table setting does not have to whisper, “I hired a stylist and possibly sold a small appliance to afford this dinner.” Sometimes, the smallest details do the loudest work. Napkin rings are one of those tiny table accessories that make a plate look finished, a cloth napkin look intentional, and a Tuesday dinner look like someone remembered company was coming.
The best part? You can make beautiful DIY napkin rings with inexpensive materials you may already have: cardboard tubes, beads, wire, ribbon, jute, leather scraps, faux greenery, and a heroic amount of hot glue. Whether you want rustic farmhouse charm, polished holiday sparkle, coastal summer style, or kid-friendly table décor, handmade napkin rings are easy to customize for any season or occasion.
This guide covers five practical ways to make napkin rings, with tips for choosing materials, avoiding common crafting mistakes, and styling your finished pieces on the table. Each idea is beginner-friendly, budget-conscious, and flexible enough to match your own home décor style. Translation: you do not need a craft room the size of a boutique. A kitchen table and a little patience will do nicely.
Why Make Your Own Napkin Rings?
DIY napkin rings are small projects with big decorative payoff. They help organize cloth napkins, add texture to place settings, and make a table feel more personal. For holidays, they can carry the theme without overwhelming the table. For everyday dinners, they add polish without requiring a centerpiece tall enough to block everyone’s face.
Handmade napkin rings are also useful because they are reusable. Instead of buying a new set for every season, you can create a basic ring and refresh it with ribbon, greenery, shells, beads, tassels, name tags, or tiny seasonal accents. They can even double as place cards, party favors, or keepsakes for special meals.
Before you begin, think about the look you want. Rustic tables usually work well with burlap, jute, wood beads, twine, dried flowers, and kraft paper. Modern tables look great with leather, metal wire, matte black paint, simple ribbon, or clean geometric shapes. Holiday tables can handle sparkle, greenery, berries, metallic paint, velvet ribbon, or personalized tags. The secret is not to make the napkin ring compete with everything else on the table. It should look like part of the outfit, not like it arrived late wearing tap shoes.
Basic Supplies for DIY Napkin Rings
You do not need every craft supply in the known universe. Most napkin ring projects use a few basic tools and materials:
- Cardboard tubes, wooden rings, wire, leather strips, or pipe cleaners for the base
- Hot glue, craft glue, or strong double-sided tape
- Scissors, wire cutters, or a craft knife
- Twine, ribbon, jute, yarn, embroidery floss, or suede cord
- Beads, faux greenery, dried flowers, charms, shells, tassels, or small ornaments
- A ruler or measuring tape for consistent sizing
A standard napkin ring should usually have enough space to hold a folded or rolled cloth napkin without crushing it. A ring with an inside diameter of about 1.5 to 2 inches works well for most cloth napkins. If you use very thick linen or dramatic folded napkins, make the ring slightly larger.
1. Rustic Jute and Cardboard Tube Napkin Rings
This is one of the easiest and most affordable ways to make napkin rings. It is also a great upcycling project because the base can be made from an empty paper towel tube or toilet paper roll. Once wrapped in jute, burlap, or twine, the humble cardboard tube becomes surprisingly stylish. Yes, your recycling bin has range.
What You Need
- Empty cardboard tube
- Jute twine, burlap ribbon, or cotton rope
- Hot glue gun
- Scissors or craft knife
- Optional: small faux leaves, dried flowers, buttons, wood tags, or mini pinecones
How to Make It
Start by cutting the cardboard tube into rings about 1 to 1.5 inches wide. Try to keep each cut even so the finished napkin rings sit neatly on the table. If the edges look rough, trim them carefully or cover them later with ribbon.
Add a small dot of hot glue to the inside edge of the cardboard ring and attach the end of the jute twine. Wrap the twine tightly around the cardboard, keeping each row close to the previous one. Continue until the entire cardboard surface is covered. Glue the end on the inside of the ring so it stays hidden.
For a farmhouse-style look, add a small faux leaf, dried wheat stem, cinnamon stick, or wood name tag to the top. For a coastal table, use cotton rope and glue on a tiny shell. For a fall dinner, add a miniature pinecone or a pressed leaf. For a wedding shower or brunch, tie a thin satin ribbon around the center.
Styling Tip
These rustic napkin rings look best with linen, cotton, or textured napkins. Use neutral colors such as white, oatmeal, gray, sage, or soft blue for a relaxed table. If you want a more polished look, pair jute rings with gold flatware or simple white plates. The contrast makes the handmade texture feel intentional instead of “I found this in a drawer.”
2. Wood Bead Napkin Rings
Wood bead napkin rings are simple, stylish, and endlessly customizable. They work for boho tables, Scandinavian-inspired place settings, farmhouse dinners, baby showers, holiday brunches, and casual family meals. The method is easy: string beads onto flexible wire, elastic cord, or pipe cleaners, then form a circle.
What You Need
- Wood beads, pony beads, or painted craft beads
- Elastic cord, jewelry wire, floral wire, or pipe cleaners
- Scissors or wire cutters
- Optional: acrylic paint, tassels, charms, letter beads, or ribbon
How to Make It
Cut a piece of elastic cord or wire about 10 to 12 inches long. String on enough beads to wrap comfortably around a rolled cloth napkin. Depending on bead size, you may need around 12 to 20 beads per ring. Larger beads create a chunky, modern look, while smaller beads feel more delicate.
Once the beads are strung, shape them into a circle and tie the elastic securely. If you are using wire, twist the ends together tightly and tuck them into the nearest bead so no sharp edge is exposed. Add a drop of glue to the knot if needed.
To customize the design, paint the beads before stringing them. Use matte black for a modern table, whitewashed beads for a coastal feel, pastel colors for spring, or metallic accents for holidays. You can also mix wood beads with gold beads, letter beads, or small tassels.
Styling Tip
Wood bead napkin rings look especially good with simple napkin folds. Roll the napkin, slide the ring around the center, and fan the fabric slightly at both ends. If you add a tassel, place it toward the top or side so it hangs naturally over the plate.
3. Leather or Faux Leather Napkin Rings
Leather napkin rings are perfect if you want something clean, modern, and slightly upscale without spending upscale money. Faux leather works beautifully too, especially for crafters who want a budget-friendly or animal-free option. This design is simple: cut a strip, punch holes, and fasten it with a rivet, snap, button, or cord.
What You Need
- Leather scraps or faux leather sheets
- Ruler
- Scissors or rotary cutter
- Hole punch
- Rivets, snaps, small buttons, or suede cord
- Optional: paint pen, initials, stamps, or metallic marker
How to Make It
Cut strips of leather about 1 inch wide and 6 to 7 inches long. Wrap one strip around a folded napkin to test the size. The ends should overlap slightly without squeezing the napkin too tightly.
Punch one hole near each end of the strip. If you are using a rivet or snap, attach it according to the package instructions. If you prefer a softer look, thread suede cord through both holes and tie a small knot or bow. You can also use a button on one end and cut a slit on the other end to create a loop closure.
For personalization, add initials, guest names, or simple line designs with a paint pen. A black leather ring with white lettering looks modern and dramatic. A tan leather ring with gold initials feels warm and elegant. A soft brown faux leather ring tied with linen cord is casual enough for everyday meals.
Styling Tip
Leather napkin rings pair well with solid cloth napkins, stoneware plates, matte flatware, and simple greenery. They are a great choice for dinner parties where you want the table to look stylish but not overly fussy. In other words, they say, “I planned this,” not “I panicked in aisle seven.”
4. Wire Leaf or Floral Napkin Rings
Wire napkin rings are lightweight, elegant, and surprisingly easy to shape. You can bend craft wire into simple loops, leaves, vines, or decorative spirals. Add beads, faux berries, silk flowers, or small glass accents to create a spring, fall, holiday, or garden-inspired table.
What You Need
- Gold, copper, silver, or floral wire
- Wire cutters
- Round object for shaping, such as a spice jar or small bottle
- Needle-nose pliers
- Optional: small beads, faux leaves, faux berries, dried flowers, or charms
How to Make It
Cut a piece of wire about 14 to 18 inches long. Wrap the center of the wire around a small bottle or spice jar to form a circular ring. Twist the ends together once or twice to secure the circle.
Use the remaining wire ends to create decorative details. For a leaf design, bend each end into a long oval and twist it closed near the base. For a vine effect, curve the wire around a pencil or the handle of a paintbrush. For a floral design, thread small beads onto the wire before shaping the ends.
If you want a fuller look, attach small faux leaves or berries with floral tape or hot glue. Keep the decorative portion mostly on one side of the ring so the napkin can slide through easily. The goal is graceful, not “tiny craft store explosion.”
Styling Tip
Gold wire looks beautiful with white, ivory, blush, sage, navy, or emerald napkins. Copper wire feels cozy for autumn tables, especially with terracotta plates, amber glasses, or woven placemats. Silver wire works well for winter, weddings, or modern tables with cool-toned linens.
5. Ribbon, Charm, and Seasonal Accent Napkin Rings
If you want a fast, flexible napkin ring idea, use ribbon as your base. Ribbon napkin rings are easy to change for different holidays, colors, and themes. You can make them with grosgrain ribbon, velvet ribbon, satin ribbon, wired ribbon, fabric strips, or even leftover gift wrap ribbon.
What You Need
- Ribbon, fabric strips, or decorative trim
- Hot glue, fabric glue, or double-sided tape
- Scissors
- Optional: charms, faux greenery, name tags, mini ornaments, shells, tassels, or small flowers
How to Make It
Cut ribbon strips about 7 to 9 inches long, depending on the thickness of your napkins. Wrap one strip around a folded napkin and overlap the ends slightly. Glue the ends together to form a ring, or tie the ribbon into a neat bow if you want a softer style.
Once the ring is formed, add a decorative accent. For Thanksgiving, attach a faux leaf, small acorn, or kraft paper name tag. For Christmas, use a sprig of faux evergreen, a tiny ornament, or a jingle bell. For spring, add a faux flower or pastel charm. For summer, try a small shell, starfish, or raffia bow.
Ribbon rings are also excellent for place cards. Write each guest’s name on a small tag and tie it to the ring with thin twine. This makes the table look thoughtful and helps prevent the traditional seating chaos of “Where do I sit?” followed by everyone hovering awkwardly near the salad.
Styling Tip
Choose ribbon width based on the look you want. Thin ribbon feels delicate and casual. Wide velvet ribbon feels dramatic and elegant. Wired ribbon holds its shape well, which is useful for bows and holiday tables. If the ribbon is slippery, add a tiny dot of glue on the underside to keep the napkin from sliding around.
How to Choose the Best Napkin Ring Style
The best DIY napkin ring depends on your table setting, event, and available supplies. For a casual family dinner, wood beads or jute rings are easy and reusable. For formal dinners, leather, wire, metallic ribbon, or pearl-style beads can look more refined. For kids’ tables, pipe cleaners, pony beads, pom-poms, and felt shapes are fun, colorful, and easy for little hands to help assemble.
Think about the napkin fabric too. Cloth napkins work best because they have enough structure to hold the shape. Linen and cotton napkins are especially reliable. Paper napkins can work for casual parties, but thin paper may collapse inside the ring or look wrinkled before dinner even starts. If you use paper, choose thick, dinner-size napkins and a looser ring.
Color matters as much as material. A napkin ring should connect with at least one other element on the table, such as the plates, centerpiece, candles, glassware, placemats, or flowers. It does not need to match perfectly. In fact, a little contrast often looks better. A natural wood ring on a white napkin, a black leather loop on a beige linen napkin, or a gold wire ring on a deep green napkin can instantly make a place setting feel more designed.
Common Mistakes to Avoid
The first mistake is making the ring too tight. A napkin ring should hold the napkin, not wrestle it into submission. Test your design with the actual napkins you plan to use before making the full set.
The second mistake is using too many decorations. A tiny pinecone, a sprig of greenery, or a small charm can look lovely. Five pinecones, three berries, two bows, and a glitter mushroom may be a lot for one napkin to emotionally process.
The third mistake is forgetting comfort and function. Avoid sharp wire ends, loose glitter, rough glue blobs, or bulky decorations that prevent the napkin from lying nicely on the plate. Guests should be able to remove the napkin easily without needing instructions, tools, or a motivational speech.
The fourth mistake is making only the exact number you need. Always create one or two extra napkin rings. Someone may spill something, a glue seam may fail, or you may suddenly remember that your cousin is bringing “just one friend.” Future you will be grateful.
Extra Experience: What I Learned Making Napkin Rings for Real Tables
After making different styles of napkin rings for dinners, holidays, and last-minute gatherings, the biggest lesson is simple: the best design is usually the one that survives actual use. It is easy to fall in love with a beautiful idea online, but the real test happens when the napkin ring has to hold a napkin, sit on a plate, travel from storage to table, and survive someone tugging at it while asking where the gravy is.
The cardboard-and-jute version is one of the most forgiving projects. It costs very little, looks warm and natural, and can be made in large batches. The trick is to wrap the twine tightly and glue only in small sections. If you use too much hot glue, it can create bumps under the twine. Those bumps may not seem important while crafting, but they show up later like tiny table décor speed bumps.
Wood bead rings are another favorite because they look more expensive than they are. The key is bead size. Very small beads can feel fussy and take longer to string, while oversized beads may look bulky on smaller plates. Medium wood beads usually create the best balance. Elastic cord makes the rings flexible, but wire gives a more structured circle. For beginners, pipe cleaners are easiest because they hold their shape and make the project almost impossible to mess up. That is a rare and beautiful thing in crafting.
Leather napkin rings feel the most grown-up. They are fast to make and store flat, which is convenient if you do not have a lot of space. However, neat cutting matters. Uneven leather strips can make the finished set look less polished. A ruler and rotary cutter help a lot. If you do not have rivets or snaps, tying the ends with cord is an easy workaround and adds a handmade look.
Wire rings are beautiful, but they require patience. The first one may look charming. The second may look confused. By the third or fourth, your hands usually figure out the motion. The most important safety detail is tucking wire ends inward or covering them with beads, tape, or glue. A napkin ring should not surprise guests with a scratch.
Ribbon rings are the fastest solution when time is short. They are especially useful for holidays because ribbon comes in every color, pattern, and mood imaginable. The downside is that some ribbon frays. To avoid that, cut the ends cleanly and seal them with a tiny amount of clear glue. For a softer look, skip the permanent ring and simply tie ribbon around each napkin. It takes longer at the table, but it looks relaxed and elegant.
Storage is another thing people forget. Napkin rings with large flowers or bulky ornaments need more room and can get crushed. If you plan to reuse them, store each set in a small box or zip-top bag with a label. For seasonal designs, keep the rings with your holiday linens or table décor. Nothing is more annoying than finding the perfect Thanksgiving napkin rings in February, unless you are extremely early, in which case congratulations on your emotional stability.
Finally, do not underestimate the power of making a sample first. Create one napkin ring, test it with your napkin, place it on a plate, and look at it from a normal seated angle. If it looks good there, it will probably look good on the table. If it looks bulky, floppy, or oddly dramatic, adjust before making twelve more. Napkin rings are small, but they can teach a big decorating lesson: thoughtful details matter, and handmade details often make guests feel more welcome than expensive ones.
Conclusion
Learning how to make napkin rings is one of the easiest ways to upgrade your table without buying a drawer full of seasonal décor. With cardboard tubes, jute, beads, leather, wire, ribbon, and a few decorative accents, you can create napkin rings for everyday dinners, holidays, parties, weddings, brunches, and cozy family meals.
The best DIY napkin rings are simple, functional, and connected to the rest of your table design. Choose materials that match your style, keep the size comfortable for your napkins, and do not be afraid to personalize the details. A handmade napkin ring may be small, but it can make the whole place setting feel warmer, more intentional, and much more memorable.
Note: This article was written from a synthesis of reputable U.S. home décor, craft, entertaining, and DIY guidance, rewritten in original language for web publishing without source links or unnecessary reference markers.