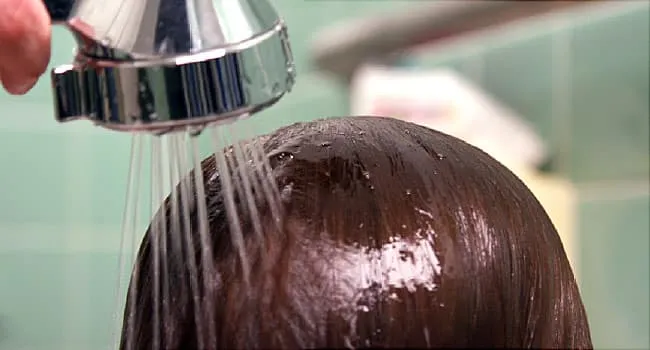
Few phrases can make a household freeze faster than “I think there are lice.” Suddenly, every head in the room starts itching, the laundry basket looks suspicious, and someone is Googling at heroic speed. The good news? Head lice are common, treatable, and not a sign that anyone has poor hygiene. The better news? A clear video on how to remove head lice can make the process much less mysterious, especially when you need to see exactly how to part hair, use a nit comb, apply treatment, and check whether the tiny villains are truly gone.
This guide walks through what a helpful head lice removal video should show, how to remove lice safely at home, which treatment steps matter most, and what mistakes to avoid. Think of it as your calm, practical, slightly less panicked companion for handling a very annoying but very manageable problem.
Why a Video on How to Remove Head Lice Is So Helpful
Reading instructions is useful, but lice removal is a hands-on job. A video can show details that are hard to explain in words: how small nits look on the hair shaft, how slowly to move a fine-toothed comb, how to wipe the comb between passes, and how close to the scalp you need to inspect. Those small details can be the difference between “all clear” and “surprise, we’re doing this again next week.”
A good head lice video should not scare viewers. It should explain the process step by step, show real tools, and emphasize safety. Head lice do not jump, fly, or spread disease. They move by crawling, usually through direct head-to-head contact. That means the goal is not to disinfect your entire life like a crime scene; the goal is to treat the scalp, remove lice and nits carefully, and prevent close-contact spread.
What Head Lice Are and How to Spot Them
Head lice are tiny insects that live on the scalp and feed on small amounts of blood. Adult lice are often grayish or tan and can move quickly, which makes them frustrating to find. Their eggs, called nits, are usually easier to spot because they are attached firmly to strands of hair, often close to the scalp. Unlike dandruff, nits do not brush away easily. They cling like they signed a lease.
Common Signs of Head Lice
The most familiar symptom is itching, especially around the ears, neckline, and back of the head. Some people feel a tickling sensation, as if something is moving in the hair. Others may have small irritated spots from scratching. However, not everyone itches right away, so visual inspection is important.
The most reliable sign is finding a live crawling louse. Nits alone can be confusing because some may be empty shells or old eggs that are no longer active. When checking, use bright light, a magnifying glass if available, and a fine-toothed lice comb. Work in sections so you do not turn the inspection into a guessing game with hair clips.
Before You Start: Tools You Need for Lice Removal
Before pressing play on a head lice removal video or starting treatment, gather your supplies. Having everything ready keeps the process smoother and prevents that classic moment when conditioner is dripping, the child is bored, and the comb is somehow in another room.
Helpful Supplies
- A fine-toothed metal nit comb
- Hair clips for sectioning
- White paper towels or tissues for wiping the comb
- Conditioner or detangling spray for wet combing
- A towel around the shoulders
- Bright lighting or a lamp
- Disposable gloves if applying medicated treatment
- A timer for treatment products
Metal nit combs often work better than flimsy plastic combs because their teeth are closer together and sturdier. For thick, curly, long, or textured hair, detangling first is not optional; it is survival. Start gently from the ends and move upward before using the nit comb near the scalp.
Step-by-Step: How to Remove Head Lice
Step 1: Confirm That Lice Are Actually Present
Do not treat “just in case” unless a healthcare professional advises it. Many things can look like lice or nits, including dandruff, hair product buildup, lint, and tiny bits of playground mystery. Look for live lice or nits firmly attached near the scalp. Focus on warm areas such as behind the ears and at the nape of the neck.
Step 2: Choose a Treatment Method
There are two main approaches: medicated lice treatment and manual wet combing. Many families use both. Over-the-counter products commonly contain ingredients such as permethrin or pyrethrins. Prescription options may include treatments such as spinosad, ivermectin lotion, malathion, or benzyl alcohol lotion, depending on age, health history, local resistance patterns, and clinician advice.
Always follow the product label exactly. More product is not better. Leaving treatment on longer than directed is not more effective and can irritate the scalp. Do not mix lice products unless a healthcare provider tells you to. Lice removal is annoying, but it is not a chemistry experiment.
Step 3: Apply Treatment Correctly
Most lice treatments are applied to the scalp and hair attached to the scalp, not eyebrows, eyelashes, or other body hair. Read the instructions before opening the bottle. Check whether the hair should be dry or damp, how long the product should stay on, how it should be rinsed, and whether shampoo or conditioner should be avoided before or after use.
Use a timer. Guessing “about ten minutes” while answering texts, calming a child, and looking for the dog is how treatment instructions get creative. After the correct time, rinse as directed. Avoid getting medicine in the eyes. If irritation, rash, breathing trouble, or other concerning symptoms occur, contact a healthcare professional promptly.
Step 4: Comb Out Lice and Nits
This is the part where a video on how to remove head lice really shines. After treatment or during wet combing, divide the hair into small sections. Place the nit comb as close to the scalp as comfortable and pull it slowly through to the ends. Wipe the comb on a white tissue after each pass so you can see what is coming out.
Work methodically from one side of the head to the other. Do not rush. If the hair is long, clip completed sections away from untreated sections. For curls or dense hair, use conditioner to help the comb glide. The goal is to remove live lice and as many nits as possible, especially those close to the scalp.
Step 5: Repeat When Needed
Some products kill live lice but do not reliably kill all eggs. That is why retreatment may be needed about seven to ten days later, depending on the product directions. The timing matters because it targets newly hatched lice before they mature and lay more eggs. If a product says to repeat, repeat. If it says one treatment is enough unless live lice remain, follow that guidance.
Continue checking the hair every two to three days for a couple of weeks. If you still find live crawling lice after proper treatment and retreatment, contact a healthcare provider. You may be dealing with incorrect use, reinfestation, or lice that are resistant to a certain ingredient.
Wet Combing: The Slow but Mighty Method
Wet combing is exactly what it sounds like: wetting the hair, adding conditioner, and using a fine-toothed nit comb to remove lice and nits by hand. It can be used alone or along with medication. It takes patience, but it is especially useful for families who want to reduce chemical exposure, for checking whether treatment worked, or for removing stubborn nits that remain after medicine.
To wet comb properly, saturate the hair with conditioner, detangle with a regular comb, then switch to the nit comb. Comb from scalp to tip in very small sections. Wipe the comb after each stroke. Repeat until you can comb through the section without seeing lice or suspicious debris. Depending on hair length and thickness, this may take 30 minutes or longer. Yes, it is a lot. Yes, snacks and a movie help.
Cleaning the Home Without Losing Your Mind
Head lice survive best on the human scalp. They do not live long away from a person, and they do not infest furniture the way fleas can. Still, basic cleaning helps prevent accidental spread from items used recently by someone with lice.
What to Wash
Wash pillowcases, hats, scarves, bedding, and clothing used by the affected person during the previous couple of days. Use hot water when the fabric allows, and dry items on high heat if safe for the material. Combs and brushes can be soaked in hot water. Items that cannot be washed can be sealed in a plastic bag for about two weeks or set aside long enough that any lice would not survive.
What Not to Do
Do not spray pesticides around the house. Do not use kerosene, gasoline, pet treatments, agricultural products, or household insecticides on hair. Do not apply essential oils as a guaranteed cure, especially to children, without professional guidance. Natural does not automatically mean safe, and “smells like a forest” is not the same as “clinically proven.”
Should Children Stay Home From School?
Many families panic because they worry a child will be excluded from school for days. Current guidance from major pediatric and public health organizations discourages strict “no-nit” policies. In many cases, a child with head lice can stay in school until the end of the day and return after treatment has started. Local school rules may vary, so parents should check their school’s policy, but medically, head lice are not considered a sign of poor hygiene or a reason for shame.
It is still considerate to notify close contacts, especially families of children who have had sleepovers, close play, or frequent head-to-head contact. Keep the message calm and factual. No dramatic soundtrack required.
Common Mistakes in Head Lice Removal
Using Too Much Medicine
More treatment does not mean better results. Overusing lice products can irritate the scalp and may be unsafe. Follow the label or clinician’s instructions exactly.
Skipping the Comb
Even when a medicine works, combing helps remove dead lice and nits. It also gives you a clearer picture of whether the infestation is improving.
Treating Everyone Automatically
Household members should be checked, but not everyone needs treatment unless live lice or clear evidence of infestation is found. Treating people unnecessarily wastes money and may expose skin to unneeded medication.
Forgetting the Second Treatment
If the product requires retreatment, skipping it can allow newly hatched lice to keep the cycle going. Put the retreatment date on the calendar immediately. Future you deserves help.
Blaming Cleanliness
Head lice can affect clean hair, dirty hair, short hair, long hair, and every household income level. Lice are equal-opportunity pests with terrible manners.
When to Call a Doctor or Pharmacist
Many cases of head lice can be handled at home, but professional advice is important in certain situations. Call a healthcare provider if the person is very young, pregnant, breastfeeding, has allergies, has open sores or signs of skin infection, or has asthma or other health conditions that could affect treatment choice. You should also ask for help if live lice remain after correctly using an over-the-counter treatment and repeating it as directed.
A doctor or pharmacist can help choose the right option and explain age restrictions. Some prescription treatments are approved only for certain ages. Products meant for animals should never be used on people. Veterinary ivermectin, for example, is not the same as medication formulated and approved for human use.
What a Good Head Lice Removal Video Should Include
If you are creating or watching a video on how to remove head lice, look for clear, practical demonstrations. The video should show how to inspect the scalp, identify nits, section hair, use a nit comb, apply treatment safely, clean tools, and decide when to repeat treatment. It should also mention what not to do, because some “home remedies” online are more dramatic than helpful.
The best videos use close-up shots without being sensational. They explain that lice are unpleasant but manageable. They show the slow pace of combing honestly, because nobody benefits from a magical thirty-second montage that skips the hard part. A useful video should leave viewers thinking, “I can handle this,” not “I need to move to a new zip code.”
Real-World Experiences: What Families Learn While Removing Head Lice
The first experience many parents describe is disbelief. “But we wash hair all the time!” is a common reaction. Then comes the second discovery: lice do not care about shampoo schedules, fancy conditioner, or whether the bathroom smells like coconut paradise. They spread mainly through close contact, which is why children who hug, whisper, share headphones, pose for selfies, or pile onto the same couch during a movie are excellent transportation systems for lice.
One practical lesson is that calm beats chaos. The household that turns lice removal into a military emergency often ends up with tears, missed steps, and three unnecessary bags of laundry. The household that sets up a chair, towel, lamp, comb, conditioner, tissues, and a show to watch usually does better. Lice removal takes patience. Treat it like a project, not a punishment.
Another experience is learning that hair type matters. Straight, fine hair may be faster to comb, while thick, curly, coily, or long hair can require more detangling, smaller sections, and extra conditioner. Families often discover that the right comb makes a huge difference. A strong metal nit comb can turn a frustrating job into a manageable one. A weak plastic comb may glide through the hair while leaving the problem behind, which is rude behavior from a tool.
Parents also learn the importance of checking close contacts without starting a blame game. Lice are not proof that someone did something wrong. They are proof that humans have heads and sometimes put them near other heads. A simple message such as, “We found head lice and started treatment today, so you may want to check your child,” is enough. No courtroom language needed.
Many families say the second week is where success is won. The first treatment feels productive, but follow-up checks are what stop the cycle. Combing every few days, watching for live lice, and repeating treatment when the label says to do so can prevent a small infestation from becoming a recurring family tradition. Nobody wants “Lice Night” to become a monthly event.
Finally, families often learn to separate useful cleaning from panic cleaning. Washing recently used bedding and hats makes sense. Vacuuming common areas is reasonable. Spraying furniture with insecticides, boiling the entire wardrobe, or replacing every pillow in the house is usually unnecessary. The scalp is the main battlefield. Focus there first.
The most reassuring experience is this: lice removal gets easier once you understand the process. The first comb-through may feel endless, but each section completed is progress. By the end, many parents know exactly what nits look like, how to part hair efficiently, and how to spot the difference between a real problem and a speck of lint trying to ruin everyone’s afternoon.
Conclusion: Head Lice Are Annoying, Not Unbeatable
A video on how to remove head lice can be one of the most useful tools for families facing an itchy surprise. The key is to confirm the infestation, choose a safe treatment, follow instructions exactly, comb carefully, repeat treatment if directed, and check close contacts. Head lice are stubborn, but they are not invincible. With the right comb, the right timing, and a steady hand, you can send them packing.
Remember: do not use dangerous household chemicals, do not overuse medication, and do not panic-clean the entire house into another dimension. Focus on the scalp, follow evidence-based steps, and ask a healthcare professional if treatment fails or if special circumstances apply. Head lice may be tiny, but your plan can be mighty.