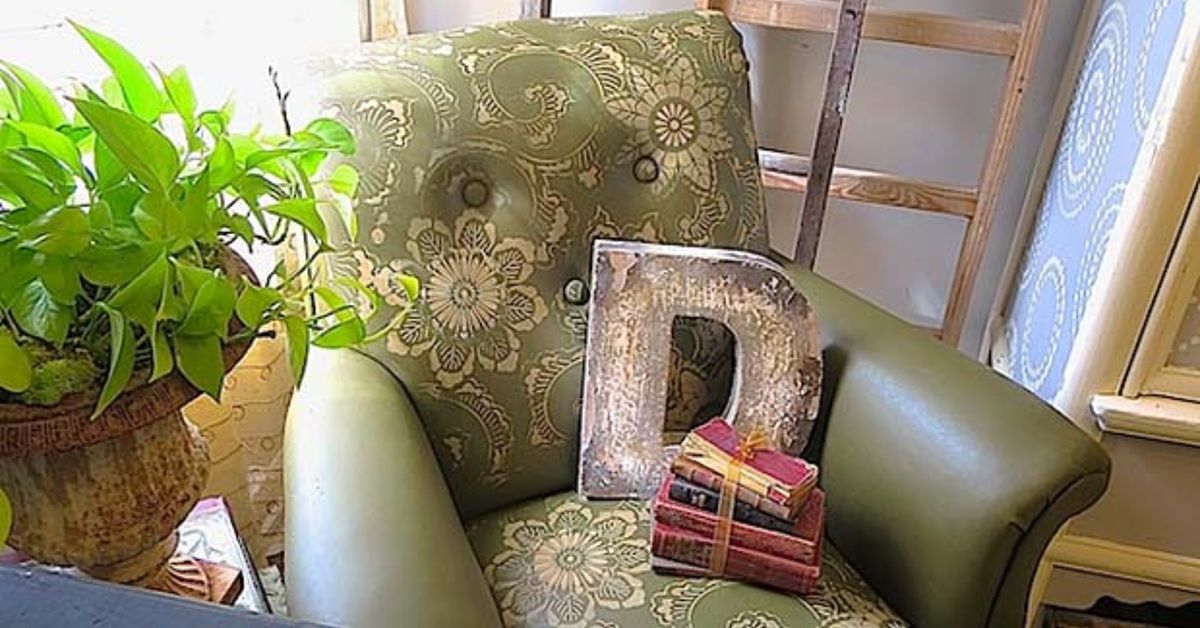
A traditional leather club chair already has personality. It sits low, looks serious, and seems prepared to discuss matters involving ol “like they used to.” Add a carefully stenciled design, however, and that dignified chair can become a one-of-a-kind statement piece without losing its classic character.
Stenciling a leather club chair is not quite the same as painting a wooden dresser. Leather bends, stretches, absorbs products differently, and may have a protective factory coating that rejects paint like a bouncer guarding a velvet rope. Success depends less on artistic genius and more on preparation, compatible materials, thin paint layers, and patience.
This guide explains how to stencil smooth leather furniture safely, choose an appropriate design, prevent paint bleeding, apply a flexible protective finish, and avoid the mistakes that turn an elegant makeover into a crackled craft experiment.
Can You Stencil a Leather Club Chair?
Yes, many smooth leather club chairs can be stenciled successfully with paint formulated for leather. The best candidates are chairs upholstered in pigmented or protected leather with a relatively even surface. These leathers usually have a factory-applied color and protective topcoat, making them common in frequently used furniture.
Aniline leather, nubuck, suede, heavily waxed leather, and some distressed finishes require greater caution. They are more absorbent, and cleaning or preparation products may create permanent dark spots, rings, or color changes. Bonded leather and faux leather also vary widely because their surface coatings can peel or react unpredictably.
Leather is naturally durable and flexible, but different tanning and finishing processes produce very different surfaces. Manufacturers of leather dyes and furniture colorants consistently recommend testing products on an inconspicuous area because adhesion, absorption, and color can vary from one item to another.
Perform a Hidden Test First
Choose a small location behind the chair, beneath a removable cushion, or near the bottom of the back panel. Test the cleaner, preparation product, paint, and finish in the same sequence you plan to use on the visible design.
After the test has dried and cured, gently bend and press the leather. Check for peeling, tackiness, discoloration, stiffness, or loss of the original grain. A successful test should remain flexible and should not rub color onto a clean white cloth.
If the chair is valuable, antique, severely cracked, or upholstered in unidentified premium leather, consult a professional leather restorer. Sometimes the most sophisticated DIY decision is recognizing when a chair costs more than your confidence level.
Choosing the Right Stencil Design
A club chair has curved arms, a rounded back, seams, piping, cushions, and areas that flex when someone sits down. Your design should cooperate with those features rather than wage war against them.
Begin with a stencil that has reasonably bold shapes and sturdy bridges. Tiny lacework, hair-thin lines, and extremely detailed lettering are difficult to reproduce on pebbled or curved leather. Larger motifs usually produce cleaner edges and remain readable from across the room.
Good Design Ideas for Leather Chairs
- A centered monogram on the outside back
- A vintage hotel, library, or railway emblem
- An Art Deco fan or geometric border
- A botanical branch placed along one side
- A heraldic crest for a traditional study
- A small repeating pattern on removable cushions
- A subtle metallic motif on dark brown or black leather
The outside back is often the easiest area for a first project because it is comparatively flat and receives less body contact. The seat cushion, front edge, and tops of the arms experience more friction and flexing, so paint applied there must be especially thin, flexible, and thoroughly sealed.
Tools and Materials
- Vacuum with a soft upholstery attachment
- Clean, lint-free cloths
- Leather-safe cleaner
- Leather preparer or deglazer recommended for the chosen paint
- Flexible acrylic leather paint
- Reusable Mylar stencil or low-tack adhesive stencil film
- Low-tack painter’s tape
- Stencil brush, dense cosmetic sponge, or small foam pouncer
- Paper towels for offloading paint
- Small artist brushes for touch-ups
- Flexible leather-compatible clear finish
- Drop cloth and disposable gloves
- Measuring tape, chalk pencil, or removable marking tool
Use a paint specifically labeled for leather or flexible leather-like surfaces. Standard wall paint and ordinary craft acrylic may dry into a rigid film that cracks when the upholstery bends. Leather paints are formulated to remain more flexible, especially when applied in several thin coats.
How to Stencil a Leather Club Chair
1. Inspect and Repair the Chair
Look closely for peeling finish, loose piping, deep cracks, punctures, greasy areas, or previous repair products. Paint will not stabilize deteriorating upholstery. If the surface is flaking, the new design may detach along with the old coating.
Minor scratches may be addressed with a compatible leather repair system. Deeper cracks may require flexible filler followed by matching colorant and finish. Complete repairs before stenciling and allow every product to cure according to its instructions.
2. Vacuum and Clean the Leather
Remove the cushion when possible and vacuum seams, folds, buttons, and piping. Dust trapped beneath paint creates tiny bumps and weakens adhesion.
Clean the design area with a leather-safe cleaner applied to a lint-free cloth. Do not soak the upholstery. Body oils are especially common on armrests and head-contact areas, and those oils can prevent paint from bonding properly.
Allow the leather to dry completely. Applying paint over damp leather is an excellent method for creating problems nobody ordered.
3. Remove the Protective Finish in the Design Area
Most finished furniture leather has a protective coating. A compatible leather preparer or deglazer removes enough of that coating, along with remaining wax and oil, to help the new paint grip the surface.
Apply the preparation product only where required and follow the manufacturer’s directions. Work with clean cloths and replace them as they collect color or residue. The prepared area often looks less glossy or slightly matte.
Do not aggressively scrub beyond the planned design. Strong preparation products may remove the original color, particularly from split leather, bonded materials, delicate finishes, or previously repaired areas. Leather paint and colorant manufacturers emphasize that removing or modifying the existing finish is a critical adhesion step, but it must be done with the correct product and controlled technique.
4. Plan the Placement
Measure the panel and mark its center with a removable chalk pencil or small pieces of painter’s tape. Position the stencil and step several feet away. A design that appears centered from six inches away can look surprisingly rebellious from across the room.
Avoid placing important details directly over seams, deep wrinkles, tufting, nailheads, or piping. On a curved chair back, a flexible stencil may conform better than thick rigid plastic.
5. Secure the Stencil
Use low-tack painter’s tape around the edges or choose removable adhesive stencil film designed for curved surfaces. Press the stencil gently but firmly, paying particular attention to narrow bridges and detailed sections.
Do not use extremely aggressive adhesive. It may lift the leather finish when removed. Test the tape or stencil material on the hidden area before placing it on the chair.
Securing the stencil reduces movement, but it does not replace careful paint control. Stencil specialists recommend an offloaded, nearly dry brush or roller because excess paint is the primary cause of bleeding beneath the pattern.
6. Apply the Paint in Thin Layers
Stir the leather paint thoroughly. Load only the tips of a stencil brush or place a small amount on a dense sponge. Blot repeatedly on a paper towel until the tool appears almost too dry to accomplish anything useful. That is usually the correct amount.
Apply the paint with light vertical tapping motions rather than sweeping sideways. Side-to-side brushing can force paint beneath the stencil edges. Begin at the outside of each opening and gradually work inward.
Build the color through multiple thin coats instead of one heavy coat. Light colors over dark leather may need a pale base layer before the final color becomes vivid. Allow each application to dry before adding another.
Thin layers preserve the leather’s grain and flexibility. Heavy paint creates raised ridges, takes longer to cure, and is more likely to crack when the chair flexes.
7. Add Shading or Multiple Colors
For a more dimensional design, use a second dry stencil brush to apply a darker shade around selected edges. Keep highlights near the center of petals, letters, or geometric shapes and shadows near their outer boundaries.
When using several colors, start with the lightest tone and work toward the darkest. Use a separate sponge or brush for each color to avoid producing an unexpected shade best described as “historic mud.”
8. Remove the Stencil Carefully
Lift the stencil while the final coat is dry to the touch but before a thick paint bridge forms between the stencil and leather. Peel it slowly upward rather than dragging it sideways.
Inspect the design immediately. Small imperfections can be corrected with a fine artist brush and paint matched to the chair’s original color. Do not chase microscopic flaws until the design looks overworked. Handmade decoration benefits from a little evidence that a human was involved.
9. Let the Paint Cure
Dry-to-the-touch paint is not fully cured paint. Keep the chair free from sitting, rubbing, pets, blankets, and enthusiastic inspection while the coating develops strength.
Curing times vary by product, temperature, humidity, and layer thickness. Many flexible acrylic products recommend at least 24 to 48 hours before normal use. Follow the exact directions for your chosen paint rather than treating the clock as an artistic suggestion.
10. Apply a Flexible Protective Finish
A compatible clear leather finish helps protect the stencil from scuffing, scratching, color transfer, and routine wear. Choose matte, satin, or gloss based on the chair’s existing sheen.
Apply two or more very thin coats, allowing each one to dry before the next. Feather the finish slightly beyond the painted edge when the product system permits, helping the design blend into the surrounding surface.
Use only a finish recommended for the paint system. Mixing unrelated cleaners, paints, conditioners, and sealers can cause cloudiness, poor adhesion, or a permanently tacky surface. Flexible leather finishes are specifically designed to seal color while accommodating normal movement.
Common Stenciling Mistakes
Using Too Much Paint
Paint bleeding is almost always caused by an overloaded brush, excessive pressure, or a loose stencil. Offload more paint than seems reasonable and build opacity slowly.
Skipping Surface Preparation
A leather chair may look clean while still carrying conditioner, silicone, wax, body oil, or factory finish. Paint applied over those substances may peel after only a few uses.
Choosing an Overly Detailed Pattern
Fine stencil details disappear on heavily grained leather. Select larger shapes or simplify the design before cutting the stencil.
Painting Over Damaged Leather
Paint is decoration, not structural repair. Cracking, peeling, and delamination must be addressed first.
Applying One Thick Coat
A thick coat may appear efficient, but it creates stiff edges and weak curing. Several thin coats are slower and substantially safer.
Conditioning Immediately After Painting
Do not spread ordinary conditioner over fresh paint unless the paint manufacturer specifically approves it. Conditioning products may alter the finish, soften uncured coatings, or reduce adhesion around the design.
How to Maintain a Stenciled Leather Chair
Dust the chair regularly with a soft, dry cloth. For routine cleaning, use a product compatible with both the original leather and the painted finish. Apply cleaner to the cloth rather than pouring it directly onto the chair.
Keep the chair away from intense sunlight, radiators, fireplaces, and heating vents. Excessive heat can dry leather, while ultraviolet exposure may fade both the original upholstery and the new design.
Clean spills promptly by blotting rather than rubbing. Avoid household disinfectants, abrasive scrubbers, furniture polish, and mystery cleaning mixtures discovered during a particularly confident moment on social media.
Before applying conditioner in the future, check the paint manufacturer’s care instructions and test the product over a hidden portion of the finished design.
Experiences and Lessons From Stenciling a Leather Club Chair
The first lesson many people learn is that preparation feels disproportionately long compared with the exciting part. Cleaning, testing, measuring, taping, and removing the glossy finish may consume most of the project. The actual stenciling can be completed rather quickly. However, the quiet preparation stages determine whether the design survives years of use or begins peeling during its first encounter with denim.
A useful approach is to create a complete sample before touching the chair. A scrap of finished leather is ideal, but an inconspicuous area can also provide information. Apply the cleaner, preparer, paint, and finish exactly as planned. Let the sample cure, bend it repeatedly, rub it with a white cloth, and press it with a fingernail. This small rehearsal exposes compatibility problems while they are still small enough to remain private.
Curved surfaces present another practical lesson. A stencil that lies perfectly flat on a table may lift along the rounded back of a club chair. Large, rigid stencils often need to be repositioned in sections, while flexible adhesive film can follow gentle curves more easily. On strongly curved arms, a small independent motif is usually easier than a continuous border.
Paint quantity is where confidence can become dangerous. During the first coat, the stencil brush may seem almost empty, encouraging the painter to add more. Resist that urge. A nearly dry brush produces faint color at first, but the second and third passes create an even image with sharper boundaries. An overloaded sponge creates immediate opacity accompanied by fuzzy edges, puddles, and regret.
Dark brown leather often responds beautifully to muted gold, antique brass, warm ivory, oxblood, or dusty blue. Bright white can create dramatic contrast, but it may require several base coats and can look too new against aged leather. Mixing a tiny amount of brown or gray into the white often creates a softer tone that feels more integrated with the chair.
Another valuable discovery is that designs need not cover a large area to transform the furniture. A single crest on the outside back may be more effective than a repeating pattern across every panel. Restraint allows the chair’s original leather, seams, nailhead trim, and patina to remain part of the composition. The objective is usually to customize the furniture, not disguise it as wallpaper.
Timing also matters. Removing the stencil too soon may allow wet paint to smear, while leaving it in place through heavy drying can cause the paint film to bridge across the edge. Lifting the stencil carefully after the final thin layer becomes stable to the touch often provides the cleanest result. Watching the stencil come away is the project’s dramatic reveal, so move slowly even when curiosity is attempting to take control of both hands.
Minor imperfections are normal. A pinpoint bleed can be corrected with a tiny brush and matching background color. A slightly irregular edge may disappear once the chair is viewed from normal distance. Overcorrecting often causes more visible damage than the original flaw. Step back frequently and judge the entire design rather than conducting an emotional investigation of one leaf tip.
The protective finish deserves the same patience as the paint. A heavy clear coat can leave ridges, change the sheen, or remain tacky. Thin coats blend more naturally and flex better. Matching the finish to the original upholstery is particularly important: a high-gloss patch on a satin chair can make a beautiful stencil look like it has been laminated.
Finally, the most satisfying result usually comes from accepting the chair’s existing character. Scuffs, creases, and gentle color variation are part of aged leather. A stencil does not need to make the chair look factory-new. It can look collected, customized, and intentionally imperfectas though the design has always belonged there, quietly waiting for someone with a stencil brush and reasonable ventilation to uncover it.
Conclusion
Stenciling a leather club chair can transform a familiar piece of furniture into a distinctive focal point. The process works best when the leather is properly identified, cleaned, tested, prepared, and decorated with flexible products designed for movement. Secure the stencil carefully, apply several nearly dry coats, allow adequate curing time, and protect the finished design with a compatible leather finish.
The project rewards patience more than speed. Spend extra time on the hidden test and surface preparation, and the creative part becomes far less risky. With a well-scaled motif and a restrained color palette, an ordinary club chair can gain the polished character of a custom piecewithout requiring a custom-furniture budget.