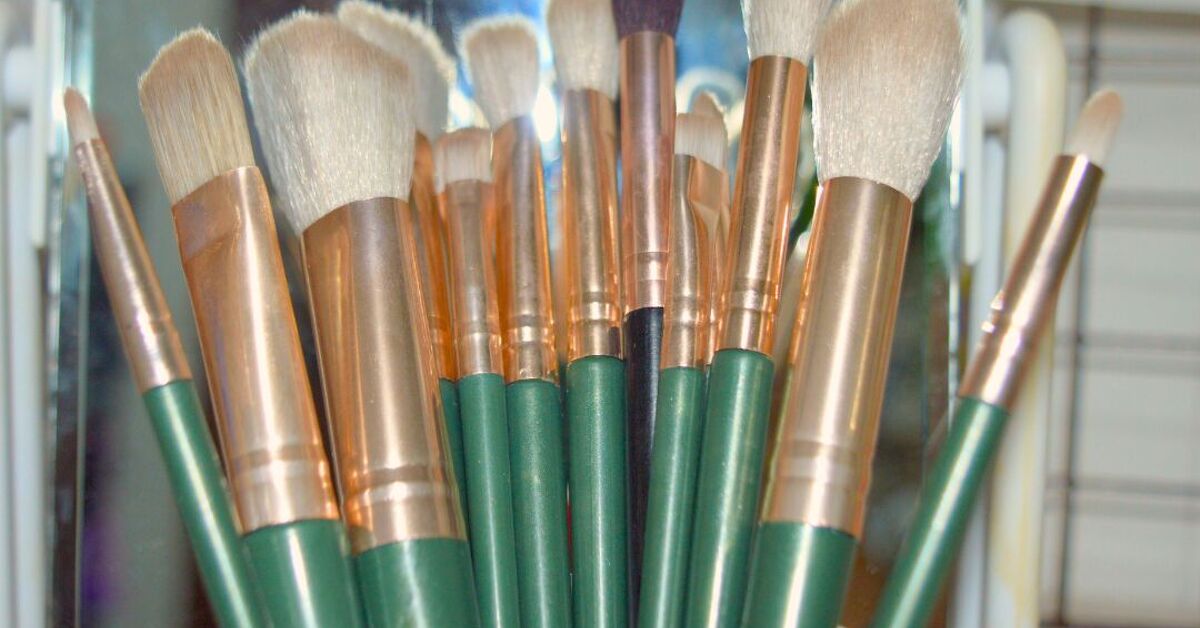
Makeup brushes are tiny artists. They blend, buff, sweep, smoke out, contour, highlight, and occasionally save a face at 7:43 a.m. when the alarm clock has betrayed you. But when those same brushes are coated in old foundation, skin oil, powder, dead skin cells, and yesterday’s “quick five-minute look,” they stop being beauty tools and start auditioning for a science fair project.
The good news? You do not need an expensive brush-cleaning machine, a luxury soap shaped like a seashell, or a complicated ritual involving moonlight and imported towels. The best way to clean makeup brushes is simple, affordable, and surprisingly satisfying. With lukewarm water, a gentle cleanser, a clean towel, and a little patience, you can keep your brushes soft, your makeup smoother, and your skin much happier.
This guide explains how to clean makeup brushes at home, how often to wash different tools, what cheap cleaning products actually work, what mistakes to avoid, and how to dry brushes correctly so they do not shed like a nervous golden retriever.
Why Cleaning Makeup Brushes Matters
Dirty makeup brushes can collect product buildup, oil, dust, and microorganisms from repeated contact with your skin, vanity, makeup bag, and cosmetic products. When you keep using them without washing, that buildup can transfer back onto your face. The result may be patchy makeup, clogged-looking pores, irritation, breakouts, or eye discomfort, especially if the brush is used near the lash line.
Think of it this way: you would not paint a clean wall with a brush that still had last month’s paint crusted into it. Your face deserves at least the same level of respect as drywall.
Clean Brushes Improve Makeup Application
A clean brush performs better. Foundation blends more evenly. Powder applies more softly. Eyeshadow colors stay true instead of turning into one mysterious brown-gray cloud. If your blush brush still contains three previous blush shades, your “soft peach glow” may become “surprise berry traffic cone.”
Fresh bristles also move more freely. When makeup residue hardens inside a brush, the bristles can clump together and drag product across the skin instead of diffusing it. Cleaning restores flexibility, which means smoother blending and less product waste.
Clean Brushes Help Protect Your Skin
Brush hygiene is especially important for people with acne-prone, sensitive, oily, or easily irritated skin. A brush used with liquid foundation, concealer, cream blush, or sunscreen can hold moisture and product residue, creating a less-than-glamorous environment. Washing your tools regularly helps reduce that buildup and gives your skincare routine a fair chance to do its job.
How Often Should You Clean Makeup Brushes?
A practical rule is to wash frequently used makeup brushes every 7 to 10 days. If that sounds ambitious, start with once a week for your most-used face brushes and eye brushes. You do not have to run a full brush spa every night, but regular cleaning prevents buildup from becoming a stubborn, cement-like situation.
Simple Cleaning Schedule
Foundation, concealer, and cream-product brushes: Clean once a week. These brushes pick up wet or creamy formulas, so they usually need more frequent washing.
Eye brushes: Clean every one to two weeks, or more often if you use them daily. Brushes used around the eyes deserve extra attention because the eye area is delicate and more vulnerable to irritation.
Powder, bronzer, and blush brushes: Clean every two to four weeks if you use them lightly, but weekly is better if you use them every day or have sensitive skin.
Makeup sponges: Wash after each use if possible, especially when used with liquid foundation or concealer. Replace sponges regularly when they stain permanently, smell odd, tear, or refuse to return to their original texture.
The Affordable Cleaning Method That Actually Works
You do not need a special brush cleanser to get great results. A gentle shampoo, mild facial cleanser, baby shampoo, or gentle liquid soap can clean most brushes effectively. For heavy foundation buildup, a small amount of dish soap can help break down oils, but use it sparingly and rinse thoroughly so the bristles do not feel dry or squeaky in a bad way.
What You Need
- Lukewarm running water
- Gentle shampoo, baby shampoo, mild facial cleanser, or brush-safe soap
- A small bowl or your clean palm
- A clean towel or paper towel
- Optional: a silicone cleaning mat or textured glove
A silicone mat is helpful, but not required. Your palm works perfectly well. The goal is to gently loosen makeup from the bristles, not scrub the brush into early retirement.
Step-by-Step: How to Clean Makeup Brushes
Step 1: Rinse Only the Bristles
Hold the brush with the bristles pointing downward. Rinse the tips under lukewarm water. Avoid soaking the entire brush head or letting water run directly into the ferrule, which is the metal part that holds the bristles. Too much water inside the ferrule can weaken glue over time and cause shedding.
Step 2: Add a Small Amount of Cleanser
Place a pea-sized amount of gentle cleanser in your palm, a bowl, or on a silicone mat. Less is more. If you use too much soap, you will spend the next ten minutes rinsing bubbles while wondering where your life went wrong.
Step 3: Swirl Gently
Swirl the damp brush tips into the cleanser. Use small circular motions to work up a lather. For dense foundation brushes, gently press and sweep the bristles to loosen product trapped in the center. Do not crush, bend, or twist the bristles harshly.
Step 4: Rinse Until the Water Runs Clear
Rinse the bristles under lukewarm running water, still keeping the brush angled downward. Continue washing and rinsing until the water runs clear and the brush no longer releases makeup. Foundation brushes may need a second round because they love holding onto beige memories.
Step 5: Squeeze Out Excess Water
Use your fingers to gently squeeze water from the bristles, moving from the ferrule toward the tips. Then blot with a clean towel. Avoid pulling on the bristles, especially with natural hair brushes or older tools.
Step 6: Reshape the Brush
Use your fingers to reshape the brush head. Fluffy brushes should dry fluffy. Flat concealer brushes should dry flat. Angled brushes should keep their angle. This step takes five seconds and helps your brushes keep their original performance.
Step 7: Dry Flat with Airflow
Lay brushes flat on a clean towel with the bristles hanging slightly over the edge of a counter. This allows air to circulate around the bristles and helps prevent water from settling into the ferrule. Do not dry brushes upright in a cup while they are wet because water can drip down into the handle and loosen the glue.
Best Cheap Cleaners for Makeup Brushes
The most affordable brush cleaner is usually already in your bathroom or kitchen. Here are budget-friendly options that work well when used correctly.
Gentle Shampoo
Gentle shampoo is one of the best all-purpose choices, especially for natural bristle brushes. It cleans without stripping too aggressively and helps keep bristles soft. Baby shampoo is popular because it is mild, easy to find, and inexpensive.
Mild Facial Cleanser
If you have sensitive skin, using your regular gentle facial cleanser can be a smart choice. The logic is simple: if your skin already tolerates it, your brushes probably will too. This is especially helpful for people who react to fragrance-heavy soaps.
Gentle Dish Soap for Heavy Buildup
Dish soap can cut through oily foundation and concealer, but it should be used carefully. Add only a tiny amount, focus on the bristles, and rinse very well. For natural hair brushes, dish soap may be too drying if used often. For synthetic brushes with stubborn cream makeup, it can be a useful occasional deep-cleaning option.
Solid Brush Soap or Plain Mild Bar Soap
A simple unscented or mild bar soap can work beautifully. Wet the brush tips, swirl lightly across the soap surface, then lather and rinse. This method is neat, cheap, and easy to store near the sink.
What Not to Use on Makeup Brushes
Not every cleaning hack deserves a place in your beauty routine. Some methods can damage bristles, irritate skin, or shorten the life of your brushes.
Avoid Hot Water
Hot water can damage bristles and weaken adhesives. Lukewarm water is enough to loosen makeup and rinse away cleanser.
Avoid Soaking the Whole Brush
Soaking brushes in a cup of water may look efficient, but it can loosen glue inside the ferrule and cause handles to crack, swell, or separate. Brushes are not pasta. They do not need to soak.
Avoid Harsh Household Cleaners
Bleach, bathroom cleaner, strong disinfectants, and highly fragranced cleaners do not belong on makeup brushes. These products may leave residue that can irritate your skin or eyes. Stick with gentle cleansers made for skin, hair, dishes, or brushes.
Avoid Rubbing Alcohol as a Main Deep-Clean Method
Alcohol-based sprays can be useful for quick spot-cleaning between colors, especially for makeup artists or anyone switching shades. However, alcohol can be drying if used constantly as the only cleaning method. Regular washing with water and gentle cleanser is still important.
How to Clean Makeup Sponges
Makeup sponges need special attention because they absorb liquid products and hold moisture. To clean one, wet it completely, add gentle soap, squeeze repeatedly until the lather pulls out makeup, then rinse until the water runs clear. Do not twist aggressively, because sponges can tear. Squeeze out excess water with a clean towel and let the sponge dry in an open, well-ventilated area.
Never store a damp sponge inside a sealed makeup bag. That is not storage; that is a tiny humid apartment for grime. Let it dry fully before putting it away.
How to Dry Brushes Faster Without Ruining Them
Brushes usually dry best overnight. Wash them after your evening routine, lay them flat, and they should be ready by morning. Dense foundation brushes may need more time, so plan ahead if you need them for an early event.
Fast-Drying Tips
- Blot thoroughly with a clean towel before air-drying.
- Place brushes near moving air, but not directly under high heat.
- Keep bristles hanging over the counter edge for better airflow.
- Wash dense brushes first so they get the longest drying time.
Do not use a hair dryer on high heat. Heat can damage bristles, loosen glue, and make brushes feel rough. If you must use a dryer, use a cool setting from a distance, but air-drying is safer.
When Should You Replace Makeup Brushes?
Cleaning extends the life of your brushes, but no brush lasts forever. Replace a brush when it sheds constantly, smells strange after washing, feels scratchy, loses its shape, or no longer applies makeup evenly. A brush that used to blend foundation beautifully but now leaves streaks like a windshield wiper may be past its prime.
Sponges usually need replacing more often than brushes. If a sponge has tears, black spots, a sour smell, or stains that never wash out, throw it away. Your skin is worth more than forcing one sponge to survive another month.
Affordable Weekly Brush-Cleaning Routine
Here is a simple routine you can actually follow, even if your schedule is held together by coffee and good intentions.
Sunday Night Brush Reset
Choose one evening each week to wash your main brushes. Set out a towel, gather your cleanser, and clean brushes in batches. Start with foundation and concealer brushes because they take the longest to dry. Then wash eye brushes, blush brushes, bronzer brushes, and powder brushes.
Two-Minute Midweek Spot Clean
If you change eyeshadow colors often, wipe eye brushes on a clean dry towel between shades. For a deeper midweek refresh, use a brush-cleaning spray or a small amount of gentle cleanser on the bristles, then rinse and dry. This keeps colors cleaner and prevents muddy blending.
Monthly Makeup Bag Check
Once a month, empty your makeup bag and wipe the inside. Wash reusable pouches if the care label allows it. Toss old sponges, broken applicators, and products that smell off or have changed texture. A clean brush placed into a dirty bag is like showering and then rolling in glittery dust. Technically dramatic, but not helpful.
Common Makeup Brush Cleaning Mistakes
Using Too Much Soap
More soap does not mean cleaner brushes. It usually means more rinsing. Leftover soap can make bristles stiff and may transfer residue to your skin. Use a small amount and repeat if necessary.
Drying Brushes Upright
Standing wet brushes upright lets water travel into the ferrule. This may weaken glue and cause shedding. Dry them flat instead.
Forgetting the Handles
Handles collect fingerprints, foundation, and powder too. Wipe handles with a damp cloth and a little mild soap, then dry them. Avoid soaking wooden handles.
Sharing Brushes
Sharing makeup brushes can transfer oil, bacteria, and eye-area germs from one person to another. If you do makeup for a friend, clean brushes before and after, and use disposable applicators for mascara or lip products.
Experience Section: What Really Works in Everyday Life
After testing different brush-cleaning habits in real-life routines, the method that works best is not the fanciest one. It is the one that is easy enough to repeat. A weekly brush wash with gentle shampoo or mild soap beats a luxury cleaning system that sits unused under the sink next to expired sheet masks and emotional support candles.
The biggest lesson is that foundation brushes need priority. They usually look dirty first, smell “off” first, and affect makeup application the most. When a foundation brush is clean, base makeup spreads more evenly and uses less product. A dirty brush often drinks up foundation, then stamps it unevenly onto the face. That is how a normal morning turns into a blending marathon.
Eye brushes are another place where cleaning makes an obvious difference. A clean blending brush keeps soft brown in the crease looking soft brown, not like a foggy mixture of every eyeshadow palette you have loved since 2019. Washing small eye brushes regularly also makes shimmer shades brighter and matte shades smoother.
One of the easiest tricks is keeping a “dirty brush cup” separate from a “clean brush cup.” Once a brush is used several times, move it to the dirty cup. This removes the guesswork. No more sniffing a brush like a detective or wondering whether the bronzer brush is clean enough for blush. The brush cup system is cheap, visual, and oddly motivating.
Another helpful experience-based tip is to wash brushes while doing another bathroom task. For example, clean brushes after washing your face at night or while waiting for a hair mask to sit. Pairing the chore with an existing routine makes it feel less like a project. The habit becomes automatic: cleanse face, wash brushes, blot, lay flat, go live your life.
Drying setup matters more than people think. Brushes left on a thick towel in a cramped corner can stay damp too long. The best setup is a clean towel near the edge of a counter, with brush heads hanging slightly over the side. Dense brushes should be spaced apart so air can move around them. If the bathroom is humid, move them to a bedroom dresser on a clean towel instead.
For affordability, mild baby shampoo remains a dependable winner. A small bottle lasts a long time, works for most synthetic and natural bristles, and is easy to rinse. For stubborn foundation, one drop of gentle dish soap mixed with a little shampoo can help, but it should not become an everyday habit for delicate brushes. Use the stronger option only when the brush truly needs it.
Finally, the most realistic advice is to stop aiming for perfection. If you cannot wash every brush every week, wash the brushes that touch liquid products and the brushes used near your eyes. That single step gives you the biggest benefit with the least effort. Clean makeup brushes are not about being obsessive. They are about making your beauty routine healthier, smoother, cheaper, and less chaotic.
Conclusion
Cleaning makeup brushes is one of the simplest beauty habits with the biggest payoff. It helps your makeup apply better, keeps bristles softer, reduces old product buildup, and supports a cleaner routine for your skin and eyes. The affordable method is easy: rinse the bristles with lukewarm water, massage with gentle cleanser, rinse until clear, blot, reshape, and dry flat with airflow.
You do not need expensive gadgets or complicated steps. You need consistency. Wash your most-used brushes weekly, give eye brushes regular attention, clean sponges often, and replace tools when they are worn out. Your brushes will last longer, your makeup will look smoother, and your skin will thank you quietly instead of filing a complaint in the form of a surprise breakout.