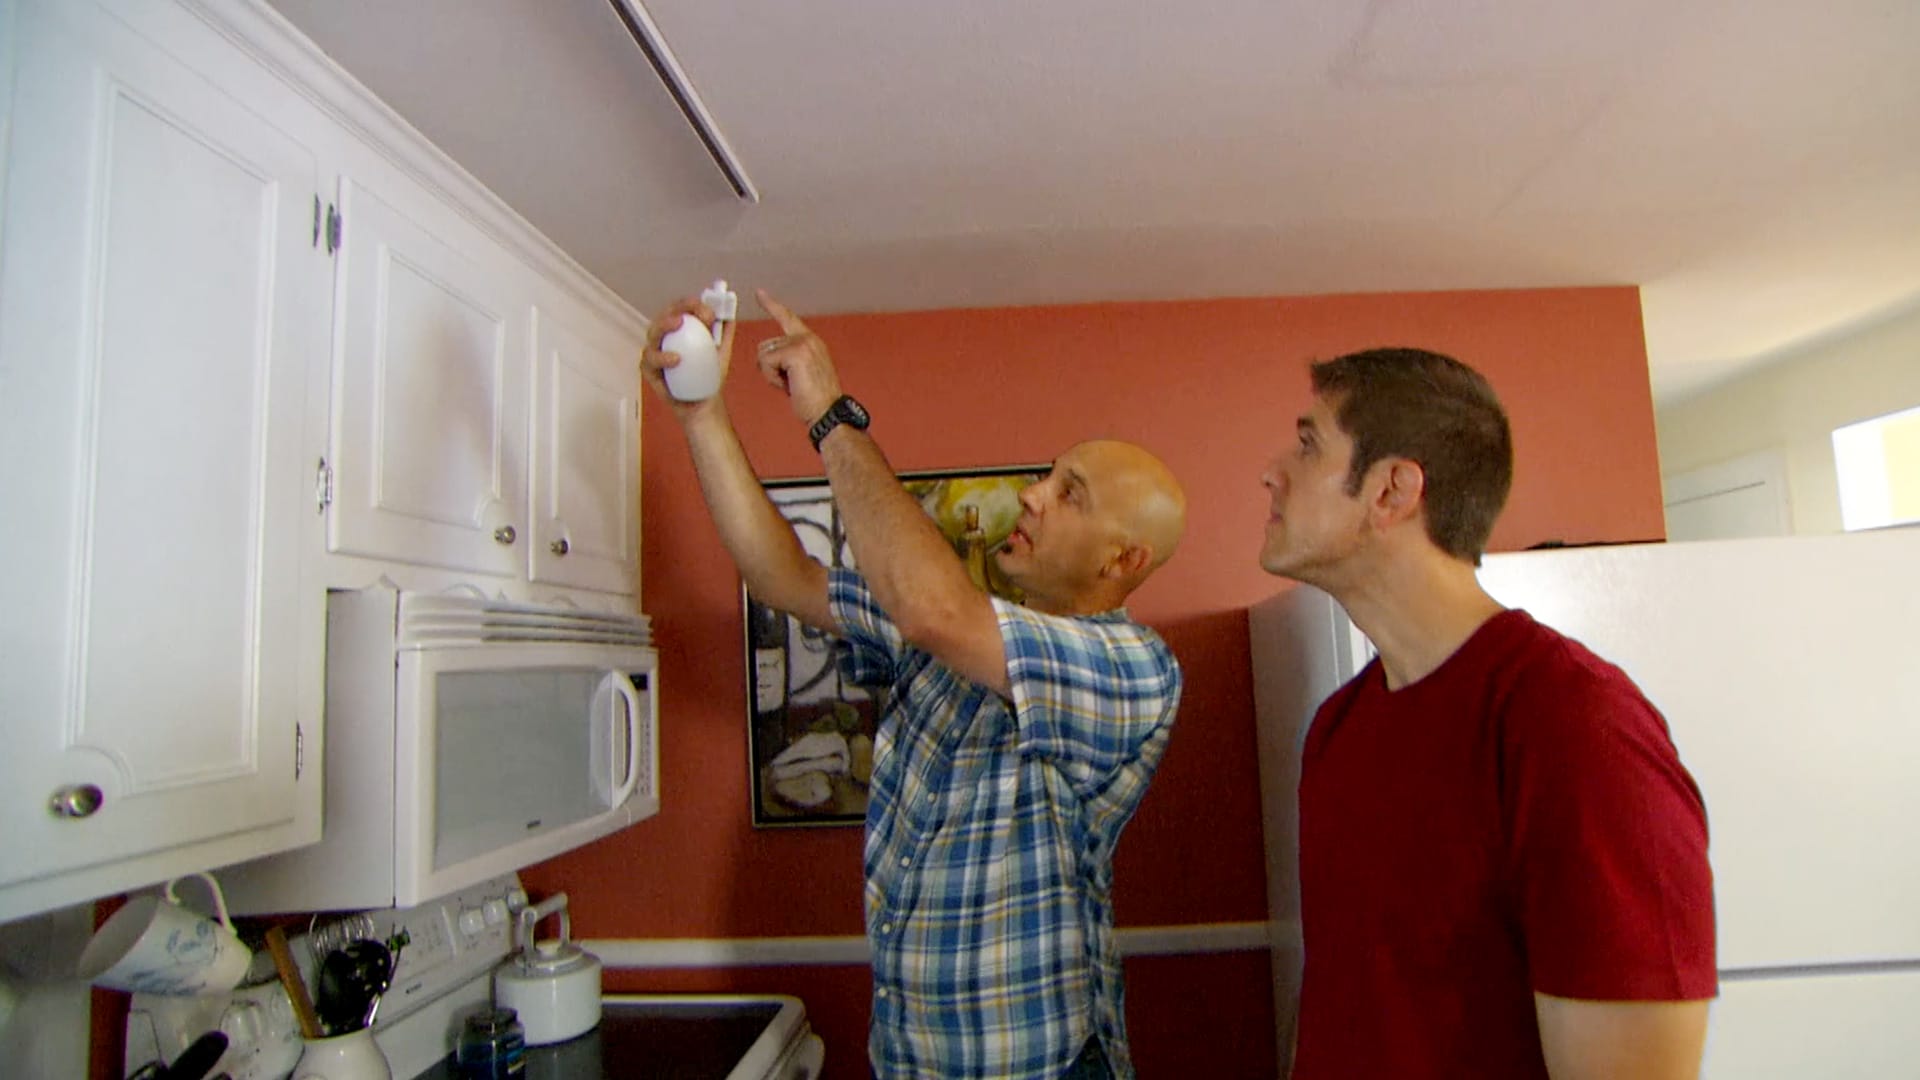
Track lighting is the kitchen’s Swiss Army knife: it can brighten prep zones, spotlight a gorgeous backsplash,
and make your island look like it belongs in a design magazineall without tearing open the ceiling for a dozen
recessed cans. If you’ve ever chopped onions in your own shadow (or tried to judge whether chicken is “golden”
or “oops”), you already understand why directional, adjustable light matters.
This guide walks you through (1) choosing the right track system and light heads, (2) planning a layout that
actually lights the countertops (not just the tops of your cabinets), (3) step-by-step installation basics, and
(4) a simple “shoot plan” so you can create a helpful kitchen track lighting video of your own.
Why Track Lighting Works So Well in Kitchens
Kitchens are a lighting “combo platter”: you need ambient light to move around safely,
task light to prep and cook, and accent light to make the room feel intentional
instead of “builder basic.” Track lighting can cover all three because you can aim each head exactly where it’s needed.
- Flexible: Add, remove, or reposition heads as your kitchen evolves (new island stools? new aim).
- Directional: Point light onto work surfaces to reduce shadows where your hands live.
- Design-friendly: Sleek rails can blend in, or become a modern feature.
- Great in tricky ceilings: Useful when joists, ducting, or concrete make recessed lighting hard.
Step 1: Make a Simple Kitchen Lighting Plan (No Drafting Degree Required)
Before you buy anything shiny, do this: grab painter’s tape, a pencil, and a rough floor plan. Your goal is to
decide what needs light first, then choose fixtures that deliver it.
Map your zones
- Task zones: sink, cooktop/range, main prep counter, island, coffee station.
- Traffic zones: paths from fridge to sink to stove (the “kitchen triangle” in action).
- Accent zones: open shelving, artwork, backsplash texture, pantry door (yes, it can be dramatic).
Use “light targets” so you don’t guess
Lighting designers often talk in foot-candles (how much light hits a surface) and lumens
(how much light a source produces). You don’t need to become a lighting engineerjust use the concept to avoid
the two classic kitchen lighting mistakes: (1) too dim to prep safely, or (2) bright enough to interrogate a tomato.
A practical approach is to plan for moderate ambient light across the room and
brighter task light on countertops and islands. In real kitchens, task areas often need noticeably more
illumination than the overall room so you can see detail while chopping, reading measurements, and checking doneness.
Quick example (so the math stops being scary)
Let’s say your kitchen is 12’ × 16’ = 192 sq ft. If you target about
40 foot-candles for general lighting, that’s roughly 192 × 40 = 7,680 lumens of
ambient light. Then, if you have about 30 sq ft of key countertop area and you target
70 foot-candles for task lighting, that’s 30 × 70 = 2,100 lumens focused where you prep.
Total in this example: about 9,780 lumens across ambient + task (delivered efficiently and aimed well).
Two important caveats: (1) finishes matter (dark countertops “eat” light; glossy surfaces bounce it), and
(2) fixture optics matter (a tight beam puts more light on the counter than a wide flood). So treat the math as a
planning tool, not a courtroom verdict.
Step 2: Choose the Right Track System and Light Heads
Pick the track type first (and don’t mix standards)
Track systems come in a few common standards. The big rule: parts must match the track standard.
If your home already has track installed, identify the system type before buying new heads. If you’re starting fresh,
pick one system and stay consistent so future replacements don’t become a scavenger hunt.
Line-voltage vs. low-voltage: what most kitchens use
Many residential kitchen track systems run on standard household voltage and simplify installation. Some systems use
a transformer (common in certain low-voltage setups). If you’re unsure what you have, check the existing label on the
track or heads, or bring one head to the store to match.
Beam angles: the secret sauce for “nice light”
If track lighting has a superpower, it’s beam control. Aim and beam width determine whether your counter is evenly lit
or looks like a spotlight talent show.
- Narrow beam (spot): Great for highlighting a sink, art, or a dramatic backsplash.
- Medium beam: Ideal for most kitchen task lightingbright, but not harsh.
- Wide beam (flood): Useful for ambient fill or washing a broader area.
Tip: For islands and main prep runs, medium beams often look best because they overlap smoothly without creating hot
circles. For open shelving or textured tile, a narrower beam aimed at a shallow angle can create beautiful “grazing”
shadows that make the material pop.
Color temperature and color quality (because food should look edible)
In kitchens, people often prefer a clean, welcoming white lightbright enough for tasks, warm enough to feel homey.
A common “sweet spot” is the warm-to-neutral range. Also consider CRI (color rendering): higher CRI makes
ingredients, wood tones, and paint colors look more accurate.
- Warm white: cozy, flattering, great for open-concept kitchens that flow into living spaces.
- Neutral white: crisp and clear for prep-focused kitchens.
- High CRI: especially helpful if you care about food color, countertops, and finish matching.
Dimming and smart control (avoid the flicker zone)
Dimming is fantastic in kitchens because the same space hosts breakfast, homework, dinner, and late-night
“just one cookie.” But LEDs and dimmers must play nicely together. The most reliable approach is to choose
a dimmable LED head (or bulb) and a dimmer that’s listed as compatible with that specific load type.
If you ever see flicker, limited dimming range, or buzzing, it’s often a compatibility issuesometimes related to
minimum load requirements or the dimming method. Using a manufacturer compatibility tool/list and keeping your dimmer
matched to the lighting load is the quickest route to smooth, quiet dimming.
Step 3: Layout Playbook (Where the Track and Heads Actually Go)
The goal is simple: put light where your work happens and overlap beams so there are no “dark patches” between heads.
You can fine-tune aiming after installation, but your starting layout matters.
Common spacing guidelines
- Between heads: many kitchens look even with heads spaced roughly 18–24 inches apart,
adjusted based on beam angle and brightness. - Long runs: use more heads with lower intensity for smoother coverage (fewer hotspots).
- Ceiling height check: taller ceilings usually need brighter heads, narrower beams, or slightly closer spacing.
Kitchen-by-kitchen placement examples
Galley kitchen (two parallel counters)
Run one track centered down the galley, then aim heads toward each counter run. Angle the heads so light lands on the
countertop surfacenot the upper cabinet doors. If one side is the main prep counter, give that side a head or two more.
L-shaped kitchen
Use an L-shaped track (or two straight runs) that follows the working counters. Put heads near the sink and primary prep
corner, then “fill in” along the run. Aim a dedicated head at the cooktop area, but avoid aiming straight into anyone’s eyes.
U-shaped kitchen
Consider two shorter tracks instead of one giant perimeter run. This lets you aim task light onto the three counter zones
without over-lighting the center. If your ceiling has one existing junction box, a track layout that branches (with connectors)
can still cover multiple zonesjust keep the design balanced.
Kitchen island (the social + prep stage)
Run a track parallel to the island length and space heads evenly so the entire surface is usable. This is where track lighting
can outperform pendants: instead of bright “pools” with gaps, you can create consistent coverage across the whole island.
Aim heads slightly inward to reduce glare for seated guests.
Step 4: Installation Instructions (Ceiling-Mounted Track Lighting)
Safety note: If you are not comfortable working with household electrical wiring, hire a licensed electrician.
Always follow local code requirements, use a voltage tester, and work with power off at the breaker. Track lighting installation
is usually a manageable DIY for experienced homeowners, but it’s still real electricityso treat it with respect.
Tools & supplies
- Voltage tester
- Screwdriver set
- Wire stripper/cutter
- Wire connectors (wire nuts) and electrical tape (as needed)
- Drill + bits (if anchors are required)
- Stud finder (helpful for solid mounting)
- Ladder and safety glasses
Step-by-step install (typical junction box feed)
-
Turn off power at the breaker.
Verify the circuit is off with a voltage tester at the existing ceiling box. -
Remove the old fixture (if replacing one).
Support it as you disconnect wires. Note how the wires are connected. -
Inspect the ceiling box.
Track heads are light, but the track must be securely mounted. If the existing box is loose, damaged,
or not rated appropriately, stop and address that first. -
Attach the mounting plate/crossbar.
Most track kits include a plate that screws into the junction box, then the canopy/adapter attaches to it.
Tighten firmly so nothing wiggles. -
Connect the wires (match hot/neutral/ground).
In many U.S. homes, black is hot, white is neutral, and green/bare is ground.
Connect supply wires to the track adapter leads using listed wire connectors. If your wiring colors differ (older homes do),
follow identification/testingdon’t guess. -
Tuck wires into the junction box.
Carefully fold wires so the canopy sits flush without pinching. -
Mount the track.
Depending on the system, you’ll snap/lock the track onto the adapter at the box and secure additional mounting points along the run.
Use ceiling joists when possible; otherwise use appropriate anchors rated for the ceiling material. -
Install the heads.
Insert each head into the track and twist/lock per the manufacturer’s instructions. Don’t overtighten; you want secure, not stripped. -
Restore power and test.
Turn the breaker back on. Confirm all heads light and the switch/dimmer behaves properly. -
Aim and refine.
Aim light onto work surfaces at a comfortable angle. Step back, check for glare, and adjust so beams overlap smoothly.
Common install mistakes (and how to avoid them)
- Only mounting at the junction box: longer tracks usually need additional mounting points for stability.
- Lighting the backsplash but not the counter: aim slightly forward so light lands where your hands work.
- Glare into seats: tilt heads away from eye level, especially over islands and peninsulas.
- Flicker with dimming: confirm LED + dimmer compatibility and minimum load requirements before blaming the bulbs.
VIDEO: A Simple Shoot Plan + Voiceover Script (3–5 Minutes)
Want the “(VIDEO)” part without turning your kitchen into a film studio? Here’s a clean, practical outline you can shoot
with a phone. The trick: keep clips short, show hands doing the work, and add on-screen labels for each step.
Shot list (what to film)
- Before shot: stand in the kitchen, show the dark prep area (10 seconds).
- Plan shot: quick pan of your taped layout on the ceiling or your sketch (10 seconds).
- Safety shot: breaker panel flip + voltage tester check (10 seconds).
- Remove old fixture: brief clip of removal (10–15 seconds).
- Mounting plate: attach crossbar/mounting plate to ceiling box (10–15 seconds).
- Wiring close-up: connect hot/neutral/ground (10–15 seconds; keep it clear, not dramatic).
- Track mounting: snap/lock track into place + secure additional points (15 seconds).
- Add heads: insert/twist heads into track (10 seconds).
- Test & aim: power on, then aim onto counters (15 seconds).
- After shot: show the bright, even countertop lighting (10 seconds).
Voiceover script (paste into your notes)
“Today I’m installing kitchen track lighting to get brighter, more flexible light over my prep zones. First, I mapped my
key areassink, stove, and main counterso the light lands where work happens, not just in the middle of the room.
After turning off power at the breaker and confirming with a voltage tester, I removed the old fixture and attached the
mounting plate to the ceiling junction box. Then I connected the wireshot to hot, neutral to neutral, and ground to ground
tucked everything safely into the box, and mounted the track.
Next, I installed the track heads and tested the system. The final step is aiming: I pointed the heads toward the counters
to reduce shadows and adjusted the angles to avoid glare. The result is brighter, more even light for cooking and cleanup,
and I can re-aim the heads anytime the kitchen layout changes. If you’re not comfortable working with electrical wiring,
this is the step where hiring a licensed electrician is absolutely worth it.”
Maintenance & Upgrades (Because Kitchens Are Hard on Everything)
- Clean lenses and housings: grease and dust reduce output more than you’d think.
- Re-aim seasonally: if you change decor, add a coffee bar, or move stools, adjust the heads.
- Consider under-cabinet lighting: track is great, but pairing it with under-cabinet light makes counters feel “chef-level” bright.
- Upgrade control: a quality dimmer (or smart dimmer) can transform the mood instantly.
Real-World Experiences & Lessons Learned (What People Wish They Knew)
If you ask homeowners how their first track lighting project went, you’ll hear a surprisingly consistent theme:
the install is often easier than the aiming. The track goes up, the heads click in, and everyone celebrates…
until they realize the light is perfectly illuminating the fruit bowl while the cutting board remains in a tasteful shadow.
The fix is simplere-aim the headsbut the lesson is real: plan for an extra 20 minutes of adjusting after everything works.
Another common experience shows up in galley kitchens. People replace a single ceiling fixture with track lighting and expect
the whole space to feel evenly bright. What actually happens is the center brightens, but the counters still feel dim because
light is landing in the walkway. The best “aha” moment comes when they aim two or three heads toward the primary counter run.
Suddenly, chopping is easier, recipe text is readable, and the kitchen feels bigger. It’s not magicit’s just putting photons
where hands do the work.
Islands create their own storyline. Many families start with pendants and love the look, but complain about the “dark zones”
between pools of lightespecially when kids do homework at one end while someone preps food at the other. Track lighting can
feel like a practical upgrade because you can spread heads evenly along the length. A frequent tip from busy households:
aim the outer heads slightly inward so seated people aren’t staring into a beam during dinner. It’s a small adjustment that
turns “bright” into “comfortable.”
Dimmer choices also generate memorable momentsusually because someone installed a dimmer, hit the switch, and discovered the
world’s tiniest disco: a gentle LED flicker. The experience teaches a valuable rule: LEDs don’t just “dim”;
they dim well when the bulb/head and dimmer are compatible. People who take five minutes to check compatibility lists tend to
get smooth dimming and quiet performance. People who wing it often become unwilling experts in the art of returns and exchanges.
Design-wise, the most satisfying “I’m glad we did this” stories come from kitchens with special featurestextured tile,
floating shelves, or a pantry wall that deserves attention. A single track head aimed to graze that surface can elevate the
whole room at night. It’s the kind of subtle accent that makes guests ask, “Did you renovate?” when you really just
repositioned a light.
Finally, there’s the pride factor. DIYers often describe track lighting as one of those projects that feels like a genuine
upgrade because it changes how the kitchen works every day. The best experiences come when people treat the project like a
mini-plan (zones, targets, layout) instead of a quick swap. When the lighting is layered, dimmable, and aimed at the right
surfaces, the kitchen becomes easier to cook inand nicer to be inwhether you’re making a five-course meal or just hunting
for snacks like a professional.
Conclusion
Kitchen track lighting is one of the most practical “big impact” upgrades you can make: it’s flexible, aimable, and capable
of delivering real task light where you need it most. Plan your zones, choose the right system and beam angles, install
safely, and spend a few minutes aiming for even countertop coverage. Once it’s dialed in, you’ll wonder why you ever cooked
in the dark.