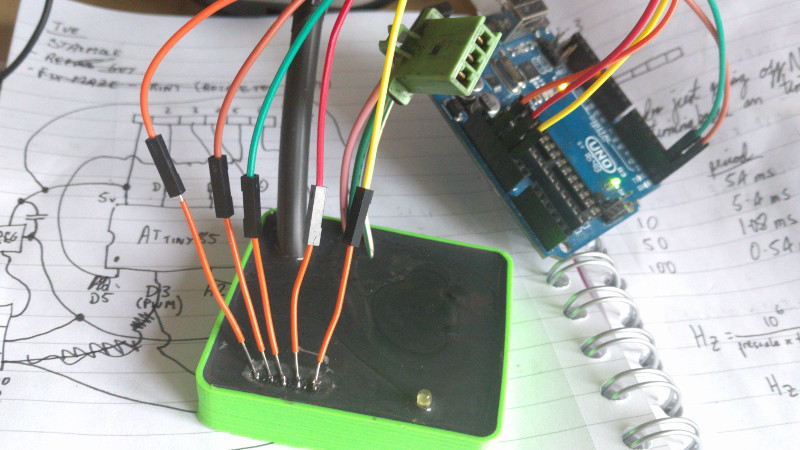
Interfacing with a digital speedometer sounds like the kind of project that begins with a sensible plan and ends with someone lying upside down in a footwell, holding a multimeter, whispering, “Why are there twelve black wires?” Welcome to the wonderful world of automotive electronics, where speed is not just something your vehicle does; it is a signal, a calculation, a display value, and occasionally a tiny gremlin hiding inside a wiring harness.
At its core, a digital speedometer takes movement and turns it into readable information. That information may come from a wheel speed sensor, a transmission output sensor, a Hall effect sensor, a magnetic pickup, GPS, or data traveling across a vehicle network such as CAN bus. The job of the interface is to listen to that information, translate it correctly, and display speed in a way that is accurate, stable, and safe.
This guide explains how digital speedometer interfaces work, what signals you are likely to encounter, and how makers, restorers, engineers, and dashboard tinkerers think through a project without accidentally turning a weekend upgrade into an electrical spaghetti festival.
What Does “Interfacing” Mean in a Speedometer Project?
In electronics, interfacing means making two systems talk to each other. In a digital speedometer project, that usually means connecting a speed source to a display or controller. The source might be a sensor on a wheel, a pulse wire from a transmission, an OBD-II adapter, a CAN bus module, or a standalone GPS receiver. The display might be a small LCD, an OLED screen, a motorcycle-style digital cluster, a custom dashboard, or even a retro device repurposed for maximum nerd points.
The important detail is that a speedometer is not magic. It does not “know” speed. It receives data and interprets it. If the input is wrong, noisy, delayed, or poorly scaled, the display will happily show nonsense with the confidence of a weather app predicting sunshine during a thunderstorm.
How a Digital Speedometer Gets Speed Data
There are several common ways to feed speed information into a digital speedometer. Each method has strengths, drawbacks, and a different level of complexity.
1. Hall Effect Sensor and Magnet
A Hall effect sensor detects a magnetic field. In a simple speedometer setup, a magnet is attached to a rotating part such as a wheel, shaft, or disc. Every time the magnet passes the sensor, the sensor produces a pulse. Count the pulses over time, combine that with wheel circumference, and you can calculate speed.
This method is popular in bicycles, scooters, small electric vehicles, robotics, and custom dashboards because it is straightforward. One magnet equals one pulse per revolution. Multiple magnets give more pulses and smoother readings, but they also require more careful calibration. The sensor must be mounted securely, the magnet must pass close enough to trigger it, and the wiring needs protection from vibration, water, and road grime. Cars are not exactly spa environments for electronics.
2. Variable Reluctance or Magnetic Pickup Sensors
Some vehicles use magnetic pickup sensors that generate an alternating voltage as teeth on a gear pass by the sensor. The faster the gear spins, the higher the pulse frequency. These sensors are common around transmissions, crankshafts, and older vehicle speed sensing systems.
Unlike a simple 5-volt square-wave Hall sensor, a magnetic pickup signal can vary in voltage and shape. At low speed, the signal may be weak. At high speed, it can become much stronger. That usually means the interface circuit must condition the signal before a microcontroller can read it safely. Signal conditioning may include filtering, voltage limiting, or converting the waveform into a clean digital pulse.
3. Transmission Vehicle Speed Sensor
Many vehicles use a vehicle speed sensor mounted on or near the transmission. It reports how fast the output shaft is turning. The vehicle’s computer can use that information for fuel control, transmission shifting, cruise control, anti-lock braking behavior, and the speedometer display.
When using this type of signal, calibration matters. Tire size, final drive ratio, sensor tooth count, and pulses per mile all affect the final displayed speed. A tire change may seem harmless until your speedometer starts telling fairy tales.
4. OBD-II Speed Data
For many modern vehicles, the easiest non-invasive approach is reading vehicle speed through the OBD-II port. OBD-II is the standardized diagnostic system used on passenger vehicles in the United States and many other markets. A scan tool or microcontroller interface can request live data such as vehicle speed, engine RPM, coolant temperature, and other parameters.
The advantage is convenience. You do not have to splice into a sensor wire, crawl under the vehicle, or explain to your family why the dashboard is on the dining table. The downside is latency. OBD-II data is often fast enough for logging and display, but it may not feel as instant as a direct wheel sensor or factory cluster connection. For a casual digital display, it can be excellent. For a high-performance racing dash, it may be too slow depending on the setup.
5. CAN Bus Speed Data
CAN bus, short for Controller Area Network, is a communication system that lets vehicle modules share data. Instead of every sensor having a dedicated wire to every device, modules broadcast messages across a shared network. A digital dashboard may listen for the message that contains vehicle speed and then display it.
CAN bus can be powerful, but it is not beginner-proof. Vehicle manufacturers do not always publish every message format, and the same data may use different IDs or scaling rules across models. Interfacing with CAN bus requires the right hardware, proper termination, electrical isolation practices, and an understanding that sending messages onto a vehicle network can have real safety consequences. Listening is usually safer than talking. In automotive electronics, silence is not only golden; sometimes it prevents warning lights from staging a rebellion.
The Basic Speed Calculation
The simplest pulse-based speedometer uses a known wheel circumference and measures how often the wheel rotates. The general idea is:
Speed = distance traveled per pulse × pulse frequency
For example, if one wheel revolution moves the vehicle 2 meters and one magnet creates one pulse per revolution, then every pulse represents 2 meters of travel. If the sensor reads 10 pulses per second, the vehicle is moving 20 meters per second. Convert that to miles per hour or kilometers per hour, and the display has its number.
Of course, real projects add complications. Tires flex. Tire diameter changes slightly with load and pressure. Sensors bounce. Magnets may not line up perfectly. Electrical noise from ignition systems, motors, alternators, and relays can create false triggers. That is why a polished digital speedometer does more than count pulses. It filters, averages, validates, and updates the display at a rate that feels responsive without jumping around like a squirrel on espresso.
Key Hardware Needed for a Digital Speedometer Interface
Microcontroller
A microcontroller is the brain of a custom speedometer interface. Arduino boards, ESP32 boards, Raspberry Pi Pico boards, STM32 boards, and other embedded platforms are commonly used. The microcontroller reads the input signal, calculates speed, and sends the result to a display.
For pulse-based input, interrupt-capable pins are useful because they can count sensor pulses accurately while the rest of the program handles display updates. For CAN bus, the microcontroller may need a CAN controller and a transceiver. Some boards include native CAN support, while others use external modules.
Signal Conditioning Circuit
Automotive signals can be messy. A sensor wire may not produce a perfect logic-level signal that a microcontroller can safely read. Signal conditioning protects the microcontroller and cleans up the signal. Depending on the sensor, that may involve pull-up resistors, optocouplers, voltage dividers, Schmitt triggers, transient voltage suppression, filtering capacitors, or dedicated interface chips.
The golden rule is simple: never assume a vehicle signal is safe for a microcontroller just because the wire looks innocent. Automotive electrical systems can produce voltage spikes, reverse polarity events, and noise that would make a development board resign immediately.
Display
Digital speedometers can use seven-segment displays, LCD modules, OLED screens, TFT panels, or ready-made automotive displays. Seven-segment displays are highly readable and give a classic digital look. OLED screens look sharp but must be selected carefully for sunlight visibility. TFT screens allow custom graphics, warning icons, and modern layouts, though they require more processing power and careful interface design.
Power Supply
A vehicle’s 12-volt electrical system is not a clean bench supply. It can dip during starting, rise during charging, and spike during switching events. A good speedometer interface needs a stable voltage regulator, fusing, reverse polarity protection, and grounding practices that reduce noise. If the display flickers every time the headlights turn on, the project is not “vintage character.” It is a power design problem wearing a tiny hat.
Calibration: Where Accuracy Is Won or Lost
Calibration is the difference between a speedometer and a decorative number generator. For a pulse-based system, you need to know how many pulses represent a known distance. That can be calculated from wheel circumference, gear ratio, and sensor count, but real-world calibration is often better.
A practical method is to compare the digital speedometer reading against a reliable reference, such as a GPS speed reading on a straight, open road at steady speed. GPS has its own limitations, especially under trees, near tall buildings, or during rapid acceleration, but it is useful for checking steady-state speed. For higher precision, measured distance testing or professional calibration equipment is better.
When calibrating, test several speeds. A system that is accurate at 20 mph but wrong at 70 mph may have a scaling or timing issue. A system that jumps around at low speed may need debounce logic, better sensor alignment, or averaging. A system that reads correctly on the workbench but fails in the vehicle may be suffering from noise, grounding, vibration, or heat.
OBD-II vs Direct Sensor vs CAN Bus: Which Interface Is Best?
There is no single best interface for every project. The right choice depends on the vehicle, the goal, and how much complexity you want to invite into your weekend.
OBD-II is usually the easiest and least invasive. It is ideal for add-on displays, data loggers, and hobby dashboards. The main limitation is update speed and compatibility variation.
Direct sensor input is often the most responsive. It works well for custom vehicles, motorcycles, bicycles, scooters, electric builds, and race projects. The trade-off is that mounting, wiring, waterproofing, and calibration become your responsibility.
CAN bus can be elegant and data-rich. It is excellent for advanced dashboards that need speed, RPM, temperature, gear, warning lights, and more. The challenge is decoding messages correctly and avoiding unsafe interaction with vehicle networks.
Common Problems When Interfacing With a Digital Speedometer
No Reading at All
If the display shows zero, start with the basics. Is the sensor powered? Is ground shared correctly? Is the magnet close enough? Is the signal wire connected to the correct input? Is the microcontroller pin configured properly? Many “advanced” problems are secretly simple wiring mistakes wearing sunglasses.
Reading Is Too High or Too Low
This usually points to calibration. Check wheel circumference, pulses per revolution, units, and conversion math. Also confirm whether the sensor produces one pulse per magnet pass or multiple transitions per cycle. Counting both rising and falling edges can double the reading if the software expects only one.
Reading Jumps Around
Jumpy readings may come from sensor bounce, weak magnetic alignment, electrical noise, loose mounting, poor grounding, or insufficient averaging. Adding software smoothing can help, but do not use smoothing to hide a bad signal. That is like spraying air freshener on a burning toaster.
Display Lags Behind Actual Speed
Too much averaging can make a speedometer feel slow. OBD-II polling may also introduce delay. A good digital speedometer balances smoothness and response. For everyday driving, a stable display is comfortable. For motorsport or testing, faster updates may be more valuable.
Safety and Legal Considerations
A speedometer is part of the driving information system. In the United States, vehicle display requirements are tied to federal safety standards, and speedometer labeling commonly uses MPH, with km/h allowed as an additional display. Any modification that affects the driver’s speed reading should be treated seriously.
For road vehicles, avoid modifications that interfere with factory safety systems, anti-lock braking, stability control, airbag modules, or emissions diagnostics. Do not tamper with odometer readings, and do not build systems intended to misrepresent vehicle mileage or speed. The best digital speedometer interface is one that reads information accurately and safely, not one that lies with better typography.
Example Project: A Simple Pulse-Based Digital Speedometer
Imagine a small electric kart project. The builder mounts a Hall effect sensor near the rear axle and attaches two small magnets evenly spaced on a rotating disc. Every full revolution creates two pulses. The wheel circumference is measured under load, not guessed from the tire label. The microcontroller counts pulses using an interrupt, calculates speed every 200 milliseconds, smooths the result slightly, and displays it on a bright seven-segment display.
The builder tests the sensor by rotating the wheel by hand, then with the kart on stands, and finally at low speed in a safe area. After comparing readings with GPS, the builder adjusts the calibration constant. The final setup is not glamorous, but it works. More importantly, it works repeatedly, which is the difference between an electronics project and a dashboard-shaped mood swing.
Example Project: Reading Speed Through OBD-II
Now picture a daily driver where the owner wants a small digital speed readout without modifying factory wiring. An OBD-II adapter reads vehicle speed data from the diagnostic port. A microcontroller or small embedded computer requests the speed value, formats it, and displays it on a compact screen mounted near the dashboard.
This approach is clean and reversible. It is also useful for logging trips, building a custom heads-up display, or adding a larger speed readout for visibility. The builder should still consider boot time, display brightness, cable routing, and whether the adapter stays powered when the vehicle is off. Nobody wants a neat dashboard gadget that slowly drains the battery like a tiny vampire with Bluetooth.
Experience Notes: What Real Projects Teach You
The biggest lesson from working with digital speedometer interfaces is that the math is usually easier than the environment. On paper, speed is simple: measure distance over time. In the vehicle, the sensor is near metal, heat, vibration, moisture, and electrical noise. A circuit that behaves perfectly on a desk can become dramatic once it is installed next to a motor, alternator, ignition coil, or long cable run.
One practical experience is to test in stages. First, make the sensor work on the bench. Confirm the display updates correctly. Then test the sensor with slow physical movement. Then test the full system with the wheel lifted or the shaft rotated safely. Only after that should road testing happen, and even then, it should be done carefully with attention on driving, not debugging. A laptop balanced on the passenger seat is not a co-pilot; it is a chaos rectangle.
Another lesson is to document calibration constants. Many builders tune a value until the display looks right, then forget what the number means. Later, after changing tires or magnets, the project becomes a guessing game. Keep notes: wheel circumference, pulses per revolution, sensor type, display update interval, and smoothing method. Future you will be grateful. Future you is also the person most likely to say, “Who wired this?” while staring at your own work.
Mounting matters more than beginners expect. A Hall sensor that is slightly too far from the magnet may work at low speed and fail at high speed. A magnet attached with weak adhesive may shift, causing inconsistent readings. A cable without strain relief may break internally while looking fine from the outside. Automotive projects reward boring mechanical details: brackets, grommets, heat shrink, cable ties, weatherproof connectors, and proper fuses.
Display readability is another real-world issue. A beautiful screen can be nearly useless in direct sunlight. Before committing to a display, test it outdoors. Check viewing angle, brightness, glare, and night readability. A speedometer that blinds you at night or disappears at noon is not an upgrade. It is a tiny dashboard prank.
Finally, the best projects respect the vehicle’s original systems. If you only need to display speed, read the signal without disturbing it. If you use CAN bus, listen first and avoid transmitting unless you fully understand the network. If the vehicle is driven on public roads, accuracy and reliability matter more than cleverness. A good interface feels invisible: turn the key, roll forward, and the number appears, calm and correct. That is when the project stops being a gadget and becomes part of the machine.
Conclusion
Interfacing with a digital speedometer is a satisfying blend of electronics, automotive knowledge, software logic, and practical problem-solving. Whether you are building a custom dashboard, restoring a vehicle, experimenting with a microcontroller, or creating a speed display for a small electric project, the principle is the same: capture reliable speed data, condition it properly, calculate it accurately, and display it clearly.
The cleanest path may be OBD-II. The most responsive path may be a direct sensor. The most data-rich path may be CAN bus. The right choice depends on your vehicle and your goal. Start simple, test carefully, protect the electronics, and remember that the most impressive dashboard is not the one with the flashiest graphics. It is the one that tells the truth every time the wheels turn.
Editorial Note
This article is based on synthesized technical information from reputable automotive electronics, maker hardware, microcontroller, CAN bus, OBD-II, and U.S. vehicle display standards references. It is written for educational and web publishing purposes and does not encourage unsafe vehicle modification or odometer tampering.