A mahogany leather top table has a certain old-library charm. It looks like it should be sitting beside a wingback chair, holding a fountain pen, a brass lamp, and possibly a secret inheritance letter. But time is not always kind. Leather dries, cracks, peels, stains, and sometimes develops the texture of a forgotten cornflake. The mahogany frame may still be gorgeous, while the leather insert looks like it lost a wrestling match with coffee cups, sunlight, and a housecat with opinions.
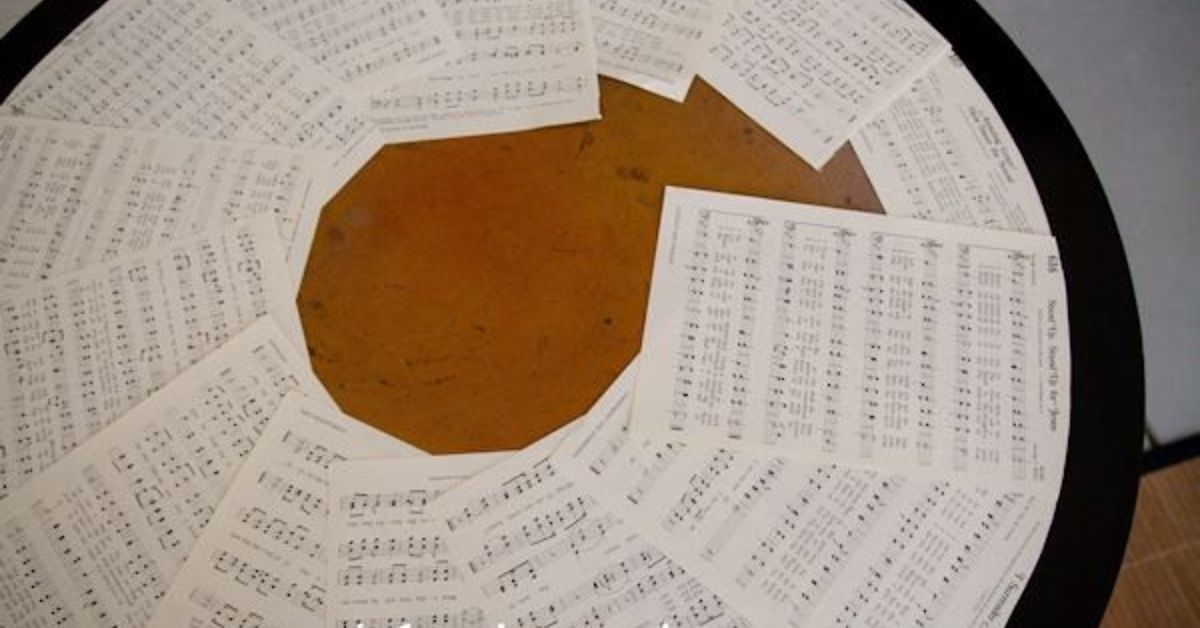
That is where sheet music comes in. Restoring a mahogany leather top table with sheet music is part furniture restoration, part decoupage project, and part storytelling. Instead of simply replacing the damaged leather with new hide, you can transform the tabletop into a meaningful, decorative surface using vintage-style music pages. The result can feel romantic, artistic, and personalespecially if the table belongs in a music room, reading nook, piano corner, studio, or cozy office.
This guide explains how to restore the mahogany wood, deal with the damaged leather top, apply sheet music properly, and seal the surface so it can survive normal use. It also covers when you should not do this project, because some antiques deserve conservation rather than a creative makeover. In other words, before you grab the glue brush like a caffeinated craft wizard, let’s make a smart plan.
Should You Restore or Preserve the Original Leather?
Before changing the tabletop, identify what you own. A modern reproduction table with peeling leather is a great candidate for a sheet music makeover. A valuable antique writing table with original tooled leather, gilt borders, rare craftsmanship, or provenance should be handled more carefully. Original leather, even when aged, can contribute to the piece’s historical and monetary value.
If the leather is only lightly dry, dusty, or faded, consider cleaning and conditioning it instead of covering it. If it is split, lifting, stained beyond recovery, or missing chunks, sheet music can be a beautiful rescue option. The goal is not to erase the table’s character. The goal is to make it useful and attractive again without turning it into a craft-store crime scene.
Good Candidates for a Sheet Music Tabletop
- The leather insert is cracked, torn, or already detached.
- The table has sentimental value but low collectible value.
- The mahogany frame is structurally sound.
- You want a decorative table for light use, not a heavy-duty dining surface.
- The sheet music has personal meaning, such as wedding songs, piano pieces, hymns, jazz standards, or public-domain classical music.
When to Call a Professional
Hire a furniture conservator or leather restoration specialist if the table is museum-quality, very old, heavily veneered, structurally unstable, or covered in original gilt-tooled leather. Also pause if you suspect old lead paint on any painted parts, unstable finishes, mold, insect damage, or severe veneer lifting. Some projects are DIY-friendly. Others are “put down the sander and back away slowly” projects.
Tools and Materials You Will Need
A successful mahogany leather top table restoration depends on preparation. You do not need a warehouse full of tools, but you do need the right basics. Cheap shortcuts often become expensive regrets with furniture.
Cleaning and Prep Supplies
- Soft microfiber cloths
- Mild dish soap
- Distilled water
- Cotton swabs
- Plastic scraper or putty knife
- Painter’s tape
- Fine sandpaper: 180, 220, and 320 grit
- Tack cloth or vacuum with soft brush attachment
- Nitrile gloves and eye protection
Wood Restoration Supplies
- Wood glue for loose joints or veneer repairs
- Wood filler or burn-in stick for small dents
- Mahogany stain or gel stain, if color correction is needed
- Shellac, varnish, lacquer, or water-based polyurethane, depending on the existing finish
- Paste wax without silicone for final buffing on finished wood areas
Sheet Music Top Supplies
- Printed sheet music pages or photocopies
- Decoupage medium or water-based clear adhesive/sealer
- Foam brush or soft flat brush
- Brayer, plastic card, or clean soft cloth for smoothing
- Craft knife and metal ruler
- Clear water-based topcoat
- Optional: glass top cut to size for extra protection
Step 1: Inspect the Table From Top to Toe
Start with a slow inspection. Take photos before you touch anything. Photograph the top, legs, underside, joints, trim, and hardware. Look for maker’s marks, labels, stamps, hand-cut joinery, or unusual construction details. These clues can tell you whether the table is a simple vintage piece or something more valuable.
Check the mahogany for loose veneer, open seams, scratches, water rings, white blush, dents, missing trim, and wobbly legs. Press gently around the leather insert. If it lifts at the edges, note where. If it is glued down like it was installed by a committee of stubborn mules, you may need patience and heat-free mechanical removal.
Avoid aggressive sanding at this stage. Mahogany furniture often has veneer over a secondary wood. Veneer can be beautiful, but it is thin. Sand through it and you will discover the tragic difference between “refinishing” and “oops.”
Step 2: Clean the Mahogany Gently
Dust the entire table with a dry microfiber cloth. Then mix a few drops of mild dish soap in distilled water. Dampen a cloth, wring it nearly dry, and wipe small sections of the wood. Immediately dry each section with a clean cloth. The word “damp” matters here. Wood restoration is not a bubble bath.
Use cotton swabs for carved edges or trim. If grime remains, test mineral spirits on a hidden area. Mineral spirits can remove waxy buildup without stripping many cured finishes, but always test first. Do not use ammonia, harsh degreasers, abrasive pads, or mystery cleaners from the back of the garage. A table can forgive a little dust. It may not forgive chemical enthusiasm.
Step 3: Decide What to Do With the Leather Insert
If the leather is salvageable, clean it with a leather-safe cleaner and condition it lightly. If the leather is too damaged for daily use, you have two main choices: remove it completely or use it as a base if it is firmly attached and flat.
Removing the leather usually creates the cleanest result. Start at a loose corner and use a plastic scraper to lift it slowly. Avoid gouging the wood below. If the leather fights back, work in small sections and take breaks. Old adhesive can be brittle, gummy, or surprisingly loyal.
If the leather is firmly bonded and not lumpy, you may be able to sand it lightly to dull the surface, then apply a sealing primer or bonding layer before adding sheet music. However, cracked leather texture may telegraph through the paper. For a smoother finish, remove loose areas and fill low spots before decoupage.
Step 4: Repair the Mahogany Frame
Once the top is clean and stable, repair the mahogany. Glue loose veneer with wood glue and clamp it gently using wax paper between the clamp and the surface. Fill small dents only where needed. Large chips or missing veneer patches may require matching veneer, which is worth doing carefully because mahogany has a rich grain that deserves respect.
Lightly sand damaged wood areas with 220-grit paper, following the grain. Do not sand carved details aggressively. The purpose is to smooth roughness, not erase history. If the color is uneven, use a mahogany stain or gel stain in thin layers. Dark red-brown mahogany can become muddy if overloaded with stain, so test on an inconspicuous area first.
Finish the wood before adding sheet music, especially around the tabletop edge. A restored frame creates a clean border and prevents glue or topcoat from accidentally dulling the surrounding mahogany. Depending on the existing finish, shellac, varnish, lacquer, or water-based polyurethane may be appropriate. For many DIY restorations, a compatible wipe-on finish is easier to control than a thick brushed coating.
Step 5: Prepare the Sheet Music
Choose your sheet music carefully. If you have original antique sheet music, scan or photocopy it rather than gluing the original pages down. Old paper can be acidic, brittle, and historically interesting. It deserves better than being drowned in glue because Tuesday felt crafty.
Public-domain music is a great option. Classical scores, hymns, folk songs, early jazz charts, and simple piano pieces can create a timeless look. For a personal table, use meaningful songs: a wedding processional, a parent’s favorite tune, a song from childhood lessons, or music connected to the room where the table will live.
Print the music on good-quality paper. Slightly off-white or cream paper looks more natural than bright white printer paper. If you want an aged look, use tea-stained paper carefully, but make sure it is fully dry and flat before application. Test your ink with a damp cotton swab. If it smears, seal the paper lightly with a clear spray sealer before decoupage or use laser-printed copies.
Step 6: Plan the Layout Before Gluing
Dry-fit every sheet before opening the adhesive. Arrange the pages so the musical notation flows naturally across the tabletop. You can align pages in neat rows for a formal look or overlap torn edges for a collage effect. For a mahogany leather top table, a tailored layout usually looks best because the wood frame already has a refined style.
Use a craft knife and metal ruler to trim pages to the leather insert area. Leave a tiny margin if the tabletop has a raised border. If the table has curved corners, make a paper template first. This step prevents the classic decoupage disaster known as “I thought I could eyeball it.” Spoiler: the table knows.
Step 7: Seal the Base Surface
Before applying sheet music, seal the exposed tabletop base. If the leather was removed, you may be dealing with bare wood, old adhesive residue, or a composite insert. Sand it smooth with 220-grit paper, vacuum the dust, and wipe with a tack cloth. Apply a thin sealing coat of water-based clear finish or primer compatible with your adhesive.
This sealing layer helps prevent stains, tannins, old glue, or uneven absorption from ruining the paper. It also gives the decoupage medium a more predictable surface. Let the sealer dry completely, then sand very lightly with 320-grit paper if needed.
Step 8: Apply the Sheet Music
Work in small sections. Brush a thin, even coat of decoupage medium onto the tabletop base. Place the first sheet down carefully, starting at one edge and lowering it slowly. Smooth from the center outward with a brayer, plastic card, or clean cloth. The goal is to push out air bubbles without tearing the paper.
Apply the next sheet according to your layout. If pages overlap, keep the adhesive thin so the seams do not become bulky. Wipe away excess medium immediately with a slightly damp cloth. Avoid overworking the paper once it is wet. Wet paper stretches, wrinkles, and occasionally behaves like it has entered a dramatic opera.
After all sheets are placed, let the surface dry fully. Do not rush this stage. If bubbles appear while the paper is still damp, tap them gently toward the edge. If a bubble dries in place, pierce it with a fine pin, add a tiny amount of adhesive beneath it, press flat, and let it dry under wax paper and a light weight.
Step 9: Seal the Sheet Music Top
Once the paper is dry, apply a thin topcoat of decoupage medium or water-based clear finish. Use several thin coats instead of one thick coat. Thick topcoat can cloud, wrinkle the paper, or leave brush ridges. Let each coat dry completely and sand very lightly between coats with extra-fine paper if the finish allows it.
For a table that will receive regular use, apply at least three to five protective coats. A satin finish often looks more elegant than high gloss on a vintage mahogany table. Gloss can be beautiful, but it also highlights every brush mark, bubble, and speck of dust that wandered in like it pays rent.
For the best protection, consider having a piece of glass cut to fit the tabletop recess. Glass preserves the sheet music, makes the surface easier to clean, and lets you use the table without panicking every time someone sets down a mug. Use small clear bumpers under the glass so moisture does not become trapped.
Step 10: Finish and Wax the Mahogany
After the sheet music top has cured, turn your attention back to the mahogany. If the wood finish is sound, buff it gently. If you used a compatible finish on repaired areas, let it cure according to the product instructions. Then apply a thin coat of silicone-free paste wax to the wood only, not the paper top unless your topcoat specifically allows it.
Buff with a soft cloth until the mahogany develops a warm glow. Mahogany has a deep, elegant color that does not need to shout. When restored well, it simply raises one eyebrow and lets cheaper furniture feel insecure.
Common Mistakes to Avoid
Using Original Rare Sheet Music
Use copies, not irreplaceable originals. You can still achieve a vintage look without sacrificing collectible paper.
Sanding Through Veneer
Many mahogany tables are veneered. Sand lightly and cautiously. If the grain pattern starts looking odd or patchy, stop.
Applying Too Much Glue
Excess adhesive causes wrinkles, bubbles, and uneven drying. Thin coats are easier to control.
Skipping the Test Patch
Test your paper, ink, adhesive, stain, and topcoat. Five minutes of testing can prevent five hours of muttering.
Using Silicone Polish
Silicone polish can create refinishing problems later. Use gentle cleaning methods and silicone-free waxes when appropriate.
Care Tips After Restoration
Keep the restored table away from direct sunlight, high humidity, and heating vents. Use coasters, trays, or a glass top for drinks. Dust with a soft cloth and clean spills immediately. Do not scrub the sheet music surface with harsh cleaners. A barely damp cloth followed by a dry cloth is usually enough.
If the topcoat begins to dull over time, clean it gently and apply another compatible protective coat. If the mahogany loses luster, buff the wood with a soft cloth and apply a very thin coat of paste wax as needed. Furniture care is a little like skincare: gentle consistency beats heroic emergency treatments.
Design Ideas for a Sheet Music Mahogany Table
A sheet music tabletop can lean classic, romantic, rustic, or modern depending on your layout. For a traditional look, use cream paper, straight alignment, and a satin finish. For a music studio, choose bold enlarged notation or pages from a favorite score. For a cottage-style table, lightly distress the edges and use overlapping pages. For a sophisticated office, use black-and-white pages under glass with a crisp mahogany border.
You can also personalize the project with small hidden details. Place a meaningful title near the front edge. Add a tiny date in the corner. Use a page from a song connected to your family. These details make the table more than restored furniture. They make it a conversation piece with rhythm.
Workshop Experiences: What This Project Teaches You
The first lesson in restoring a mahogany leather top table with sheet music is that old furniture likes patience. It does not care about your weekend schedule. A table that looks simple at first can surprise you with old glue, uneven leather thickness, hidden veneer damage, or a finish that behaves differently on every side. The best projects begin with observation, not action. Put the table in good light, walk around it, and let it tell you where the trouble is.
One common experience is discovering that the leather top is worse than it looked in the listing photos. Online sellers have a magical talent for photographing furniture from the one angle where disaster is taking a coffee break. In person, you may find brittle edges, ink stains, water rings, or a leather insert that lifts like burnt toast. Do not panic. If the mahogany frame is solid, the table still has plenty of life left.
Another useful lesson is that sheet music placement matters more than people expect. Random pages can look messy, while thoughtful alignment looks intentional. Before gluing, spread the pages across the table and step back. Look at the balance of dark notes and blank margins. Too many heavy bars on one side can make the top feel visually lopsided. Rotate pages only if it supports the design. A clean, readable flow usually suits mahogany better than chaotic collage.
Paper thickness also changes the experience. Thin paper blends smoothly but wrinkles easily. Thick paper resists wrinkles but can show raised seams. Laser-printed copies are usually easier than inkjet prints because the ink is less likely to bleed when wet. If you only have inkjet prints, sealing them lightly before application can save the design. That tiny test patch is not optional; it is the furniture equivalent of checking the weather before painting the porch.
The most satisfying moment usually comes after the first clear coat dries. At first, wet adhesive can make the paper look too dark, too shiny, or slightly alarming. Then it dries, the music settles into the surface, and the mahogany frame starts to look intentional again. The table changes from “damaged old desk” to “custom music-room piece.” It feels like the furniture has cleared its throat and remembered the second verse.
There is also a practical lesson about protection. A decoupaged sheet music table can be durable, but it is not a butcher block, a kitchen counter, or a landing pad for wet flowerpots. If the table will live in a busy room, glass is your friend. A fitted glass top keeps the design visible while protecting it from rings, scratches, and enthusiastic guests who believe coasters are decorative myths.
Finally, this project teaches restraint. It is tempting to over-age the paper, over-darken the wood, overcoat the top, and over-style the final piece. Mahogany already has drama. Sheet music already has pattern. Let them work together. When the restored table has warm wood, clean lines, meaningful music, and a protected surface, it does not need extra fuss. It just needs a lamp, a chair, and someone to say, “Wait, did you make that?”
Conclusion
Restoring a mahogany leather top table with sheet music is a creative way to rescue a damaged surface while honoring the elegance of the original furniture. The process starts with careful inspection, gentle cleaning, and a realistic decision about whether the leather should be preserved, removed, or covered. From there, the key steps are repairing the mahogany, preparing the sheet music, applying it smoothly, and sealing it with thin protective coats.
The best results come from patience and restraint. Let the mahogany remain the star, and let the sheet music add personality rather than noise. Use copies of meaningful music, protect the final surface, and avoid harsh shortcuts that can damage old wood or paper. Done well, the table becomes more than a restored piece. It becomes a functional keepsake with a story written in grain, notes, and a little bit of glue-brush courage.
Note: For valuable antiques, original tooled leather, suspected lead paint, mold, or major structural damage, consult a qualified furniture conservator before beginning. For decorative vintage pieces with damaged leather, this sheet music restoration method can create a beautiful and practical second life.