Note: This original article is written for web publication in standard American English and is based on practical sewing, toy safety, craft, and stuffed-animal clothing guidance from reputable U.S. sewing and consumer-safety resources.
Teddy bears already have the unfair advantage of being adorable. Give one a handmade hoodie, tiny pajamas, or a miniature sundress, and suddenly it has more style than half the humans in the grocery store. Learning how to make teddy bears clothes is a fun, low-cost sewing project that works for beginners, parents, crafters, gift makers, and anyone who has ever looked at a stuffed animal and thought, “This bear needs a cardigan.”
The best part? Teddy bear clothing does not require a fashion degree, an industrial sewing machine, or a dramatic reality-show workroom. You can start with fabric scraps, an old T-shirt, simple measurements, and a basic pattern. Whether you want to dress a 15-inch stuffed animal, a Build-A-Bear-style plush, a memory bear, or a childhood teddy that has survived more adventures than Indiana Jones, the process is surprisingly approachable.
This guide explains the tools, measurements, fabrics, patterns, sewing steps, closures, safety tips, and beginner-friendly outfit ideas you need to create cute, durable teddy bear clothes at home.
Why Make Teddy Bear Clothes Yourself?
Buying stuffed animal outfits is easy, but making them yourself gives you more control over size, style, fabric, and sentimental value. Store-bought teddy bear clothes often fit only a narrow range of bears. Handmade clothes can be adjusted for long arms, round bellies, short legs, extra stuffing, floppy limbs, and all the charmingly odd proportions that make teddy bears lovable.
DIY teddy bear clothes are also a clever way to reuse fabric. Old baby clothes, worn flannel shirts, soft cotton pajamas, outgrown kids’ T-shirts, and leftover quilting cotton can become tiny bear wardrobes. A child’s old onesie can become a teddy bear pajama set. A grandparent’s shirt can become a memory bear vest. A scrap of denim can become miniature overalls. It is recycling, but with more buttons and emotional damagein a sweet way.
Making teddy bear clothes is especially useful for gifts. A bear dressed in a handmade school uniform, birthday outfit, holiday costume, sports jersey, or wedding-themed outfit feels personal. It says, “I spent time on this,” without requiring you to carve a statue or learn the violin.
Basic Supplies You Need
You do not need a huge sewing room to get started. A small table, good lighting, and a little patience are enough. For most teddy bear clothing projects, gather these supplies:
- Flexible measuring tape
- Paper for drafting patterns
- Pencil or fabric marker
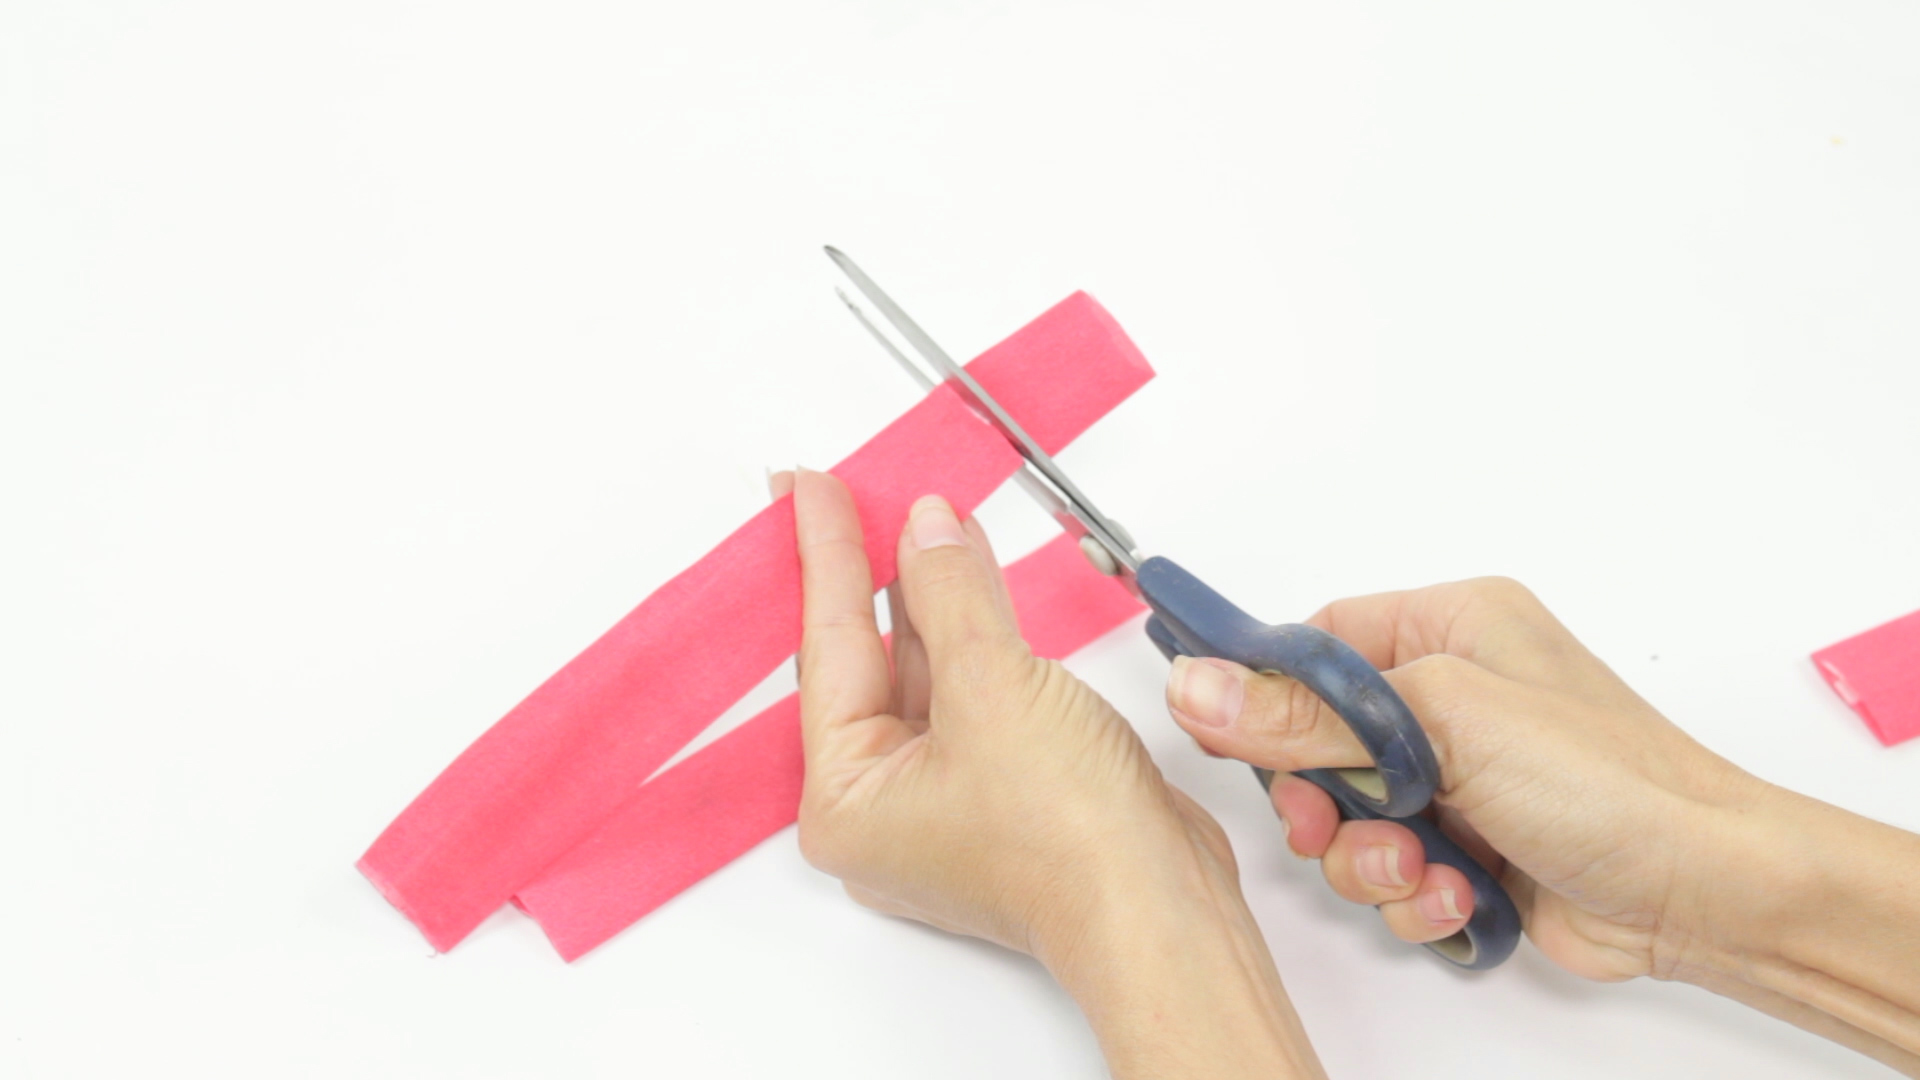
- Fabric scissors
- Sewing pins or clips
- Needle and thread or a sewing machine
- Lightweight fabric
- Hook-and-loop tape, snaps, ribbon, or elastic
- Iron and ironing board
- Small ruler or seam gauge
A sewing machine makes the process faster, but hand sewing works perfectly well for small outfits. In fact, some tiny seams are easier to control by hand. If your bear is very small, your sewing machine may act like it has been asked to hem a postage stamp. In that case, hand stitching is your friend.
How to Measure a Teddy Bear for Clothes
Accurate measurements are the secret to clothes that fit instead of looking like the teddy bear borrowed laundry from a confused squirrel. Use a soft measuring tape and write everything down.
Key Teddy Bear Measurements
- Chest: Measure around the widest part of the bear’s torso.
- Waist or belly: Measure around the roundest part of the stomach.
- Neck: Measure around the base of the head.
- Arm length: Measure from shoulder to paw.
- Leg length: Measure from hip to foot.
- Torso length: Measure from shoulder to waist or hip.
- Shoulder width: Measure across the upper back.
- Head opening: Make sure tops can slide over the bear’s head, unless you plan to use a back opening.
Stuffed animals do not move like people. Their arms may stick out, their bellies may be very round, and their heads may be too large for pullover tops. For that reason, most teddy bear clothes need extra ease. Add about 1/4 inch to 1/2 inch of extra room to small bears and up to 1 inch for larger plush animals. The outfit should fit comfortably without squeezing the stuffing into a crisis.
Choosing the Best Fabric for Teddy Bear Clothes
The best fabric depends on the outfit and your sewing skill level. For beginners, lightweight cotton is the easiest choice. It cuts cleanly, presses well, and does not stretch wildly while you sew. Quilting cotton, cotton lawn, flannel, chambray, and thin denim are all good options.
Beginner-Friendly Fabrics
- Quilting cotton: Great for dresses, shirts, skirts, and aprons.
- Flannel: Soft and cozy for pajamas, robes, and winter outfits.
- Old T-shirts: Useful for casual tops, but stretch fabric takes more care.
- Fleece: Good for jackets and hoodies, though bulky seams should be trimmed.
- Light denim: Cute for pants, vests, and overalls.
Avoid thick upholstery fabric, heavy wool, stiff vinyl, and anything that frays dramatically the moment you look at it. Tiny garments have tiny seams, and bulky fabric can make a bear look like it is wearing a sofa cover. Stretch fabrics can work beautifully, especially for T-shirts and leggings, but they are easier to sew with a ballpoint needle, a stretch stitch, or a narrow zigzag stitch.
How to Make a Simple Teddy Bear Shirt
A shirt is one of the easiest teddy bear clothing projects because it teaches you the basics: measuring, cutting, sewing shoulder seams, finishing edges, and adding a closure. A back-opening shirt is usually easier than a pullover because teddy bear heads are often large and not exactly designed for runway wardrobe changes.
Step 1: Draft the Pattern
Place the bear on paper and lightly trace the upper body from shoulder to waist. Mark the neck, shoulders, armholes, side seams, and shirt length. Use this shape to create a front piece. For the back, make two separate pieces instead of one so the shirt can open and close easily.
Add seam allowance around the edges. A 1/4-inch seam allowance is common for small teddy bear clothes because it reduces bulk. If you are new to sewing, 3/8 inch may feel easier to handle. Just be consistent.
Step 2: Cut the Fabric
Fold the fabric and cut one front piece on the fold. Cut two back pieces as mirror images. If you want sleeves, draft a simple sleeve shape by measuring around the armhole and making a shallow curved top. For a beginner project, you can make a sleeveless shirt or vest first.
Step 3: Sew the Shoulders
Place the front and back pieces right sides together. Sew the shoulder seams. Press the seams flat with an iron. Pressing may feel like an optional step, but it is the difference between “handmade and charming” and “wrestled from a fabric tornado.”
Step 4: Finish the Neck and Armholes
Turn the raw edges under and stitch them down, or use bias tape for a cleaner finish. For very small clothes, you can also finish edges with a narrow zigzag stitch. If the fabric does not fray much, such as fleece or knit fabric, you may leave some edges raw for a casual look.
Step 5: Sew the Side Seams
Match the sides of the shirt and sew from underarm to hem. Clip curves carefully if needed, turn the shirt right side out, and test the fit on the bear. If it is too loose, take in the side seams. If it is too tight, give the shirt to a smaller bear and pretend that was the plan all along.
Step 6: Add a Closure
Hook-and-loop tape is the easiest closure for teddy bear shirts. Small snaps also work, but avoid tiny buttons or detachable decorations for toys used by children under three. If the outfit is decorative and not for young children, buttons, bows, and trims can add personality.
How to Make Teddy Bear Pants or Bloomers
Pants and bloomers are perfect for bears because they are forgiving. The elastic waist hides minor fitting errors, and the result looks cute even when the bear has a belly shaped like a dinner roll.
Step 1: Measure the Waist and Leg Length
Measure around the bear’s waist or belly, then measure from waist to ankle or paw. Decide whether you want shorts, bloomers, pajama pants, or full trousers.
Step 2: Create a Basic Pants Pattern
Use a simple doll pants pattern or draft your own. The shape is similar to children’s pajama pants, only much smaller. Cut two mirrored pieces, leaving extra space in the seat area so the pants can fit over the bear’s round lower body.
Step 3: Sew the Inseams and Crotch Seam
Place fabric right sides together and sew the inseams. Then place one leg inside the other, matching the crotch curve, and sew the curved seam. This part looks confusing the first time, but it is basically fabric origami with a happy ending.
Step 4: Add Elastic
Fold the waist down to create a casing, leaving a small opening. Thread elastic through the casing with a safety pin, overlap the ends, stitch them securely, and close the opening. You can also add elastic to bloomers at the leg openings for a classic puffy look.
Easy Teddy Bear Outfit Ideas
Once you understand the basics, you can create an entire teddy bear wardrobe. Start simple and build your skills with each project.
1. Teddy Bear Pajamas
Use soft flannel or cotton knit to make a loose top and elastic-waist pants. Add a tiny robe or sleep cap if you enjoy being ridiculously adorable.
2. Teddy Bear Dress
A basic dress can be made from a bodice and gathered skirt. Use lightweight cotton and a back closure. Add ribbon trim at the waist for a polished finish.
3. Teddy Bear Vest
A vest is great for beginners because it has no sleeves. Felt, fleece, denim, or cotton all work. A vest can turn a plain bear into a cowboy, professor, explorer, or tiny CEO.
4. Teddy Bear Hoodie
Use sweatshirt fleece or an old hoodie. Keep the hood slightly oversized so it fits over the bear’s head. A front opening makes dressing easier.
5. Teddy Bear Skirt
Cut a rectangle of fabric, gather the top edge, and attach it to an elastic waistband. This is one of the fastest teddy bear clothes projects and a good choice for kids learning to sew.
6. Teddy Bear Overalls
Overalls are a little more advanced but very rewarding. Use light denim or twill, add shoulder straps, and secure them with hook-and-loop tape instead of metal hardware for easier dressing.
Tips for Better Fit and Cleaner Sewing
Small garments magnify little mistakes, so slow sewing helps. Use short stitches for curves, press seams as you go, and trim bulky seam allowances. Clip curved seams so they turn smoothly. Use pins or sewing clips to keep tiny pieces from shifting.
When sewing sleeves, mark the front and back pieces so you do not accidentally create a shirt that only fits a bear from another dimension. For fuzzy fabric, brush the fibers away from the seam before sewing, then gently pull trapped fibers out with a pin after stitching. This makes seams look cleaner and more professional.
If you use printed patterns, print them at 100 percent scale. Many PDF sewing patterns include a test square. Measure it before cutting fabric. Otherwise, your bear may end up with a shirt fit for a hamster, and while hamsters deserve fashion too, that is not today’s mission.
Closures: Velcro, Snaps, Buttons, and Ties
Closures matter because teddy bear clothes need to be easy to put on and remove. Hook-and-loop tape is beginner-friendly and works well for children because it is simple to open and close. Use small pieces instead of long strips to reduce stiffness and puckering.
Snaps create a cleaner look but require careful placement. Sew-on snaps are better for delicate fabric, while snap pliers can be useful for sturdier garments. Buttons look classic, but they should be used with caution if the teddy bear belongs to a young child. Loose buttons can become choking hazards, so embroidered details or fabric appliques are safer alternatives for toddler toys.
Ribbons and ties are cute for decorative bears, but keep them short and secure for play toys. Safety should always outrank style. Even the best-dressed teddy bear does not need a dramatic scarf incident.
Safety Tips for Teddy Bear Clothes
If the teddy bear will be used by a child, especially a child under three, avoid small detachable pieces. Buttons, beads, sequins, glued-on decorations, tiny buckles, and loose snaps may pose a choking risk. Choose embroidered details, fabric patches, secure stitching, and soft closures instead.
Check seams regularly. Stuffed animals get hugged, dragged, dressed, undressed, slept on, and occasionally invited to tea parties with suspicious plastic food. Reinforce stress points such as straps, waistbands, and closures. Avoid sharp wire, exposed elastic ends, rough edges, or long cords. Washable fabrics are ideal for children’s toys because teddy bears have a mysterious talent for finding jam.
Common Mistakes to Avoid
The most common mistake is making the clothing too tight. Teddy bears need extra ease because they do not bend like humans. Another mistake is using fabric that is too thick. Heavy fabric makes small seams bulky and can prevent the garment from closing properly.
Skipping the test fit is another classic problem. Try the garment on the bear before finishing every edge. This lets you adjust the side seams, armholes, waistband, or closure placement early. Also, do not forget seam allowance. Cutting directly on the finished size creates an outfit that shrinks emotionally and physically after sewing.
Finally, avoid overdecorating. A tiny bear shirt does not need fourteen bows, six buttons, three patches, and a rhinestone slogan unless the bear is starting a pop career. Simple designs often look best.
How to Personalize Teddy Bear Clothes
Personal touches make teddy bear clothes memorable. Add initials with embroidery, use fabric from a meaningful shirt, match the outfit to a child’s favorite color, or create seasonal wardrobes. A red flannel shirt makes a lumberjack bear. A cotton floral dress creates a picnic bear. A small cape turns any teddy into a superhero, which is honestly what most childhood bears already are.
You can also make themed outfits for holidays, birthdays, baby showers, school events, or memorial gifts. Memory bears dressed in clothing made from a loved one’s fabric can become deeply meaningful keepsakes. In that case, sew slowly, stabilize delicate fabric with lightweight interfacing, and save extra scraps for patches or accessories.
A 500-Word Maker’s Experience: What You Learn While Making Teddy Bear Clothes
The first time you make teddy bear clothes, you may expect the project to be simple because the outfit is small. Then you discover the great sewing truth: small does not always mean easier. A tiny sleeve can be more dramatic than a full-size jacket sleeve because there is less fabric to hold, less room to maneuver, and absolutely no forgiveness from a curved armhole the size of a cookie. Still, that is part of the charm. Making teddy bear clothes teaches patience in the friendliest possible way.
One of the most useful experiences is learning to test fit constantly. When sewing human clothes, you can often follow a pattern size and make adjustments later. Teddy bears, however, have unique bodies. One bear may have a wide belly and tiny arms. Another may have long legs, a huge head, and shoulders that slope like a sleepy mountain. After making a few outfits, you learn not to trust measurements alone. You place the fabric on the bear, pin carefully, step back, and ask the important fashion question: “Can this bear sit down without looking personally offended?”
You also learn that fabric choice can make or break the project. Lightweight cotton behaves politely. Flannel is cozy and forgiving. Fleece is warm but bulky. Stretch knit is comfortable but likes to wiggle under the needle like it has somewhere better to be. The best experience comes from using scraps first. Before cutting into sentimental fabric or expensive material, make a test version from an old pillowcase or worn T-shirt. This practice version, often called a muslin, helps you fix the pattern before making the final outfit.
Another lesson is that simple designs often look the most professional. A clean vest, a neat pair of pajama pants, or a basic dress with one ribbon can look better than an outfit overloaded with decorations. Tiny clothing has limited space, so every trim matters. One small pocket is cute. Five pockets may look like the bear is preparing for tactical camping.
The most satisfying moment is the final fitting. You turn the garment right side out, fasten the closure, smooth the seams, and suddenly the bear has a personality. A plain teddy becomes a bedtime buddy in flannel pajamas, a garden helper in overalls, or a birthday guest in a tiny party dress. Handmade teddy bear clothes carry warmth because they show effort. They are imperfect in the best way. Maybe the hem is not perfectly straight. Maybe one sleeve is a whisper wider than the other. The bear does not mind. In fact, the bear looks delighted, and that is the whole point.
Over time, making teddy bear clothes improves your sewing skills without the pressure of large projects. You practice measuring, pattern drafting, hemming, gathering, clipping curves, adding closures, and choosing fabric. Each little outfit becomes a low-risk lesson. If something goes wrong, you have not ruined five yards of fabric. You have simply made a bear poncho by accident. And honestly, there are worse outcomes.
Conclusion
Learning how to make teddy bears clothes is a rewarding craft that combines creativity, sewing practice, recycling, and personal storytelling. Start with simple garments like shirts, skirts, vests, or elastic-waist pants. Choose lightweight fabric, measure carefully, add enough ease, and use safe closures for children’s toys. With each project, you will get better at fitting odd plush shapes, sewing tiny seams, and turning fabric scraps into something full of personality.
Whether you are dressing a favorite childhood bear, creating a handmade gift, making a memory keepsake, or building a tiny wardrobe for fun, teddy bear clothing is proof that small projects can carry big heart. Also, once your bear has pajamas, a jacket, and formalwear, do not be surprised if it starts judging your outfit from the shelf.