Installing Pergo flooring is one of those DIY projects that looks intimidating until you realize the planks are basically adult building blocks with better resale value. Thanks to modern click-lock systems, many Pergo laminate and waterproof laminate floors can be installed as floating floors, meaning they are not glued or nailed down. They lock together, rest over the subfloor, and expand slightly as your home’s temperature and humidity change.
That does not mean you should charge into the room waving a saw like a weekend warrior in a home improvement commercial. A great Pergo flooring installation depends on preparation: measuring correctly, cleaning the subfloor, choosing the right underlayment, leaving expansion gaps, and making careful cuts around doorways, vents, and walls. Do those things right, and your new floor can look smooth, tight, and professional. Skip them, and your floor may squeak, buckle, gap, or develop the personality of a potato chip.
This guide walks you through how to install Pergo flooring from start to finish, including tools, layout planning, cutting tips, waterproofing details, and real DIY lessons that can save you time, money, and a few dramatic sighs.
What Is Pergo Flooring?
Pergo is best known for laminate flooring, though the brand also offers waterproof laminate, vinyl, and wood-look flooring products. Most DIY homeowners searching for how to install Pergo flooring are usually working with laminate or waterproof laminate planks. These floors often use click-lock edges that snap together without adhesive, creating a floating floor over an approved subfloor.
A floating floor is designed to move slightly. That movement is normal. It is why installers leave an expansion gap around the perimeter of the room and around fixed objects like pipes, cabinets, door frames, and floor vents. The floor should not be trapped under heavy built-ins or pinned tightly against walls. Think of it as giving the floor a little breathing room, not a VIP lounge.
Before You Start: Read the Instructions for Your Exact Pergo Product
This step sounds boring, but it matters. Pergo products can have different requirements depending on the collection, thickness, attached pad, waterproof rating, subfloor type, and installation location. Some products require a separate underlayment. Some already include attached padding. Some waterproof installations require foam backer rod and 100% silicone sealant around the perimeter. Some may have specific room-size limits or transition requirements.
Before cutting a single plank, open the installation guide included in the box or find the guide for your exact product model. Check the required expansion gap, acclimation instructions, approved subfloors, moisture barrier requirements, and whether the floor can be installed in bathrooms, kitchens, basements, or laundry areas.
Tools and Materials You Will Need
You do not need a professional flooring truck to install Pergo flooring, but having the right tools makes the job cleaner and less frustrating. At minimum, gather the following:
- Pergo flooring planks
- Approved underlayment, if your product does not have attached pad
- 6-mil vapor barrier if required over concrete
- Spacers for expansion gaps
- Tape measure
- Pencil or marker
- Carpenter’s square
- Utility knife
- Jigsaw, circular saw, miter saw, or laminate cutter
- Tapping block and pull bar approved for laminate flooring
- Rubber mallet
- Oscillating multi-tool or jamb saw
- Safety glasses and hearing protection
- Vacuum or broom
- Quarter round, shoe molding, baseboards, or transition strips
- Foam backer rod and 100% silicone sealant if required for waterproof installation
Do not use random carpet padding under laminate flooring. It is usually too soft and can allow the planks to flex, which may damage the locking joints. Underlayment should match the flooring manufacturer’s requirements.
Step 1: Measure the Room and Buy Extra Flooring
Measure the length and width of the room, then multiply them to get the square footage. For example, a 12-foot by 15-foot room equals 180 square feet. Add about 10% extra for cuts, waste, mistakes, and future repairs. If your room has lots of closets, angled walls, or tricky doorways, buying a little more is usually smarter than trying to save one box and later discovering the color lot is gone forever.
Also measure the width of the room to determine how wide the first and last rows will be. You do not want to end with a tiny sliver of flooring along the final wall. If the last row would be too narrow, trim the first row lengthwise so both sides look balanced.
Step 2: Acclimate the Flooring When Required
Many laminate floors need time to adjust to the room’s temperature and humidity before installation. Some Pergo products may have specific acclimation instructions, while others may say little or no acclimation is needed under certain conditions. Follow the exact product guide.
If acclimation is required, place the unopened cartons flat in the room where the floor will be installed. Keep them away from exterior walls, vents, and direct moisture. The room should be climate-controlled before, during, and after installation. A floor installed in a freezing, damp, or unfinished space is not being “brave.” It is being set up for trouble.
Step 3: Remove Old Flooring, Baseboards, and Trim
Pergo flooring can often be installed over certain existing hard surfaces if they are flat, dry, clean, and structurally sound. However, carpet and carpet pad must be removed. Soft flooring under laminate can create too much movement and damage the locking system.
Remove old baseboards or plan to cover the expansion gap with quarter round or shoe molding. Taking off baseboards usually gives the cleanest finish, especially if you want the new floor to look built-in rather than added later. Label each trim piece as you remove it so reinstalling does not become a guessing game hosted by your future annoyed self.
Step 4: Prepare the Subfloor
Subfloor preparation is the secret sauce of a good Pergo installation. The planks may be beautiful, but they can only perform as well as the surface underneath them. Sweep, vacuum, and remove debris. Pull staples, scrape old adhesive bumps, tighten loose panels, and fix squeaks before the new floor goes down.
Check for Flatness
Use a long level or straightedge to find high and low spots. Most laminate floors require the subfloor to be flat within a specific tolerance over a certain distance. Check your Pergo instructions for the exact number. Sand or grind high spots carefully and fill low spots with an approved leveling compound. Let any patching material dry fully before installing flooring.
Check for Moisture
Moisture matters, especially over concrete. Concrete can look dry while still releasing moisture vapor. If your Pergo product requires a moisture test or 6-mil polyethylene vapor barrier over concrete, do not skip it. Moisture trapped under laminate can lead to swelling, odor, mold concerns, or floor failure.
Step 5: Undercut Door Jambs
Door jambs are where DIY floors often reveal their secrets. The cleanest method is to undercut the door casing so the plank slides underneath. Place a scrap piece of underlayment and flooring next to the jamb, then use an oscillating tool or jamb saw to cut the casing at the right height.
This creates a professional look and still allows the floor to expand. Cutting planks to fit around door trim is possible, but it often leaves visible gaps that scream, “This was my first rodeo.” Undercutting is worth the extra few minutes.
Step 6: Install the Underlayment or Vapor Barrier
If your Pergo flooring has attached underlayment, you may not need additional padding. In fact, adding extra underlayment when it is not approved can make the floor too soft and harm the locking joints. If your flooring does not have attached pad, roll out the recommended underlayment according to the instructions.
Lay underlayment flat without wrinkles or overlaps unless the product specifically calls for overlapping seams. Tape seams if required. On concrete, install the approved vapor barrier first or use an underlayment with an integrated moisture barrier if allowed by the manufacturer.
Step 7: Plan Your Layout
Start along the longest, straightest wall when possible. Decide which direction the planks should run. Many homeowners run planks parallel to the longest wall or toward the main light source. In hallways, planks usually look best running lengthwise.
Dry-lay a few rows before locking anything together. Stagger end joints according to the product guide, often by at least several inches. Avoid stair-step patterns that look too predictable. Random-looking staggered seams create a more natural wood-floor appearance.
Step 8: Install the First Row
Place spacers along the wall to maintain the required expansion gap. Many Pergo laminate installations use a gap around 3/8 inch, but your exact product may differ. Always follow the instructions in the box.
Trim the tongue or click profile from the wall-facing side of the first row if the instructions require it. This helps maintain the proper gap and allows the plank to sit neatly near the wall. Connect the short ends of the planks and keep the row straight. The first row controls the rest of the floor, so do not rush it. A crooked first row becomes a crooked room, and the room will not apologize.
Step 9: Cut the Last Plank in Each Row
When you reach the end of a row, measure the remaining space, subtract the expansion gap, and cut the plank to fit. Use the leftover piece to start the next row if it is long enough and creates the proper stagger. This saves material and gives the layout a natural rhythm.
For cleaner cuts, mark carefully and cut with the finished side positioned according to your saw type. With some saws, cutting face down reduces chipping; with others, face up works better. Test on a scrap piece before cutting an important plank.
Step 10: Continue Installing Row by Row
Angle the long side of each plank into the previous row, then lower it into place. Lock the short ends as directed by the flooring system. Use a tapping block and rubber mallet only when allowed, and never hammer directly on the plank edge. Direct hits can damage the locking profile, which is the flooring equivalent of biting your phone charger and wondering why it stopped working.
Check every few rows to make sure the floor is staying straight and the joints are tight. Small mistakes are easier to fix immediately than after you have installed half the room and emotionally committed to denial.
Step 11: Cut Around Vents, Pipes, and Corners
For floor vents, mark the opening and cut with a jigsaw. Leave the required expansion gap around the cutout if the vent or surrounding structure is fixed. The vent cover should hide the opening edges.
For pipes, drill a hole slightly larger than the pipe diameter plus the required expansion space. Cut the plank so it can fit around the pipe, then cover the gap with a pipe collar or approved sealant if your waterproof installation requires it.
For odd corners, make a paper template or use a contour gauge. Measure twice, cut once, and keep scrap pieces handy for practice cuts. Laminate is forgiving, but not magical.
Step 12: Install the Final Row
The last row often needs to be ripped lengthwise. Measure the gap between the wall and the installed floor, subtract the expansion gap, and transfer the measurement to the plank. Walls are rarely perfectly straight, so measure at multiple points.
Use a pull bar to gently lock the final row into place. Work slowly to avoid damaging the wall or plank edge. Once the final row is down, remove the spacers around the room.
Step 13: Add Waterproof Edge Sealing If Required
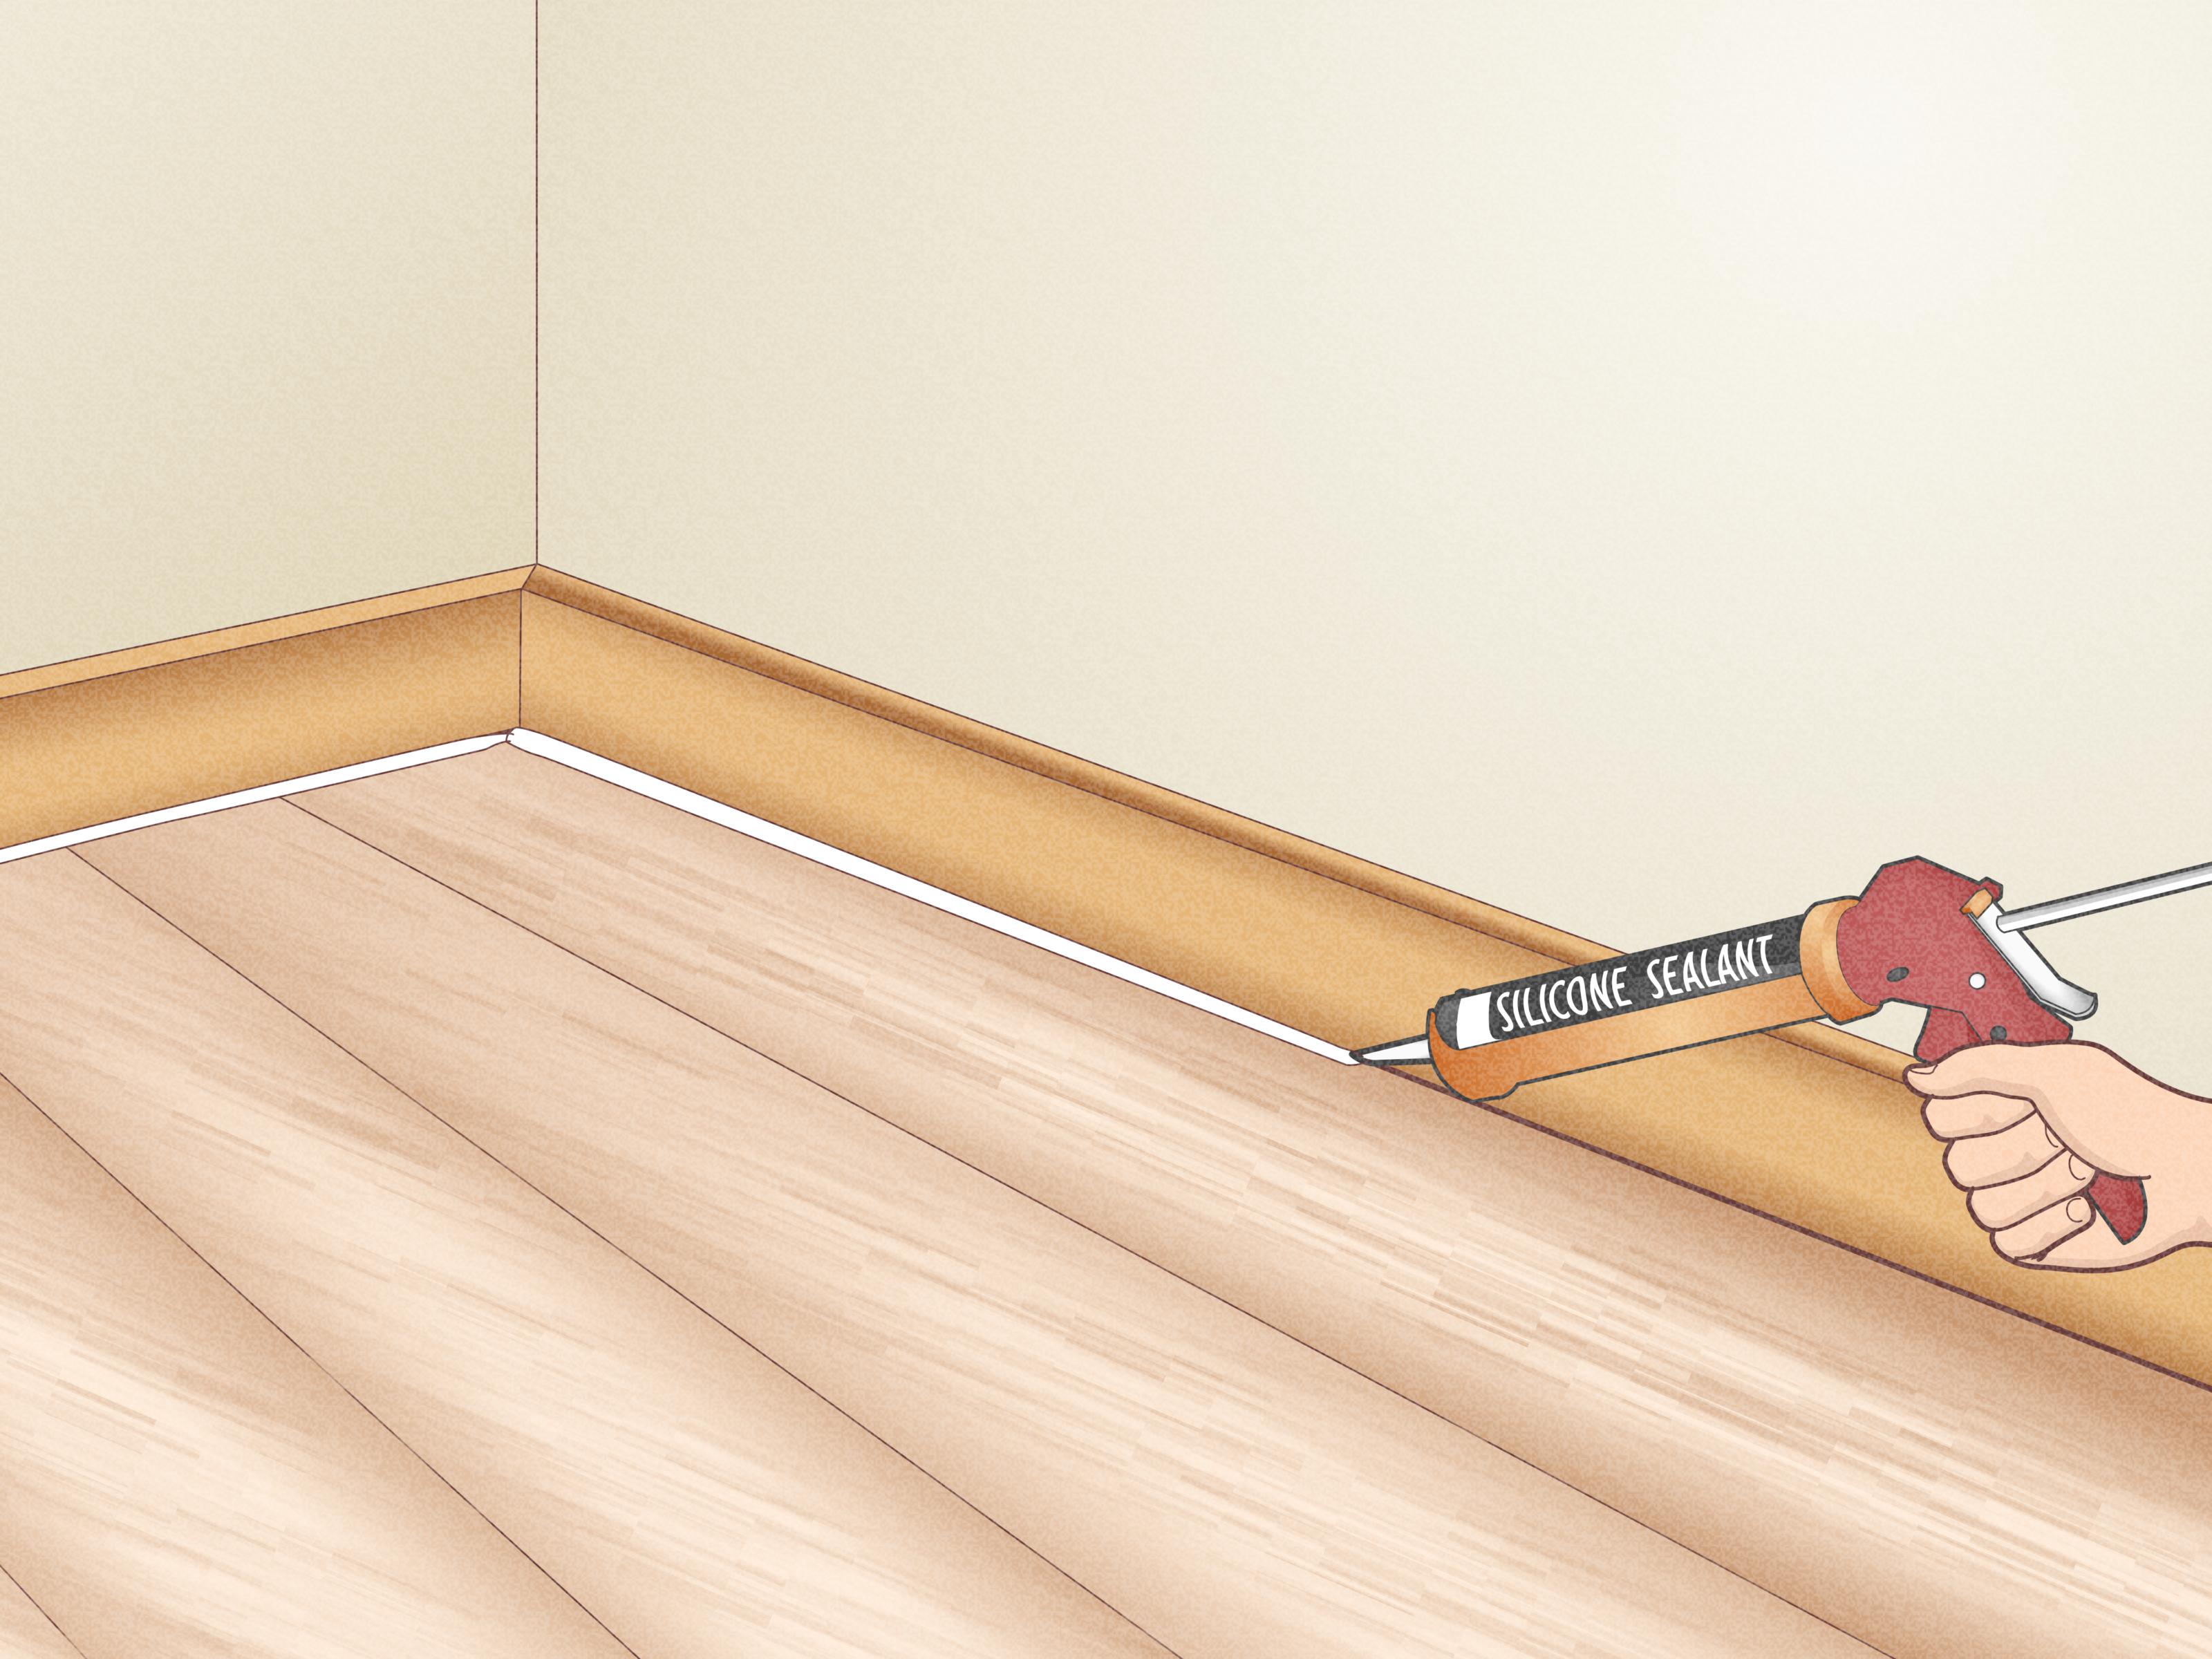
Some waterproof Pergo laminate installations require sealing the perimeter and fixed objects with compressible foam backer rod and 100% silicone sealant. This detail helps prevent topical spills from reaching the subfloor. It is especially important in kitchens, bathrooms, laundry rooms, and entry areas when the product instructions call for it.
Do not assume “waterproof” means “ignore water forever.” Waterproof flooring still depends on proper installation. Wipe spills promptly, follow the maintenance guide, and avoid steam mops unless the manufacturer specifically allows them.
Step 14: Install Baseboards, Quarter Round, and Transitions
Reinstall baseboards or add quarter round to cover the expansion gap. Nail trim to the wall or baseboard, not into the floating floor. The floor must remain free to move underneath the trim.
Use transition strips where the Pergo floor meets carpet, tile, vinyl, exterior doors, stairs, or another room. Transitions are not just decorative. They can protect edges, cover expansion spaces, and help large flooring runs move properly.
Step 15: Clean and Inspect the Finished Floor
After installation, vacuum with a hard-floor attachment or sweep with a soft broom. Inspect seams, edges, transitions, and doorways. Look for planks that did not lock fully, trim that pins the floor, or areas where the expansion gap disappeared.
Move furniture back carefully using felt pads. Do not drag heavy items across the new floor. If appliances must be moved, use protective boards or sliders. Your new Pergo flooring may be tough, but it is not interested in wrestling a refrigerator on day one.
Common Pergo Flooring Installation Mistakes to Avoid
Skipping the Subfloor Prep
A dirty, uneven, or damp subfloor can cause noise, movement, joint stress, and visible imperfections. The prettiest plank in the store cannot hide a bad foundation.
Forgetting the Expansion Gap
Laminate flooring expands and contracts. If it is tight against walls, cabinets, pipes, or trim, it can buckle or peak. Use spacers and keep the gap consistent.
Using the Wrong Underlayment
More cushion is not always better. Too much padding can make click-lock joints flex and fail. Use only approved underlayment for your Pergo product.
Not Staggering Seams Properly
Short, repetitive seam patterns can weaken the layout and look unnatural. Stagger joints according to the product instructions and vary plank lengths for a better appearance.
Nailing Trim Through the Floor
Baseboards and quarter round should attach to the wall or existing trim, not through the floating floor. Pinning the floor can prevent movement and cause problems later.
How Long Does It Take to Install Pergo Flooring?
A small bedroom may take one day for an experienced DIYer, while a larger living area may take a full weekend. Add extra time for removing old flooring, repairing the subfloor, undercutting door jambs, installing transitions, and sealing waterproof edges. If this is your first laminate flooring installation, plan generously. The floor does not care about your optimistic schedule.
Can Beginners Install Pergo Flooring?
Yes, many beginners can install Pergo flooring successfully, especially in a simple rectangular room. The project becomes more challenging with stairs, multiple connected rooms, uneven concrete, lots of doorways, cabinets, bathrooms, or large open spaces that require transitions. If your project involves structural issues, moisture problems, or complicated stairs, hiring a professional may be the smarter option.
Real DIY Experience: Lessons from Installing Pergo Flooring
The biggest lesson from installing Pergo flooring is that the actual clicking of planks is only half the job. The other half is preparation, patience, and learning to respect walls for being wildly imperfect. A room may look square until you start laying straight planks across it. Suddenly, the wall reveals it has been living a curved little life for years.
One useful experience is to spend more time on the first two rows than you think is necessary. Those rows set the line for the whole installation. If they shift, bow, or fail to lock tightly, the problem can multiply across the room. Use spacers, check alignment, and step back often. It feels slow at first, but it is faster than pulling up ten rows because row one decided to wander.
Another practical tip is to open several boxes and mix planks as you install. Wood-look laminate often has pattern variation, and mixing boxes helps avoid placing too many similar boards together. Nothing ruins the illusion of a natural floor faster than three identical knots lined up like they are waiting for a school photo.
Doorways deserve special attention. Undercutting door jambs makes the job look much more professional, but the cut height must be accurate. Use a scrap piece of underlayment and flooring as a guide. Cut too low and the plank will not slide under; cut too high and you may have an awkward gap. Slow, careful cuts win here.
Cutting also gets easier when you create a small cutting station outside or in a garage. Laminate dust can spread quickly, and repeated trips to the saw are part of the job. Keep a pencil, square, tape measure, and scrap pile nearby. Mark the waste side of each cut so you do not accidentally cut the wrong end. Almost every DIY installer makes that mistake once. The goal is to make it once, laugh politely, and not make it ten times.
When working around vents and pipes, make templates before cutting the actual plank. Cardboard from the flooring box works well. A template lets you test the shape before sacrificing a board. This is especially helpful in older homes where nothing is quite centered and every pipe seems to have been installed with artistic freedom.
Waterproof installations also require discipline. If your Pergo product calls for foam backer rod and silicone sealant, do not treat that step as optional decoration. The sealing details are part of the waterproof system. Apply sealant neatly, wipe excess before it cures, and make sure trim covers the gap without pinning the floating floor.
Finally, protect the finished floor immediately. Add felt pads under furniture, lift heavy pieces instead of dragging them, and keep a few spare planks stored flat in a dry place. Years later, if a board gets damaged, having matching material from the same batch can feel like finding buried treasure in your own closet.
Conclusion
Learning how to install Pergo flooring is very doable for a careful DIYer. The project rewards planning more than brute force. Measure the room, prepare the subfloor, follow the product instructions, leave the correct expansion gap, use approved underlayment, and take your time around doorways and obstacles. The result can be a durable, attractive floor that upgrades the whole room without requiring professional installation.
Pergo flooring may click together, but a great installation does not happen by accident. Treat the prep work seriously, keep your rows straight, seal waterproof edges when required, and finish with trim that allows the floor to float freely. Do that, and your floor will look less like a weekend experiment and more like a project you proudly point to when guests walk in.
Note: Always follow the installation guide for your exact Pergo product, because requirements for acclimation, underlayment, expansion gaps, waterproof sealing, and approved rooms can vary by flooring line.