Filleting a sea bass sounds like one of those kitchen skills reserved for chefs with tattooed forearms, mysterious knife rolls, and the ability to say “mise en place” without smiling. But here is the good news: you do not need a restaurant kitchen or a dramatic seafood soundtrack to do it well. You need a fresh fish, a sharp flexible knife, a clean cutting board, patience, and the willingness to make your first fillet look slightly less glamorous than your second.
Sea bass is a beautiful fish to practice on because it has firm, mild, sweet flesh and a round-fish structure that teaches you the fundamentals used for many similar fish, including snapper, trout, branzino, porgy, and striped bass. Once you understand where the backbone, rib cage, pin bones, belly flap, and skin sit, the process becomes less intimidating. The knife is not supposed to hack through the fish like a tiny sword. It should glide along the bones, using them as a guide. Think of the skeleton as your GPS, except it never tells you to make a U-turn in 500 feet.
This guide explains how to fillet a sea bass in 11 clear steps, from choosing the right fish to trimming, deboning, skinning, storing, and cooking your finished fillets. Whether you caught the fish yourself, bought a whole black sea bass from a market, or decided that today is the day you stop asking the fishmonger to do everything, this tutorial will help you get clean, usable fillets with less waste and more confidence.
Why Learn How to Fillet a Sea Bass?
Buying whole fish can be fresher, more economical, and more flexible than buying pre-cut fillets. You can inspect the eyes, gills, skin, and smell before purchasing. You also get the bones and head, which can become a light fish stock for soups, risotto, chowder, or sauce. In other words, one fish gives you dinner and the beginning of another dinner. That is not wasteful; that is culinary budgeting with fins.
Learning how to fillet sea bass also gives you control over portion size and presentation. Want skin-on fillets for crispy pan-searing? Keep the skin. Prefer boneless, skinless pieces for tacos, fish cakes, or steaming? Remove it. Want to leave the collar for roasting? You can. Once you know the anatomy, you are no longer trapped by whatever the seafood counter has wrapped in plastic that day.
Before You Begin: Choose a Fresh Sea Bass
A clean fillet starts with a good fish. Look for clear, shiny eyes, bright red or pink gills, firm flesh, and skin that appears moist rather than dull or dried out. The fish should smell like the ocean: clean, briny, and mild. If it smells sour, ammonia-like, or aggressively “fishy,” politely walk away. No recipe can rescue a questionable fish, and your kitchen does not need that kind of suspense.
If you are buying fillets instead of a whole fish, the flesh should look firm and moist, not mushy or dry around the edges. For whole sea bass, ask whether it has already been scaled and gutted. If it has not, you can do that at home, but scaling is messy enough to make your sink look like a tiny fish confetti parade. Most seafood markets will scale and gut the fish for you if you ask.
Tools You Need to Fillet Sea Bass
Essential Equipment
You do not need many tools, but the right ones matter. A sharp fillet knife is the star. A flexible 6- to 8-inch blade works well for most sea bass because it can bend slightly along the rib cage and backbone. A dull knife tears flesh, slips more easily, and turns a simple job into a seafood wrestling match.
- A sharp flexible fillet knife
- A sturdy, easy-to-clean cutting board
- Kitchen towels or paper towels
- Fish tweezers or needle-nose pliers for pin bones
- Kitchen shears for trimming fins, if needed
- A bowl for bones, head, and trimmings
- Cold running water for rinsing the fish and cleaning up
Food Safety Setup
Raw fish should be handled cold and clean. Wash your hands before and after touching it, keep raw seafood away from ready-to-eat foods, and use a nonporous cutting board when possible. Place a damp towel under the board to stop it from sliding. A moving cutting board is funny only in cartoons; in real life, it is how knives become rude.
Keep the sea bass chilled until you are ready to fillet it. If you are working with several fish, keep the others on ice while you cut one at a time. Once filleted, refrigerate the fish promptly and cook it within a day or two for the best flavor and texture.
How to Fillet a Sea Bass: 11 Steps
Step 1: Rinse and Dry the Fish
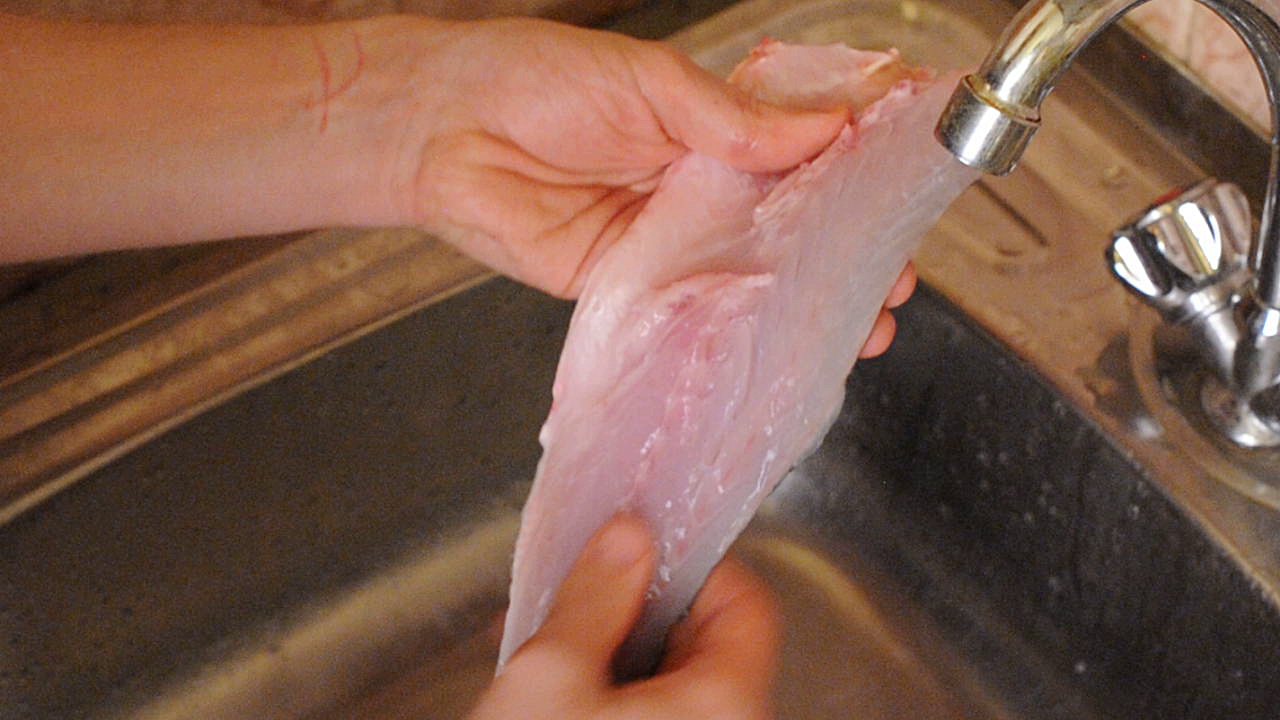
Rinse the sea bass briefly under cold water to remove loose scales, blood, or residue. Do not soak it. Pat the fish very dry with paper towels, especially around the skin and belly cavity. A dry fish is easier to grip and safer to cut. Moisture makes the fish slippery, and slippery fish have a talent for escaping at exactly the wrong moment.
Place the fish on the cutting board with the belly facing you and the head toward your non-dominant hand. If you are right-handed, the head usually points left. If you are left-handed, reverse the setup. The goal is to make your knife hand comfortable and your holding hand safe.
Step 2: Trim Sharp Fins if Necessary
Sea bass can have sharp dorsal spines and fins. If they are in your way, use kitchen shears to trim them before filleting. Cut carefully from tail toward head when trimming dorsal fins, keeping your fingers away from the spines. This step is optional, but it can make the fish easier to handle and reduce the chance of getting poked.
If the fish has already been cleaned by the market, it may be ready to fillet without much trimming. Still, take a moment to inspect it. A few seconds of preparation can save you from fumbling later.
Step 3: Make the First Cut Behind the Gills
Lift the pectoral fin and place your knife just behind it, near the gill plate. Make an angled cut down toward the backbone, following the natural line behind the head. Do not cut straight down like you are chopping vegetables. Angling the knife helps preserve the shoulder meat near the head, which is some of the best flesh on the fish.
Cut until you feel the backbone. You are not trying to saw through the spine at this stage. You are creating the starting line for the fillet. Let the bones tell you when to stop.
Step 4: Turn the Knife Along the Backbone
With the tip of the knife still near your first cut, rotate the blade so it points toward the tail. Begin slicing along the top of the backbone. Use long, smooth strokes instead of short, frantic jabs. The blade should stay close to the bones. You may feel a gentle clicking as the knife passes over the rib cage; that is normal.
Keep your non-dominant hand flat on the fish to stabilize it, but keep your fingers away from the blade path. This is not the moment for heroic finger placement. Slow and steady gives you cleaner fillets and fewer bandages.
Step 5: Open the Fillet as You Cut
As the fillet begins to separate, lift it gently with your free hand. This helps you see where the knife is traveling. Continue cutting toward the tail while keeping the blade angled slightly downward against the bones. The key is to release the flesh, not carve deeply into it.
For beginners, it helps to make shallow passes. A professional may remove the fillet in one elegant motion, but there is no prize for speed at home. Several careful strokes are better than one aggressive cut that leaves half the fish stuck to the skeleton.
Step 6: Cut Over the Rib Cage
When you reach the rib cage, keep the knife shallow and flexible. Follow the curve of the ribs rather than cutting through them. This is the trickiest part of filleting sea bass because the bones curve outward and the belly flesh is thinner. Let the knife skim over the bones, using gentle pressure.
If you accidentally leave some flesh on the ribs, do not panic. Everyone does at first. You can scrape small bits from the frame later for fish cakes or stock. The goal is improvement, not perfection worthy of a documentary close-up.
Step 7: Free the Fillet at the Tail
Once the fillet is mostly released, cut through the skin and flesh near the tail to separate it completely. Place the first fillet skin-side down on a clean section of the board or on a plate. Check it quickly for obvious rib bones or ragged edges, but save detailed trimming for later.
The first side is usually easier because the fish is still stable. The second side can feel wobblier because one fillet is gone. That is normal. Take your time.
Step 8: Flip the Fish and Repeat
Turn the fish over and repeat the process on the second side. Start with the angled cut behind the gills, turn the knife along the backbone, open the fillet as you go, follow the rib cage, and release the tail. Because the fish is less stable now, use a towel if needed to grip the head or tail.
Try to keep the blade in contact with the bones. If you drift upward, you will leave meat behind. If you dig downward, you may cut through bones or tear the fillet. The sweet spot is a smooth glide along the frame.
Step 9: Remove Rib Bones and Belly Membrane
Lay each fillet skin-side down. Look for rib bones, belly membrane, and any thin ragged edges. Use the tip of your knife to trim away the rib cage section if it came off with the fillet. Angle the blade shallowly so you remove bone without sacrificing too much meat.
Trim the belly flap if it is very thin, uneven, or strongly flavored. Some cooks keep it, especially for stock or crispy scraps. For a clean restaurant-style fillet, trimming creates a neater shape and more even cooking.
Step 10: Pull the Pin Bones
Run your fingertips gently along the center line of each fillet. You may feel small pin bones sticking up like tiny needles. Use fish tweezers or clean needle-nose pliers to pull them out in the direction they naturally angle. Pulling against the grain can tear the flesh.
Pin bones are small, but they matter. Nobody wants to take a heroic bite of sea bass and suddenly feel like they are chewing a toothpick. Take your time here, especially if serving children or guests.
Step 11: Skin the Fillet or Leave the Skin On
Sea bass skin can become crisp and delicious when pan-seared, so you may want to leave it on. If you prefer skinless fillets, place the fillet skin-side down. Make a small cut between the flesh and skin at the tail end. Grip the skin with a towel, angle the knife slightly downward, and slide the blade away from you while pulling the skin taut.
Use a gentle sawing motion and keep the knife almost flat against the skin. If you angle upward, you will leave skin on the fillet. If you angle too far downward, you will cut through the skin. When done correctly, the skin comes away in one piece and the fillet stays smooth.
Common Mistakes When Filleting Sea Bass
Using a Dull Knife
A dull knife is the number-one enemy of clean fillets. It crushes delicate flesh, slips off bones, and forces you to use too much pressure. Sharpen your knife before starting. If the knife cannot slice through fish skin cleanly, it is not ready for the job.
Cutting Too Far From the Bones
Beginners often leave a lot of meat on the frame because they are afraid of the bones. Stay close to the skeleton. The bones are not obstacles; they are your cutting guide. Long, confident strokes help you follow the fish’s natural shape.
Rushing the Rib Cage
The rib cage requires finesse. If you push too hard, you may cut through bones or tear the belly meat. Keep the blade shallow, slow down, and work with the curve. This is the part where patience pays rent.
Forgetting the Pin Bones
Even beautiful fillets can contain pin bones. Always check with your fingertips. Visual inspection alone is not enough because pin bones often hide under the surface.
How to Store Fresh Sea Bass Fillets
After filleting, pat the fish dry and place it in a covered container in the refrigerator. For best quality, cook it the same day. If you need to store it overnight, keep it very cold, ideally over ice in a sealed container so melting water does not soak the fish.
If freezing, wrap the fillets tightly to reduce air exposure. Vacuum sealing is ideal, but tightly wrapped plastic followed by a freezer bag also works. Label the package with the date. Frozen fish is best used while it still tastes fresh, not after it has become a frosty archaeological discovery in the back of the freezer.
Best Ways to Cook Sea Bass Fillets
Pan-Seared Sea Bass
Pan-searing is one of the best ways to cook skin-on sea bass. Pat the skin very dry, season with salt, and place the fillet skin-side down in a hot lightly oiled pan. Press gently with a spatula for the first few seconds to prevent curling. Cook mostly on the skin side until crisp, then flip briefly to finish.
Baked Sea Bass
For an easy dinner, bake sea bass fillets with olive oil, lemon slices, garlic, herbs, and a little salt. The mild flesh pairs well with parsley, dill, thyme, capers, cherry tomatoes, fennel, and white beans. Bake just until the flesh turns opaque and flakes easily.
Grilled Sea Bass
Grilling works best with skin-on fillets because the skin helps protect the flesh. Oil the grates well, preheat the grill, and avoid moving the fish too early. If the fillet sticks, it probably needs another minute before turning.
What to Do With the Bones, Head, and Trimmings
Do not throw away the frame immediately. Sea bass bones, head, and clean trimmings can make a delicate fish stock. Remove the gills first because they can taste bitter. Simmer the bones with onion, celery, parsley stems, bay leaf, peppercorns, and cold water for about 20 to 30 minutes. Avoid boiling hard, which can make stock cloudy and harsh.
Use the stock for seafood soup, risotto, chowder, poaching liquid, or sauce. This is one of the hidden benefits of learning how to fillet a whole sea bass: you get more than two fillets. You get flavor insurance.
Experience Notes: Lessons From Filleting Sea Bass at Home
The first time you fillet a sea bass, expect the process to feel slower than it looks in videos. That is not failure; that is normal. Most professional fish cutters make it look effortless because they have repeated the motion thousands of times. At home, your first goal should be safety and understanding, not speed. Put the fish on the board, breathe, and remind yourself that the knife is supposed to follow the bones, not fight them.
One helpful habit is to pause after the first few cuts and look at the fish from the side. You can often see whether your knife is staying close to the backbone or drifting into the flesh. This small visual check prevents waste. Another useful trick is to lift the fillet gently as you cut. When the flesh opens like a page, you can see the rib cage and adjust the blade angle. It feels awkward at first, but after a few tries, it becomes the difference between a ragged fillet and a clean one.
Dryness also matters more than beginners expect. A wet sea bass slides around, and when the fish moves, your knife control disappears. Pat the fish dry before cutting, dry your hands if they get slippery, and use a towel to grip the tail when skinning. This is not fancy technique; it is practical kitchen survival.
The second side of the fish teaches humility. Once the first fillet is removed, the body does not sit as evenly on the board. Many beginners do a better first fillet and a rougher second one. To fix this, slow down and stabilize the fish with a folded towel. Use shorter strokes near the rib cage and long strokes along the backbone. If the fillet comes off unevenly, trim it neatly afterward. A tidy trim can make a beginner fillet look much more polished.
Pin bones are another place where experience pays off. Running your fingers over the fillet is more reliable than looking. Pull each bone in the direction it leans, and support the flesh with your other hand. If you yank straight upward, you may tear a crater into the fillet. If that happens, do not worry. The fish will still taste good, and sauce is very forgiving.
Finally, save the bones at least once. Making stock from the frame helps you appreciate the value of the whole fish. It also makes filleting feel less wasteful while you are learning. Even if your fillets are not perfect, the bones, head, and trimmings can still become something delicious. That is the quiet joy of whole-fish cooking: every part has potential.
Conclusion
Learning how to fillet a sea bass is one of those kitchen skills that looks intimidating until you understand the pattern. Start behind the gills, follow the backbone, glide over the rib cage, repeat on the second side, trim carefully, remove pin bones, and decide whether to keep the skin. That is the whole rhythm. The more you practice, the cleaner your fillets become.
Sea bass rewards careful handling with mild, sweet, versatile fillets that can be pan-seared, baked, grilled, steamed, or turned into elegant seafood dishes. Keep your knife sharp, your board stable, your fish cold, and your movements controlled. And remember: even if your first fillet is not perfect, you are still closer to becoming the person at dinner who casually says, “Oh, I filleted that myself.” That person is annoying, yes, but also impressive.
SEO Tags
Note: This article is written for educational cooking guidance. Always use a sharp knife carefully, keep raw seafood cold, clean all surfaces after preparation, and follow local seafood safety recommendations.