Note: This article is written as original, publish-ready web content based on widely taught American crochet standards and beginner-friendly stitch guidance from reputable crochet education and yarn craft resources.
What Does “Decrease” Mean in Crochet?
In crochet, a decrease is the clever little move that turns two or more stitches into one. It is how a flat rectangle becomes a sleeve, a beanie curves toward the crown, an amigurumi head closes neatly, and a shawl forms a graceful point instead of looking like a confused potholder. If increases make your project wider, decreases make it narrower.
The most common decreases beginners meet are single crochet two together and double crochet two together. In American crochet terms, these are usually abbreviated as sc2tog and dc2tog. Some patterns may also write them as sc dec, dc dec, or simply dec, depending on the designer’s style.
The basic idea is simple: start a stitch, do not finish it, start the next stitch, then finish them together. It feels a little like asking two stitches to carpool. They begin separately, but they arrive at the final loop as one.
Why Crochet Decreases Matter
Learning how to decrease in crocheting with single and double stitches gives you control over shape. Without decreases, many crochet projects would stay stubbornly square or tube-shaped forever. Decreases help create curves, angles, fitted edges, tapered sleeves, hat crowns, soft toy bodies, bag bottoms, and decorative stitch patterns.
Common projects that use crochet decreases
You will often see single crochet decrease stitches in amigurumi, slippers, mittens, bags, and tightly textured items. Double crochet decreases appear frequently in garments, blankets, shawls, cardigans, hats, and lacy stitch patterns where shaping needs to remain flexible and smooth.
Decreases also help repair or balance stitch counts. If your row has accidentally grown by one stitch, a carefully placed decrease can sometimes save the day. It is not cheating. It is textile diplomacy.
American Crochet Terms You Should Know First
Before you begin, make sure your pattern uses US crochet terms. In the United States, single crochet means the short, dense stitch abbreviated as sc. A double crochet, abbreviated as dc, is taller and more open.
This matters because UK crochet terms are different. A US single crochet is called a double crochet in UK terminology. If your pattern came from another country, check the notes before blaming your yarn, your hook, or Mercury being in retrograde.
Key abbreviations
- sc: single crochet
- dc: double crochet
- st: stitch
- yo: yarn over
- sc2tog: single crochet two stitches together
- dc2tog: double crochet two stitches together
- dec: decrease
How to Single Crochet Decrease: SC2TOG
The single crochet decrease is one of the first shaping techniques most crocheters learn. It is compact, sturdy, and excellent for projects where you want the fabric to stay firm. If you are making stuffed animals, baskets, winter accessories, or anything that needs structure, sc2tog will become one of your best hook friends.
Step-by-step SC2TOG instructions
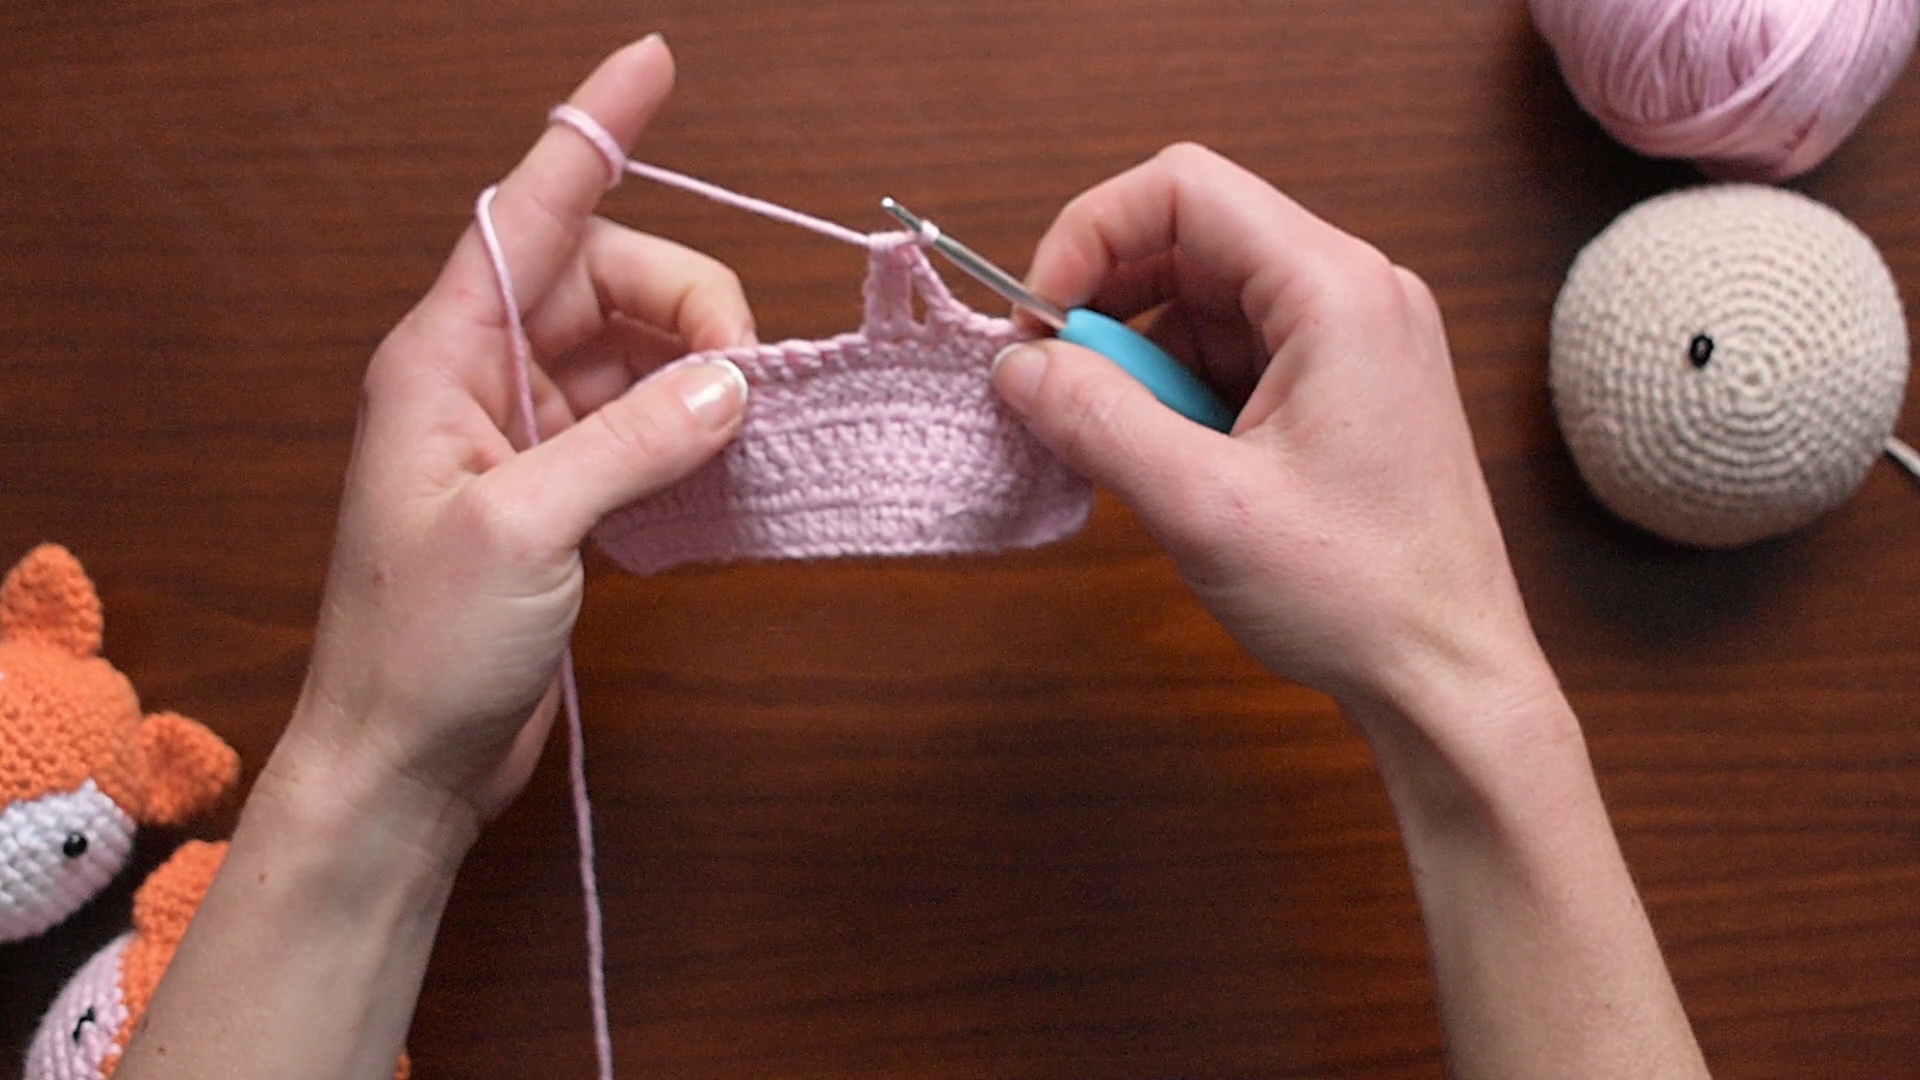
- Insert your hook into the next stitch.
- Yarn over and pull up a loop. You now have two loops on your hook.
- Insert your hook into the following stitch.
- Yarn over and pull up another loop. You now have three loops on your hook.
- Yarn over and pull through all three loops.
That is one single crochet decrease completed. You have worked across two stitches but created only one finished stitch. Your stitch count has decreased by one.
Example: decreasing across a row
Imagine you start with 10 single crochet stitches. If your pattern says, “sc in next 3 sts, sc2tog, sc in next 3 sts, sc2tog,” you will work 3 normal single crochets, decrease over the next 2 stitches, work 3 more single crochets, then decrease over the final 2 stitches. You began with 10 stitches and finished with 8.
The math can sound fussy at first, but it is only counting. Crochet is basically soft geometry with snacks nearby.
How to Double Crochet Decrease: DC2TOG
The double crochet decrease is taller than a single crochet decrease and often looks smoother in open fabrics. It is ideal for shaping garments, shawls, blankets, and hats made with double crochet rows or rounds. Because double crochet stitches have more height, tension matters a little more. Keep your loops even, but do not strangle the yarn like it owes you money.
Step-by-step DC2TOG instructions
- Yarn over.
- Insert your hook into the next stitch.
- Yarn over and pull up a loop. You now have three loops on your hook.
- Yarn over and pull through two loops. You now have two loops on your hook.
- Yarn over and insert your hook into the following stitch.
- Yarn over and pull up a loop. You now have four loops on your hook.
- Yarn over and pull through two loops. You now have three loops on your hook.
- Yarn over and pull through all three loops.
You have now completed one double crochet decrease. Like sc2tog, dc2tog works two stitches into one, reducing your stitch count by one.
Example: shaping a double crochet row
Suppose a pattern says, “dc in next 4 sts, dc2tog, dc across.” You will double crochet into the next four stitches, then work a dc2tog over the next two stitches. After that, continue with regular double crochet stitches across the row. This creates a gentle narrowing point instead of an abrupt dip.
Regular Decrease vs. Invisible Decrease
A regular decrease is worked through the normal top loops of the stitches. It is useful, strong, and widely accepted in most patterns. However, it can sometimes leave a small bump or hole, especially in tight single crochet projects such as amigurumi.
An invisible decrease is a popular variation often used in amigurumi. Instead of inserting the hook under both loops of each stitch, you insert the hook into the front loop only of the first stitch, then the front loop only of the next stitch, and finish them together. This pulls the stitches together more discreetly and helps reduce gaps.
When to use an invisible single crochet decrease
Use an invisible decrease when you are crocheting stuffed toys, dolls, balls, animal heads, or any project where the decrease should hide politely in the fabric. Use a regular sc2tog when the pattern calls for it, when structure matters more than invisibility, or when you are working in rows where both sides may be visible.
For double crochet, invisible decreases are less common because the stitch is taller and more open by nature. A neat, even dc2tog usually gives better results than trying to hide the decrease completely.
Where to Place Crochet Decreases
Knowing how to make a decrease is only half the story. Knowing where to place it is what makes your work look intentional instead of mysteriously lopsided.
At the beginning of a row
To decrease at the beginning of a single crochet row, chain one, turn, then sc2tog over the first two stitches. For a double crochet row, you may chain two or three depending on the pattern, then work a dc2tog over the first two stitches. Some designers count the turning chain as a stitch, while others do not, so always check the pattern notes.
At the end of a row
To decrease at the end of a row, work until the final two stitches, then make your sc2tog or dc2tog over those last two stitches. This creates a clean taper along the edge.
In the middle of a row
Middle-row decreases are often used for shaping bust lines, waistlines, sleeves, blanket motifs, and decorative stitch patterns. To keep the decrease less noticeable, place it where the pattern tells you, or hide it near seams, underarms, corners, or textured sections.
In the round
When crocheting in the round, decreases are often spaced evenly. For example, a pattern might say, “sc in next 4 sts, sc2tog, repeat around.” This means you work four regular single crochets, then one decrease, repeating that sequence until the round is complete. Even spacing prevents puckering and helps the shape close smoothly.
How to Count Stitches After a Decrease
After a decrease, the two stitches you worked into become one stitch at the top. When counting your row or round, count the finished decrease as one stitch. This is where many beginners get into trouble. They see two stitch bases and accidentally count both. The top of the stitch is what matters for your next row.
A stitch marker can save your sanity. Place one in the first stitch of each round or row, especially when working amigurumi or dark yarn. Dark yarn is beautiful, dramatic, and occasionally behaves like a tiny black hole for stitch visibility.
Simple stitch-count example
If you have 12 stitches and work six sc2tog decreases around, you will end with 6 stitches. If you have 20 double crochet stitches and work four dc2tog decreases with regular stitches between them, you will end with 16 stitches. Each “two together” decrease removes one stitch from the total count.
Common Mistakes When Decreasing in Crochet
Pulling the decrease too tight
If your decrease feels stiff or puckered, your tension may be too tight. Try relaxing your hands and lifting your working loop slightly before the final yarn over. A decrease should be secure, not clenched like it is holding a family secret.
Skipping instead of decreasing
Skipping a stitch can reduce stitch count, but it often leaves a visible hole. In some lace patterns, that hole is intentional. In shaping, it usually is not. For smooth shaping, use sc2tog or dc2tog unless the pattern specifically says to skip.
Working into the wrong loops
Most standard decreases are worked under both top loops of each stitch. Invisible single crochet decreases use front loops only. Mixing these methods by accident can create uneven texture. Choose the correct method before you begin and stay consistent.
Forgetting that a decrease counts as one stitch
This is the classic beginner mistake. After completing a decrease, do not work again into the second stitch that was part of the decrease. You already used it. Let it retire in peace.
Placing decreases randomly
Random decreases can make your fabric lean, twist, or ripple. In rows, place decreases symmetrically when shaping both sides. In rounds, space them evenly unless the pattern is creating a specific angle or feature.
Tips for Neater Single and Double Crochet Decreases
Good decreases are not just technically correct; they also look smooth in the finished fabric. The following tips can help your crochet decreases blend in better.
Use consistent tension
The final pull-through of a decrease can become loose if you rush. Keep the loops even on your hook before finishing the stitch. If one loop is much taller than the others, the decrease may look sloppy.
Choose the right hook size
If your fabric has large gaps around decreases, your hook may be too large for the yarn or project type. Amigurumi usually benefits from a smaller hook than the yarn label recommends because the fabric needs to be dense enough to hold stuffing.
Practice on a swatch
Before decreasing on an important project, make a small practice swatch. Work a few rows of single crochet and try sc2tog at the beginning, middle, and end. Then do the same with double crochet and dc2tog. This takes ten minutes and can prevent an entire evening of dramatic unraveling.
Read the pattern repeat carefully
Instructions like “sc 3, dec” mean single crochet in the next three stitches, then decrease over the next two stitches. That repeat uses five stitches and turns them into four. Understanding the repeat helps you predict your final stitch count.
Single Crochet Decrease vs. Double Crochet Decrease
Both sc2tog and dc2tog reduce your stitch count, but they create different textures. A single crochet decrease is short, firm, and compact. It works beautifully for dense fabric. A double crochet decrease is taller and more flexible, making it better for drapey projects.
Use SC2TOG when:
- You are making amigurumi or stuffed crochet toys.
- You need firm shaping.
- Your project uses single crochet fabric.
- You want a compact decrease with less height.
Use DC2TOG when:
- Your pattern is worked in double crochet.
- You are shaping garments, shawls, hats, or blankets.
- You need a taller decrease that matches the surrounding stitches.
- You want shaping that keeps the fabric soft and flexible.
Practice Pattern: Small Decrease Swatch
Here is a quick beginner practice swatch for learning how to decrease in crocheting with single and double stitches. Use medium-weight yarn and a hook size that feels comfortable.
Single crochet decrease swatch
- Chain 12.
- Row 1: Single crochet in the second chain from the hook and in each chain across. You should have 11 stitches.
- Row 2: Chain 1, turn. Single crochet in the next 4 stitches, sc2tog, single crochet in the remaining stitches. You should have 10 stitches.
- Row 3: Chain 1, turn. Single crochet across.
- Repeat Rows 2 and 3 until you feel comfortable.
Double crochet decrease swatch
- Chain 14.
- Row 1: Double crochet in the fourth chain from the hook and in each chain across.
- Row 2: Chain 2 or 3 as your pattern style requires, turn. Double crochet in the next 4 stitches, dc2tog, double crochet across.
- Row 3: Chain and turn, then double crochet across.
- Repeat until your dc2tog feels smooth and even.
Real Crochet Experience: What I Learned from Decreasing Single and Double Stitches
The first time many crocheters learn decreases, they expect the stitch to behave like a neat little magic trick. Sometimes it does. Sometimes it looks like a tiny yarn goblin sat in the middle of the row. That is normal. Decreasing is simple in theory, but your hands need a little practice before the motion feels natural.
One of the biggest lessons is that single crochet decreases are less forgiving than they look. Because single crochet fabric is dense, every tight pull and uneven loop shows up. In amigurumi, this becomes especially obvious when stuffing presses against the fabric. A regular sc2tog may leave a small bump or gap, while an invisible decrease can make the surface look much cleaner. After trying both methods, many crocheters keep regular sc2tog for flat practice pieces and use invisible decreases for toys, dolls, and round shapes.
Double crochet decreases teach a different lesson: height matters. If the loops on a dc2tog are uneven, the stitch can lean or look bulky. The fix is not complicated. Slow down during the unfinished parts of the stitch. When you have the final three loops on your hook, check that they are similar in size before the last yarn over. That tiny pause can make the difference between “beautiful shaping” and “why is my cardigan making a face?”
Another practical experience is learning where decreases should sit. On hats, evenly spaced decreases create a smooth crown. If they stack directly above each other in every round, they may create visible lines. Sometimes that is a design feature; sometimes it looks like your hat has tiny corners. Staggering decreases can make the crown rounder. On garments, decreases near seams or edges are easier to hide, while random middle-row decreases can draw attention.
Counting is the quiet hero of successful decreasing. Beginners often finish a row, count, and discover one stitch has escaped the plan. The best habit is to count before and after a decrease row. Use stitch markers, especially with fuzzy yarn, dark yarn, or textured stitches. There is no award for counting everything in your head while squinting at navy yarn at midnight.
Yarn choice also changes the experience. Smooth, light-colored yarn makes decreases easier to see while practicing. Splitty cotton can make sc2tog annoying because the hook catches only part of the strand. Fuzzy yarn hides mistakes but also hides the stitches, which is a suspiciously balanced trade. For learning, choose a plain worsted-weight yarn in a light or medium color. Your future self will send a thank-you card.
The final lesson is confidence. Decreases may feel awkward for a few rows, but they quickly become automatic. Once you understand that every decrease simply combines stitches before finishing them together, you can apply the idea to many crochet stitches beyond single and double crochet. Half double crochet, treble crochet, post stitches, and clusters all follow the same logic: begin the stitches, leave them unfinished, then complete them together.
In short, decreasing is not just a beginner technique. It is one of the main tools that turns crochet from flat fabric into shaped design. Master sc2tog and dc2tog, and suddenly patterns start making more sense. Hats close neatly, toys become round, sleeves taper, shawls angle beautifully, and your hook starts to feel less like a mystery wand and more like a well-trained assistant.
Conclusion
Learning how to decrease in crocheting with single and double stitches is a major step toward better shaping, cleaner patterns, and more confident crochet projects. The single crochet decrease, or sc2tog, is compact and ideal for firm fabrics, while the double crochet decrease, or dc2tog, creates smooth shaping in taller, softer stitches.
Once you understand the basic concept, the process becomes easy: start two stitches, finish them as one, and reduce your stitch count by one. Practice on swatches, count carefully, use stitch markers, and adjust your tension until the decreases blend naturally into your fabric. Your first attempts may look a little dramatic, but that is part of learning. Crochet has a sense of humor, and apparently, it enjoys testing our counting skills.
With a bit of practice, crochet decreases become second nature. Whether you are closing an amigurumi head, shaping a hat crown, tapering a sleeve, or adding elegant structure to a blanket or shawl, sc2tog and dc2tog are essential techniques every crocheter should know.