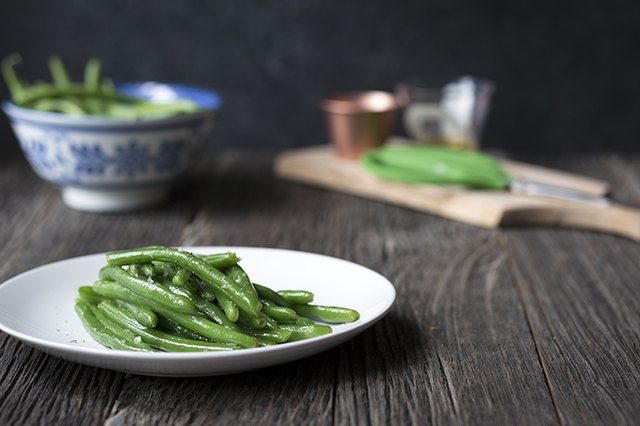
Fresh green beans are the overachievers of the produce aisle. They are inexpensive, quick to cook, naturally colorful, and willing to pair with almost anythingfrom roast chicken and grilled salmon to pasta, burgers, and holiday turkey.
Treat them well and they become bright, crisp-tender, and pleasantly sweet. Treat them badly and they become the limp, olive-green vegetable many people remember negotiating around at childhood dinners.
Fortunately, learning how to cook fresh green beans is simple. The real secret is not a fancy ingredient or a restaurant-only trick. It is controlling moisture, heat, seasoning, and cooking time. This guide covers selecting, trimming, blanching, boiling, steaming, sautéing, roasting, microwaving, and grilling fresh green beans. It also includes a dependable skillet recipe, common troubleshooting tips, and practical lessons learned from cooking more green beans than any reasonable refrigerator should hold.
How to Choose the Best Fresh Green Beans
Great cooked green beans begin before the burner is turned on. Look for beans that are firm, smooth, and brightly colored. A fresh bean should bend slightly and then snap. It should not fold like a tired shoelace.
Avoid pods that are limp, heavily wrinkled, slimy, or covered with large brown spots. Minor surface marks are usually harmless, but extensive discoloration can indicate that the beans have been stored too long.
Thin green beans usually cook faster and have a delicate texture. Standard green beans are thicker and hold up well to roasting, skillet cooking, and longer braises. Haricots verts are slender French-style green beans that require less cooking time, so watch them closely.
Yellow wax beans and purple beans can generally be prepared using the same cooking methods. Purple beans usually turn green when heated, which feels like a small kitchen magic trick performed without smoke, mirrors, or an expensive ticket.
How Much Should You Buy?
Plan on approximately 4 ounces of raw green beans per person when serving them as a side dish. One pound usually serves four people generously. Purchase a little extra when trimming a large batch or feeding enthusiastic vegetable eatersyes, those people really exist.
How to Store Fresh Green Beans
Keep unwashed green beans dry in the refrigerator. Store them in a loose produce bag or a covered container lined with a dry paper towel. The towel helps absorb excess moisture, which can accelerate spoilage.
For the best flavor and crispness, cook fresh beans within several days of purchasing them. Very fresh beans may remain usable for slightly longer, but they gradually lose their snap and sweetness.
Do not wash green beans before refrigerating them unless you can dry them thoroughly. Moisture left on the pods creates a friendlier environment for mold and sliminess, neither of which has ever improved a side dish.
How to Prepare and Trim Green Beans
Rinse the beans under cool running water immediately before cooking. Do not wash fresh vegetables with dish soap, detergent, or household cleaners. Running water is appropriate for routine cleaning.
Dry the beans with a clean kitchen towel or paper towels, especially when you plan to sauté, roast, or grill them. Dry beans brown more effectively and produce less dangerous splattering when they hit hot oil.
Trimming Green Beans Efficiently
The stem endthe side that was attached to the plantcan be tough and should be removed. The thin pointed tip is tender and may remain attached.
To trim several beans at once, line up a handful on a cutting board with their stem ends facing the same direction. Slice off the stems using a chef’s knife. Repeat with the remaining beans.
Small green beans can be left whole for an elegant presentation. Longer beans may be cut into 1- or 2-inch pieces for casseroles, soups, salads, pasta, and mixed vegetable dishes.
Do You Need to Remove the String?
Most modern supermarket green beans are stringless. However, older garden varieties and some pole beans may have a fibrous string running along the seam. If you feel a string when snapping off the stem, pull it down the length of the pod before cooking.
The Best All-Purpose Method: Blanch and Sauté
For reliably bright, flavorful, and crisp-tender beans, blanch them briefly in salted boiling water and finish them in a hot skillet. Blanching cooks the interior evenly, while sautéing adds butter, garlic, browning, and the possibility that someone asks for seconds.
Ingredients
- 1 pound fresh green beans, rinsed and trimmed
- 1 tablespoon kosher salt for the cooking water
- 1 tablespoon olive oil
- 1 tablespoon unsalted butter
- 2 garlic cloves, thinly sliced or minced
- 1 teaspoon fresh lemon juice
- Kosher salt and freshly ground black pepper to taste
- Optional: lemon zest, toasted almonds, Parmesan, or red pepper flakes
Step-by-Step Instructions
-
Boil the water.
Bring a large pot of water to a rolling boil. Add the kosher salt. -
Blanch the green beans.
Add the trimmed beans and cook for 2 to 4 minutes. Slender beans may need only 2 minutes, while thicker beans may require closer to 4 minutes. -
Check for doneness.
Remove one bean and taste it. It should be bright green, easy to bite through, and slightly crisp in the center. -
Stop the cooking.
Transfer the beans to a bowl of ice water when preparing them ahead, adding them to a cold salad, or preserving a particularly crisp texture. If serving immediately, prompt draining may be sufficient. -
Dry thoroughly.
Drain the beans and pat them dry. Wet beans steam and splatter instead of browning. -
Sauté the beans.
Heat the olive oil and butter in a large skillet over medium-high heat. Add the beans and cook for 2 to 3 minutes, tossing occasionally. -
Add the garlic late.
Stir in the garlic during the final 30 to 60 seconds. This gives it time to become fragrant without turning bitter. -
Finish and serve.
Remove the skillet from the heat. Add lemon juice, black pepper, and additional salt as needed. Serve immediately.
This technique is excellent for entertaining. The beans can be blanched several hours ahead, chilled, dried, and refrigerated. Shortly before dinner, sauté them with butter and seasonings. You get freshly finished vegetables without attempting a last-minute kitchen wrestling match.
Six Easy Ways to Cook Fresh Green Beans
1. How to Boil Green Beans
Bring a large pot of salted water to a rolling boil. Add the trimmed beans and cook for approximately 3 to 6 minutes. Thin beans will be ready sooner than thick beans.
Drain as soon as they are tender with a slight bite. Toss with butter or olive oil, salt, and freshly ground pepper. Boiling is particularly useful when preparing green bean salad, casserole, or a large quantity of beans at once.
The main danger is walking away and beginning a completely unrelated task. Start testing the beans after 3 minutes.
2. How to Steam Green Beans
Add approximately 1 inch of water to a saucepan and place a steamer basket above it. Bring the water to a simmer. Add the trimmed green beans, cover the pot, and steam for 4 to 7 minutes.
Steaming produces a clean flavor and prevents the beans from becoming waterlogged. After cooking, toss them with lemon butter, vinaigrette, fresh herbs, toasted nuts, or sesame oil.
3. How to Sauté or Steam-Fry Green Beans
Heat 1 to 2 tablespoons of oil in a wide skillet over medium-high heat. Add dry, trimmed beans and cook for 3 to 5 minutes, allowing browned spots to form.
Add 2 to 4 tablespoons of water and immediately cover the skillet. Cook for another 2 to 4 minutes. Remove the lid and allow the remaining water to evaporate.
This one-pan method combines the flavor of sautéing with the gentle tenderness of steaming. It is often the easiest way to cook fresh green beans on a busy weeknight.
4. How to Roast Green Beans
Preheat the oven to 425°F. Toss 1 pound of trimmed, thoroughly dried green beans with 1 tablespoon of olive oil, salt, and black pepper.
Spread the beans in a single layer on a large rimmed baking sheet. Roast for 12 to 18 minutes, turning once, until they are tender and browned in spots. Thick beans may require several additional minutes.
Do not crowd the baking sheet. Overlapping beans trap moisture and steam instead of browning. Roasted green beans taste especially good with Parmesan, balsamic vinegar, smoked paprika, toasted breadcrumbs, or fresh lemon.
5. How to Microwave Green Beans
Place 1 pound of trimmed green beans in a microwave-safe dish with 2 tablespoons of water. Cover loosely with a microwave-safe lid or plate.
Microwave on high for 4 to 6 minutes, stirring or rotating the dish halfway through. Carefully lift the cover away from your face because the trapped steam will be extremely hot.
Drain the beans, add butter or olive oil, and season to taste. Microwaving is the fastest method and an excellent choice when every stove burner is occupied by pots that appeared much smaller in the recipe photograph.
6. How to Grill Green Beans
Toss dry green beans with olive oil, salt, and pepper. Place them in a grill basket over medium-high heat. Cook for 7 to 10 minutes, tossing occasionally, until the beans are blistered and tender.
A grill basket is important unless you enjoy donating vegetables to the fire. Finish grilled beans with charred lemon, crumbled feta, chimichurri, pesto, or a garlicky vinaigrette.
How Long Should You Cook Fresh Green Beans?
Cooking time depends on the thickness and freshness of the beans, the size of the pan, the intensity of the heat, and your preferred texture. Use these ranges as a starting point rather than a courtroom verdict:
- Blanching: 2 to 4 minutes
- Boiling: 3 to 6 minutes
- Steaming: 4 to 7 minutes
- Skillet steam-frying: 6 to 10 minutes total
- Microwaving: 4 to 6 minutes
- Roasting at 425°F: 12 to 18 minutes
- Grilling: 7 to 10 minutes
The most accurate doneness test is tasting one bean. Properly cooked green beans should be easy to bite through without becoming mushy.
Crisp-tender beans retain a gentle snap. Southern-style or braised green beans are intentionally softer and are normally cooked longer with broth, onions, tomatoes, bacon, or ham.
Simple Green Bean Seasoning Combinations
Fresh green beans have a mild, grassy sweetness. They pair well with bright acids, savory fats, crunchy toppings, salty cheeses, and aromatic seasonings.
-
Classic:
Butter, garlic, lemon zest, and black pepper -
Almondine-inspired:
Browned butter, toasted sliced almonds, lemon juice, and parsley -
Italian:
Olive oil, garlic, Parmesan, and crushed red pepper -
Southern:
Bacon, onion, broth, and a small splash of vinegar -
Mediterranean:
Tomatoes, feta, oregano, olives, and red wine vinegar -
Asian-inspired:
Soy sauce, sesame oil, ginger, garlic, and toasted sesame seeds -
Holiday-style:
Sautéed mushrooms, shallots, thyme, and crispy onions
Add delicate herbs and acidic ingredients near the end of cooking. Sturdy aromatics such as onions and shallots can be added earlier. Minced garlic should usually be added late or cooked gently so it does not burn.
Burned garlic can turn an otherwise cheerful vegetable side into a tiny edible grievance.
Common Green Bean Mistakes and How to Fix Them
The Green Beans Turned Mushy
The beans were cooked too long or remained hot after draining. Begin tasting them earlier, drain promptly, and use an ice bath when they will not be served immediately.
Overcooked beans can still be chopped and added to soup, casserole, frittata, pasta sauce, or vegetable puree rather than being sentenced to the trash.
The Beans Are Wrinkled but Still Tough
High, dry heat browned the exterior before the interior softened. Add a splash of water, cover the skillet, and steam the beans for a few minutes. This softens the center without requiring more oil.
The Green Beans Taste Bland
Season the cooking water, then taste and season again before serving. Green beans often need both salt and contrast from lemon juice, vinegar, mustard, Parmesan, bacon, toasted nuts, or fresh herbs.
The Beans Will Not Brown
The beans may be wet, crowded, or moving too frequently. Dry them thoroughly, use a wider pan, cook in batches if necessary, and leave them undisturbed long enough to make direct contact with the hot surface.
The Garlic Burned
Add garlic near the end of cooking or sauté it gently over medium heat. If the garlic becomes dark brown and bitter, remove it and begin that step again. There are heroic kitchen rescues, but burned garlic rarely volunteers for one.
Can You Cook Fresh Green Beans Ahead of Time?
Yes. Blanch the beans until they are slightly firmer than your preferred final texture. Transfer them immediately to ice water, drain them, and dry them thoroughly.
Refrigerate the beans in a covered container. When ready to serve, reheat them quickly in a skillet with butter, olive oil, garlic, or another preferred seasoning.
Refrigerate cooked leftovers promptly and use them within three to four days for the best quality.
How to Freeze Fresh Green Beans
To freeze a seasonal surplus, wash, trim, and blanch the beans for approximately 3 minutes. Cool them rapidly in ice water and dry them thoroughly.
Arrange the beans in a single layer on a baking sheet and freeze until firm if you want them to remain separate. Transfer the frozen beans to airtight freezer bags or containers and remove as much air as possible.
Blanching before freezing helps preserve the beans’ color, texture, and overall quality.
Experiences From Cooking Fresh Green Beans
My most useful lesson came from a batch that looked perfect but tasted like warm lawn clippings. I had boiled the beans in unsalted water, drained them, and expected a teaspoon of butter to perform a miracle. It did not.
Green beans benefit from seasoning at more than one stage. Salting the cooking water gives the vegetable a flavorful foundation. Finishing with salt, acidity, and fat makes the final dish feel complete. Lemon juice, butter, Parmesan, vinegar, or toasted nuts can turn a plain batch into a side dish that tastes intentional.
The second lesson was about drying. After blanching one holiday batch, I transferred the beans directly from a colander into a skillet of hot butter. The pan hissed like an offended cat, the butter spat across the stove, and the beans steamed instead of sautéing.
Patting the beans dry had seemed like a fussy restaurant step until I skipped it. Now I spread blanched beans over a clean towel for several minutes before they meet the skillet. They brown better, the seasonings cling more evenly, and the stove requires considerably less emotional recovery.
Cooking fresh green beans for a crowd also taught me to separate “done” from “ready to serve.” Beans that taste perfect when removed from the pot can become soft while waiting under a lid.
For dinner parties, I blanch them earlier in the day, shock them in ice water, and refrigerate them after they are completely dry. At serving time, they need only a few minutes in a skillet with butter, shallots, and lemon. This method keeps the color brighter and gives the cook time to locate the serving spoon that mysteriously disappeared despite the household owning six of them.
Different types of beans also demand different cooking times. Slender haricots verts can move from raw to tender surprisingly quickly. Thick garden beans may require several extra minutes, particularly late in the growing season.
A timer is helpful, but tasting is more reliable. I begin checking at the earliest suggested time and bite through the center. The ideal texture is not determined by a universal number. It is the point at which the bean is tender enough to enjoy but still feels fresh and lively.
Roasting eventually became my favorite weeknight method because it requires almost no attention. The breakthrough was using a larger sheet pan. When the beans overlap, they release moisture and steam one another. When they are spread out, they blister, darken, and develop a more concentrated flavor.
A final shower of Parmesan and lemon zest turns roasted green beans into the kind of side dish people pick from the pan before it reaches the table.
I have also learned that softer green beans are not automatically wrong. Crisp-tender beans are excellent with grilled foods, salads, and light dressings. Slowly braised beans have their own comforting character.
Cooked with onion, broth, tomatoes, or a little bacon, green beans become silky and deeply savory. The intended texture should match the dish. Texture is a cooking decision, not a moral ranking.
Finally, the best method is usually the one that fits the rest of dinner. When the oven is busy, steam or microwave the beans. When the main course is mild, blister them and use bold garlic, ginger, or chile. When dinner is rich, add lemon, vinegar, and fresh herbs.
Fresh green beans are adaptable, forgiving, and fastprovided you taste them before they cross the tiny border between pleasantly tender and cafeteria nostalgia.
Conclusion
Learning how to cook fresh green beans comes down to a few dependable habits: choose firm beans, rinse and trim them properly, control the cooking time, season in layers, and match the cooking method to the texture you want.
Blanching followed by a quick sauté produces an especially reliable result. Steaming, roasting, microwaving, grilling, boiling, and one-pan steam-frying also offer practical advantages depending on your meal and available equipment.
Keep your first batch simple with butter, garlic, lemon, salt, and pepper. Once the timing feels natural, experiment with almonds, Parmesan, bacon, tomatoes, sesame, fresh herbs, and vinaigrettes.
Fresh green beans do not need an elaborate culinary makeover. They need heat, attention, good seasoning, and the courtesy of not being boiled into surrender.
SEO Metadata
Note: Cooking times are practical ranges. Bean thickness, freshness, equipment, and preferred texture may require adjustments.