Your SSD is the quiet little workhorse inside your computer. It boots Windows before your coffee cools, opens apps like it has somewhere important to be, and stores your photos, projects, games, invoices, and “final_final_REALLY_final.docx” files without asking for applause. But like every storage device, an SSD can wear out, overheat, develop errors, or simply decide that retirement sounds nice.
That is why knowing how to check your SSD health matters. You do not need to be a repair technician, wear an anti-static lab coat, or understand every hexadecimal-looking SMART attribute. You just need to know where to look, what the key numbers mean, and when to back up your data before your drive starts acting like a raccoon in a server room.
This guide explains how to check SSD health on Windows, macOS, and Linux, how to read important SSD health indicators, which tools are worth using, and what to do when your SSD shows warning signs.
What Does “SSD Health” Actually Mean?
SSD health is a general measurement of your solid-state drive’s condition. It usually combines several signals, including wear level, temperature, available spare blocks, error counts, power-on hours, firmware status, and SMART data. SMART stands for Self-Monitoring, Analysis and Reporting Technology, a built-in monitoring system used by modern storage drives.
Unlike old spinning hard drives, SSDs do not have moving parts. There are no platters, arms, or dramatic clicking noises that sound like a tiny robot practicing tap dance. Instead, SSDs store data in NAND flash memory cells. These cells can only be written to a limited number of times. That does not mean your SSD is fragile, but it does mean SSD lifespan is connected to write endurance.
Key SSD Health Terms You Should Know
Estimated remaining life: A percentage that estimates how much usable life the SSD may have left based on wear. A drive showing 95% remaining life is generally in much better shape than one showing 5%.
Percentage used: Common on NVMe SSDs. A value of 100% usually means the drive has reached its rated endurance, not necessarily that it will explode into digital confetti tomorrow.
Available spare: SSDs keep spare memory blocks in reserve. If available spare drops below the manufacturer’s threshold, the drive may be running out of backup blocks.
Temperature: SSDs can throttle or become unstable when they run too hot. NVMe drives, especially fast PCIe models, can get warm under heavy workloads.
Media and data integrity errors: These are serious because they may indicate actual problems reading or writing data.
Power-on hours: The total time the drive has been running. This does not tell the whole story, but it helps put the SSD’s age into context.
Before You Check Anything: Back Up Important Files
Here is the boring advice that becomes exciting only after disaster: back up your data first. Checking SSD health is usually safe, but if you already suspect a drive is failing, do not waste precious time poking around menus while your files stand near the edge of a cliff.
Copy important documents, photos, business files, school work, passwords, and project folders to an external drive, cloud storage, or another computer. A health report can tell you the drive is in trouble, but it cannot apologize for losing your vacation photos.
How to Check SSD Health on Windows 11
Windows 11 includes a built-in drive health feature for many modern NVMe SSDs. It is not always as detailed as manufacturer software, but it is a great first stop because it is already sitting there, waiting politely.
Method 1: Use Windows Settings
- Open Settings.
- Go to System.
- Select Storage.
- Click Advanced storage settings.
- Choose Disks & volumes.
- Select your SSD and click Properties.
- Look for drive health details such as estimated remaining life, available spare, and temperature.
If Windows displays a critical warning, take it seriously. A warning about low spare capacity, degraded reliability, or abnormal drive behavior means you should back up immediately and plan for replacement.
Method 2: Use PowerShell
PowerShell can show basic disk health information and, on supported drives, reliability counters such as temperature, wear, errors, and power-on hours.
For more detailed reliability data, try:
Not every SSD reports every value through Windows. If some fields are blank, your drive, controller, enclosure, or driver may not expose that data. Translation: Windows asked the SSD a question, and the SSD stared out the window.
Method 3: Avoid Relying on WMIC
You may see old tutorials suggesting this command:
It may still work on some systems, but WMIC has been deprecated and is being phased out in modern Windows versions. It also gives a very basic result, such as “OK,” which is not enough for a serious SSD health check. Use Windows Settings, PowerShell, or a trusted SSD utility instead.
How to Check SSD Health on Windows 10
Windows 10 does not always provide the same friendly drive health screen found in Windows 11, especially for older SATA SSDs. Still, you have good options.
Use Manufacturer Software
The most accurate consumer-friendly method is usually the SSD maker’s own software. These tools can read SMART data, show lifespan estimates, update firmware, run diagnostics, and sometimes perform secure erase or overprovisioning tasks.
- Samsung SSDs: Samsung Magician
- Crucial SSDs: Crucial Storage Executive
- Kingston SSDs: Kingston SSD Manager
- Western Digital and SanDisk SSDs: SanDisk Dashboard or WD-related tools depending on model
- Seagate drives: SeaTools
- Solidigm SSDs: Solidigm Storage Tool
Always download SSD utilities from the official manufacturer website. Random download sites are where innocent computers go to collect toolbars, fake installers, and digital bad decisions.
Use CrystalDiskInfo
CrystalDiskInfo is a popular Windows utility for reading SMART data from HDDs, SATA SSDs, and many NVMe drives. It can show health status, temperature, total host reads and writes, power-on count, power-on hours, and important warning attributes.
When using CrystalDiskInfo, look for:
- Health Status: Good, Caution, or Bad
- Temperature: Make sure the SSD is not running unusually hot
- Total Host Writes: Useful for estimating wear
- Reallocated sectors or bad blocks: Watch for increasing counts
- Percentage used or remaining life: Important for NVMe SSDs
One warning: do not panic over a single number without context. SMART attributes vary by manufacturer. A value that looks strange on one SSD may be normal on another. The trend matters. If errors are increasing, that is more concerning than one isolated statistic.
How to Check SSD Health on macOS
Mac users can check basic SSD health with Disk Utility, although the amount of information available depends on the Mac model, drive type, and whether the SSD is internal or external.
Use Disk Utility
- Open Disk Utility.
- Select your physical SSD, not just the volume underneath it.
- Look for SMART Status.
- If available, it may show Verified, Failing, or Not Supported.
If SMART status says “Verified,” that is generally good news. If it says “Failing,” back up the Mac and replace the drive if possible. If it says “Not Supported,” it does not automatically mean the SSD is bad. Many external SSDs and some USB enclosures do not pass SMART data properly to macOS.
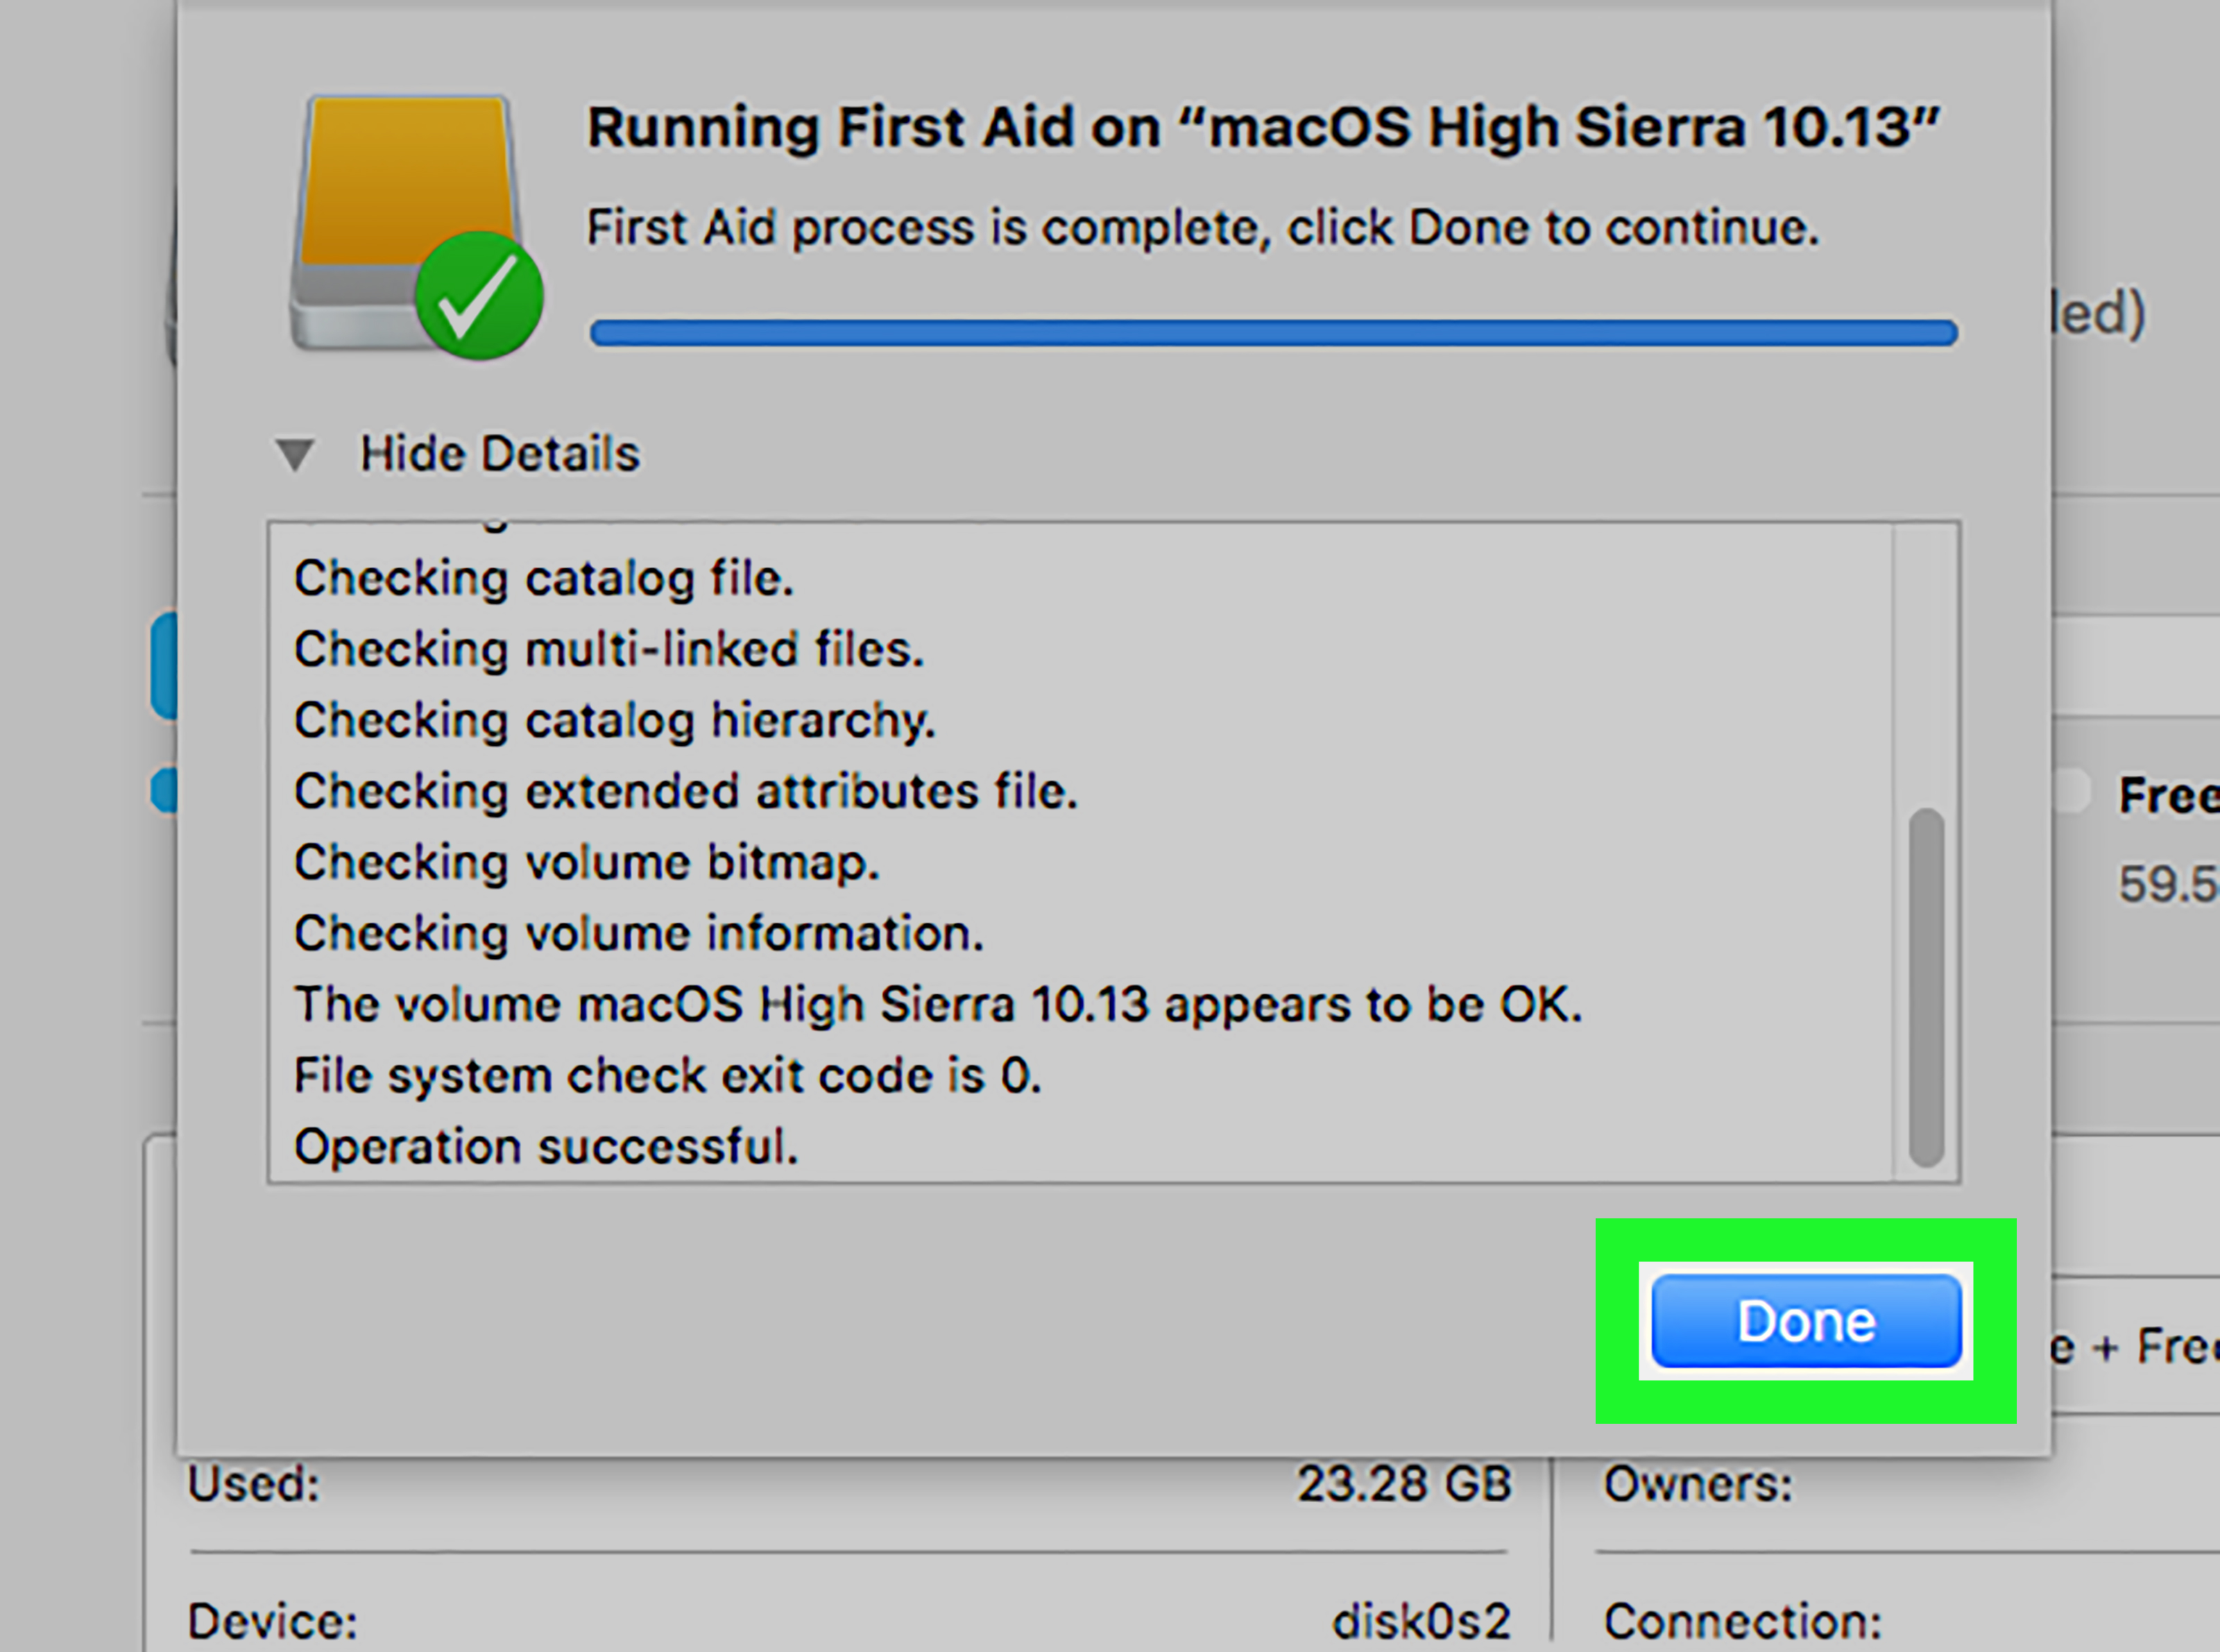
Use First Aid
Disk Utility’s First Aid checks and repairs file system issues. This is useful when your Mac has directory errors, mounting problems, or strange storage behavior. However, First Aid is not the same as a full SSD health test. Think of it as checking the filing cabinet labels, not examining the metal cabinet itself.
Use System Information
You can also open System Information, check storage details, and review hardware information. For more detailed SMART and NVMe data, advanced users often use command-line tools such as smartmontools, but casual users may prefer manufacturer utilities when available.
How to Check SSD Health on Linux
Linux gives you powerful tools for SSD health checks, especially if you are comfortable with the terminal. The two most common options are smartmontools and nvme-cli.
Check SATA SSD Health with smartctl
Install smartmontools, then run:
Replace /dev/sda with the correct drive name. Look for overall health, reallocated sectors, wear indicators, temperature, power-on hours, and error logs.
Check NVMe SSD Health with smartctl
For NVMe drives, the command often looks like this:
You may see useful fields such as percentage used, data units written, available spare, temperature, unsafe shutdowns, media errors, and error information log entries.
Use nvme-cli
For NVMe-specific information, install nvme-cli and run:
This command can show critical warnings, temperature, available spare, percentage used, data written, power cycles, power-on hours, unsafe shutdowns, and media errors.
How to Read the Most Important SSD Health Numbers
SSD health tools can feel like they were designed by engineers who believe “friendly interface” means using fewer than 400 acronyms. Fortunately, you only need to focus on a few major indicators.
1. Health Percentage
A health percentage near 100% usually means the SSD has most of its rated life remaining. A much lower number means the drive has experienced significant wear. If the number is dropping quickly, investigate what is writing so much data.
2. Temperature
Many SSDs operate comfortably in the 30°C to 60°C range, depending on workload and model. Fast NVMe drives can run hotter, especially during large file transfers, gaming, video editing, or benchmarking. If your SSD often sits near its thermal limit, improve airflow, use a heatsink if supported, or move the drive away from hot components.
3. Available Spare
Available spare shows how much reserve memory remains. If it falls below the manufacturer’s threshold, the SSD may trigger a warning. Treat low spare capacity as a “replace soon” sign.
4. Media Errors
Media errors are more serious than cosmetic warnings. If this number is not zero or starts increasing, back up immediately and monitor closely. Growing media errors can indicate a drive that is becoming unreliable.
5. Total Bytes Written or TBW
SSD endurance is often rated in TBW, meaning terabytes written. For example, a 1TB SSD might be rated for hundreds of terabytes written. If your drive has written only 30TB after years of normal use, it is probably not sweating. If it has written 500TB because you use it as a scratch disk for massive video projects, it deserves a small retirement party.
Warning Signs Your SSD May Be Failing
Software reports are useful, but your computer’s behavior can also tell a story. Watch for these symptoms:
- The computer freezes during file transfers.
- Windows or macOS reports storage warnings.
- The SSD disappears from BIOS, Disk Management, or Disk Utility.
- Files become corrupted or refuse to open.
- The system becomes unusually slow even after restarts.
- The drive becomes read-only.
- SMART tools show bad health, low spare blocks, or media errors.
One symptom alone does not always prove SSD failure. Bad cables, buggy drivers, overheating, malware, file system corruption, and power problems can also cause storage weirdness. But if symptoms appear with SMART warnings, assume the SSD is guilty until proven innocent.
How Often Should You Check SSD Health?
For most home users, checking SSD health once every month or two is enough. If your computer is used for school, gaming, office work, browsing, and streaming, your SSD probably has a relaxed lifestyle.
Check more often if you:
- Edit large videos or photos daily
- Run virtual machines
- Use your SSD as a cache or scratch disk
- Download and delete huge files constantly
- Operate a workstation, server, or NAS
- Have received a storage warning before
For critical computers, set a recurring reminder to check drive health and confirm backups. The reminder is boring. Losing data is much more boring, except with crying.
How to Improve SSD Health and Lifespan
You cannot make an SSD immortal, but you can help it live a long, useful life.
Keep Free Space Available
Try to keep at least 10% to 20% of the SSD free. SSDs use free space for wear leveling, garbage collection, and performance stability. A completely full SSD is like a closet packed so tightly that opening the door becomes a physics experiment.
Keep Firmware Updated
SSD firmware updates can improve stability, compatibility, performance, and sometimes reliability. Use the manufacturer’s official tool and read the notes before updating. Back up important data first.
Make Sure TRIM Is Enabled
TRIM helps the operating system tell the SSD which blocks are no longer in use. Modern Windows, macOS, and Linux systems usually handle this automatically for internal SSDs, but it is still worth checking if performance becomes strange.
Avoid Unnecessary Defragmentation
Traditional defragmentation was designed for spinning hard drives. SSDs do not need manual defragging in the old sense. Windows “Optimize Drives” understands SSDs and normally performs appropriate maintenance such as retrim, so do not use random old defrag utilities on your SSD.
Control Heat
Heat is a common enemy of fast NVMe SSDs. Make sure your case has decent airflow. For desktop PCs, install the motherboard’s M.2 heatsink if available. For laptops, avoid blocking vents while gaming or exporting large files.
Use Reliable Power
Sudden shutdowns can cause file system issues and, in rare cases, contribute to data loss. Use a quality charger for laptops and consider a UPS for desktops used for important work.
When Should You Replace an SSD?
Replace your SSD when health tools show clear warnings, available spare falls below the safety threshold, media errors increase, the drive becomes unreliable, or the estimated remaining life is very low. You should also replace it if it regularly disappears from the system, becomes read-only, or fails diagnostic tests.
Do not wait for a dramatic final scene. SSDs often fail quietly. One day everything works; the next day your computer says, “What drive?” and you suddenly remember every backup you meant to make.
Extra Experience: Practical Lessons from Checking SSD Health
The biggest lesson from checking SSD health is that healthy-looking drives can still surprise you, while scary-looking numbers sometimes need context. In real-world use, SSD maintenance is less about staring at every SMART attribute and more about noticing patterns. A drive that shows 98% remaining life, normal temperature, no media errors, and stable performance is probably fine. A drive that drops from 85% to 60% health in a short period deserves attention, even if it still says “Good.”
One common experience is the “slow computer panic.” A laptop starts taking longer to boot, apps open slowly, and the owner assumes the SSD is dying. After checking SSD health, the drive looks perfectly fine. The real problem turns out to be a nearly full system drive, too many startup apps, or an operating system update chewing resources in the background. This is why SSD health checks should be part of troubleshooting, not the entire investigation.
Another useful lesson: external SSDs are trickier than internal drives. Many people plug in a portable SSD and wonder why SMART data does not appear. The SSD may be healthy, but the USB enclosure or adapter may not pass through health information properly. In that case, the manufacturer’s portable SSD app may show more useful details than the operating system. If the external drive stores important files, do not rely only on “it mounts, so it must be fine.” Test it, back it up, and avoid yanking the cable like you are starting a lawn mower.
Gamers and creators often learn about SSD temperature the hard way. A high-speed NVMe drive can run hot during game installs, large Steam library moves, 4K video exports, or benchmark sessions. When temperatures climb, the drive may throttle, making performance drop suddenly. The fix may be simple: improve airflow, remove dust, update firmware, or use a proper M.2 heatsink. Sometimes the SSD is not failing; it is just sweating through a marathon in a tiny laptop chassis.
For students, freelancers, and small business users, the most valuable habit is monthly checking plus automatic backups. It takes only a few minutes to open Windows Settings, CrystalDiskInfo, Disk Utility, or a vendor dashboard. Save a screenshot or note the health percentage, temperature, and any error counts. Next month, compare. If the numbers are stable, relax. If errors increase, act early. Storage problems are easier to handle when the drive is still readable.
The final experience-based tip is simple: never ignore a warning just because the computer still works. A car can run with a dashboard warning light, too, but that does not mean you should drive across the desert with snacks and optimism as your only repair plan. If an SSD health tool says reliability is degraded, backup comes first, replacement comes second, curiosity comes third.
Conclusion
Learning how to check your SSD health is one of the easiest ways to protect your computer and your data. Whether you use Windows Settings, PowerShell, CrystalDiskInfo, Samsung Magician, Disk Utility, smartctl, or nvme-cli, the goal is the same: catch warning signs before they become data-loss disasters.
Pay attention to estimated remaining life, available spare, temperature, media errors, and total writes. Use official manufacturer tools when possible. Keep backups current. Leave free space on the drive. Avoid heat. Update firmware carefully. And when your SSD starts waving red flags, do not negotiate with it like it is a moody printer. Back up, replace, and move on with your files intact.
Note: This article is based on current SSD health-check practices from operating system documentation, storage utility behavior, and major SSD manufacturer guidance. For safety, always download SSD diagnostic tools directly from the official vendor website.