Building a compost bin is one of those backyard projects that sounds suspiciously wholesome, like baking bread from scratch or labeling your spice jars. But unlike many “simple weekend projects” that secretly require a second mortgage and emotional support, a DIY compost bin is genuinely doable. With a few basic materials, a shady corner, and a willingness to let banana peels become garden gold, you can turn everyday organic waste into rich compost for your soil.
Composting is the natural process of breaking down organic materials such as leaves, grass clippings, fruit peels, vegetable scraps, coffee grounds, and small garden trimmings. When managed correctly, these materials become a dark, crumbly soil amendment that improves garden beds, helps soil hold moisture, and feeds beneficial organisms. In other words, your trash can have a glow-up.
This guide explains how to build a compost bin from scratch, where to put it, what materials to use, how to keep your compost pile healthy, and how to avoid common mistakes like bad odors, pests, soggy sludge, and the mysterious feeling that your pile is “just sitting there judging you.”
Why Build a Compost Bin?
A compost bin keeps organic waste contained while still allowing air, moisture, and microorganisms to do their work. You can compost in a loose pile, but a bin is cleaner, tidier, and usually more neighbor-friendly. It also makes it easier to control moisture, protect scraps from animals, and turn the pile when needed.
For home gardeners, compost is valuable because it improves soil structure. Heavy clay soil becomes easier to work, sandy soil holds water better, and garden beds become more biologically active. Compost does not replace every fertilizer need, but it does help build healthier soil over time.
There is also the waste-reduction benefit. Food scraps and yard trimmings take up space in landfills, where they may break down without enough oxygen and contribute to methane production. Composting at home keeps useful organic material in your yard, where it can become something productive instead of another sad bag at the curb.
Before You Build: Choose the Right Compost Bin Style
The best compost bin depends on your space, budget, climate, and patience level. Some people want a neat wooden system that looks like it belongs in a garden magazine. Others want a wire cylinder that says, “I am practical, and I own gloves.” Both can work beautifully.
1. Simple Wire Compost Bin
A wire compost bin is one of the easiest and cheapest options. You make a cylinder or square enclosure from hardware cloth, welded wire, or fencing. It provides excellent airflow and is simple to move. The downside is that it may look a little rustic, which is a polite way of saying “farm-adjacent.”
2. Wooden Pallet Compost Bin
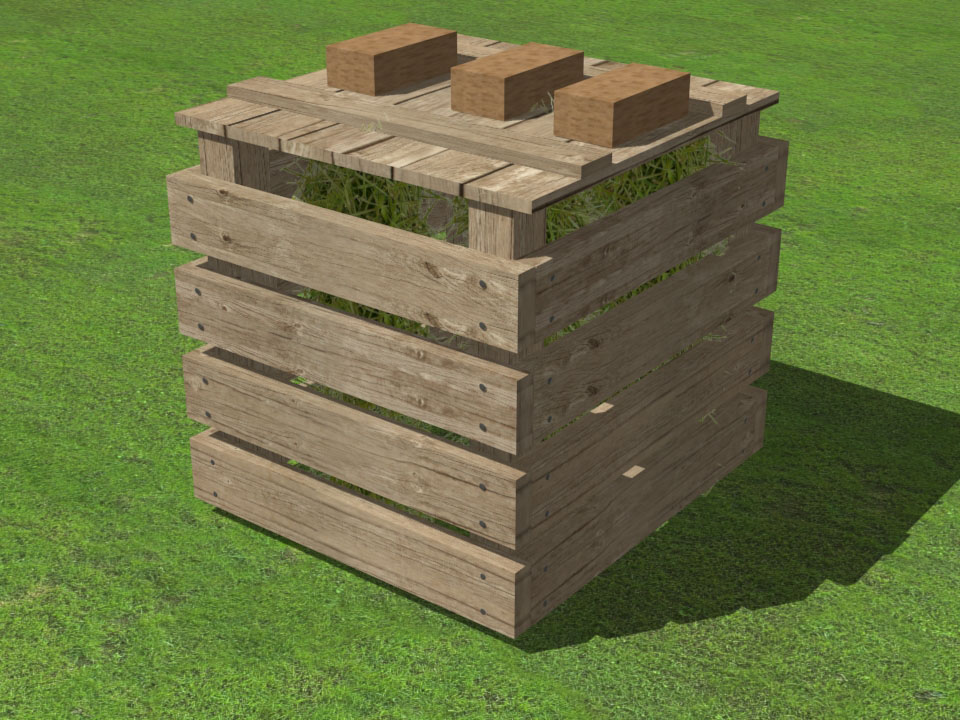
A pallet compost bin is popular because pallets are often inexpensive or free. You can connect three or four heat-treated pallets to create a sturdy box. Always look for pallets marked “HT,” meaning heat-treated, and avoid chemically treated or mystery-stained pallets. Compost is supposed to feed your garden, not audition for a toxicology report.
3. Three-Bin Compost System
A three-bin compost system is ideal for serious gardeners. One bin holds fresh materials, the second holds active compost, and the third stores finished compost. This setup makes turning easier and gives you a continuous supply. It takes more room and effort, but it is the Cadillac of backyard composting, minus the cup holders.
4. Trash Can Compost Bin
A plastic trash can with drilled holes can become a compact compost bin for small yards. It is inexpensive, enclosed, and easy to use. However, it needs plenty of ventilation holes, and it can become too wet if drainage is poor.
5. Compost Tumbler
A tumbler is not usually a “build from scratch” project, but it is worth mentioning. Tumblers are clean, contained, and easy to rotate. They are useful for people who want less bending and fewer animal problems. The trade-off is cost and limited capacity.
The Best Size for a Backyard Compost Bin
A practical compost bin should be large enough to hold heat and moisture but small enough to manage. A good target is about 3 feet wide, 3 feet deep, and 3 feet tall. This size gives microorganisms enough material to work with while still allowing you to turn the pile without needing the upper-body strength of a lumberjack.
Smaller bins can still work, especially in mild climates, but they may break materials down more slowly. Larger bins can process more material, but they become harder to turn and may compact if not managed well. For most households, a 3-by-3-by-3-foot bin is the sweet spot.
Where to Place Your Compost Bin
Location matters. Put your compost bin in a spot that is convenient but not directly in the way of daily life. You want it close enough to the garden and kitchen that you will actually use it, but not so close to your patio that guests ask why your landscaping has a lid.
Look for These Features
Choose a level area with good drainage. Partial shade is helpful because it keeps the pile from drying out too quickly in hot weather. A nearby water source makes it easier to moisten dry leaves or cardboard. Good airflow around the bin is important, so avoid pressing it tightly against fences, sheds, or wooden structures.
If pests are a concern, place hardware cloth underneath the bin before filling it. This can help discourage rodents from tunneling in from below. Also, avoid placing the bin in a low, soggy area. Compost likes moisture, but it does not want to become a swamp with ambitions.
Materials and Tools You Need
For a basic wooden pallet compost bin, gather the following materials:
- Three or four heat-treated wooden pallets
- Galvanized screws, zip ties, or heavy-duty wire
- Hardware cloth for the bottom, if pests are a concern
- Hinges and a latch, if you want a front gate
- Landscape stakes or metal T-posts for extra support
- A drill or screwdriver
- Wire cutters, if using hardware cloth
- Work gloves
- A garden fork for turning compost
For a wire compost bin, you will need welded wire fencing or hardware cloth, wire cutters, gloves, and clips or wire to fasten the ends together. For a trash can compost bin, you need a plastic trash can with a lid and a drill for ventilation and drainage holes.
How to Build a Compost Bin Step by Step
Step 1: Prepare the Site
Clear a level patch of ground. Remove large weeds, rocks, and debris. If you want extra pest protection, lay hardware cloth on the ground where the bin will sit. This bottom layer should extend slightly beyond the edges of the bin.
Do not place a solid plastic sheet under the compost. Your pile benefits from contact with soil because earthworms, insects, fungi, and bacteria can move in and help break down the materials. Compost is a team sport, and the underground crew does not send invoices.
Step 2: Set Up the Back and Side Walls
Stand three pallets upright to form a U shape: one pallet in the back and one on each side. Secure the corners with screws, wire, or heavy-duty zip ties. If the pallets feel wobbly, use stakes or posts at the corners for support.
The front can stay open for easy access, or you can attach a fourth pallet as a removable door. A door helps keep the pile contained, but an open front makes turning and harvesting easier. Choose the option that matches your patience and your tolerance for things spilling slightly forward like a compost waterfall.
Step 3: Add a Front Gate
If you want a gate, attach the fourth pallet with hinges on one side and a latch on the other. Another simple option is to wire the fourth pallet loosely so you can remove it when turning the pile. The goal is easy access. If harvesting compost requires wrestling the bin like an angry refrigerator, you will avoid doing it.
Step 4: Improve Airflow
Pallets naturally have gaps, which makes them excellent for composting. Air is essential because most backyard composting depends on aerobic decomposition, meaning oxygen-loving microorganisms do the work. Without enough air, the pile can become anaerobic, which is when unpleasant smells enter the chat.
If you build with solid lumber, leave gaps between boards. If you use a trash can, drill holes around the sides, bottom, and lid. Drainage holes at the bottom are especially important because excess liquid needs somewhere to go.
Step 5: Start With a Base Layer
Add a loose base layer of small twigs, dry stems, straw, or coarse leaves. This helps create air pockets at the bottom of the pile. Think of it as a mattress for microbes, except nobody has to assemble it with an Allen wrench.
Step 6: Layer Browns and Greens
Successful composting depends on balancing “browns” and “greens.” Browns are carbon-rich materials such as dry leaves, shredded cardboard, straw, small twigs, wood chips, and sawdust from untreated wood. Greens are nitrogen-rich materials such as fruit and vegetable scraps, coffee grounds, fresh grass clippings, plant trimmings, and spent flowers.
A practical backyard rule is to use about two to three parts browns for every one part greens by volume. You do not need to measure with a kitchen scale unless you enjoy making your compost pile feel like a science fair finalist. Just remember this: when in doubt, add more dry browns.
Step 7: Add Moisture
Your compost pile should feel like a wrung-out sponge. It should be damp, not dripping. If the pile is dry, decomposition slows down. If it is too wet, airflow drops and odors increase. Add water as you build the pile, especially when using dry leaves, straw, or cardboard.
Step 8: Turn the Pile
Turning mixes oxygen into the pile and helps materials break down more evenly. Use a garden fork to lift and fluff the compost every one to two weeks for faster results. If you prefer low-effort composting, you can turn it less often, but it will take longer. Compost is forgiving. It may be slow, but it is not petty.
Step 9: Keep Adding Materials Correctly
As you collect kitchen scraps, bury them under several inches of brown material or partially finished compost. This helps reduce fruit flies, odors, and animal interest. Keep a bag of dry leaves, shredded cardboard, or straw near the bin so you can cover fresh scraps each time you add them.
What You Can Compost
Good compost ingredients include fruit and vegetable scraps, coffee grounds, paper coffee filters, crushed eggshells, dry leaves, grass clippings, straw, small prunings, untreated wood shavings, shredded plain cardboard, and garden plants that are not diseased or full of mature seeds.
Chopping or shredding larger pieces helps them break down faster. A whole pumpkin will eventually compost, but it may take its sweet time and look like a seasonal crime scene along the way. Cut bulky items into smaller pieces before adding them.
What Not to Put in a Backyard Compost Bin
Avoid meat, fish, bones, dairy products, grease, oily foods, pet waste, diseased plants, weeds with mature seeds, glossy coated paper, charcoal ash, and treated wood sawdust. These materials can attract pests, create odors, spread disease, or introduce unwanted chemicals.
Small amounts of citrus and onion scraps are usually fine in a balanced outdoor pile, but avoid dumping large quantities at once. The same goes for grass clippings. A thick mat of fresh grass can become slimy and smelly, so mix it with dry leaves or straw.
How Long Does Compost Take?
Finished compost can take anywhere from a few months to a year or more, depending on the size of the pile, the mix of materials, moisture, temperature, and how often it is turned. A hot, well-managed pile with chopped materials may produce compost relatively quickly. A cold, passive pile takes longer but still works.
You will know compost is ready when it is dark, crumbly, earthy-smelling, and no longer recognizable as last month’s salad scraps. If it smells sour, looks slimy, or still contains large chunks, let it continue breaking down.
Common Compost Bin Problems and Easy Fixes
The Bin Smells Bad
A healthy compost pile should smell earthy, not rotten. Bad odors usually mean too much moisture, too many greens, or too little air. Add dry browns such as leaves or shredded cardboard, then turn the pile to bring in oxygen.
The Pile Is Too Dry
If materials are not breaking down and the pile looks dusty, add water while turning. Dry piles are common in hot climates or bins with lots of leaves and cardboard. Aim for dampness throughout the pile.
The Pile Is Too Wet
If the compost is soggy, heavy, and compacted, mix in dry browns. Make sure the bin drains well and is not sitting in a low area. Wet compost needs structure and air, not sympathy.
The Bin Attracts Flies
Fruit flies usually appear when food scraps sit exposed. Bury fresh scraps under browns or finished compost. Keep a lid on your kitchen scrap container and empty it regularly.
The Pile Is Not Heating Up
A pile may stay cool if it is too small, too dry, too high in browns, or not mixed enough. Add greens, moisten the materials, and turn the pile. However, cold composting is still composting. It simply takes longer.
How to Use Finished Compost
Use finished compost as a soil amendment in vegetable beds, flower borders, around shrubs, or in container mixes. Spread one to two inches over garden beds and gently work it into the top layer of soil. You can also use compost as mulch around plants, keeping it slightly away from stems and trunks.
For containers, mix compost with potting mix rather than using it alone. Pure compost can be too dense and may not drain properly in pots. Like hot sauce, compost is wonderful, but more is not always better.
Best DIY Compost Bin Ideas for Different Homes
For Small Yards
Use a trash can compost bin, compact tumbler, or small wire bin. Focus on kitchen scraps, shredded cardboard, and dry leaves. Keep the bin covered and turn it regularly to avoid odors.
For Large Gardens
Build a three-bin wooden system. This gives you room for fresh materials, active compost, and finished compost. It also makes seasonal yard cleanup much easier.
For Budget Builders
Use heat-treated pallets, wire fencing, or concrete blocks. These materials are usually affordable and easy to assemble. Avoid painted or chemically treated wood.
For Low-Maintenance Composters
Choose a cold composting bin and accept a slower timeline. Add materials in layers, keep food scraps covered, and let nature do most of the work. Turn occasionally when ambition strikes.
Real-Life Experience: What Building a Compost Bin Teaches You
The first thing you learn after building a compost bin is that composting is less about perfection and more about observation. At the beginning, many people treat the pile like a delicate recipe. They worry about ratios, layering, moisture, temperature, and whether coffee grounds count as green even though they are brown in color. Then, after a few weeks, they realize compost is not a soufflé. It does not collapse because you looked at it wrong.
A good experience is to keep a small container in the kitchen for daily scraps. Coffee grounds, banana peels, carrot tops, apple cores, and vegetable trimmings add up quickly. The trick is to empty the container before it becomes a tiny indoor swamp. Each time you take scraps to the bin, toss in a handful or two of shredded cardboard or dry leaves. This habit keeps the compost balanced and prevents the “why does my yard smell like old soup?” problem.
Another useful lesson is that fall leaves are composting treasure. If you have trees nearby, collect dry leaves in bags and save them beside the bin. They are perfect for covering fresh scraps, drying out wet piles, and adding carbon. In fact, many compost problems can be solved with the phrase “add more leaves.” Too wet? Add leaves. Smelly? Add leaves. Fruit flies? Bury scraps and add leaves. Existential backyard confusion? Fine, leaves may not fix that, but they help.
Turning the pile is where reality meets enthusiasm. At first, you may imagine yourself turning compost every Saturday morning with heroic consistency. Then life happens. The good news is that occasional turning still helps. When you do turn it, move dry outer materials toward the center and break up clumps of grass or food scraps. You will often find that the middle of the pile is warmer, darker, and more active than the edges. That is a satisfying moment, like discovering your trash has been secretly productive.
You also learn to manage expectations. Finished compost does not appear overnight. Some materials, such as shredded leaves and vegetable scraps, break down quickly. Others, such as corn cobs, avocado pits, eggshells, thick stems, and wood chips, take much longer. Screening finished compost through a simple mesh frame can help separate the good crumbly material from the stubborn chunks. Toss the chunks back into the bin for another round. Composting is basically a slow-motion recycling program with excellent job security.
One practical experience is to build the bin with access in mind. A beautiful bin that is hard to open will become annoying fast. Make the front removable or hinged, and leave enough room around the bin for a wheelbarrow or garden fork. The easier it is to add, turn, and harvest compost, the more likely you are to keep using it.
Finally, composting changes how you see household waste. Vegetable peels stop looking like garbage and start looking like future tomatoes. Dry leaves become a resource instead of a chore. Even cardboard boxes become useful once stripped of tape and shredded. Building a compost bin is not just a DIY project; it is a small system that makes your home and garden work together. And when you spread your first batch of finished compost over a garden bed, you get the quiet satisfaction of knowing that yesterday’s scraps are helping tomorrow’s plants grow. That is not magic, but it is close enough to make a gardener smile.
Conclusion
Learning how to build a compost bin is one of the easiest ways to reduce waste, improve soil, and make your garden more self-sufficient. Whether you build a simple wire bin, a pallet compost bin, a trash can composter, or a full three-bin system, the basic principles stay the same: choose a good location, allow airflow, balance browns and greens, keep the pile moist, and turn it when you can.
You do not need fancy equipment or a biology degree. You need organic material, a little patience, and the courage to believe that coffee grounds and cucumber peels have a second career waiting for them. Build the bin, feed it wisely, and your garden will thank you with healthier soil, stronger plants, and fewer bags of waste heading to the curb.