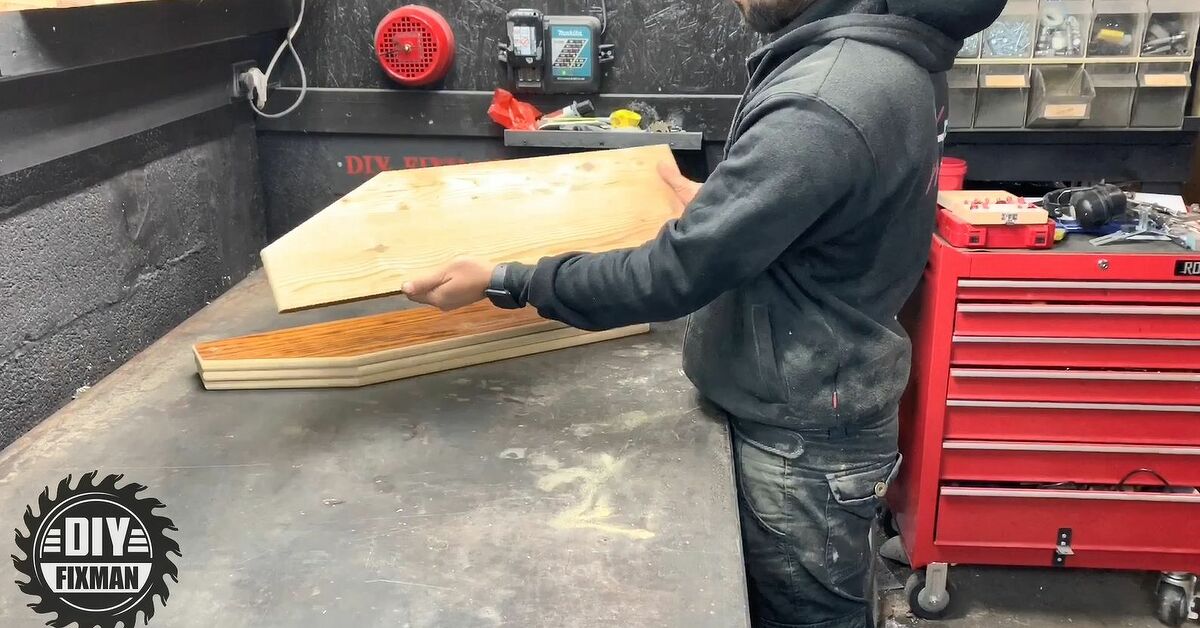
If your kid loves airplanes, travel, clouds, or anything that sounds like “zoom,” an airplane wall shelf is one of those rare DIY projects that is both adorable and actually useful. It is décor, storage, and a tiny statement piece all in one. Better yet, it does not require a full-blown woodshop, a television renovation crew, or a dramatic soundtrack. With a smart design, a few basic tools, and a weekend’s worth of determination, you can build a wall shelf that looks playful enough for a kids room but sturdy enough to hold books, plush toys, and the occasional very important dinosaur.
This project works because it blends simple shelf-building techniques with a shaped front profile. In plain English, you are basically making a strong wooden shelf, then giving it wings, a tail, and a cockpit silhouette so it looks like an airplane instead of “random rectangle from the garage.” The result feels custom, creative, and much more expensive than it really is. That is always the sweet spot in DIY.
Why an Airplane Wall Shelf Is a Great DIY Project
An airplane wall shelf for a kids room checks several boxes at once. It adds vertical storage, which is a polite way of saying it helps rescue the floor from toy chaos. It also gives the room a themed focal point without committing you to a full aviation museum. And because you are building it yourself, you can customize the size, color, and details to match the space.
Want a vintage propeller look with soft blue paint? Great. Want a modern shelf in white and navy with clean lines? Also great. Want to add little wooden wheels even though airplanes do not technically use wheels in the sky? Your workshop, your rules.
From an SEO and practical home-improvement standpoint, this is also the kind of project people actually search for: DIY kids room shelf, airplane shelf tutorial, wall shelf for children’s bedroom, beginner woodworking project, and creative storage ideas for small rooms. In other words, it is not just cute. It is useful content with real intent behind it.
Plan the Design Before You Cut Anything
The biggest rookie mistake in woodworking is getting excited, grabbing a board, and cutting first. That is how a 36-inch shelf becomes a 29-inch “design choice.” Start with a simple sketch and choose your finished size based on the wall space available.
A good beginner-friendly size for an airplane wall shelf is about 30 to 36 inches wide, 8 to 10 inches deep, and 10 to 14 inches tall at the highest point of the airplane body. This is large enough to be useful but small enough to stay visually light in a child’s bedroom.
Basic design idea
Think of the shelf as five main parts:
1. A bottom shelf board
2. A back panel that mounts to the wall
3. A shaped front panel that looks like the airplane body
4. Two wing pieces, either decorative or structural
5. A small tail fin and nose detail for personality
If you want the easiest version, make the shelf box first and attach airplane-shaped trim pieces afterward. If you want a more advanced look, cut the side profile and front face so the whole unit reads as one airplane shape. Both approaches can look fantastic.
Materials and Tools You’ll Need
For most DIY shelf builds, 3/4-inch plywood or solid pine/poplar is a smart choice. Plywood is stable and resists warping well. Poplar is easy to paint and friendly for beginners. Solid oak may look beautiful, but for a kids room shelf project, it is a little like wearing a tuxedo to a juice box party.
Materials
3/4-inch plywood, pine, or poplar boards
1×2 or 1×3 boards for cleats or trim
Wood glue
1 1/4-inch wood screws
Brad nails or finish nails
Wood filler
Sandpaper in 120-, 180-, and 220-grit
Primer
Low-VOC or zero-VOC paint
Clear water-based topcoat optional
Heavy-duty wall screws and anchors or lag screws into studs
Tools
Tape measure
Pencil
Speed square
Jigsaw for curved airplane shapes
Circular saw or miter saw
Drill/driver
Pocket hole jig optional but helpful
Clamps
Orbital sander or sanding block
Stud finder
Level
If you have a router, you can soften the edges with a round-over bit for a more finished look. If you do not have one, no panic. Sanding the edges well will still make the shelf look polished and kid-friendly.
How to Build the Airplane Wall Shelf Step by Step
Step 1: Measure the wall and choose the mount height
Before building, decide exactly where the shelf will go. In a kids room, the right height depends on the child’s age and whether the shelf is decorative, functional, or both. If it will hold bedtime books, install it low enough for easy reach. If it is mainly for display, mount it higher and keep heavier objects toward the wall.
Use a stud finder and mark the wall studs early. This matters because a cute shelf still needs grown-up structural decisions. If at all possible, mount through studs for the strongest installation.
Step 2: Create a simple cut list
Here is a sample cut list for a 32-inch-wide shelf:
Bottom shelf: 32 x 9 inches
Back panel: 32 x 8 inches
Front airplane panel: 32 x 8 to 12 inches, shaped with nose and tail
Two side panels: 9 x 8 inches
Wing pieces: two pieces about 10 x 4 inches each
Tail fin: one piece about 5 x 4 inches
Wall cleat: 30 x 2 1/2 inches
Draw the airplane nose curve and tail on paper first, then trace it onto the wood. A gentle rounded nose usually looks better than an overly pointy one. Remember, this is a children’s shelf, not a fighter jet built in a secret hangar.
Step 3: Cut the main shelf parts
Cut the straight boards first, then move on to the decorative shapes. Use a jigsaw for the nose, tail, cockpit bump, or propeller-style front accent. Cut slowly and stay just outside the line. You can always sand to the final shape, but you cannot un-cut wood. The laws of DIY are cruel but consistent.
Step 4: Dry-fit everything before assembly
Set all the parts together on a flat surface without glue. This quick dry-fit helps you catch uneven cuts, bad spacing, and those moments when your “perfect” wing is somehow upside down. Adjust now, not after glue and screws have entered the chat.
Step 5: Assemble the shelf box
Start by attaching the side panels to the bottom shelf using wood glue and screws or pocket-hole joinery. Then attach the back panel. Make sure the box stays square as you go. A square and clamps are your best friends here.
After the box is assembled, attach the front airplane-shaped panel. If you want more visual depth, set the front panel slightly proud of the shelf body. That creates dimension and gives the shelf a more custom furniture look.
Step 6: Add the airplane details
Now the fun part begins. Attach the wings on each side or slightly beneath the main shelf line. Add a tail fin on the top rear corner. You can also glue on a round wooden nose piece or a flat propeller cutout for extra character. Keep these details secure and sand them well. In a kids room, decorative is good. Sharp is not.
Step 7: Fill, sand, and smooth everything
Use wood filler on nail holes, screw holes, and small gaps. Once dry, sand the whole shelf starting with 120-grit, then move to 180, and finish with 220 for a smoother paint-ready surface. Pay special attention to edges, corners, and the shaped nose section where splinters love to hide.
If you want the shelf to feel more premium, slightly round over all exposed edges by sanding them smooth. This gives the build a softer, more furniture-like finish and makes it better suited to a child’s bedroom.
Painting and Finishing for a Kids Room
Because this project is going in a kids room, finish matters almost as much as structure. Choose a low-VOC or zero-VOC primer and paint, and work in a well-ventilated space. Water-based products are easier to use, dry faster, and are generally more pleasant than the kind of finish that makes the whole house smell like a chemistry final exam.
Popular airplane shelf color ideas
Classic sky blue with white wings
Navy and white for a crisp aviation look
Red, white, and yellow for a playful vintage vibe
Soft gray with wood accents for a more modern nursery or toddler room
Apply primer first, especially if you used plywood or wood filler. Then paint two light coats rather than one thick one. If you want extra durability, especially for a shelf that will hold books or toys, add a water-based clear topcoat after the paint cures. Sand lightly between coats if needed for a smoother finish.
How to Mount the Shelf Safely
This is the part where style meets responsibility. A wall shelf in a child’s room must be installed securely. The cleanest method is to use a wall cleat mounted into studs, then screw the shelf body into that cleat from inside the shelf. This hides the fasteners and creates a strong connection.
Mounting method
1. Cut a wall cleat from a sturdy 1×3 board.
2. Level it on the wall and screw it into at least one, preferably two studs.
3. Lift the shelf onto the cleat.
4. Drive screws through the inside back of the shelf into the cleat.
If studs do not line up with the shelf width, use high-quality anchors rated for the load, but still hit at least one stud whenever possible. Keep the heaviest items lower and closer to the wall. Also, avoid styling the shelf with anything that might encourage climbing. Children are wonderfully imaginative, and unfortunately, they sometimes imagine they are also monkeys.
Styling the Finished Airplane Wall Shelf
Once the airplane shelf is mounted, it is ready for takeoff. Or at least for books and stuffed bears. The best styling approach is to keep it functional without overcrowding it. A few well-chosen items look better than a clutter pile that resembles a yard sale at 30,000 feet.
What to put on the shelf
Favorite bedtime books
Small framed art
Soft toys
A name sign or wooden letters
A night light if the shelf is mounted safely away from cords
Small baskets for tiny treasures and mystery objects children insist are important
For a cohesive kids room design, repeat airplane or travel-themed elements elsewhere in the space, like cloud art, map prints, striped bedding, or a soft blue-and-white palette. You do not need to turn the room into an airport terminal. A few subtle echoes are enough.
Common DIY Mistakes to Avoid
The most common mistake is overcomplicating the design. A shelf that is too detailed can become difficult to build, paint, and mount. Keep the structure simple and let the silhouette do the storytelling.
Another mistake is using wood that is too thin. Lightweight boards may look fine for five minutes and then begin to sag once you load them with books. A third classic error is rushing the finish. If you skip sanding, paint over dust, or install before the coating cures, the project can look homemade in the wrong way.
Finally, do not treat wall mounting as an afterthought. The shelf should be beautiful, but it also needs to be safe, especially in a child’s bedroom where curiosity tends to operate at Olympic levels.
Is This DIY Project Worth It?
Absolutely. Building an airplane wall shelf for a kids room is one of those satisfying projects that feels custom without becoming overwhelming. It is practical enough to solve a storage problem, creative enough to become part of the room design, and flexible enough for beginners to tackle with confidence.
You do not need a giant workshop or master carpenter status to make this happen. You just need a clear plan, decent measurements, patience with sanding, and the emotional maturity to accept that you may repaint one wing because the first coat looked suspiciously like mashed blueberries.
In the end, the best part is that you are not just making a shelf. You are making a piece of the room that feels personal. That is what good DIY does. It turns ordinary materials into something with a little story attached.
Experience and Lessons Learned From Building an Airplane Wall Shelf
The first time I built a themed wall shelf for a kids room, I thought the hard part would be the cutting. It was not. The hard part was stopping myself from adding “just one more cute detail” until the project looked like a wooden parade float. That experience taught me something useful: when you are building for a child’s room, simple usually wins. Kids notice the big shape, the fun color, and the fact that it belongs to them. They do not stand there judging whether your tail fin profile is historically accurate to 1940s aviation design. Frankly, that would be unsettling.
What mattered most in real life was balance. The shelf needed enough personality to feel playful, but not so much decoration that it became fragile or impossible to clean. A clean airplane silhouette, a strong shelf base, and a cheerful paint color did far more for the final result than a dozen tiny add-ons ever could.
I also learned that sanding is where a good DIY project quietly becomes a great one. When I rushed that step on an early build, the paint highlighted every flaw like a spotlight on bad decisions. On the next attempt, I spent extra time smoothing edges, filling gaps, and sanding between finish coats. The difference was dramatic. The shelf looked less like “weekend experiment” and more like something you would actually be proud to hang in a nicely designed bedroom.
Another lesson was about wall placement. On paper, the center of the wall looked perfect. In reality, the shelf worked better near the reading corner, where it could hold books and a small plush toy collection. That changed the project from purely decorative to genuinely useful. It became part of the child’s daily routine, which is probably the highest compliment a shelf can receive.
I also became much more aware of safety choices after building for children’s spaces. Rounded edges, stronger fasteners, lighter décor items, and careful mounting are not optional extras. They are part of the build. The cutest shelf in the world is not a success if it is mounted poorly or loaded with heavy objects in a way that invites trouble.
One of the most rewarding moments came after the shelf was installed and styled. The room felt finished in a way that store-bought décor often does not quite achieve. It matched the color palette, fit the wall exactly, and had the kind of handmade charm that makes a space feel personal. That is the real magic of DIY kids room projects. You are not just making furniture. You are helping shape a room that becomes part of family memories.
So if you are hesitating because you are not a woodworking expert, here is the honest truth: you do not need perfection. You need a solid plan, safe installation, and the willingness to take your time. A handmade airplane wall shelf can absolutely be a beginner-friendly project, and the final result often feels far more meaningful than anything ordered from a warehouse shelf on the internet.
Conclusion
If you want a DIY project that is equal parts practical, creative, and charming, an airplane wall shelf for a kids room is a smart choice. It gives you storage, personality, and a custom design feature all in one build. Keep the structure simple, use durable materials, choose a child-friendly finish, and mount it securely. Do that, and you will end up with a shelf that looks great, works hard, and earns its place on the wall for years to come.