A red party cup is already a tiny American icon. It has been to backyard barbecues, tailgates, birthday parties, game nights, and at least one event where somebody said, “Don’t worry, I know how to make buffalo dip,” and then served orange lava in a slow cooker. But what happens after the party, when the snacks are gone and the cup is sitting there like it has seen things? You can toss it, recycle it if your local program accepts that plastic, or give it a second life as a playful DIY coaster.
This DIY coaster from a red "Solo" party cup is inspired by the fun, thrifty, “why didn’t I think of that?” energy often associated with Jersey Girl Knows Best-style home hacks. It is simple, affordable, and surprisingly stylish when done with a little care. The result is a conversation-starting coaster that looks perfect for Super Bowl parties, dorm rooms, game-day trays, summer cookouts, man caves, she sheds, craft nights, and casual bars where nobody is pretending to be too fancy for chips and salsa.
The best part? You probably already have most of the supplies. A clean red party cup, scissors, adhesive, a backing material, and a sealer can turn disposable partyware into a useful little piece of handmade decor. It is recycling with personality, and yes, it may make your coffee table look like it has weekend plans.
Why Make a Coaster From a Red Party Cup?
DIY coasters are popular because they are practical, customizable, and beginner-friendly. You do not need a full craft room, a degree in engineering, or a glue gun named Gerald. Coasters protect tables from condensation rings, add color to a room, and make great small gifts. When you use a red party cup, you also add a dose of nostalgia.
The red party cup has become a familiar symbol of casual American gatherings. It is bold, cheerful, and instantly recognizable. Turning it into a coaster gives that party energy a second act. Instead of becoming clutter, the cup becomes something useful. That is the sweet spot of upcycling: less waste, more charm, and a project that does not require a second mortgage at the craft store.
This project works especially well because the cup material is lightweight, easy to cut, and naturally shaped into a round form. The rim, base, or side panels can all be used creatively. Depending on your style, you can make a minimalist red ring coaster, a layered collage coaster, a resin-sealed coaster, or a sporty game-day version with stickers, team colors, and a cork bottom.
Materials You Will Need
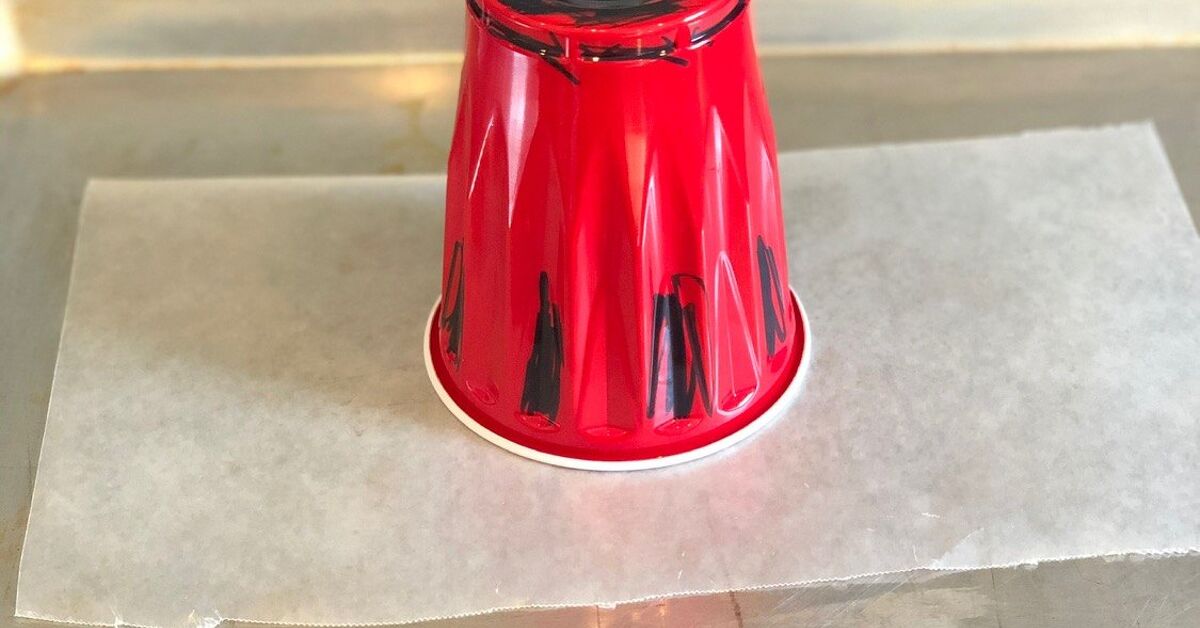
Before you start, gather everything on a covered work surface. A piece of cardboard, wax paper, or an old shopping bag will protect your table from glue and sealer. Crafting is more fun when you are not explaining to your family why the dining table now has a permanent glossy blob.
Basic Supplies
- 1 clean red party cup or red "Solo"-style cup
- Sharp scissors or a craft knife
- Pencil or marker
- Ruler or measuring tape
- Round template, such as a mug, jar lid, or small bowl
- Thin cardboard, cork sheet, craft foam, or felt for backing
- Strong craft glue, hot glue, or contact adhesive
- Clear acrylic sealer, dishwasher-safe decoupage medium, or craft resin
- Fine-grit sandpaper or an emery board for smoothing edges
- Optional decorations: stickers, vinyl letters, glitter, paint pens, printed paper, team logos, or small candy wrappers
Safety Supplies
- Disposable gloves if using resin or strong adhesive
- Ventilated workspace for spray sealer or epoxy resin
- Protective eyewear if cutting thicker plastic
- Mask or respirator if your chosen sealer requires it
One important note: many red party cups are made for cold beverages, not hot drinks or microwave use. This coaster is best for cold glasses, cans, bottled drinks, or room-temperature mugs. If you plan to place hot coffee on it, use a heat-resistant sealer and test carefully before trusting it with your favorite table.
Step-by-Step Guide: How to Make a Red Party Cup Coaster
Step 1: Wash and Dry the Cup
Start with a clean cup. Wash it with mild dish soap, rinse it well, and let it dry completely. Any sticky soda, lemonade, or mystery punch residue can interfere with glue and sealer. If the cup has been through a party where it was abandoned near the nachos, wash it twice. We are making crafts, not preserving evidence.
Step 2: Decide Which Part of the Cup to Use
You have a few design options. The easiest version uses the bottom circle of the cup as the coaster face. Another fun option is to cut the upper rim into a ring and glue it onto a circular base, creating a raised edge that catches condensation. You can also cut red panels from the side of the cup and arrange them like mosaic pieces.
For beginners, the rim-and-base method is the most practical. The cup rim gives the coaster a clean red border, while the cork or cardboard base gives it structure. If you want a flatter look, use the cup bottom as a decorative center and mount it onto a stronger backing.
Step 3: Cut the Cup Carefully
Use scissors to cut down the side of the cup. Then trim around the cup to remove the rim or bottom section. Take your time. Plastic can crack if you force it, especially around curved areas. If you use a craft knife, place the cup on a cutting mat and keep your fingers away from the blade path.
Once you have your red plastic pieces, smooth any sharp edges with fine-grit sandpaper or an emery board. This step only takes a minute, but it makes the finished coaster feel much more polished. Nobody wants a coaster that doubles as a tiny red booby trap.
Step 4: Create a Strong Base
Trace a 4-inch circle onto cork sheet, craft foam, thick felt, or cardboard. Four inches is a comfortable coaster size for most glasses and cans. Cut out the circle and check that your cup pieces fit neatly on top. If the base looks too small, size up slightly. If it looks too large, trim it down.
Cork is the best option if you want a sturdy, table-friendly coaster. Felt is soft and prevents scratches, but it may absorb moisture if the top layer is not sealed well. Cardboard works for a quick party craft, but it should be sealed carefully because water and cardboard are not exactly best friends.
Step 5: Glue the Red Cup Pieces in Place
Apply a thin, even layer of strong craft glue to the base. Press the red cup ring, bottom, or plastic pieces into position. If you are making a mosaic design, arrange the pieces first without glue so you can test the pattern. Then glue one piece at a time.
For a classic look, place the cup rim around the edge of the coaster and use the cup bottom or a decorative paper circle in the center. For a game-day version, add a small football sticker, team-color stripe, or white paint-pen lines. For a funny version, add tiny lettering such as “Sip Happens,” “Proceed to Party,” or “This Drink Has a Designated Parking Spot.”
Step 6: Seal the Coaster
Sealing is what turns a cute craft into something you can actually use. Without sealer, condensation can creep under decorations, loosen glue, and make the coaster look tired after one iced tea. A clear acrylic spray sealer is easy for beginners. Apply light coats in a ventilated area and let each coat dry according to the product directions.
If you use decoupage medium, apply several thin coats rather than one thick coat. Thin coats dry clearer and smoother. Let each layer dry fully before adding the next. If you choose dishwasher-safe decoupage medium, remember that many formulas need a long cure time before they reach full durability.
For a glossy, professional finish, you can use clear epoxy resin. Resin creates a hard, shiny surface that looks impressive, but it requires careful measuring, mixing, gloves, and ventilation. Follow the resin manufacturer’s directions exactly. Resin is not the place to freestyle unless your personal brand is “sticky coaster tragedy.”
Step 7: Add a Non-Scratch Bottom
Once the top is fully dry, flip the coaster over and add felt pads, a cork circle, or a foam backing. This protects your table and gives the coaster a finished feel. If the coaster wobbles, add small adhesive felt dots to the corners or edges until it sits level.
Step 8: Let It Cure Before Use
Dry and cured are not always the same thing. A coaster may feel dry to the touch after an hour but still be soft underneath the surface. Give it extra time before placing wet glasses on top. For spray sealers, overnight drying is usually a good starting point. For resin or specialty decoupage products, follow the full cure time on the label.
Creative Design Ideas for Your DIY Red Cup Coaster
Game-Day Coasters
Red party cup coasters are perfect for football season, basketball watch parties, tailgates, and backyard tournaments. Add white vinyl stripes, a mini team decal, or black-and-white referee-style paper in the center. Make a set of four and tie them with twine for a fun host gift.
Dorm Room Coasters
This project is dorm-friendly because it is inexpensive and small. Students can make coasters for desks, nightstands, or shared lounge areas. Add initials, school colors, or inside jokes. Just avoid glitter explosions unless you want your roommate to find sparkles in their laundry until graduation.
Retro Party Coasters
Lean into the nostalgia with bold lettering, music-note stickers, or tiny printed phrases from classic party playlists. The red cup already has personality, so the design does not need to be complicated. Sometimes the best craft choice is knowing when to stop before it becomes a scrapbook wearing a coaster costume.
Holiday Coasters
Red works beautifully for Christmas, Valentine’s Day, Memorial Day, and Fourth of July crafts. Add white snowflakes, tiny hearts, blue stars, or metallic accents. A set of red party cup coasters can become a budget-friendly stocking stuffer, classroom craft, or family activity during holiday breaks.
Common Mistakes to Avoid
Using Too Much Glue
More glue does not always mean stronger results. Too much glue can bubble, slide, or create lumps under the plastic. Use a thin layer and press pieces flat. If glue squeezes out around the edges, wipe it away before it dries.
Skipping the Sealer
A coaster has one job: handle moisture. If you skip the sealer, the project may look great for photos but struggle in real life. Always seal the top and edges, especially if you used paper, cardboard, stickers, or paint.
Using the Coaster Too Soon
Patience is the secret ingredient. Let the coaster cure fully before using it. If you place a cold drink on a soft finish, the glass may stick, leave rings, or damage the surface. Nobody wants to lift a drink and accidentally bring the coaster along for the ride like a tiny plastic passenger.
Forgetting the Bottom
The bottom matters. A hard plastic or rough cardboard underside can scratch wood, glass, or painted furniture. Felt, cork, and foam are simple fixes that make the coaster safer and more professional.
Is This DIY Coaster Eco-Friendly?
This project is best described as creative upcycling. It does not erase the environmental issues connected with disposable plastic, but it does give one item a longer useful life. Many red party cups are made from #6 plastic, which some local recycling programs do not accept. That means reuse can be a practical option when recycling is limited.
The most eco-conscious approach is to reduce single-use items when possible, choose reusable cups for regular gatherings, and upcycle leftover party supplies you already have. If you are hosting a large event, consider setting up clearly labeled bins, washing reusable items, and saving clean cups for crafts, seed starters, paint mixing, scoopers, or party decorations.
A red party cup coaster is not going to save the planet by itself, but it can help shift the mindset from “use once and toss” to “what else could this become?” That question is where many great DIY projects begin.
How to Clean and Care for Your Red Cup Coaster
Wipe the coaster with a damp cloth after use. Do not soak it in water unless your sealer specifically says the finished item can handle it. Avoid placing it in the dishwasher unless every material used, including glue, backing, and sealer, is rated for dishwasher use after curing.
Store the coaster flat and away from extreme heat. Because party cup plastic is not meant for microwaves or hot liquids, the finished coaster should not be used as a trivet for hot pans, boiling mugs, or anything fresh from the oven. It is a coaster, not a superhero.
Why This Project Works So Well for Parties
The DIY red party cup coaster is more than a craft. It is a themed detail that makes a casual event feel intentional. Put a stack of handmade coasters beside the drink station, and suddenly your snack table looks curated instead of “we panic-cleaned at 4:45.” You can even turn the project into a party activity by setting out pre-cut bases, cup rings, stickers, and markers.
For a backyard barbecue, guests can write their names on their coasters and use them as drink markers. For a birthday party, each coaster can match the theme. For a game night, you can make coasters with player numbers or team names. For a college send-off, add school initials and colors. Small details like this are inexpensive, but they make people smile.
Experience Notes: What It Is Really Like Making a Red Party Cup Coaster
The first thing you notice when making this coaster is that the project looks almost too easy. You hold the red cup in one hand and the scissors in the other and think, “This cannot possibly become home decor.” Then you cut the rim, place it on a cork circle, and suddenly it starts looking like something you meant to do. That moment is the magic of simple DIY projects. They do not demand perfection; they reward curiosity.
Cutting the cup is the trickiest part. The plastic is flexible, but it can bend in dramatic little waves if you rush. The best method is to make one vertical cut down the side, then trim slowly around the section you want. Small cuts are better than big aggressive snips. Big snips make the edge jagged, and jagged edges make the coaster look like it fought a raccoon behind the garage.
Another lesson is that the backing makes a huge difference. A cup piece by itself feels flimsy. Once it is glued onto cork or thick craft foam, it feels intentional and sturdy. Cork gives the most finished look, especially if you trim it cleanly and sand the edges. Felt is softer and easier to cut, but cork handles condensation better. Cardboard is fine for a one-night party craft, but if you want the coaster to last, choose cork or foam.
The sealing step is where patience matters most. It is tempting to add one heavy coat and call it done, but thin layers look better. Thick sealer can pool around the plastic rim and dry unevenly. With spray sealer, light passes from different angles help cover the surface without creating drips. With brush-on sealer, use a soft brush and move in smooth strokes. Let the coaster dry flat so the finish does not slide to one side.
Decorating is where the project becomes personal. A plain red coaster has a clean, sporty look, but adding small details makes it gift-worthy. White paint pen lines can make it look like a mini party sign. A tiny vinyl name turns it into a place marker. A sticker sealed under clear finish gives it personality. The key is not to overload the surface. The red cup is already bold, so a little decoration goes a long way.
One of the best uses for this coaster is a themed party favor. Make a batch before a cookout, stack them near the drinks, and let guests take one home. People love useful favors, especially ones that feel handmade without being fussy. The coaster says, “I planned this,” but also, “I am still fun enough to appreciate a red party cup.” That balance is surprisingly hard to achieve in adult life.
The final experience note is simple: this is a low-pressure craft. If one coaster turns out crooked, make another. If the glue shows, add a border. If the design feels too plain, add a sticker. If it looks too busy, call it “maximalist” and move forward with confidence. DIY should not feel like a final exam. It should feel like making something useful while your iced drink waits patiently nearby, preferably on a coaster you made yourself.
Conclusion
A DIY coaster from a red "Solo" party cup is proof that fun crafts do not need to be expensive or complicated. With a clean cup, a sturdy backing, a little glue, and the right sealer, you can create a useful coaster that brings party personality to your table. It is nostalgic, practical, customizable, and just silly enough to make people ask, “Wait, did you make that from a cup?”
Whether you are decorating for game day, creating dorm room accessories, making budget-friendly gifts, or looking for a clever upcycling project, this coaster delivers. It turns a familiar disposable item into something with a second life and a better story. And honestly, any craft that protects your table while making your guests laugh deserves a spot in the DIY hall of fame.