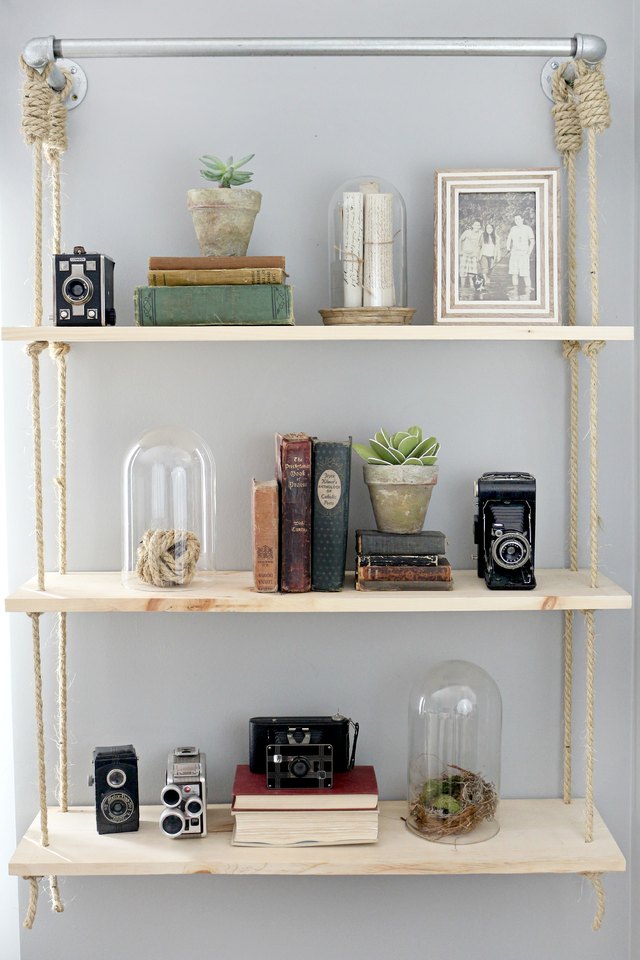
Store-bought shelves have a talent for being almost right: almost the correct length, almost the right finish, and almost strong enough for the mountain of books waiting on the floor. Building your own wood shelves fixes those problems and gives you complete control over size, material, color, and hardware.
This guide focuses on bracket-supported wall shelves, one of the safest and most beginner-friendly designs. You will learn how to choose lumber, plan shelf spans, prevent sagging, make clean cuts, apply a durable finish, find wall studs, and install the shelves securely.
Choose a Shelf Style That Fits the Job
Bracket-supported shelves are simple boards carried by visible metal or wood brackets. They are easy to build, easy to inspect, and suitable for everything from plants to cookbooks when the hardware is properly rated.
Floating shelves hide the mounting system inside a thick board or hollow box. They look sleek but require more precise drilling, stronger concealed hardware, and reliable stud attachment. Freestanding bookcases provide more storage, although tall units should still be anchored to the wall to reduce tip-over risk.
For a first project, visible brackets remove much of the mystery. They also make it obvious where the weight is going, which is comforting when your shelf is holding a ceramic collection rather than three decorative twigs.
Plan the Size, Span, and Load
Decide what the shelf will hold before buying lumber. Framed photographs create a light load; books, dishes, tools, records, and storage bins create much heavier loads. The expected weight determines board thickness, bracket size, bracket spacing, fasteners, and how many studs should support the installation.
A shelf 8 to 12 inches deep works well in many rooms. A nominal 1-by-10 board is actually about 9 1/4 inches wide, while a 1-by-12 is about 11 1/4 inches wide. Measure the real board rather than trusting its retail name.
Keep unsupported spans reasonable. Wood can bend immediately under weight and continue bending slowly over time. For heavily loaded household shelves, brackets spaced roughly 16 to 24 inches apart are a practical starting point when they can align with studs. Always follow the bracket manufacturer’s instructions and rated capacity.
You can make a shelf stiffer by shortening the span, adding another bracket, choosing thicker material, or attaching a solid-wood strip to the front edge. A deeper front edge acts like a small beam and can reduce sag while making the shelf look more substantial.
Select the Best Wood for DIY Shelves
Pine
Pine is affordable, widely available, and easy to cut. It paints well and can be stained, although soft areas may absorb stain unevenly. Inspect every board for bowing, twisting, cracks, loose knots, and damaged corners.
Poplar
Poplar is an excellent choice for painted shelving. It is usually smoother than low-grade pine, machines cleanly, and accepts primer well. Its natural color can vary, so paint is often more flattering than a clear finish.
Hardwood
Oak, maple, cherry, and walnut resist dents better and provide a furniture-grade appearance. They cost more and benefit from sharp blades, careful predrilling, and patient finishing, but they can turn basic storage into a focal point.
Plywood
Three-quarter-inch cabinet-grade plywood is stable and useful for wide shelves and built-ins. Cover the exposed layers with iron-on veneer edge banding or a glued solid-wood nosing. Thin sheet goods and low-density particleboard are poor choices for long, heavily loaded spans unless the design includes substantial reinforcement.
Tools and Materials
- Straight 1-by-10 or 1-by-12 boards cut to the desired length
- Two or more rated shelf brackets per shelf
- Wood or structural screws suitable for fastening into studs
- Approved wall anchors where stud attachment is not possible
- Tape measure, pencil, square, level, and stud finder
- Drill/driver with drill and driver bits
- Circular saw, miter saw, or handsaw
- Clamps and a stable work surface
- Sandpaper from about 80 to 220 grit
- Primer and paint, or stain and a clear topcoat
- Safety glasses, hearing protection, and dust protection
A circular saw guided by a clamped straightedge can make accurate cuts without a table saw. Many home centers will also make basic cuts if you bring a clear cut list.
How to Build Your Own Wood Shelves Step by Step
Step 1: Inspect the Wall
Check the area for switches, outlets, vents, plumbing fixtures, doors, and windows. These may affect shelf placement or indicate wiring and pipes behind the wall. Choose a height that allows nearby doors and cabinets to open normally. Locate the studs and mark their centers lightly.
Step 2: Make a Cut List
Measure the available wall width and choose the finished shelf length. Write down every dimension before using the saw. For example, two shelves measuring 36 inches long can be cut from standard boards. Mark each cut with a square so the line is perpendicular to the edge.
Step 3: Cut the Boards
Clamp the board securely and support both sides of the cut. Position the blade on the waste side of the line because the saw removes a narrow strip called the kerf. Let the blade reach full speed before entering the wood, feed it steadily, and never force it.
Painter’s tape over the cut line can reduce splintering. A sharp, appropriate blade matters more than aggressive pushing, which generally produces heat, wandering cuts, and language not found in the tool manual.
Step 4: Test-Fit the Shelves
Hold the cut boards against the wall and confirm the proportions. Check depth, overhang, bracket placement, and clearance around furniture. This is the best time to shorten a board, soften a corner, or change the design.
Step 5: Sand Thoroughly
Use the least aggressive grit needed. Smooth stock may begin at 120 grit; rough boards may need 80 grit first. Progress through 120, 180, and possibly 220 grit, sanding with the grain. Ease sharp edges lightly without rounding surfaces that must fit tightly.
Vacuum dust between grits. Wood dust can irritate the eyes, skin, and respiratory system, so use collection equipment when available and wear suitable protection.
Step 6: Apply the Finish
For painted shelves, fill defects, sand the filler, apply a compatible primer, and add two thin coats of durable interior paint. For stained shelves, test the complete color and topcoat system on an offcut first. Pine may need a pre-stain conditioner if the finish manufacturer recommends one.
Allow every coat to dry as directed and sand lightly between coats when required. Work with strong ventilation and follow product labels. Finishing the boards before installation is usually cleaner and easier than painting around brackets on the wall.
Step 7: Lay Out the Brackets
Draw a light level reference line. Measure from a dependable point rather than assuming the ceiling, floor, or trim is perfectly straight. Mark the stud centers along the line, position each bracket, and mark its mounting holes.
Step 8: Fasten the Brackets
Predrill pilot holes into the studs with a bit sized for the selected screws. The holes should guide the screws without removing the wood needed for thread grip. Install the brackets using hardware approved for the bracket and wall structure.
Direct stud attachment is preferred for substantial loads. When a mounting point cannot reach a stud, use an anchor specifically rated for the wall material and expected load. The shelf system is only as strong as its weakest board, bracket, screw, anchor, or wall connection.
Step 9: Secure the Shelf Boards
Place each board on its brackets and check level from side to side and front to back. Mark the screw locations through the bracket holes. Remove the board, drill shallow pilot holes, replace it, and fasten it with screws short enough that they cannot break through the top.
Step 10: Load Gradually
Let the finish cure before use. Add items gradually and watch for movement, flexing, wall damage, or visible deflection. Place heavier objects close to brackets instead of concentrating them at the center of the longest span.
Common Wood Shelf Mistakes
Buying Warped Lumber
Sight down every board before purchasing it. A twisted board will not become straight because you own clamps and a positive attitude.
Creating an Oversized Span
Long shelves sag more easily. Add supports, strengthen the front edge, increase thickness, or reduce the length before placing heavy items on the shelf.
Relying on Drywall Alone
Drywall is a finish material, not structural framing. Use studs whenever possible and choose anchors only within their intended application and capacity.
Skipping Pilot Holes
Predrilling improves accuracy and reduces the risk of splitting wood, especially near board ends and in hardwood.
Rushing the Finish
Glue residue, sanding dust, fingerprints, thick coats, and inadequate drying time can spoil an otherwise good project. Several thin coats usually outperform one ambitious puddle.
Easy Ways to Customize Homemade Shelves
Pair black steel brackets with stained pine for an industrial look, or use white-painted poplar and simple brackets for a clean traditional room. Hardwood boards with brass-colored hardware create a more refined finish.
Add a narrow front lip for spices, picture frames, or children’s books. Install hooks underneath an entryway or kitchen shelf. Cover plywood edges with veneer tape or hardwood nosing. In a pantry or closet, build side panels with shelf-pin holes so shelf heights can change later.
Keep function ahead of decoration. A gorgeous shelf that blocks a switch, collides with a cabinet door, or cannot carry its intended load is simply an expensive wall eyebrow.
Safety and Long-Term Care
Wear eye protection when cutting, drilling, and sanding. Use hearing protection around loud tools, control dust, secure loose clothing, and keep hands and cords away from blades. Read the instructions for every tool, finish, bracket, and anchor.
Inspect installed shelves periodically. Tighten loose hardware and check for cracks, sagging, moisture damage, or separation around anchors. Clean the surface with products compatible with the finish and avoid leaving water on unsealed wood.
Conclusion
Learning how to build your own wood shelves is an excellent introduction to useful woodworking. The project teaches measuring, cutting, sanding, finishing, drilling, wall layout, and secure installation without requiring a full cabinet shop.
Begin with straight lumber, keep spans modest, use enough brackets, attach to studs whenever possible, and match every component to the load it must carry. The result is storage sized for your actual wall, finished for your actual room, and strong enough for your actual belongingsnot just the suspiciously weightless décor in a catalog photograph.
Field Notes: of Real-World Shelf-Building Experience
One of the most useful lessons in shelf building happens before the project reaches the workshop. The lumber rack is part of the build. Boards carrying the same label can vary dramatically in straightness, grain, moisture, knots, and surface quality. Sight along both the edge and face of every board. A beautiful grain pattern is not a bargain when the board twists away from the wall.
Designing around the wall is equally important. Stud locations rarely cooperate with perfectly symmetrical bracket spacing. For a working shelf, strong attachment matters more than copying an inspiration photograph. A small change in shelf length or end overhang can make stud-based bracket positions look deliberate.
A full-size paper template is a remarkably cheap design tool. Tape together kraft paper or printer sheets, cut the shape of the proposed shelf, and attach it temporarily to the wall. The template reveals whether the shelf is too deep, too high, awkward above furniture, or likely to interrupt movement through the room. Three minutes of paper testing can prevent a handsome hardwood board from becoming expensive scrap.
Labeling parts also saves confusion. Mark the top, bottom, front, left, and right surfaces before cutting. Use small pencil triangles across boards that should stay together. These marks preserve grain orientation and keep defects facing the wall or underside after the parts have been moved through cutting, sanding, and finishing stations.
Finishing before installation is usually the cleaner approach. Horizontal boards are easier to inspect under angled light, and drips can be corrected without repainting the wall. Support the pieces on small scrap blocks or painter’s pyramids so the edges remain accessible. Several thin coats require patience, but they generally cure more evenly than one thick coat.
Another surprise is that “level” and “looks level” may briefly disagree. In an older room with sloping ceilings or crooked trim, a genuinely level shelf can appear slightly off. Keeping the shelf objectively level is normally the practical choice because books, frames, and containers behave better on a level surface. Décor can soften the visual conflict with nearby architectural lines.
Loading strategy matters too. Heavy books and dishes belong near brackets, while lighter objects can occupy the middle of a span. Felt pads protect the finish beneath ceramics, and removable museum putty can stabilize fragile objects in homes with children, pets, or floors that seem to transmit every footstep.
A helpful final habit is photographing the hidden stud and bracket locations before loading the shelves. Those images can save time later when repainting, repairing the wall, or adding a matching shelf nearby.
The best DIY shelf is not necessarily the one with the fanciest joinery. It is the one that fits the room, safely supports the intended load, stays level, and remains easy to inspect. Accurate measurements, straight stock, sensible spans, secure wall attachment, and patient finishing create more value than buying every tool in the woodworking aisle. Build the first pair carefully, and empty walls may start looking less like unfinished space and more like available storage.
Note: This article synthesizes practical guidance from established U.S. resources, including The Home Depot, Lowe’s, This Old House, Family Handyman, Popular Woodworking, WOOD Magazine, Kreg Tool, Rockler, CDC/NIOSH, and the U.S. Environmental Protection Agency.