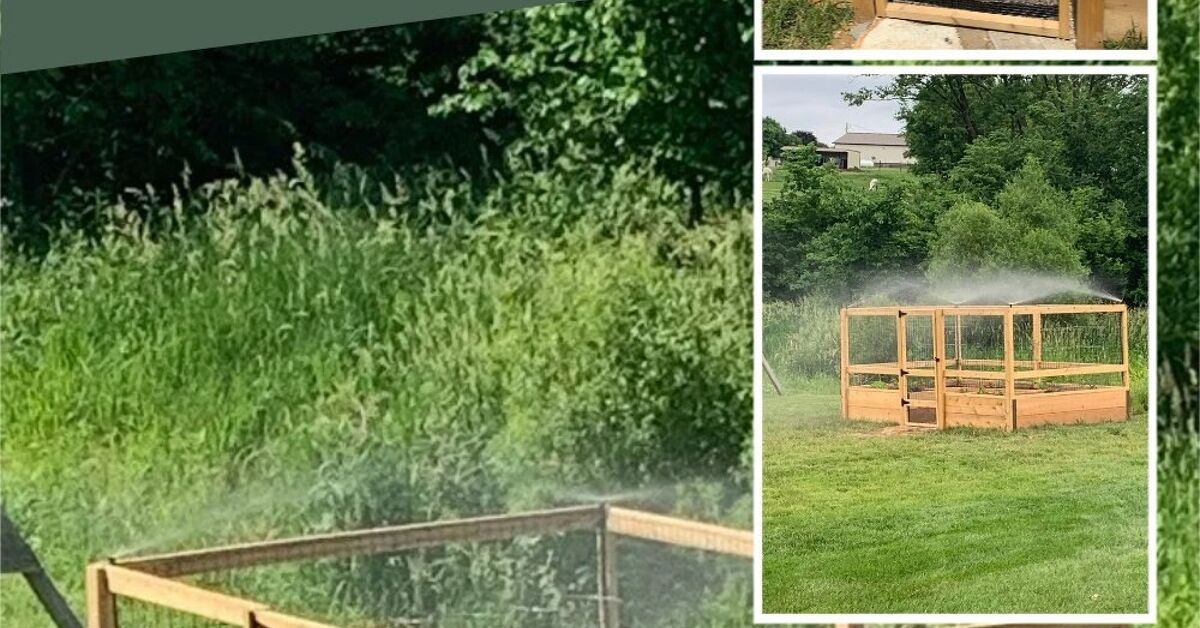
There are few gardening moments more dramatic than walking outside with your morning coffee, admiring your beautiful raised bed garden, and discovering that deer held an all-you-can-eat salad bar there overnight. The lettuce is gone. The bean tops are gone. The tomato plants look personally offended. And somewhere in the woods, a deer is probably writing a five-star review.
If you live in deer country, a raised bed alone will not protect your vegetables. Deer can reach into low beds, hop over short barriers, and sample plants like picky restaurant critics. The real solution is to combine smart raised bed design with strong physical exclusion, thoughtful plant choices, sturdy gates, and a little seasonal maintenance. In other words, you are not just building a garden; you are building a tiny vegetable fortress with better drainage.
This guide explains how to build a deer-proof raised bed garden from the ground up: where to place it, what materials to use, how tall the fence should be, how to protect seedlings, and how to keep the whole system easy to maintain. The goal is simple: more harvest for you, fewer midnight snacks for Bambi and friends.
What “Deer-Proof” Really Means
Let’s be honest: “deer-proof” is a bold phrase. Deer are athletic, curious, hungry, and annoyingly persistent. A better way to think about it is “deer-excluding.” You are trying to make your garden too difficult, too tall, too confusing, or too inconvenient for deer to enter.
Raised beds help with drainage, soil control, accessibility, and organization, but they do not stop deer by themselves. A deer can easily browse plants growing in a 10-inch or 12-inch bed. Even a taller bed may only slow them down unless it is paired with a reliable barrier. The strongest strategy is physical exclusion: a properly built fence, enclosure, cage, or covered bed system.
Repellents, shiny tape, soap bars, motion lights, and “deer-resistant” plants may help reduce damage, especially when deer pressure is light. But when deer are hungry or accustomed to visiting your yard, those tricks become background music. A fence is the bouncer at the garden club.
Step 1: Choose the Right Location
Before you buy lumber or start digging post holes, choose the garden site carefully. A deer-proof raised bed garden should be placed where vegetables can thrive and where fencing will be practical.
Look for Full Sun
Most vegetables need at least six hours of direct sun per day, and fruiting crops such as tomatoes, peppers, cucumbers, squash, and beans usually perform best with more. Place your raised beds away from deep shade, large trees, and buildings that block afternoon light.
Stay Close to Water
Raised beds drain faster than in-ground gardens. That is wonderful after heavy rain, but less wonderful during July when your tomato plants start looking like they have given up emotionally. Put the garden near a hose bib, rain barrel system, or irrigation line. If watering is easy, you will do it consistently.
Avoid Deer Highways
Walk your property and look for deer trails, tracks, droppings, or rubbed tree trunks. If possible, avoid placing your vegetable garden along a known deer route, beside woods, or near dense shrub cover. You can still build there, but you may need stronger fencing from day one.
Step 2: Plan the Raised Bed Layout
A good raised bed layout is comfortable for humans and annoying for deer. Keep beds narrow enough to reach across without stepping into the soil. A common width is 4 feet for beds accessible from both sides, or 2 to 3 feet for beds against a fence or wall.
For length, 6 to 8 feet is practical because lumber commonly comes in 8-foot boards. Longer beds are possible, but they can make you walk around like you are doing laps at a tiny garden gym. Leave paths at least 2 to 3 feet wide so you can move comfortably with a wheelbarrow, watering can, compost bucket, or basket full of vegetables you successfully hid from deer.
Recommended Layout for Beginners
- Two to four raised beds, each 4 feet wide by 8 feet long
- Paths at least 30 inches wide
- A single fenced rectangle around all beds
- One strong gate wide enough for a wheelbarrow
- Drip irrigation or soaker hoses installed before planting
Fencing the whole garden area is usually easier than fencing each bed separately. It also gives you room to rotate crops, add compost, install trellises, and work without wrestling with little cages every time you want a basil leaf.
Step 3: Select Safe, Durable Materials
Raised bed materials should be strong, long-lasting, and appropriate for growing food. Popular options include cedar, redwood, untreated lumber, concrete blocks, stone, brick, galvanized metal beds, and composite boards made for garden use.
Naturally rot-resistant woods such as cedar and redwood are popular because they last longer than untreated pine. Concrete blocks and stone are durable and low-maintenance, though they can be heavier to install. Metal raised beds are increasingly common because they are tidy, long-lasting, and easy to assemble.
Avoid old railroad ties, utility poles, and unknown salvaged wood that may have been treated with chemicals not intended for food gardens. If using pressure-treated lumber, choose modern products labeled for residential ground contact and follow current extension guidance. When in doubt, use a safer alternative or line the interior sides with a heavy-duty food-safe barrier while leaving the bottom open for drainage.
Step 4: Build the Raised Beds
For a simple wooden raised bed, use 2-by-10 or 2-by-12 boards to create a sturdy rectangular frame. A 10- to 12-inch-deep bed is enough for many greens, herbs, onions, and shallow-rooted crops. For tomatoes, peppers, eggplants, cucumbers, carrots, and deep-rooted crops, 16 to 24 inches gives roots more room and makes watering more forgiving.
Basic Building Steps
- Measure and mark the bed location.
- Remove grass or weeds from the area.
- Loosen the native soil under the bed with a garden fork.
- Assemble the frame with exterior-grade screws.
- Check that the frame is level.
- Add hardware cloth on the bottom if burrowing pests are a problem.
- Fill with a high-quality raised bed soil blend and compost.
Do not place solid plastic under a bottomless raised bed. Roots need drainage, air, and connection to the soil below. If you have gophers, voles, or other diggers, use hardware cloth instead. It keeps underground snack thieves out while still allowing water to move through.
Step 5: Fill Beds with Healthy Soil
Great fencing protects the garden from deer. Great soil protects the garden from disappointment. Fill raised beds with a loose, well-draining mix that holds moisture without becoming swampy. A practical blend includes quality topsoil, finished compost, and a light component such as aged bark fines or a raised-bed mix designed for vegetables.
Do not fill deep beds entirely with dense garden soil. It can compact, drain poorly, and make roots work harder than they need to. Also avoid filling beds with pure compost. Compost is valuable, but plants usually grow best in a balanced soil mix, not a giant lasagna of decomposed yard waste.
Soil Tips for Better Harvests
- Mix compost into the top several inches before planting.
- Test soil pH and nutrients before adding fertilizer.
- Mulch with straw, shredded leaves, or untreated grass clippings to conserve moisture.
- Refresh beds annually with compost as soil settles.
- Avoid walking in the beds to prevent compaction.
Step 6: Install the Deer Fence
This is the heart of a deer-proof raised bed garden. If you skip the fence, you are basically sending deer an engraved dinner invitation.
For reliable deer exclusion, build a fence about 8 feet tall around the garden. Deer can jump surprisingly high, especially when motivated by tender beans, young lettuce, or your most expensive seedlings. A tall woven-wire, welded-wire, polypropylene mesh, or deer-netting fence supported by strong posts is the most dependable option for most home gardens.
Fence Materials That Work
- 8-foot deer fencing or heavy-duty polypropylene mesh
- Woven wire or welded wire fencing
- Sturdy wood, metal, or fiberglass posts
- Ground staples or landscape pins
- A strong gate with a latch
- Zip ties, fence clips, or wire for fastening
Keep the bottom edge close to the ground. Deer may try to push under loose fencing, and rabbits will absolutely RSVP if there is a gap. Secure the lower edge with ground staples or attach it to a bottom rail. If rabbits, groundhogs, or dogs are also a problem, add a lower layer of smaller mesh fencing.
Make the Gate Deer-Smart
The gate is often the weak spot. Build it as tall as the fence, keep gaps small, and use a latch that will not pop open in wind. A gate that swings freely, drags on soil, or leaves a 6-inch gap at the bottom is not a gate. It is a deer suggestion box.
Step 7: Consider a Covered Raised Bed System
If you have only one or two beds, you may not need a full perimeter fence. Instead, you can build individual bed covers using hoops, PVC, metal conduit, wood frames, or hinged panels covered with deer netting or welded wire.
Covered beds are useful for lettuce, greens, strawberries, young beans, brassicas, and seedlings. Hinged covers make harvesting easy and prevent you from doing battle with loose netting every time you want parsley. For taller crops like tomatoes or pole beans, a full-height fence is usually easier.
Best Crops for Covered Beds
- Lettuce, spinach, kale, and Swiss chard
- Carrots, beets, radishes, and onions
- Strawberries
- Young bean plants
- Herbs such as parsley, cilantro, and dill
Make sure covers are secured well. Loose netting can tangle birds, wildlife, pets, and gardeners who have not had enough coffee. Use a frame that keeps netting taut and visible.
Step 8: Add Deer-Resistant Buffer Plants
No plant is completely deer-proof. Hungry deer may taste almost anything, especially during drought, winter, or periods of high population pressure. Still, deer are less enthusiastic about strongly scented, fuzzy, tough, spiny, or resinous plants.
Around the outside of your fenced garden, consider planting herbs and ornamentals that deer usually ignore. Lavender, rosemary, sage, thyme, oregano, bee balm, yarrow, ornamental onion, catmint, and some native grasses can create a less tempting border. These plants will not replace a fence, but they can make your garden smell less like a vegetable buffet and more like a place deer might politely avoid.
Inside the raised beds, plant what you actually want to eat. Do not give up tomatoes just because deer like them. Build the barrier, then enjoy the tomatoes. That is the whole point.
Step 9: Use Repellents as Backup, Not the Main Plan
Deer repellents can help protect plants outside the fence or reduce browsing pressure while your fence is being built. Many products rely on unpleasant smells or tastes, such as putrescent egg solids, hot pepper, garlic, or predator scents. They must be reapplied according to label directions, especially after rain or rapid new growth.
Repellents work best before deer develop a habit of feeding in your garden. Once they learn that your yard has premium organic snacks, they may become less impressed by smells. Rotate products if needed, and do not spray edible plant parts unless the label clearly allows it.
Common Mistakes to Avoid
Building the Fence Too Short
A 4-foot fence may stop a toddler, a small dog, or a very lazy deer. It will not reliably stop a determined adult deer. If deer pressure is serious, plan for height from the beginning.
Leaving Gaps at the Bottom
Deer push, rabbits squeeze, groundhogs dig, and your garden becomes a wildlife coworking space. Secure the bottom edge of fencing and inspect it often.
Forgetting About Snow and Wind
In cold climates, snow can pile against fencing and reduce the effective height. Wind can loosen netting and bend weak posts. Use strong supports, tension the fence properly, and check it after storms.
Making Beds Too Wide
If you cannot reach the center, you will step into the bed, compact the soil, and invent new yoga poses while harvesting carrots. Keep beds narrow enough to manage comfortably.
Depending Only on Deer-Resistant Plants
Deer-resistant does not mean deer-proof. It means “less likely to be eaten unless the deer are hungry, bored, adventurous, or in a mood.” Protect prized vegetables with barriers.
Seasonal Maintenance Checklist
A deer-proof raised bed garden is not a one-and-done project. It needs light maintenance, but much less drama than replacing every plant after a deer party.
Spring
- Inspect fence posts, gate hinges, and latches.
- Repair holes or loose netting before planting.
- Add compost to raised beds.
- Install row covers or hoops for tender seedlings.
Summer
- Check for gaps caused by animals, wind, or soil settling.
- Water deeply and mulch beds to reduce heat stress.
- Train tall crops away from the fence so deer cannot nibble through it.
- Keep the gate closed, even during quick harvest trips.
Fall
- Remove spent crops and diseased plant debris.
- Plant cover crops or add mulch to protect soil.
- Check fence tension before winter weather arrives.
- Store loose netting safely.
Winter
- Watch for snow buildup along the fence.
- Repair storm damage promptly.
- Plan crop rotation for the next growing season.
- Order seeds before everyone else discovers the good varieties.
Best Design Example: A Simple Deer-Proof Raised Bed Garden
For a practical backyard design, build four 4-by-8-foot raised beds inside a fenced area measuring about 18 by 24 feet. Use cedar or metal beds, 18 inches deep, with 3-foot paths between them. Install 8-foot deer fencing around the perimeter, supported by posts every 8 feet. Add a 4-foot-wide gate so a wheelbarrow can enter easily.
Inside the beds, dedicate one bed to tomatoes, peppers, and basil; one to lettuce, carrots, beets, and onions; one to cucumbers, beans, and herbs; and one to rotating seasonal crops such as kale, cabbage, squash, or flowers for pollinators. Use drip irrigation under mulch, and add hinged wire covers over early spring greens.
This setup is large enough to grow a serious amount of food, but small enough to manage on weekends. It protects crops from deer, keeps soil organized, improves drainage, and makes harvesting feel like a victory instead of a negotiation with wildlife.
Conclusion
Building a deer-proof raised bed garden is less about one magic trick and more about combining smart layers of protection. Start with a sunny, accessible location. Build raised beds that are narrow, deep, and filled with healthy soil. Surround them with a tall, secure fence or individual bed covers. Add deer-resistant plants and repellents only as backup. Then maintain the system through the seasons.
The reward is worth it. Instead of waking up to chewed stems and suspicious hoofprints, you get lettuce, tomatoes, herbs, beans, and strawberries that actually make it to your kitchen. Deer may still wander by and look offended, but that is their journey. Your journey involves salsa, salad, and a garden that finally keeps its promises.
Real-World Experience: What Gardeners Learn After Building One
The first lesson many gardeners learn is that deer do not read garden plans. You may design a beautiful raised bed layout, install perfect soil, and plant seedlings with the tenderness of a parent sending a child to kindergarten. Then one deer discovers the beans, and suddenly the whole herd knows. Deer pressure often starts small: one nibbled pepper plant, one missing hosta, one lettuce row that looks mysteriously shorter. By the time you see repeated damage, the garden may already be on their mental map.
Experienced gardeners often say they wish they had built the fence before planting. It feels easier to “wait and see,” but deer are excellent at helping you see regret. Installing the fence first protects young plants when they are most vulnerable. Seedlings are tender, low, and easy to browse. Once a tomato plant is mature, it can survive a little damage. A young bean plant eaten to the ground has fewer career options.
Another common lesson is that gates matter more than expected. A tall fence with a flimsy gate is like locking the front door and leaving the garage open. Gardeners who use wheelbarrows quickly appreciate a wide gate, a smooth threshold, and a latch they can operate with one hand. A self-closing spring or simple reminder sign can help, because the most intelligent gardener on earth will eventually leave the gate open “just for a minute.” Deer only need that minute. They are punctual when vegetables are involved.
Many gardeners also discover that raised beds inside a deer fence create a better working rhythm. The fence defines the garden as a room, and the beds organize the room into stations. One bed can hold salad greens under a hoop cover, another can support tomatoes on trellises, and another can grow herbs near the gate for quick harvesting. Paths stay cleaner, soil stays loose, and watering becomes easier to automate.
The best experience-based advice is to build slightly stronger than you think you need. Use better posts, secure the bottom edge, tighten loose fencing, and repair small holes before they become wildlife doors. Deer are not the only visitors. Rabbits, groundhogs, raccoons, squirrels, birds, pets, and enthusiastic children may all test the system in their own special ways.
Finally, gardeners learn to enjoy the peace of a protected space. A deer-proof raised bed garden does not remove all challenges. You will still deal with weeds, insects, heat, watering, and the occasional zucchini that becomes the size of a canoe overnight. But it removes one of the biggest heartbreaks: watching a season’s worth of work disappear before breakfast. Once the fence is up and the beds are thriving, the garden feels calmer, more productive, and much more yours.