If replacing a truss rod sounds a little like performing neck surgery on your favorite instrument, that is because it basically is. This is not the glamorous side of guitar repair. No one posts dramatic slow-motion videos of a properly aligned fretboard going back on with perfect clamp pressure. But when a truss rod is broken, frozen, stripped beyond rescue, or simply the wrong design for a neck rebuild, replacement can bring a guitar or bass back from the dead.
The good news is that this job is absolutely possible. The bad news is that it is one of the most invasive repairs in stringed-instrument work. In many cases, the smartest move is not replacing the entire truss rod at all, but replacing the nut, cleaning damaged threads, or correcting relief through a proper setup. So before you charge into this project like a hero with a hex key and too much confidence, let’s walk through what a truss rod does, when full replacement is actually necessary, and how the repair is typically handled on a guitar or bass.
What a Truss Rod Actually Does
A truss rod is the metal rod buried inside the neck under the fingerboard. Its job is to counter the pull of the strings and help control neck relief, which is the slight forward curve that lets strings vibrate cleanly without buzzing all over the frets. On a guitar or bass, that tiny curve matters a lot. Too much relief and the action feels high and clunky. Too little and the instrument buzzes like it is protesting your song choices.
Single-action rods mainly pull the neck back against string tension. Dual-action or double-acting rods can push and pull, which gives techs more control when the neck moves in either direction. Basses often use beefier rods because the string tension and neck length can be more demanding. In plain English, the truss rod is not a magic “fix everything” bar. It is one part of the bigger setup picture, along with the nut, frets, bridge height, saddle, neck angle, and humidity.
Do You Need to Replace the Truss Rod or Just the Nut?
This is the first big question, and it can save you a lot of money, time, and emotional damage.
Usually, a full truss rod replacement is not the first repair to consider.
Many truss rod problems turn out to be one of these:
- A stripped truss rod nut
- Debris or corrosion in the adjustment cavity
- Damaged but still salvageable threads
- A neck that only needs a correct relief adjustment
- A humidity problem that is being mistaken for a rod problem
If the adjustment nut is removable and the threads on the rod are still good, replacing the nut is often the easy win. That repair is far simpler than replacing the entire rod. On some guitars, especially certain Fender-style and Gibson-style instruments, access to the nut is straightforward. On others, especially recessed or soundhole-access designs, it can get fiddly fast.
A full truss rod replacement becomes more likely when the rod has snapped, the rod is frozen and cannot be recovered, the anchor end has failed, the exposed threads are too damaged to hold a new nut, or the neck is already apart for a major rebuild. If you hear the phrase “we have to remove the fingerboard,” congratulations, you have officially left routine maintenance and entered expensive-repair country.
Signs a Truss Rod May Actually Need Replacement
Here are the red flags that suggest you are dealing with more than a simple setup:
- The truss rod nut turns but relief does not change after careful, measured adjustments
- The nut is seized, rounded off, or broken off
- The rod has no usable threads left for a replacement nut
- The neck will not respond even after proper string tension, tuning, and settling time
- You hear internal rattling from a loose or failed rod
- The rod has broken near the adjustment end or anchor point
- The neck is being rebuilt and needs a different rod style or size
Before declaring the rod dead, always measure relief properly. A capo, a feeler gauge, and a straightedge tell the truth better than eyeballing the neck and muttering, “Yeah, that looks weird.” On many instruments, only a very small amount of relief is normal. What seems like a “bent neck disaster” might simply be seasonal movement.
Tools and Parts You Typically Need
For diagnosis and minor repairs, the list is simple: correct truss rod wrench, capo, feeler gauges, straightedge, light, mirror for soundhole access, and maybe a replacement nut or washer.
For full replacement, the list becomes much more serious:
- Heating equipment for fingerboard removal
- Palette knives or separation tools
- Clamps and cauls
- Fret tools if frets need to come out first
- Specialized extraction and cleanup tools
- A correctly sized replacement truss rod
- Adhesives appropriate for the neck design
- Measuring tools for channel depth, width, and alignment
- Setup tools for the final adjustment
The replacement rod must match the instrument’s design. Length, access location, adjustment style, and channel dimensions all matter. Installing the wrong rod is a fantastic way to turn one repair into a sequel nobody asked for.
How to Replace a Truss Rod on a Guitar or Bass: The Real Workflow
1. Confirm the diagnosis
Start by measuring neck relief with the instrument strung and tuned to pitch. Check whether the problem is truly the rod, the nut, the frets, the saddle height, neck angle, or humidity. If the neck responds to adjustment, even slightly, you may not need replacement at all.
2. Decide whether a nut replacement will solve it
If the issue is a stripped or damaged adjustment nut, inspect the threads. On many instruments, a new nut, a thread cleanup, proper lubrication, and the right wrench can restore normal function. This is the “buy lunch instead of financing surgery” option, so check it first.
3. Remove strings, hardware, and any access covers
Once you know the rod itself is the problem, remove string tension and disassemble what is necessary. Depending on the instrument, that may include the truss rod cover, neck from body, nut, frets near the access area, or parts that block safe fingerboard removal.
4. Remove the fingerboard if the design requires it
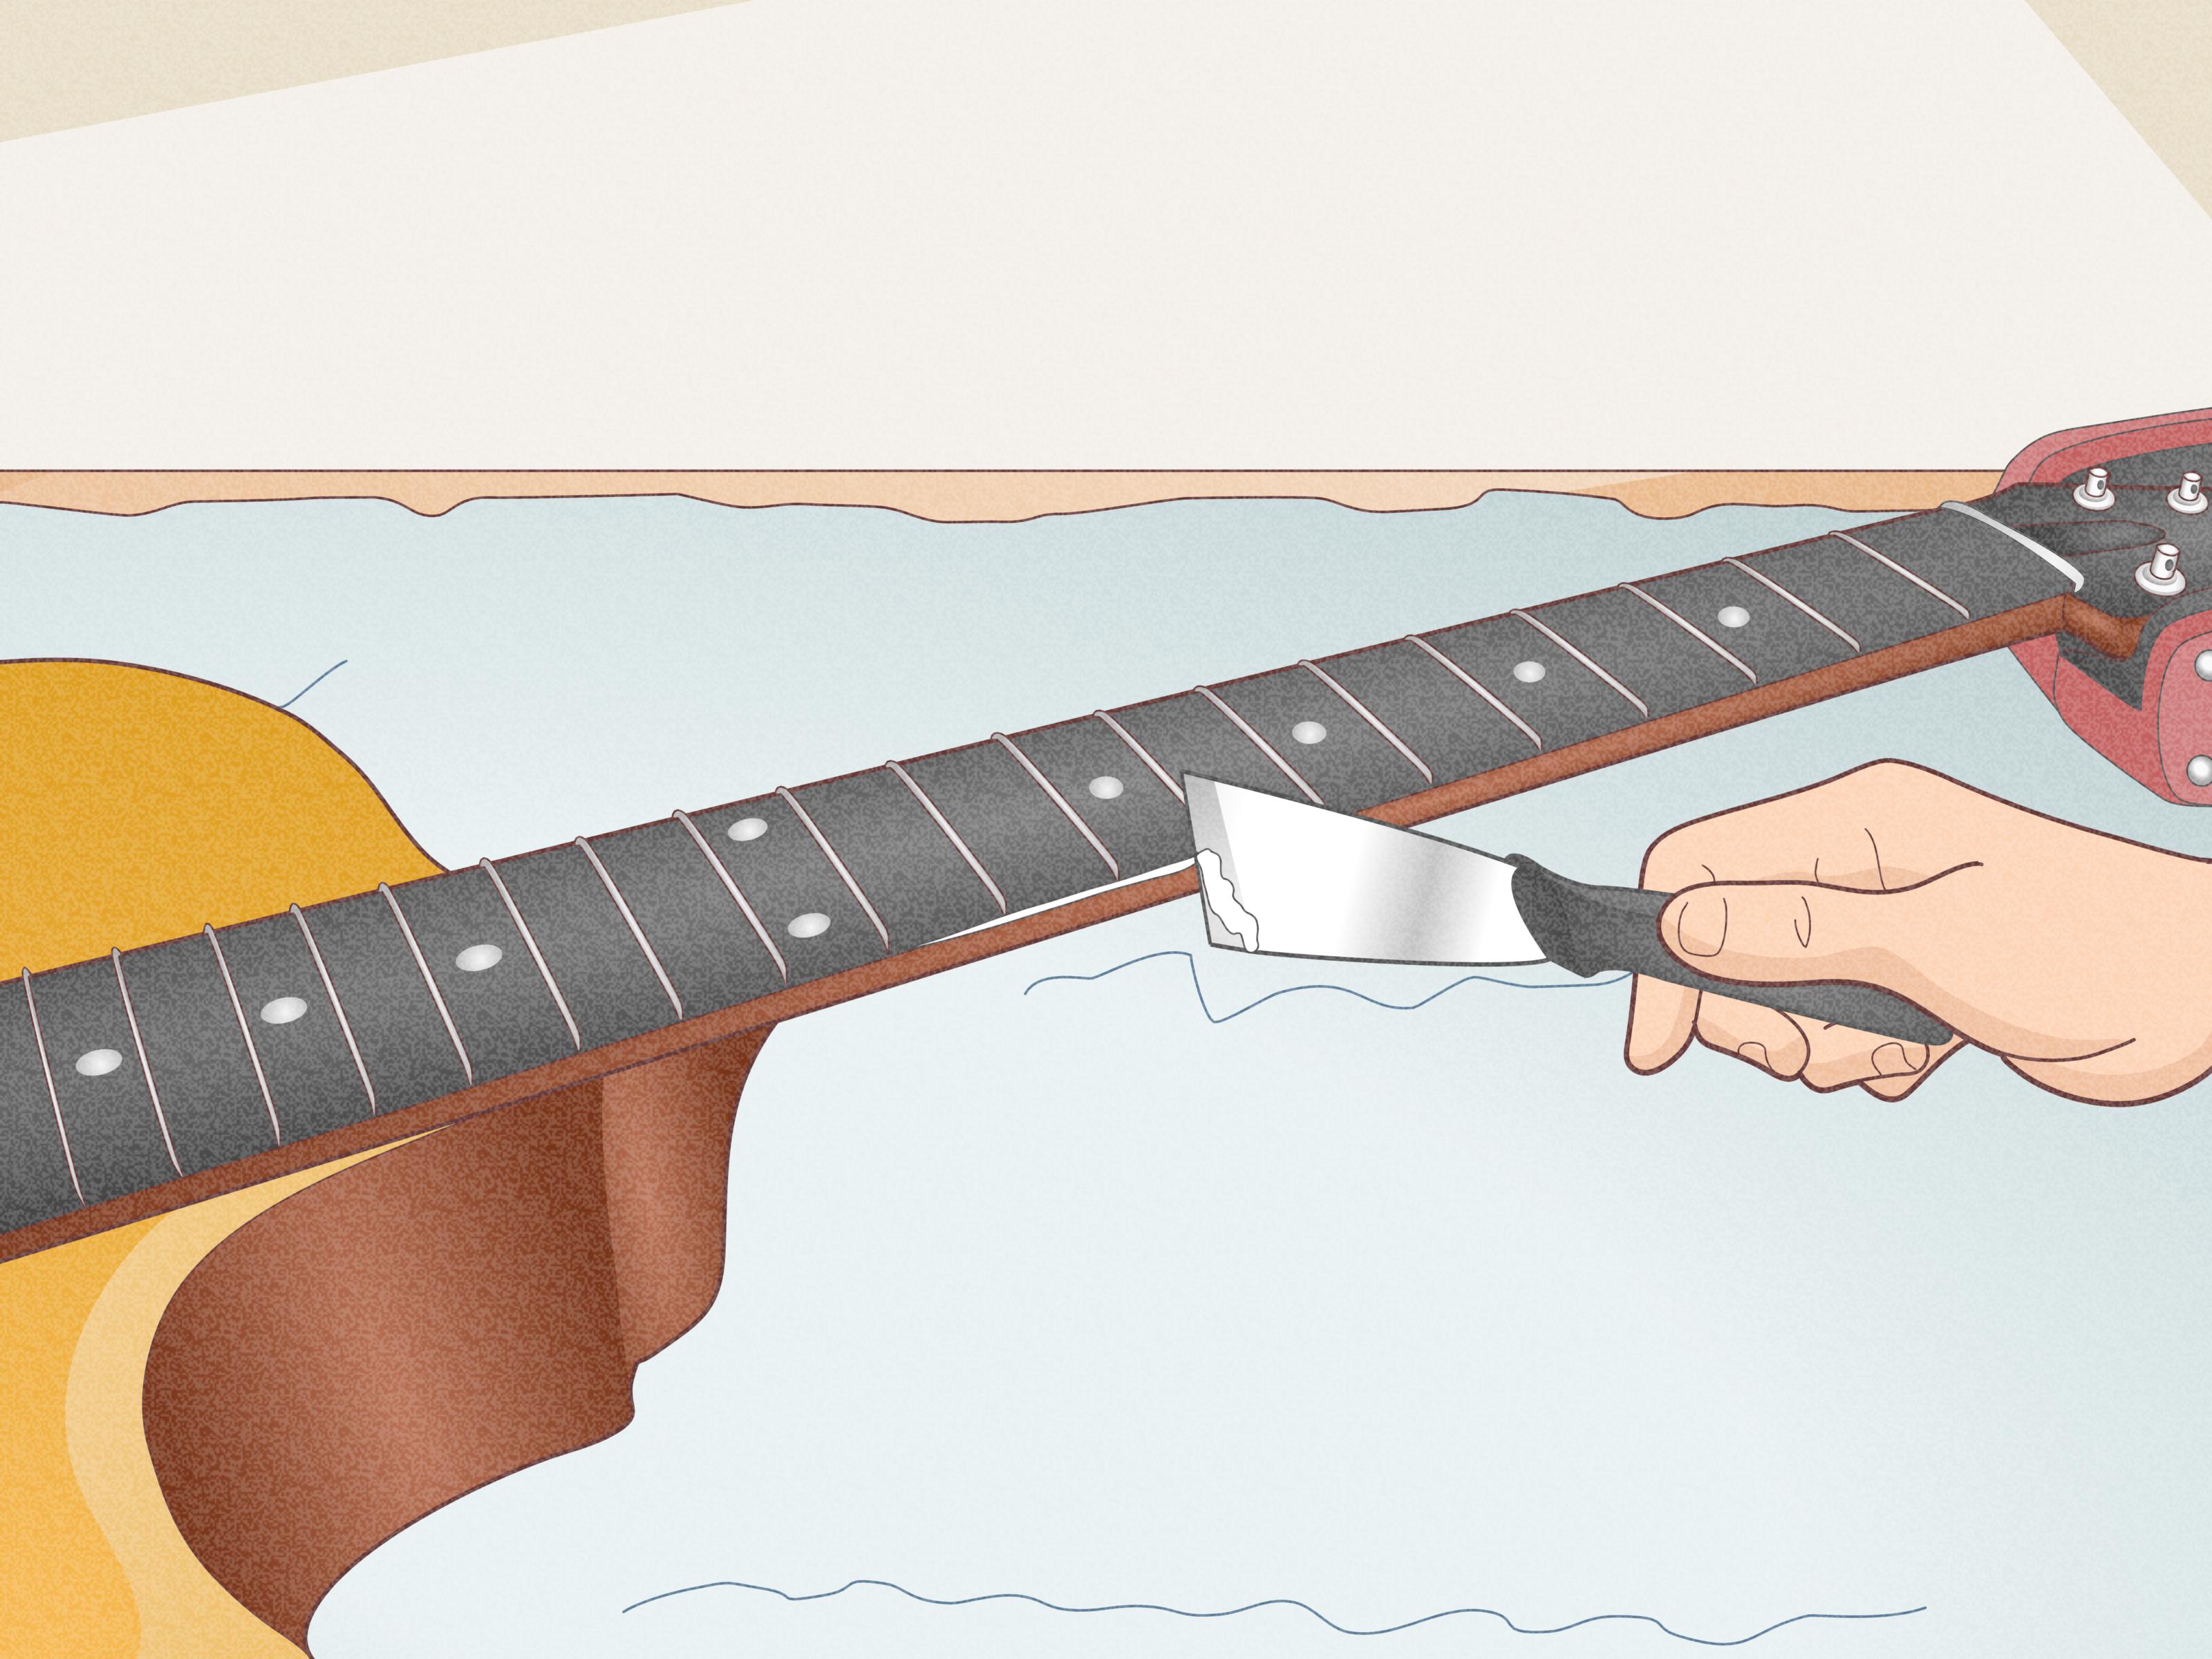
This is the point where many DIY dreams quietly leave the building. On most traditional necks, full truss rod replacement means separating the fingerboard from the neck. Heat is commonly used to soften glue, and the board is lifted carefully to avoid chip-out, fretboard cracks, finish damage, or neck warping. The goal is slow, controlled separation, not “well, it came off eventually.”
5. Extract the old rod and inspect the channel
Once exposed, the rod can be removed. The channel must then be cleaned and inspected for damage, glue contamination, compression, or misalignment. If the rod failed because the neck channel was wrong for the rod, that underlying issue must be fixed before anything goes back together.
6. Fit the new truss rod correctly
The new rod has to sit in the channel in the proper orientation, with the correct access point and enough clearance to function freely. This is not a “close enough” moment. A rod installed backward, twisted, glued into its moving parts, or forced into the wrong slot can create a neck that is worse than when you started.
Some modern rods use different installation methods than traditional single-action designs, so follow the part manufacturer’s specs for channel shape, adhesive use, and orientation. In a restoration or rebuild, matching the original design often matters for both function and value.
7. Reattach the fingerboard and stabilize the neck
After dry-fitting and confirming proper rod movement, the fingerboard is glued back on and clamped evenly. This stage demands patience and alignment. A fingerboard that shifts even slightly can create scale, fret, and cosmetic problems later.
8. Level, dress, and reassemble
Once the glue has cured and the neck is stable, the instrument is reassembled. Depending on what was removed, that can include fretwork, finish touch-up, nut work, hardware reinstallation, and cleanup around the truss rod access point.
9. Perform a full setup
The repair is not done when the rod is installed. It is done when the guitar or bass plays correctly. That means setting relief, checking action, dialing in bridge height, confirming nut slot height, testing for fret buzz, and adjusting intonation. The truss rod is only one chapter in the setup story.
Special Considerations for Guitar vs. Bass
Replacing a truss rod on a bass follows the same general logic, but the neck is usually longer, the tension can be heavier, and the setup tolerances often feel less forgiving. A bass with relief issues may seem only mildly uncomfortable at first, then suddenly become an upper-body workout disguised as a groove machine.
On acoustic guitars, access can be more complicated because some adjustment nuts sit at the soundhole end, and fingerboard removal can involve finish and extension issues around the top. On electric guitars, bolt-on construction can help with access, but some recessed nuts and certain neck designs make even a “simple” repair annoyingly complex. Vintage instruments add another layer: originality matters, and every move should be made with resale value and structural integrity in mind.
The Biggest Mistakes People Make
- Using the wrong wrench and rounding out the nut
- Assuming action problems always mean truss rod problems
- Forcing a rod that is already maxed out
- Skipping relief measurements and adjusting by guesswork
- Ignoring humidity and temperature as root causes
- Installing a replacement rod that does not match the neck
- Rushing fingerboard removal and tearing wood fibers
- Thinking the job is done before the final setup
The most expensive mistake is confusing a truss rod nut problem with a full truss rod failure. The second most expensive mistake is deciding you are definitely qualified because you once changed strings during a commercial break.
When to Call a Professional
If the rod is broken, the anchor end has failed, the fingerboard has to come off, the neck is vintage, or the adjustment point is stripped and deeply recessed, this is usually a pro-level repair. Routine truss rod adjustment is one thing. Full rod replacement is luthier territory.
That is not gatekeeping. It is economics. A clean, well-planned repair can save the neck. A rushed repair can destroy the fingerboard, finish, frets, and resale value all in one memorable afternoon.
Experience-Based Lessons from Real-World Truss Rod Repairs
In real-world repair situations, the story usually starts with a player saying something like, “I only turned it a little.” That little turn may have been on the wrong tool, at the wrong angle, on a nut that was already damaged, during a dry winter, on a neck that really needed humidity control instead of more torque. In other words, truss rod failures are often the final scene, not the first act.
One of the most common experiences techs report is discovering that the instrument never needed a full truss rod replacement in the first place. The player notices fret buzz or high action, assumes the neck is broken, and panics. After proper measuring, the real culprit turns out to be seasonal movement, a badly cut nut, worn frets, a bridge that drifted out of spec, or a stripped adjustment nut that can be replaced in a fraction of the time. That is why experienced repair people diagnose first and operate second.
Another common lesson is that neck movement is slow, stubborn, and occasionally dramatic in the most inconvenient way. A neck may not respond instantly after a small adjustment. It may need hours to settle. Sometimes it looks fixed on the bench and slightly different the next morning. Bass necks especially can be patient creatures. They do not always change on your schedule, which is frustrating if you were hoping for a five-minute miracle before rehearsal.
There is also the emotional side of the repair. Players get attached to a neck. It is the part of the instrument your hand knows best. When that neck fights back, it can feel personal. A favorite bass that suddenly develops relief problems before a gig, or a beloved guitar whose truss rod nut snaps, can create the kind of stress usually reserved for laptops crashing before deadlines. That is why a careful repair matters so much. You are not just restoring hardware. You are restoring trust between player and instrument.
Repair benches also teach humility. Two instruments that appear similar on the outside may behave very differently once opened up. One fingerboard lifts cleanly. Another clings to the neck like it has unfinished business. One replacement nut threads on beautifully. Another reveals deeper rod damage hiding underneath. The lesson is simple: treat every guitar or bass as its own case study, not as a copy of the last one.
And finally, experienced players and techs learn that prevention is far cheaper than heroics. Use the correct wrench. Make tiny adjustments. Retune and recheck. Respect humidity. Do not force a stubborn rod. Learn what normal relief looks like on your instrument before trouble starts. Most truss rod horror stories begin with impatience. Most happy endings begin with measurement, restraint, and the radical decision to stop turning the wrench when something feels wrong.
Final Thoughts
Replacing a truss rod on a guitar or bass is possible, but it is rarely the first or easiest solution. Start with the basics: measure neck relief correctly, confirm whether the nut or threads are the real problem, and remember that setup, humidity, and neck geometry all affect playability. If the rod itself is truly done, expect a deep repair that often involves fingerboard removal, precise fitting, careful reassembly, and a full professional setup afterward.
So yes, you can replace a truss rod. But the smartest repair path is the one that fixes the neck with the least trauma. Sometimes that means a new nut. Sometimes it means a careful adjustment. And sometimes it means calling a great luthier and saying, with dignity, “I have made a series of interesting decisions.”