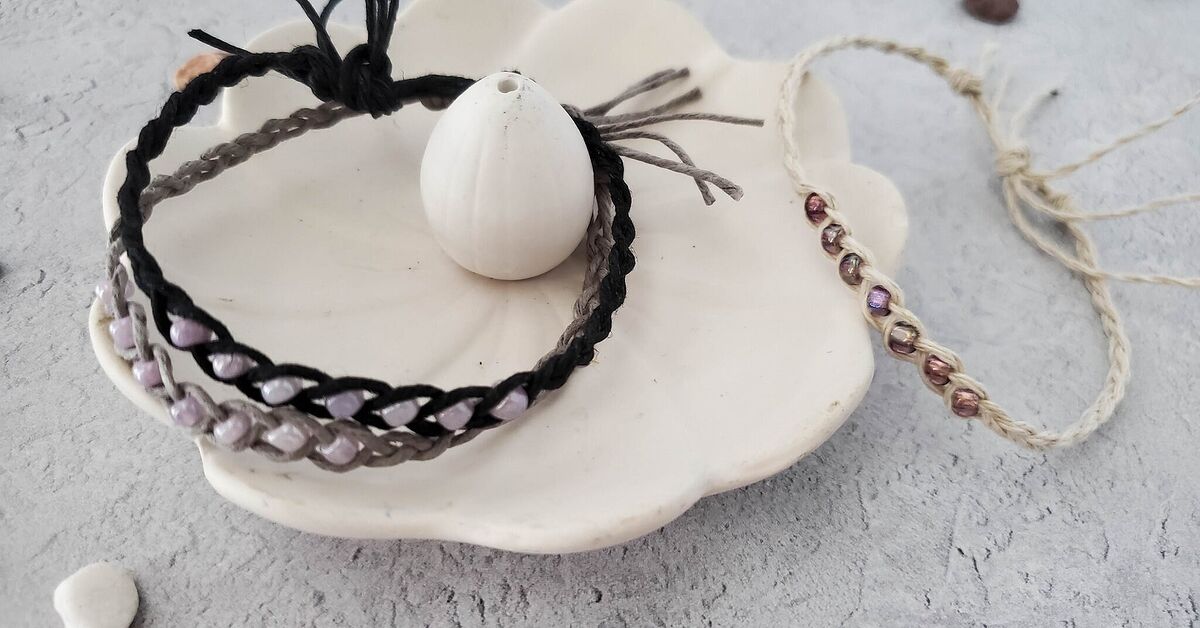
A DIY wish hemp bracelet is the kind of craft that looks charming, costs very little, and somehow makes people say, “Wait, you made that?” with the same awe usually reserved for homemade sourdough or a perfectly folded fitted sheet. It is simple, earthy, personal, and small enough to finish before your coffee gets coldunless you are the type of person who spends twenty minutes choosing bead colors, in which case welcome to the club.
The basic idea is easy: you use hemp cord, a few simple knots, and optional beads or charms to create a bracelet tied to a wish, goal, memory, or meaningful intention. Some people wear wish bracelets until the cord naturally loosens or wears away; others keep them as friendship bracelets, festival accessories, beachy summer jewelry, or handmade gifts. The “wish” part is symbolic, not magic, but that does not make it any less fun. A bracelet can be a tiny reminder on your wrist that says, “Drink water,” “Be brave,” “Call Grandma,” or “Please stop buying craft supplies you already own.”
This guide walks you through a beginner-friendly hemp wish bracelet using square knots, overhand knots, and an adjustable closure. You will also learn how to choose cord, measure bracelet length, add beads, prevent fraying, and fix common mistakes. The result is a casual, wearable bracelet with handmade personalityand yes, personality includes one slightly uneven knot because perfection is not the rent we pay to enjoy crafts.
What Is a Wish Hemp Bracelet?
A wish hemp bracelet is a handmade bracelet made from natural hemp cord and designed around a personal wish or intention. It often includes a bead, charm, color pattern, or knot count that represents something meaningful. Traditional wish bracelets are usually tied onto the wrist and worn until they naturally come off. Modern DIY versions may use a sliding knot, button closure, loop closure, or adjustable macramé finish so the bracelet can be removed and worn again.
Hemp cord is popular for this project because it has a rustic texture, good strength, and a casual handmade look. It pairs beautifully with wooden beads, glass beads, ceramic beads, shells, small metal charms, letter beads, and natural stones. The finished bracelet can look minimalist, boho, beachy, vintage, spiritual, artsy, or “I made this during a rainy afternoon and now I have a personality trait.”
Supplies You Need
You do not need an expensive jewelry kit to make a DIY wish hemp bracelet. In fact, one of the best parts of this craft is that it uses simple materials you can find at most craft stores or online.
Basic Materials
- Hemp cord, ideally around 1 mm thick for beginners
- Scissors
- Ruler or measuring tape
- Clipboard, masking tape, or safety pin to hold the bracelet while knotting
- One focal bead, charm, or small accent bead
- Craft glue or jewelry glue for securing final knots
Optional Add-Ons
- Small wooden, glass, clay, ceramic, or metal beads
- Letter beads for names, words, or initials
- Button for a loop-and-button closure
- Macramé board if you plan to make many bracelets
- Large-eye needle to help thread beads onto thicker cord
For a classic wish bracelet, choose one focal bead or charm that represents the wish. A blue bead might symbolize calm, a green bead could represent growth, a heart charm might stand for love, and a star bead can represent hope. You do not need a color theory degree. If a bead makes you smile, it has passed the official test.
How Much Hemp Cord Should You Cut?
For a simple bracelet with knots, cut one center cord about 18 inches long and one working cord about 50 to 60 inches long. The center cord forms the base of the bracelet, while the longer working cord wraps around it to create knots. If you have a larger wrist, want a wrap bracelet, or plan to add many knots, cut more cord than you think you need. Hemp cord is very forgivingexcept when you cut it too short, at which point it becomes a tiny rope of regret.
For most adult wrists, a finished bracelet length of 6.5 to 8 inches works well, depending on whether you want a snug or relaxed fit. For teens or smaller wrists, 6 to 7 inches may be enough. Always measure the wrist and add about half an inch for comfort. If you are making a gift and do not know the size, use an adjustable sliding closure so the bracelet can fit more people.
Step-by-Step: How to Make a DIY Wish Hemp Bracelet
Step 1: Choose Your Wish or Intention
Before you cut the cord, decide what the bracelet represents. It can be serious, sweet, funny, or personal. Examples include “confidence,” “safe travels,” “new beginnings,” “friendship,” “good luck,” “creative energy,” or “survive Monday without becoming a villain.”
Choose a bead, charm, or color that connects to that intention. A single bead in the center keeps the bracelet clean and meaningful. Multiple beads can create a more decorative style, but beginners may want to start simple.
Step 2: Cut the Cord
Cut one 18-inch piece of hemp cord for the center strand. Then cut one 50-to-60-inch piece for knotting. Fold the long cord in half and place the short cord straight down the middle. Tie an overhand knot near the top, leaving a small loop if you want a button closure or leaving tails if you plan to tie the bracelet directly onto the wrist.
Secure the top knot to a clipboard or tape it to a table. The cord should be steady but not stretched like it is training for the Olympics. A stable starting point makes your knots cleaner and your patience last longer.
Step 3: Learn the Square Knot
The square knot is the classic knot used in many hemp and macramé bracelets. You will have a center cord and two working cords: one on the left and one on the right.
- Take the left cord and cross it over the center cord, forming a shape like the number 4.
- Take the right cord and place it over the left cord’s tail.
- Move the right cord behind the center cord and pull it through the loop on the left.
- Pull both working cords gently to tighten.
- Repeat the same process from the opposite side to complete one full square knot.
The key is alternating sides. If you always start from the same side, your bracelet will twist into a spiral. That can be beautiful too, but it will not be a flat square-knot bracelet. In crafting, this is called a “design choice,” especially when you did not mean to do it.
Step 4: Knot Until You Reach the Center
Continue making square knots until the bracelet reaches roughly half the desired length. For example, if you want a 7-inch bracelet, knot about 3 inches before adding the focal bead. Keep the tension even. Tight knots make the bracelet stiff; loose knots make it floppy. Aim for firm but flexible, like a good handshake from someone who respects personal space.
Step 5: Add the Wish Bead
Slide your focal bead onto the center cord. If the hole is too small, try using a large-eye needle or choose a bead with a wider opening. Hemp cord is thicker and more textured than standard beading thread, so not every bead will work. Wooden beads, pony beads, clay beads, and many glass beads are beginner-friendly choices.
Once the bead is in place, tie one square knot below it to secure it. This keeps the bead from sliding around like it has somewhere better to be.
Step 6: Continue Knotting the Second Half
Keep making square knots after the bead until the bracelet is long enough to wrap comfortably around the wrist. Check the size before finishing. The bracelet should not cut into the skin, but it should not be so loose that it spins around your wrist like a tiny hula hoop.
Step 7: Finish the Bracelet
For a simple tie-on wish bracelet, gather all cord ends and tie a secure overhand knot. Add a tiny dot of craft glue to the knot if needed, then trim the excess cord after the glue dries.
For an adjustable bracelet, overlap the two ends and use a short piece of hemp cord to tie several square knots around both bracelet ends. This creates a sliding closure. Add small knots or beads to the loose tails so they do not slip out of the closure.
For a button closure, create a small loop at one end of the bracelet and attach a button at the other end. The loop should fit over the button snugly. This style is great for gifts because it feels more finished and can be removed easily.
Design Ideas for Your Wish Hemp Bracelet
Minimalist One-Bead Bracelet
Use natural hemp cord with one small bead in the center. This design is clean, quick, and ideal for everyday wear. It also works well as a party favor, camp craft, classroom project, or handmade gift.
Friendship Wish Bracelet
Make two matching bracelets using the same cord color and bead. One bracelet can represent one person’s wish and the other can represent shared friendship. Add initials if you want a personal touch, but keep the design simple so it stays comfortable.
Beach-Inspired Bracelet
Pair natural hemp cord with shell beads, turquoise-colored glass, or sandy neutral tones. This style looks like it came from a coastal gift shop, except you made it at home and did not pay tourist-town prices.
Boho Layering Bracelet
Make several thin hemp bracelets in different colors and stack them together. Try one with a charm, one with knots only, and one with tiny seed beads. Layered bracelets look relaxed and handmade without needing to match perfectly.
Word Bracelet
Add letter beads to spell a short word such as “hope,” “joy,” “grow,” “brave,” “dream,” or “calm.” Keep the word short so the bracelet stays balanced. A four-letter word is usually easier to center than a full inspirational quote, especially if your wrist is not the size of a bookmark.
Common Mistakes and How to Fix Them
The Bracelet Twists
If the bracelet twists, you may be starting each knot from the same side. That creates a spiral pattern. To make a flat bracelet, alternate sides after each half knot. If you like the spiral, keep going and pretend it was the plan all along.
The Bead Will Not Fit
Hemp cord can be too thick for small beads. Use beads with larger holes, switch to thinner cord, or use a large-eye needle to guide the cord through. Do not force the bead too hard, or the cord may fray.
The Knots Look Uneven
Uneven knots usually come from inconsistent tension. Try pulling both working cords at the same angle each time. After a few knots, your hands will find a rhythm. The first inch is often the awkward introduction; the second inch is where the bracelet starts behaving.
The Cord Frays at the Ends
Trim frayed ends with sharp scissors. A tiny amount of craft glue can help stiffen the end before threading beads. Avoid using heat to seal hemp cord because natural fibers can scorch or burn. Glue is safer and cleaner for this project.
The Bracelet Is Too Short
This is the one mistake that is hard to fix elegantly. You can add a longer adjustable closure, tie on extra cord, or turn the bracelet into a keychain. Next time, cut more cord than you think you need. Extra cord is an inconvenience; not enough cord is a plot twist.
Why Hemp Cord Works So Well for Wish Bracelets
Hemp cord has a natural texture that gives bracelets an earthy, handmade look. It is sturdy enough for knotting, flexible enough to wear, and attractive with many bead styles. It also softens slightly with handling, so a bracelet that feels a little stiff at first often becomes more comfortable after a few wears.
Compared with embroidery floss, hemp cord creates a more rustic bracelet. Compared with leather cord, it is usually easier to knot and more casual. Compared with elastic string, it feels more traditional and symbolic because the knots are part of the design. For a wish bracelet, that matters. Each knot can feel like a tiny pause, a repeated intention, or at minimum a good excuse to sit quietly for a few minutes.
How to Make the Bracelet More Giftable
If you are making a DIY wish hemp bracelet as a gift, presentation makes a big difference. Cut a small rectangle of cardstock and write the wish or message on it. Punch two holes in the card, thread the bracelet through, and tie it loosely. You can write something simple like, “Tie this bracelet on, make a wish, and wear it as a reminder of good things coming.”
For birthdays, use the recipient’s favorite color. For graduation, choose a charm shaped like a star, key, sun, or compass. For a friendship gift, make two bracelets with matching beads. For a self-care gift, pair the bracelet with a handwritten note. Handmade items feel special because they carry time, attention, and the small but powerful message: “I made this instead of scrolling for another hour.”
Care Tips for Hemp Bracelets
Hemp bracelets are durable, but they last longer with gentle care. Remove the bracelet before swimming if it has metal charms, dyed beads, or glue. Let it dry fully if it gets wet. Store it in a dry place when not wearing it. If the cord becomes fuzzy over time, carefully trim stray fibers with sharp scissors.
Natural hemp may darken slightly with wear, especially if exposed to water, lotion, sunscreen, or sweat. That aged look can be part of its charm. A wish bracelet does not need to stay showroom-perfect. It is meant to be worn, lived in, and eventually retired with honor like a tiny woven warrior.
Personal Experiences and Practical Lessons from Making DIY Wish Hemp Bracelets
The first time you make a DIY wish hemp bracelet, you may think the hardest part will be learning the knots. Surprisingly, the hardest part is often choosing the bead. There is something deeply dramatic about staring at a pile of beads and deciding which one best represents “new beginnings.” Suddenly, a small blue bead is not just a bead. It is a whole emotional support object with a hole through the middle.
One useful experience is to make the first bracelet as a practice piece instead of a gift. This removes the pressure to be perfect. Use a plain cord, one bead, and a simple tie closure. The first bracelet teaches your fingers how hemp behaves. You will learn how tightly to pull, how quickly the cord shortens as knots build up, and why measuring before finishing is not optional. Many beginners underestimate how much cord knots consume. A bracelet that starts with a heroic amount of cord can suddenly become suspiciously short halfway through. That is normal. It is also why experienced crafters cut extra cord and refuse to apologize for it.
Another lesson is that tension matters more than speed. When you rush, knots become uneven, beads sit crooked, and the bracelet may curve. Slow knotting produces cleaner results. A good trick is to stop every inch and gently straighten the bracelet with your fingers. This keeps the center cord aligned and prevents the working cords from twisting too much. It is a small habit, but it makes the finished bracelet look much more polished.
Making wish bracelets with friends or family is especially fun because every person approaches the project differently. One person will carefully plan a color palette. Another will grab random beads and somehow create something amazing. Someone else will tie three knots, announce that crafting is “surprisingly intense,” and request snacks. That is the beauty of this project: it is flexible enough for different personalities. The final bracelets do not need to match. In fact, they are better when they reflect the person wearing them.
For gift-making, the best experience comes from connecting the bracelet to a real message. A bracelet with a green bead and a note that says “for growth and fresh starts” feels more meaningful than a bracelet handed over with “Here, I made rope jewelry.” The story matters. You can turn a simple hemp bracelet into a graduation keepsake, a travel charm, a friendship token, a camp memory, or a personal goal reminder just by adding a thoughtful sentence.
It is also worth experimenting with closures. Tie-on bracelets feel traditional and symbolic, but adjustable sliding closures are more practical. Button closures look charming and are easy to use. If you are making bracelets for a group, adjustable closures save time because you do not need exact wrist measurements. For a polished handmade shop look, pair a loop closure with a small wooden button. It feels intentional, sturdy, and slightly more professional without requiring advanced jewelry tools.
The biggest lesson is that small crafts can carry real emotional weight. A DIY wish hemp bracelet is not expensive, complicated, or flashy. It is a few pieces of cord and a handful of knots. But while making it, you slow down. You think about the wish. You choose colors. You repeat a motion until the bracelet grows under your hands. That process gives the finished piece meaning. Whether the wish is serious, silly, hopeful, or private, the bracelet becomes a wearable reminder that someone took time to make something by hand. In a world full of fast purchases and plastic packaging, that little handmade detail feels refreshingly human.
Conclusion
A DIY wish hemp bracelet is one of the easiest handmade jewelry projects to start, but it still leaves plenty of room for creativity. With hemp cord, a few basic knots, and a meaningful bead or charm, you can create a bracelet that feels personal without being complicated. It is affordable, beginner-friendly, giftable, and endlessly customizable.
Start with a simple square-knot design, add one focal bead, and choose an adjustable closure if you want the bracelet to be easy to wear. Once you understand the basics, experiment with colors, charms, stacked bracelets, word beads, spiral knots, and button closures. The best bracelet is not the one with the most perfect knots. It is the one that carries a wish, a story, or a tiny reminder you actually want to keep close.
Note: This article is based on real DIY jewelry-making practices commonly taught by reputable craft, macramé, and bracelet-making resources in the United States. Source links are intentionally omitted for clean web publishing.