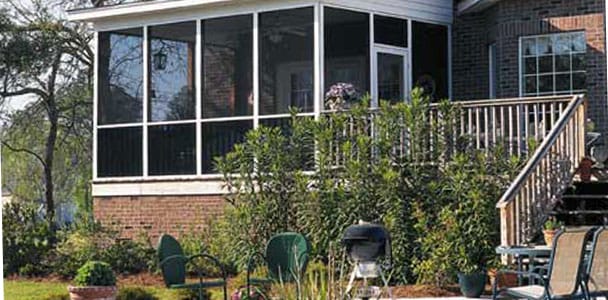
A screened-in porch is one of the rare home upgrades that can make you feel outdoorsy without requiring you to become a snack bar for mosquitoes. It gives you breeze, shade, comfort, and a bug-free place to sip coffee, host friends, read a book, or supervise the dog while pretending not to notice the dog has claimed the best chair.
But here is the part homeowners care about after the dream phase: how do you install a screened-in porch faster without cutting corners? The answer is not “rush harder.” The answer is smarter planning, better materials, fewer custom surprises, and a clean installation sequence. Whether you are screening an existing covered porch, enclosing a deck, or planning a new porch addition, speed comes from reducing rework.
This guide explains how to make screened-in porch installation faster, cleaner, and less stressful while still building something that looks polished and lasts.
Why Screened-In Porches Are Worth the Effort
A screened-in porch turns a basic outdoor area into a usable outdoor room. It blocks insects, filters leaves and debris, softens harsh sun, and gives your home a comfortable transition between inside and outside. In humid regions, wooded neighborhoods, and areas with heavy mosquito activity, a screened porch can be the difference between “let’s eat outside” and “why is everyone slapping their ankles?”
The best part is flexibility. A screened porch can be simple and budget-friendly, or it can become a three-season retreat with ceiling fans, outdoor curtains, lighting, heaters, durable furniture, and a dining area. But if your goal is faster installation, simplicity is your friend. A rectangular porch with standard openings, a track-and-spline screening system, and a ready plan will move much faster than a custom curved porch with twelve design changes and a door you found online at midnight.
The Fastest Path: Start With an Existing Covered Porch
The quickest screened-in porch projects usually begin with a porch that already has a roof, floor, posts, and basic structural support. In that case, you are mostly adding screen framing, mesh, trim, a screen door, and finishing details. That is far faster than building a new porch from the ground up.
If you already have a covered porch, inspect it before ordering materials. Look for rotted posts, loose railings, uneven framing, sagging roof areas, damaged flooring, and water drainage issues. A screen system can hide minor visual flaws, but it cannot fix structural problems. Installing beautiful screen panels on a weak frame is like putting a tuxedo on a raccoon: technically impressive, but not a long-term solution.
Pre-Installation Checklist
- Measure each porch opening individually.
- Check whether the posts and rails are plumb, level, and square.
- Repair rot, cracks, peeling paint, or soft wood before installing screens.
- Decide where the screen door will swing.
- Confirm electrical needs for fans, lights, or outlets before closing walls.
- Contact your local building department about permits and code requirements.
Permits: The Step That Can Save or Slow Your Timeline
Permit rules vary by city, county, and project type. Screening an existing porch may be treated differently from building a new porch, adding a roof, changing stairs, altering railings, or enclosing a deck. Some municipalities require permits for all porches and decks, while others focus on height, structural changes, setbacks, electrical work, and roof additions.
For faster installation, do not treat permits as an afterthought. Prepare a simple packet early: site plan, porch dimensions, elevation sketch, framing details, door location, railing height, stair information, and material notes. If you are hiring a contractor, ask whether they handle permits. If you are doing it yourself, call the building department before buying all materials. Nothing slows a project like finishing half a porch and discovering the inspector wants a different railing detail.
Choose a Fast Screening System
Traditional porch screening often uses staples, wood battens, and trim. It works, but it can be slow, especially when future repairs are needed. Modern porch screening systems can speed up installation by using base strips, tracks, spline, caps, and modular components. These systems help keep screen tension consistent and make individual panel repairs easier later.
Track-and-Spline Systems
A track-and-spline system uses a channel attached to the porch frame. The screen mesh is stretched across the opening, and a rubber or vinyl spline is rolled into the channel to lock the mesh in place. Trim caps may snap over the base to hide the edges. This method is popular because it creates a clean finish without rows of visible staples.
Pre-Made or Cut-to-Size Panels
For some projects, custom screen panels can arrive ready to install. This can reduce on-site cutting and speed up installation, especially when the porch openings are consistent. The tradeoff is that measuring must be extremely accurate. If a panel arrives too small, you will invent new vocabulary. If it arrives too large, you will invent even more.
Removable Screen Panels
Removable panels are useful when you want seasonal flexibility or easier maintenance. They can be faster for simple rectangular openings, but they may cost more than basic roll screening. They also require careful storage when removed.
Pick Screen Material Before You Build
Screen mesh affects cost, durability, visibility, airflow, and installation speed. Choosing late can delay the entire project, so decide early.
Fiberglass Screen
Fiberglass is lightweight, flexible, affordable, and easy to install. It is a common choice for DIY screened-in porch installation because it rolls into channels easily and does not crease like metal. The downside is that it can tear more easily than stronger materials, especially in homes with pets, children, or furniture that mysteriously “walks” into the wall.
Aluminum Screen
Aluminum is stronger than standard fiberglass and offers a crisp, traditional look. However, it can dent or crease during installation. It also may not be compatible with every modern track system, so always check the manufacturer’s recommendations.
Polyester and Pet-Resistant Screen
Polyester screen and pet-resistant mesh are excellent choices for high-traffic porches. They are tougher, more tear-resistant, and better suited for doors, lower panels, and homes with enthusiastic pets. They can cost more, but they often reduce repair headaches.
Solar and Privacy Screen
Solar screen can reduce glare and improve shade, making it useful for porches with strong afternoon sun. Privacy screen can make the porch feel more secluded. Both may reduce visibility and airflow, so sample the material before committing to the entire porch.
Design for Speed: Keep the Layout Simple
If you want faster installation, avoid overcomplicating the porch. Large, uneven, oddly shaped openings take more time to frame and screen. Standard rectangular openings are quicker, cleaner, and easier to repair later.
A smart layout includes evenly spaced posts, a clear door location, a consistent rail height, and manageable screen sections. Large openings may look dramatic, but dividing them with intermediate framing can make the screen easier to tension and less likely to sag.
For example, imagine a 12-by-16-foot porch with six matching wall openings and one standard screen door. That project will usually move faster than a porch with mismatched openings, angled corners, decorative arches, and three different trim profiles. Beautiful design matters, but speed loves repetition.
Tools That Make Installation Faster
The right tools can save hours. Before starting, gather everything in one place. A surprisingly large amount of project time disappears into “Where did I put the utility knife?” territory.
- Tape measure
- Level
- Square
- Drill and driver bits
- Spline roller
- Utility knife with fresh blades
- Tin snips or saw for track materials
- Rubber mallet
- Clamps
- Step ladder
- Safety glasses and work gloves
Fresh blades matter. A dull utility knife can pull the mesh, leave ragged edges, and turn a neat job into a wrestling match. Keep extra blades nearby and change them often.
A Faster Step-by-Step Installation Plan
Step 1: Repair and Prep the Porch Frame
Clean the framing, scrape loose paint, repair damaged wood, and repaint or stain before installing screen components. It is much faster to paint bare framing now than to carefully paint around newly installed mesh later.
Step 2: Measure Every Opening
Do not assume matching openings are truly identical. Measure width and height at multiple points. Older porches often have small variations. Label each opening so cuts and screen pieces stay organized.
Step 3: Install Tracks or Base Strips
Attach the base strips or tracks according to the system instructions. Keep fasteners aligned, avoid overtightening, and check level as you go. Crooked tracks create crooked screens, and crooked screens have a way of becoming the only thing anyone notices.
Step 4: Cut Screen Oversized
Cut the screen larger than the opening so you have enough material to grip and tension. Trying to save three inches of mesh can cost you thirty minutes of frustration.
Step 5: Roll the Top Edge First
For most systems, it is easier to secure the top edge first, then the sides, then the bottom. Pull gently as you roll the spline to keep the screen smooth. Do not stretch so hard that the mesh distorts.
Step 6: Trim Cleanly
After the spline is fully seated, trim excess screen with a sharp blade. Cut slowly and keep the knife angled away from the finished panel. One careless cut can create a brand-new repair project, which is not the kind of productivity we are celebrating.
Step 7: Install Caps, Trim, and Door Hardware
Snap or attach trim caps after the screen is secure. Then install the screen door, latch, closer, sweep, and weather-resistant hardware. Test the door swing and latch several times before calling the project complete.
Common Mistakes That Slow the Job
The fastest installation is the one you do once. Avoid these common delays:
- Skipping frame repairs: Rotten trim and loose rails will cause problems later.
- Measuring once: Measure twice, label everything, and keep a cut list.
- Choosing the wrong screen: Pet-resistant mesh belongs near pets, not wishful thinking.
- Overstretching mesh: Too much tension can warp the pattern or pull out later.
- Ignoring water flow: A screened porch still needs drainage and weather protection.
- Changing the plan mid-project: Late changes are speed bumps wearing tool belts.
Cost-Smart Ways to Speed Up Installation
Screening an existing porch is generally far more affordable and faster than building a new structure. Costs vary widely based on porch size, region, labor rates, screen type, framing condition, doors, trim, and electrical upgrades. Enclosing an existing porch with screens usually costs much less per square foot than building a new screened porch from scratch.
To save both time and money, keep the existing roof and floor if they are in good condition. Use standard-size screen doors. Choose one screen material for most panels and upgrade only the lower panels or door areas if pets are a concern. Order a little extra mesh and spline so a small mistake does not pause the project.
Finishing Touches That Do Not Slow You Down
Once the structure is screened, you can make the porch feel finished quickly with practical details. Add a ceiling fan for airflow, outdoor-rated curtains for privacy, low-pile rugs for comfort, and weather-resistant cushions. Choose furniture that fits the porch’s purpose. A small porch may only need two chairs and a side table; a larger porch might support dining, lounging, and a reading corner.
Lighting is another high-impact upgrade. Wall sconces, pendant lights, string lights, and lamps rated for damp or outdoor use can make the porch usable after sunset. Just plan wiring before screening if possible. Running electrical after the screens are finished is possible, but it is rarely faster.
Maintenance: Keep the Porch Looking New
A screened-in porch is easier to maintain when it is built with future repairs in mind. Track-and-spline systems allow individual sections to be re-screened without tearing apart the whole porch. Keep extra spline, a small roll of matching mesh, and the system instructions in a labeled storage bin.
Clean screens with a soft brush or vacuum attachment. Rinse gently when needed. Check the door closer, latch, and sweep each season. Look for small tears before they become large ones. Inspect caulk, trim, and painted surfaces annually, especially in humid climates.
Real-World Experience: What Makes a Screened-In Porch Installation Feel Faster
The biggest lesson from screened-in porch projects is that speed happens before installation day. The homeowners who have the smoothest experience usually make decisions early. They know the screen material, trim color, door style, fan location, furniture layout, and whether they need a permit before anyone starts cutting. That may sound boring, but boring planning is exactly what makes exciting progress possible.
One common experience is the “almost square” porch. From the yard, everything looks straight. Then the tape measure comes out, and suddenly one opening is half an inch wider at the bottom than at the top. This is normal in older homes. The faster approach is not to panic; it is to measure each opening, label it, and cut materials for that specific opening. Treat every panel like it has its own personality. Some are friendly. Some need supervision.
Another practical experience involves pets. Many homeowners install standard fiberglass screen everywhere, then discover the family dog believes the lower panel is a suggestion, not a boundary. A faster long-term strategy is to upgrade vulnerable areas from the beginning. Use pet-resistant screen on doors, lower wall panels, and places where pets lean, scratch, or watch squirrels with professional intensity. It may add cost upfront, but it can prevent repeated repairs.
Weather also teaches lessons quickly. A porch may be screened, but it is not sealed like an indoor room. Wind-driven rain can still reach furniture and flooring. During installation, think about overhangs, drainage, floor slope, and furniture placement. Outdoor-rated fabrics, mildew-resistant cushions, and low-maintenance flooring save time after the project is finished. A porch that is easy to clean will get used more often.
DIY installers often learn that the spline roller is simple but not magical. The first panel may take longer than expected. By the third panel, the rhythm improves: top, sides, bottom, trim. The key is patience. If a wrinkle appears, pull the spline back out and correct it immediately. Leaving it “for now” usually means staring at it for the next five years while drinking coffee.
Contractor-led projects move fastest when communication is clear. Ask when materials will arrive, who handles permits, what happens if hidden rot is found, and how change orders are priced. A good contractor will not mind practical questions. In fact, those questions help prevent delays. The fastest screened-in porch installation is not just about tools; it is about decisions, sequencing, and fewer surprises.
Conclusion
A screened-in porch can be installed faster when the project is planned like a system, not a weekend guessing game. Start with a solid structure, confirm permit requirements, choose compatible materials, keep the design simple, and use modern screen systems that reduce messy trim work and future repairs. Faster installation does not mean careless installation. It means doing the right steps in the right order so your porch becomes usable sooner and stays beautiful longer.
Whether you are upgrading an existing covered porch or planning a new outdoor room, the goal is the same: more fresh air, fewer bugs, less maintenance, and a space that makes home feel a little more like vacation. And if the mosquitoes are disappointed, well, they can file a complaint with the deck furniture.