Flowers are lovely. Chocolate is powerful. Put them together and you get a Mother’s Day gift that says, “I love you, I know your snack preferences, and I absolutely did not panic-buy this at the gas station.” A chocolate bouquet is a handmade arrangement made with wrapped chocolates, candy bars, decorative paper, skewers, ribbon, and a sturdy container. It looks like a bouquet, behaves like a gift basket, and disappears much faster than tulips.
The best part? You do not need to be a professional florist, pastry chef, or craft-store wizard to make one. With a few simple supplies and a little patience, you can create a chocolate bouquet that feels personal, polished, and wonderfully fun. Whether you are making it for your mom, grandmother, wife, sister, aunt, stepmom, mother-in-law, or the mother figure who has saved your life with snacks and advice more times than you can count, this DIY Mother’s Day gift is easy to customize.
In this guide, you will learn how to make a chocolate bouquet step by step, what supplies to use, how to arrange the chocolates beautifully, and how to add thoughtful details that make the gift feel less “craft project” and more “wow, you made this for me?”
What Is a Chocolate Bouquet?
A chocolate bouquet is an edible gift arrangement that uses chocolates and candies instead of fresh flowers. The treats are attached to sticks or skewers, placed into a foam base, and styled with tissue paper, wrapping paper, ribbons, faux leaves, flowers, or gift tags. Think of it as a candy bouquet with better manners and a Mother’s Day outfit.
Unlike a traditional flower bouquet, a chocolate bouquet can be tailored to the recipient’s favorite flavors. Dark chocolate, milk chocolate, peanut butter cups, truffles, caramel bars, chocolate-covered pretzels, mini candy packs, and individually wrapped bonbons all work beautifully. You can keep it elegant with gold and blush tones or make it playful with bright colors and cheerful wrappers.
It is also budget-friendly. A small chocolate bouquet can be made with a mug, a foam block, several mini chocolates, and tissue paper. A larger version can include premium chocolate bars, gourmet truffles, silk flowers, and a keepsake vase. The arrangement can be sweet and simple or fancy enough to make the dining table jealous.
Why a Chocolate Bouquet Makes a Great Mother’s Day Gift
Mother’s Day is about appreciation, and handmade gifts carry a special kind of emotional sparkle. A chocolate bouquet shows effort without requiring advanced crafting skills. It is personal, pretty, edible, and practicalfour words moms tend to respect.
It Feels Personal
Instead of choosing a generic box of chocolates, you can build the bouquet around her favorites. If she loves dark chocolate, use rich dark bars and espresso truffles. If she prefers creamy milk chocolate, add classic candy bars and chocolate caramels. If she loves fruity flavors, include chocolate-covered strawberries, berry-flavored chocolates, or pink-wrapped sweets.
It Works for Any Budget
You can make a charming bouquet for under $20 using mini chocolates, a dollar-store container, and tissue paper. You can also create a luxury version with artisan chocolates, a ceramic vase, silk peonies, and satin ribbon. The technique stays the same; only the chocolate gets a more dramatic entrance.
It Doubles as Decor
A well-made chocolate bouquet can sit on a kitchen counter, desk, brunch table, or bedside tray. It looks festive before it becomes dessert. That is what we call multitasking with sprinkles.
Supplies You Need to Make a Chocolate Bouquet
Before you begin, gather everything in one place. Chocolate bouquet making is much easier when you are not hunting for tape while holding three candy bars and a glue gun like a confused octopus.
Basic Supplies
- Individually wrapped chocolates or candy bars
- Wooden skewers, lollipop sticks, or floral picks
- Floral foam or craft foam block
- Small vase, mug, gift box, basket, mason jar, or decorative pot
- Tissue paper, shredded paper, or cellophane
- Clear tape, double-sided tape, or low-temperature hot glue
- Ribbon, twine, or bow
- Gift tag or small Mother’s Day card
- Scissors
- Optional: silk flowers, faux greenery, paper flowers, stickers, or mini balloons
Choosing the Right Chocolate
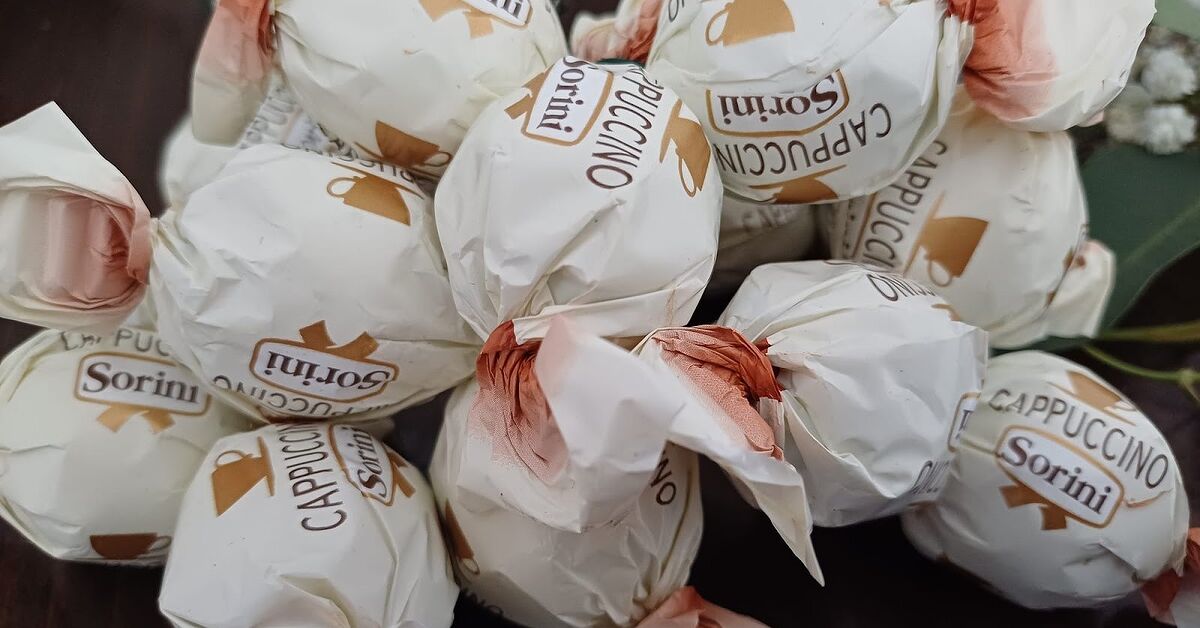
Use wrapped chocolates whenever possible. Wrapped candy is cleaner, easier to attach, and better for gifting. Mini chocolate bars are great for filling spaces, while larger bars make strong focal points. Truffles and round chocolates can add dimension, especially if you nestle them into paper “flowers.”
Avoid chocolates that melt too quickly if the bouquet will sit in a warm room or travel in a car. Soft filled chocolates, chocolate-covered fruit, and unwrapped sweets can be beautiful, but they require more careful handling. For a beginner-friendly Mother’s Day chocolate bouquet, wrapped candy bars and individually wrapped chocolates are the safest starting point.
Step-by-Step Guide: How To Make a Chocolate Bouquet
Step 1: Pick a Theme and Color Palette
Start with a simple theme. For Mother’s Day, popular color palettes include blush pink and gold, lavender and cream, red and white, or cheerful spring pastels. Match your tissue paper, ribbon, and container to the candy wrappers when possible. If the chocolates come in bold colors, let them be the star and keep the container neutral.
You can also build the bouquet around your mom’s personality. For a cozy mom, use a mug and add hot chocolate packets. For a glamorous mom, choose gold-wrapped truffles and satin ribbon. For a garden-loving mom, mix chocolates with silk flowers. For a coffee-loving mom, include espresso chocolates and a small coffee gift card.
Step 2: Prepare the Container
Choose a container with enough weight to hold the bouquet upright. A ceramic mug, small vase, metal pail, or sturdy gift box works well. Cut the floral foam to fit snugly inside. If the foam is loose, wrap it with tissue paper or add shredded paper around the edges so it does not wobble.
For a polished look, cover the top of the foam with tissue paper, crinkle paper, or cellophane before inserting the skewers. This hides the mechanics of the bouquet. Nobody needs to see the foam. It is doing important work, but it does not need applause.
Step 3: Attach Chocolates to Skewers
Place each wrapped chocolate face down. Attach a skewer to the back using clear tape or a small dot of low-temperature hot glue. If using glue, apply it to the wrapper only, not directly to the chocolate. Let the glue cool completely before handling.
For heavier candy bars, use two skewers or reinforce the back with extra tape. Smaller chocolates can be grouped together on one stick by taping several mini pieces in a fan shape. This creates a fuller arrangement and keeps tiny candies from looking lonely.
Step 4: Create Paper “Foliage”
Cut tissue paper or cellophane into squares. Pinch each square in the center and tape it around a skewer beneath the chocolate. This creates a flower-like ruffle that adds volume and color. Green tissue paper can mimic leaves, while pink, white, or lavender paper gives the bouquet a spring look.
You can also wrap the skewers with floral tape or ribbon if you want a cleaner stem effect. This step is optional, but it makes the bouquet look more intentional and less like candy on stickswhich, to be fair, is exactly what it is.
Step 5: Arrange the Tallest Chocolates First
Insert the tallest skewers toward the back or center of the foam. These create the structure and height of the bouquet. Angle them slightly outward so the arrangement opens like a fan. If the bouquet will be viewed from all sides, place the tallest pieces in the center and work around them evenly.
Push each skewer firmly into the foam, but do not force it so hard that it pierces through the bottom of the container. Step back every few minutes to check the shape. A good bouquet has balance, height variation, and a clear front view.
Step 6: Add Medium and Short Chocolates
Next, insert medium-height chocolates around the tall pieces. Use shorter chocolates in the front so the entire bouquet is visible. This creates depth and prevents the arrangement from looking like a candy fence.
Mix shapes as you go. Flat chocolate bars create visual panels, round truffles soften the design, and small candies fill gaps. If one side looks heavy, add a matching piece on the opposite side. Symmetry is helpful, but it does not need to be perfect. Handmade charm is part of the magic.
Step 7: Fill Gaps With Tissue, Flowers, or Extras
Once the chocolates are arranged, fill empty spaces with tissue paper, shredded paper, faux leaves, silk flowers, or small paper hearts. This makes the bouquet look lush and finished. For Mother’s Day, silk roses, daisies, peonies, or baby’s breath add a soft floral touch.
You can also include non-chocolate extras such as tea bags, a mini lotion, a small candle, a bookmark, a gift card, or a handwritten coupon for breakfast in bed. Just keep the add-ons lightweight so the bouquet stays stable.
Step 8: Wrap and Decorate
Tie ribbon around the container, add a bow, and attach a gift tag. If you are using a mug, tuck the ribbon through the handle for extra security. If you are using a box or basket, wrap the outside with cellophane for a professional gift-basket look.
Finish with a short message such as “Happy Mother’s Day,” “For the sweetest mom,” or “Thanks for raising me and still answering my calls.” A personal note is what turns a pretty chocolate bouquet into a keepsake moment.
Chocolate Bouquet Design Ideas for Mother’s Day
The Classic Pink-and-Gold Bouquet
Use gold-wrapped truffles, pink tissue paper, white silk flowers, and a blush ribbon. Place everything in a white ceramic mug or gold vase. This design looks elegant and works well for moms who enjoy classic, feminine gifts.
The Coffee-and-Chocolate Bouquet
Use a large coffee mug as the base. Add chocolate-covered espresso beans, mocha bars, dark chocolate squares, instant latte packets, and a small coffee gift card. This is ideal for the mom who says she is “fine” before coffee but clearly is not taking questions yet.
The Garden-Inspired Bouquet
Combine chocolates with faux greenery, paper leaves, and silk flowers. Use a small flowerpot as the container. Add a garden marker-style tag that says “Mom, you make everything grow.” This version is charming for plant lovers and backyard queens.
The Movie Night Bouquet
Use a popcorn bucket or decorative box. Add chocolate bars, mini candies, caramel popcorn, and a streaming gift card. This is a fun option if Mother’s Day plans include a cozy movie night at home.
The Luxury Truffle Bouquet
Choose premium wrapped truffles, dark chocolate squares, metallic tissue paper, and a satin bow. Keep the colors minimal: black, gold, cream, and deep red work beautifully. This bouquet feels grown-up, elegant, and wonderfully indulgent.
Helpful Tips for a Better Chocolate Bouquet
Keep It Cool
Chocolate does best in a cool, dry place away from direct sunlight. Do not leave your bouquet near a window, stove, heater, or warm car seat. If the weather is hot, transport it in an insulated bag and avoid adding delicate chocolate pieces that soften easily.
Check for Food Allergies
Many chocolates contain or may come into contact with common allergens such as milk, peanuts, tree nuts, wheat, soy, or sesame. If you are gifting the bouquet to someone with allergies, read every label carefully and keep the original wrappers visible whenever possible.
Use Wrapped Candy for Clean Handling
Wrapped chocolates are easier to tape, safer to arrange, and more practical for gifting. They also keep the bouquet looking neat if it sits out during brunch or a family gathering.
Balance the Weight
Large candy bars can make the bouquet top-heavy. Use a sturdy container and place heavier pieces toward the center or lower part of the arrangement. If needed, add clean decorative stones, wrapped candy, or extra paper to the bottom of the container for weight.
Make It Personal
The prettiest bouquet is not always the most expensive one. The best version includes details that feel like her: favorite flavors, favorite colors, a meaningful card, or a small add-on that reflects her hobbies.
Common Mistakes to Avoid
Using Too Much Hot Glue
A tiny amount of glue is enough. Too much glue can melt wrappers, create lumps, or make the back of the candy look messy. Tape is often safer for beginners.
Skipping the Foam Base
Without foam, the skewers can slide around and ruin the shape. Floral foam or craft foam gives the bouquet structure and keeps everything upright.
Making Every Stem the Same Height
A bouquet needs levels. Use tall, medium, and short stems to create depth. If every chocolate sits at the same height, the arrangement can look flat.
Forgetting the Card
The chocolate is wonderful, but the message matters. A short handwritten note can make the gift feel deeply thoughtful. Chocolate says “I love you,” but handwriting says “I did not outsource my emotions to a checkout aisle.”
How Long Does a Chocolate Bouquet Last?
A chocolate bouquet made with wrapped shelf-stable candies can last for several weeks if stored properly in a cool, dry place. However, it is best to make the bouquet one to three days before Mother’s Day so it looks fresh, clean, and gift-ready. If you include perishable items such as fresh fruit, homemade treats, or chocolate-covered strawberries, prepare it much closer to gifting time and follow proper food-safety practices.
For mailing or long-distance gifting, stick with wrapped chocolates and avoid fragile decorations. Pack the bouquet securely, cushion the container, and consider temperature during shipping. Chocolate and summer heat are not best friends; they are more like dramatic roommates.
of Real-Life Experience: What Making a Chocolate Bouquet Teaches You
The first thing you learn when making a chocolate bouquet is that it looks much easier in your imagination. In your head, every candy bar stands like a proud tulip. In real life, one chocolate leans left, one skewer refuses to stay still, and somehow there is tape stuck to your elbow. This is normal. The secret is to slow down and treat the project like arranging flowers, not building a candy skyscraper.
One helpful experience is to lay out all the chocolates before attaching anything. Group them by size and color. Larger bars should become the background or centerpieces, while smaller chocolates are better for filling the front and sides. When you skip this step, you may end up with all the big pieces on one side and a bouquet that looks like it is trying to escape the container.
Another practical lesson is that the container matters more than you think. A lightweight paper box may look cute, but once you add candy on sticks, it can tip over like a toddler in oversized shoes. A mug, ceramic pot, glass jar, or sturdy basket gives the bouquet enough weight to stand securely. If the container still feels wobbly, add wrapped candies, clean stones, or extra shredded paper at the bottom before inserting the foam.
When making a Mother’s Day chocolate bouquet, personalization is what gets the biggest reaction. A bouquet filled with random candy is nice. A bouquet filled with her favorite sea salt dark chocolate, caramel squares, and the peanut butter cups she hides from everyone else is unforgettable. Add a small handwritten card, and suddenly the gift feels carefully planned rather than simply assembled.
It is also worth remembering that perfection is not the goal. Handmade gifts should look thoughtful, not factory-stamped. A slightly uneven ribbon or a quirky candy angle can make the bouquet feel warmer and more human. Moms are famously skilled at detecting effort. They can tell when something was made with love, even if the bow has a tiny identity crisis.
If kids are helping, give them safe jobs: choosing chocolates, crumpling tissue paper, writing the tag, or placing wrapped candies into the container. Adults should handle scissors, skewers, and glue guns. The project becomes more meaningful when everyone contributes. A child-written tag that says “I love you more than chocolate” may be the most powerful decoration in the whole bouquet.
Finally, making a chocolate bouquet teaches you that gifts do not need to be expensive to feel generous. Time, attention, and a little creativity can turn everyday candy into something memorable. It is the kind of gift that makes Mom smile first, laugh second, and then immediately ask, “Can I eat one now?” That is when you know the bouquet worked.
Conclusion
Learning how to make a chocolate bouquet is a sweet, simple way to create a Mother’s Day gift that feels thoughtful without being complicated. With wrapped chocolates, skewers, floral foam, tissue paper, and a decorative container, you can build a beautiful edible arrangement in under an afternoon. The key is to choose chocolates she truly loves, vary the heights, fill the gaps, and finish the bouquet with a personal message.
Whether you go elegant, playful, cozy, or completely chocolate-crazy, this DIY Mother’s Day gift delivers charm, flavor, and a little handmade magic. Flowers fade, cards get tucked away, but chocolate? Chocolate gets rememberedespecially when it comes with love and a bow.
Note: This article is original, written in standard American English, and synthesized from current U.S.-based craft, gifting, chocolate-care, and food-safety guidance for web publication.