A DIY Grapevine and Laurel Door Wreath is the kind of front-door project that looks expensive, smells quietly elegant, and politely refuses to be fussy. It has that “I just gathered this from my charming countryside garden” energyeven if your greenery came from a craft store aisle while you were holding a coffee and pretending not to buy more ribbon.
This wreath combines two timeless materials: a rustic grapevine base and graceful laurel-style leaves. Grapevine gives the wreath structure, texture, and a natural brown frame that looks beautiful even when partially exposed. Laurel brings symbolism, shine, and a refined evergreen feel. Historically, laurel wreaths have represented victory, honor, celebration, and achievement. On a door, that translates nicely into: “Welcome, I have my life together enough to decorate.”
The best part? You do not need professional floral training. With a grapevine wreath form, faux or fresh laurel stems, floral wire, wire cutters, ribbon, and a hot glue gun, you can make a polished wreath in an afternoon. This guide walks through supplies, design decisions, step-by-step assembly, styling tips, care advice, and real-life experience from making this kind of wreath at home.
Why Choose a Grapevine and Laurel Door Wreath?
Grapevine wreaths are beloved in DIY home décor because they are sturdy, forgiving, and naturally beautiful. Unlike foam wreath forms, grapevine does not need to be completely covered. In fact, leaving part of the vine visible often makes the finished design look more organic and high-end. The twisted branches create built-in pockets where stems can be tucked, wired, or glued into place.
Laurel-style greenery adds a different kind of charm. Its elongated leaves create movement, direction, and a classic look. Bay laurel, magnolia leaves, olive-like greenery, eucalyptus, faux laurel garlands, and similar broadleaf stems all work well depending on the mood you want. Fresh laurel gives a fragrant, natural finish, while faux laurel is ideal if you want a wreath that lasts through multiple seasons without slowly turning into crunchy salad.
Best Uses for This Wreath
This grapevine laurel wreath works beautifully for front doors, covered porches, entryways, interior walls, mantel displays, wedding signage, farmhouse kitchens, and seasonal tablescapes. With small changes, it can move from spring to fall to Christmas. Add cream ribbon for spring, velvet ribbon for winter, dried orange slices for holidays, or tiny white flowers for a cottage-style look.
Supplies You Will Need
Before starting, gather everything on a table so you are not hunting for wire cutters with glue on your fingers. Crafting is peaceful until the hot glue gun starts acting like a tiny volcano.
- One 14-inch to 18-inch grapevine wreath form
- Fresh or faux laurel stems, bay leaves, magnolia leaves, olive branches, or similar greenery
- Floral wire, preferably green or brown
- Wire cutters or floral snips
- Hot glue gun and glue sticks
- Ribbon, twine, or velvet bow
- Optional: dried flowers, berries, eucalyptus, pinecones, moss, seed pods, or mini ornaments
- Optional: wreath hanger, command hook, or loop of floral wire
For a clean, classic look, choose two to three textures only: grapevine, laurel greenery, and ribbon. For a fuller seasonal wreath, add berries, dried hydrangeas, pinecones, or small flowers. The trick is restraint. A wreath should look lush, not like it lost a wrestling match with the clearance bin.
Fresh Laurel vs. Faux Laurel: Which Is Better?
Both options can look beautiful, but they serve different needs. Fresh laurel or fresh evergreen foliage feels authentic, fragrant, and elegant. It is perfect for holidays, parties, weddings, or short-term seasonal decorating. However, fresh greenery needs moisture and protection from heat. It lasts longer outdoors in cool shade than indoors near vents, fireplaces, or direct sun.
Faux laurel is the practical winner for year-round door décor. High-quality artificial stems are bendable, reusable, weather-resistant under a covered porch, and easier to arrange. Faux greenery also allows you to store the wreath and bring it back later, which is excellent news for anyone who enjoys decorating but does not enjoy repeating the same project every month.
Best Recommendation
Use faux laurel for the base structure and add a few fresh clippings for scent and realism when hosting guests. This hybrid method gives you the durability of artificial greenery with the natural charm of fresh leaves.
Step-by-Step: How to Make a DIY Grapevine and Laurel Door Wreath
Step 1: Choose the Wreath Direction
Place the grapevine wreath flat on your table. Decide which side looks best as the front. Most grapevine wreaths have one side that is smoother and one that is a bit wild. The wild side can be useful if you like a rustic look, but the smoother side usually works better for a polished door wreath.
Next, decide whether your design will be full, half-covered, or crescent-shaped. A full wreath covers the entire form with leaves. A half wreath decorates only one side, letting the grapevine show. A crescent wreath places greenery on the lower left or lower right, creating an elegant asymmetrical shape.
Step 2: Trim the Laurel Stems
Use wire cutters to trim your laurel stems into smaller pieces, usually 4 to 7 inches long. Shorter pieces are easier to control and layer. Keep a few longer pieces for the outer edges so the wreath looks airy instead of flat.
If using fresh stems, cut them at an angle and mist them lightly before arranging. Avoid crushed or damaged leaves. If using faux stems, bend the wire gently to mimic the curve of real branches. Little curves make a huge difference. Straight plastic stems can look stiff, while curved ones look like they casually grew that way after studying interior design.
Step 3: Make Small Greenery Bundles
Gather three to five short stems into a small bundle. Mix leaf sizes and directions so the arrangement looks natural. Wrap the bottom of each bundle with floral wire, twisting tightly enough to hold but not so tightly that you snap the stems.
Make several bundles before attaching them. For a 16-inch wreath, five to eight bundles are usually enough for a half wreath. For a full wreath, you may need twelve to sixteen bundles depending on how lush you want it.
Step 4: Attach the First Bundle
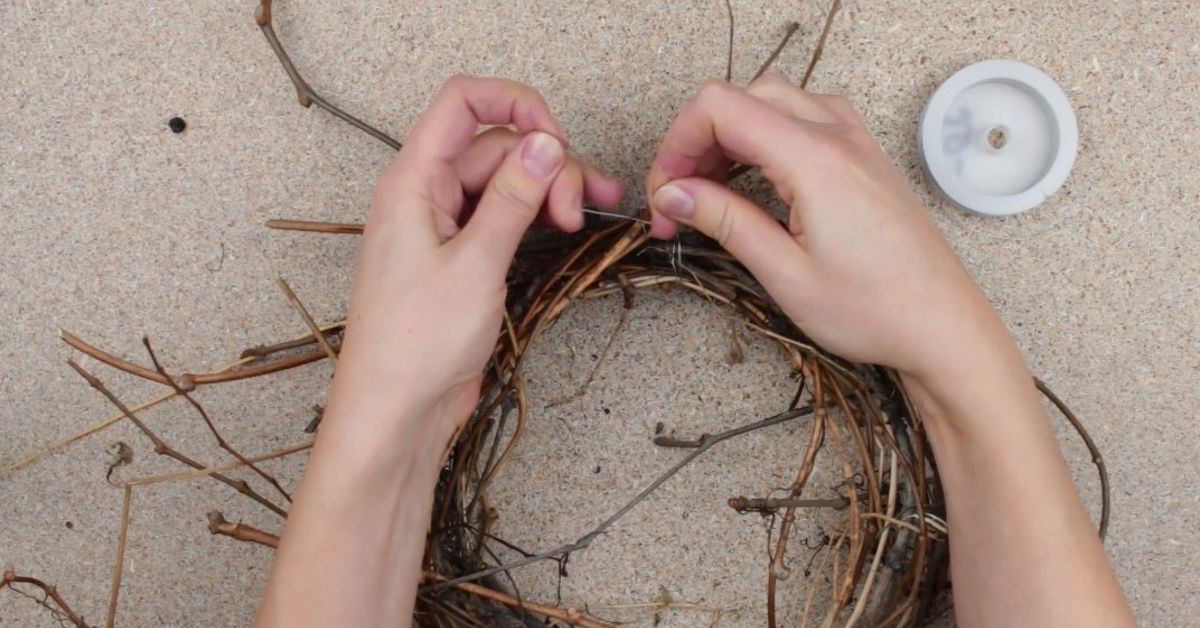
Place the first bundle on the grapevine base at your chosen starting point. Thread floral wire through the grapevine and around the bundle stems. Twist at the back of the wreath to secure it. Tuck the wire ends into the vine so they do not scratch your door.
Angle the first bundle slightly outward. This creates width and softness. If every bundle points straight around the circle, the wreath can look too mechanical. Nature rarely arranges herself with a ruler, and that is part of the charm.
Step 5: Layer the Bundles
Add the next bundle so the leaves cover the wired stems of the first bundle. Continue layering in one direction, letting each bundle overlap the previous one. This creates a flowing laurel effect and hides the mechanics.
As you work, step back occasionally and look at the wreath from a distance. Up close, every tiny gap looks dramatic. From five feet away, most gaps are invisible. This is an important crafting truth and possibly a life lesson.
Step 6: Fill Gaps with Smaller Leaves
Once the main greenery is attached, fill bare spots with small leaf sprigs. Use hot glue for lightweight faux leaves or floral wire for heavier stems. Tuck leaves into the grapevine openings before gluing so they look integrated rather than pasted on top.
For a natural look, vary the direction of the leaves. Some should point outward, some inward, and some around the wreath. This gives the design depth and movement.
Step 7: Add Ribbon or a Bow
A ribbon can completely change the mood of your laurel door wreath. Linen ribbon feels relaxed and farmhouse-inspired. Black velvet looks dramatic and modern. Cream satin feels romantic. Burlap gives the wreath a rustic cottage feel.
You can tie a bow at the bottom, top, or side. For a cleaner design, skip the bow and use ribbon only as a hanging loop. If the wreath already has lots of greenery, a simple ribbon tail may look more elegant than a large bow.
Step 8: Create a Hanging Loop
Turn the wreath over and thread floral wire through a sturdy section of grapevine. Twist the wire into a loop. Make sure the loop is centered so the wreath hangs straight. If it tilts, adjust by moving the loop slightly left or right.
For heavier wreaths, use two wire loops or a strong wreath hanger. Always test the wreath indoors before placing it outside. A front-door wreath should greet guests, not leap dramatically onto the doormat.
Design Ideas for Every Season
Spring Grapevine and Laurel Wreath
Add small white flowers, lavender sprigs, or pale pink blossoms. Keep the grapevine partially visible for a fresh garden look. A soft gingham or linen ribbon completes the design.
Summer Laurel Wreath
Use fuller greenery with lemon accents, dried herbs, or yellow flowers. Bay laurel pairs beautifully with rosemary, eucalyptus, and olive branches for a Mediterranean-inspired style.
Fall Grapevine Wreath
Add dried wheat, orange berries, preserved oak leaves, mini pumpkins, or copper ribbon. Keep the laurel as the green foundation so the wreath does not become too heavy visually.
Winter or Christmas Laurel Wreath
Mix laurel with pine, cedar, juniper, pinecones, dried orange slices, and velvet ribbon. For a holiday version, add small brass bells or red berries. Keep the decorations clustered instead of scattered everywhere for a designer look.
How to Keep a Fresh Laurel Wreath Looking Good
If you use fresh greenery, location matters. Fresh leaves dry faster in direct sunlight, wind, heated rooms, or near fireplaces. Hang the wreath on a shaded, covered door when possible. Mist the back of the stems every couple of days, focusing on the cut ends rather than soaking decorative elements like ribbon or dried fruit.
Fresh broadleaf greenery may discolor if exposed to freezing conditions after cutting, depending on the plant. If you live in a very cold climate, consider using faux laurel outdoors and saving fresh greenery for indoor arrangements away from heat sources.
Common Mistakes to Avoid
Using Too Much Glue
Hot glue is helpful, but it should not be the only thing holding heavy greenery. Floral wire is stronger and more reliable for stems. Use glue for small accents, not structural support.
Forgetting the Door Color
A wreath that looks stunning on your table may disappear on your door. Dark green laurel on a dark green door needs contrast, such as cream ribbon, white flowers, or lighter greenery.
Making It Too Perfect
A handmade wreath should have life and movement. Let a few leaves extend beyond the circle. Allow the grapevine to show. Perfect symmetry can feel flat, while slight unevenness feels natural and charming.
Ignoring Weight
Heavy wreaths need secure hanging. If adding pinecones, ornaments, thick ribbon, or many fresh stems, reinforce the back with extra wire and test the hanger before display.
Budget-Friendly Tips
You can make a beautiful DIY wreath for front door décor without spending a fortune. Start with a basic grapevine wreath form and reuse it season after season. Instead of permanently gluing every element, wire on larger decorations so you can remove and replace them later.
Shop end-of-season sales for faux greenery and ribbon. Save pinecones from walks, dry orange slices at home, and reuse leftover floral stems from old arrangements. Even small scraps can become filler. A two-inch sprig that looks useless in your hand may be exactly what your wreath needs to cover one awkward gap.
Personal Experience: What I Learned Making a Grapevine and Laurel Door Wreath
The first time I made a grapevine and laurel wreath, I expected the project to take twenty minutes. This was optimistic in the same way people say they are “just running into Target for one thing.” The basic assembly was simple, but making it look balanced took more patience than expected.
The biggest lesson was to arrange everything before attaching anything. When I started wiring stems immediately, I ended up with one side looking lush and the other side looking like it had missed breakfast. Laying the laurel pieces around the wreath first helped me see the shape. I could test a full wreath, a half wreath, and a crescent design without committing. The crescent style won because it looked elegant and allowed the grapevine texture to show.
The second lesson was that floral wire is your best friend. Hot glue works for small leaves and accents, but it does not always hold up on a front door that moves, swings, or gets warm in the afternoon sun. Wire made the wreath feel secure. Once the greenery was wired in place, I used tiny dots of glue only where a leaf refused to behave. There is always one leaf with a rebellious personality.
I also learned that ribbon can either elevate the wreath or make it look too busy. My first ribbon choice was wide, shiny, and dramatic. It looked lovely on the roll but overwhelmed the natural greenery. A narrower linen ribbon worked much better. It softened the design without stealing attention from the laurel leaves.
Another helpful trick was taking phone photos during the process. A wreath can look balanced when you are staring at it up close, but a quick photo reveals empty spots, awkward angles, or one section that sticks out like it is waving at passing cars. I adjusted the greenery after each photo, and the final version looked much cleaner.
Hanging the wreath also taught me something practical: doors are not gentle environments. They open, close, shake, and face changing temperatures. I reinforced the back with extra floral wire and made sure no sharp wire ends touched the paint. For renters or anyone with a delicate door finish, adding felt pads to the back of the wreath can help prevent scratches.
My favorite part of the project was how adaptable it became. After a few weeks, I added small white flowers for spring. Later, I removed them and tied on a rust-colored ribbon for fall. In winter, I tucked in pine sprigs and tiny bells. The same grapevine and laurel base worked for multiple seasons, which made the project feel both creative and practical.
Most importantly, this wreath did what good handmade décor should do: it made the entryway feel personal. It was not perfect, but it had texture, movement, and a little story behind it. Every time I came home, it looked welcoming without trying too hard. That is the magic of a DIY grapevine wreath. It adds charm before anyone even steps inside.
Conclusion
A DIY Grapevine and Laurel Door Wreath is a simple project with a timeless result. The grapevine base gives rustic structure, while laurel greenery adds elegance, symbolism, and natural beauty. Whether you use fresh stems, faux leaves, or a mix of both, the wreath can be customized for every season and style.
Start with a strong base, trim your stems, build small bundles, layer them carefully, and finish with ribbon or seasonal accents. Keep the design balanced but not overly perfect. The best wreaths look collected, thoughtful, and alivenot manufactured.
With a few supplies and a relaxed afternoon, you can create a front-door wreath that feels warm, polished, and personal. And if anyone asks where you bought it, you may casually say, “Oh, I made it,” while pretending that was not the exact moment you had been waiting for.