If you have milk, lemon juice, and a clean kitchen towel, congratulations: you are dangerously close to making fresh paneer at home. Paneer, the beloved Indian cheese used in dishes like palak paneer, paneer tikka, matar paneer, and paneer butter masala, is one of the most beginner-friendly cheeses on the planet. No rennet. No aging cave. No mysterious cheese wizardry. Just hot milk, acid, a little patience, and the courage to believe that a pot of curdled milk can become dinner.
This guide explains how to make paneer in seven clear steps, with practical tips for getting a soft, sliceable, creamy block instead of a rubbery brick that looks like it has trust issues. Whether you call it Indian cheese, Indian cottage cheese, homemade paneer, or “that magical white cube in curry,” the method is simple once you understand the rhythm: heat, acidify, strain, rinse, press, chill, and cook.
The best part? Homemade paneer tastes fresher than many store-bought versions. It has a mild dairy sweetness, a tender bite, and the ability to soak up spices like it was born to live in a tomato-onion masala. Let’s make it.
What Is Paneer?
Paneer is a fresh, non-melting cheese widely used in Indian cooking. Unlike mozzarella or cheddar, paneer does not melt into stretchy strings when heated. Instead, it holds its shape, making it perfect for grilling, pan-frying, simmering in curry, or stuffing into wraps and parathas.
Paneer is made by heating milk and adding an acidic ingredient such as lemon juice, vinegar, lime juice, or citric acid. The acid separates the milk into solid curds and liquid whey. The curds are then drained, rinsed, gathered in cloth, and pressed into a firm block. That is the whole storybut like all simple recipes, the tiny details matter.
Ingredients for Homemade Paneer
Main Ingredients
- 8 cups whole milk about 1/2 gallon; avoid ultra-pasteurized milk if possible.
- 1/4 cup fresh lemon juice or 3 to 4 tablespoons white vinegar.
- 1/4 to 1/2 teaspoon salt optional, but recommended for flavor.
- Cold water for rinsing the curds and cooling them quickly.
Equipment You Need
- A heavy-bottomed pot
- A long spoon or silicone spatula
- Fine-mesh strainer or colander
- Cheesecloth, muslin cloth, or a very clean thin kitchen towel
- A bowl to catch whey
- A plate, cutting board, or small tray for pressing
- A heavy object, such as a pot filled with water or a few cans
How to Make Paneer (Indian Cheese): 7 Steps
Step 1: Choose the Right Milk
Start with whole milk. Paneer depends on milk solids, especially protein and fat, so full-fat milk gives the best yield and texture. Low-fat milk can work in a pinch, but the paneer may be drier and more crumbly. Skim milk is the sad trombone of paneer-making: technically possible, emotionally disappointing.
For best results, avoid ultra-pasteurized or UHT milk. This type of milk has been heated to very high temperatures, which can change how the proteins behave. In plain kitchen language, it may refuse to curdle properly, and nobody wants to argue with a gallon of milk at 6 p.m.
Pour the milk into a heavy-bottomed pot. A heavy pot helps prevent scorching because milk loves to stick to the bottom the moment you look away. If your pot is thin, stir more often and keep the heat moderate.
Step 2: Heat the Milk Slowly
Set the pot over medium heat and warm the milk gradually. Stir every minute or two, scraping the bottom gently so the milk does not burn. You want the milk to come to a gentle boil or a lively simmer, not a volcanic eruption. If it foams up dramatically, reduce the heat quickly.
This step is where patience pays off. Heating too aggressively can scorch the milk, leaving a burnt flavor that follows your paneer around like gossip. A gentle boil is enough to prepare the milk proteins for curdling.
Once the milk reaches a boil, turn off the heat. This is important. Adding acid while the milk is off the heat helps prevent overcooking the curds, which can make paneer tough or squeaky in the wrong way.
Step 3: Add Lemon Juice or Vinegar
Stir in the lemon juice slowly, one tablespoon at a time. Give the milk a gentle stir after each addition. Within moments, you should see the milk separate into white curds and pale yellow-green whey. It looks dramatic, but do not panic. This is exactly what you want.
If the milk does not curdle after adding the full 1/4 cup lemon juice, add another tablespoon of lemon juice or vinegar and wait a minute. Sometimes milk needs a tiny nudge, like a teenager asked to clean their room.
Stop adding acid as soon as the whey looks mostly clear and the curds have separated. Too much acid can make paneer grainy or sour. The goal is not to win a lemon-eating contest; the goal is tender cheese.
Step 4: Let the Curds Rest Briefly
After the milk separates, let it sit for 5 to 10 minutes. This short rest allows the curds to gather and firm up slightly, making them easier to strain. Do not continue boiling the mixture. Overheating after curdling is one of the most common reasons homemade paneer turns hard.
During this rest, line a colander or fine-mesh strainer with cheesecloth. Place it over a large bowl if you want to save the whey. Whey can be used in soups, bread dough, rice, lentils, smoothies, or as a tangy liquid for kneading chapati dough. It is not glamorous, but it is usefulbasically the dependable sidekick of the paneer world.
Step 5: Strain and Rinse the Curds
Carefully pour the curdled milk into the lined strainer. The whey will drain away, leaving soft white curds in the cloth. Let the curds drain for a minute or two, then rinse them gently under cool running water.
Rinsing does two helpful things. First, it removes excess lemon or vinegar flavor. Second, it cools the curds and slows further cooking, which helps keep the paneer soft. Be gentle. These curds are not laundry; they do not need a wrestling match.
Gather the cloth around the curds and twist lightly to squeeze out extra liquid. Do not squeeze with superhero intensity unless you want dry paneer. A firm but gentle squeeze is enough.
Step 6: Press the Paneer
Shape the wrapped curds into a flat square or rectangle. Place the bundle on a plate or cutting board, then set another plate or board on top. Add a moderate weight, such as a pot filled with water, a cast-iron pan, or a few cans.
For soft paneer that will be crumbled into bhurji, press for about 15 to 20 minutes. For paneer cubes that hold together in curry, press for 30 to 45 minutes. For grilling or paneer tikka, you can press closer to 45 to 60 minutes, but do not go wild. Pressing too long removes too much moisture and can turn paneer dry.
If your kitchen is warm, move the pressing setup to the refrigerator after the paneer has cooled slightly. Food safety matters, especially with fresh dairy. Paneer is delicious, but it is still a perishable food, not a countertop decoration.
Step 7: Cut, Store, or Cook the Paneer
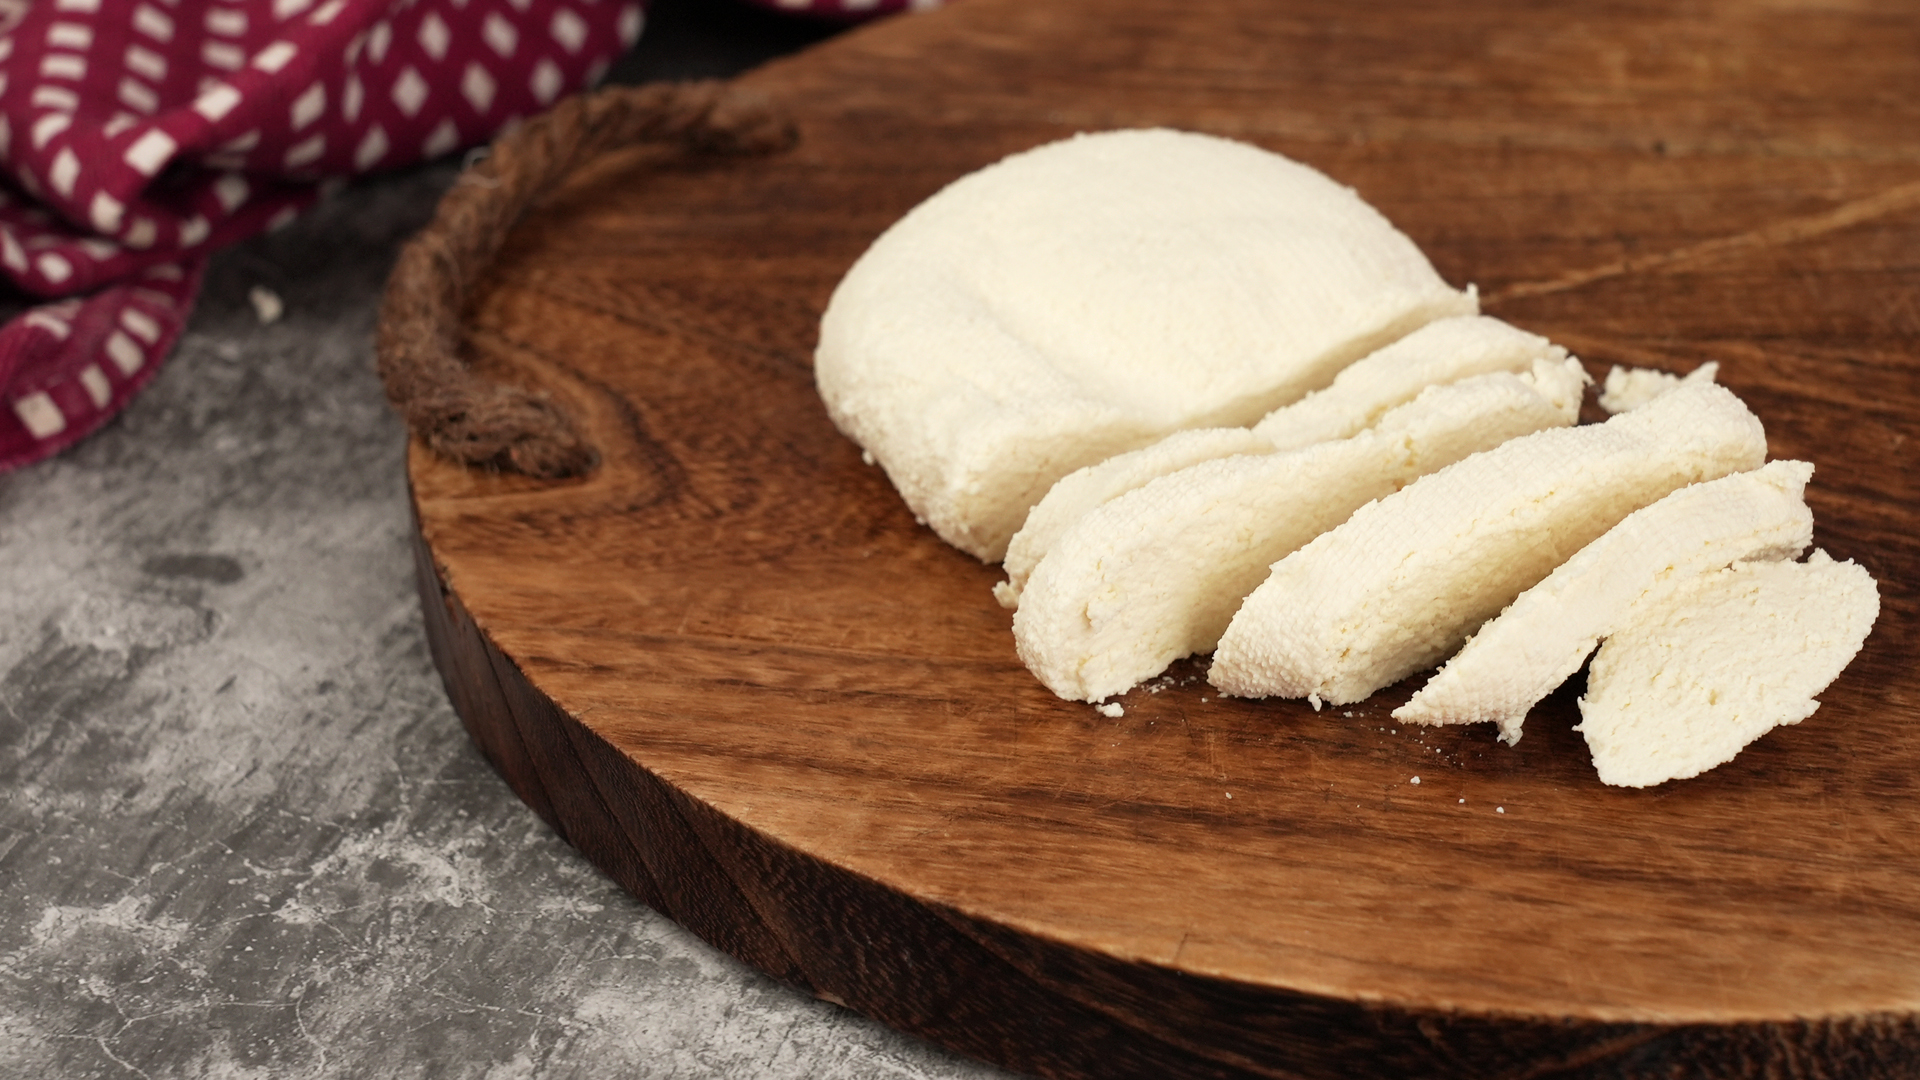
Unwrap the paneer and admire your work. You made cheese. This is the part where you may briefly feel like a culinary genius, and honestly, take the win.
Cut the paneer into cubes, rectangles, or slabs depending on the recipe. For extra-soft paneer, soak the block or cubes in cold water for 10 to 15 minutes before cooking. This helps the cheese stay moist, especially if it will be simmered in a sauce.
Use fresh paneer right away, or store it in an airtight container in the refrigerator. For best texture, cover the paneer with fresh water and change the water daily. Use it within a few days. Keep your refrigerator at 40°F or below and avoid leaving paneer at room temperature for more than two hours.
How to Use Homemade Paneer
Homemade paneer is mild, which is exactly why it is so useful. It plays well with bold spices, rich sauces, smoky marinades, and bright herbs. Think of it as the quiet friend who somehow makes the whole party better.
Classic Paneer Dishes
- Palak paneer: Paneer cubes in a creamy spinach sauce with garlic, ginger, and spices.
- Paneer butter masala: A rich tomato-based curry with butter, cream, and warming spices.
- Matar paneer: Paneer and green peas simmered in a spiced tomato-onion gravy.
- Paneer tikka: Paneer marinated in yogurt and spices, then grilled or broiled.
- Paneer bhurji: Crumbled paneer sautéed with onions, tomatoes, turmeric, and chilies.
- Paneer kathi rolls: Spiced paneer wrapped in flatbread with vegetables and chutney.
Easy Everyday Ideas
You do not need a restaurant-style curry every time. Toss paneer cubes into a vegetable stir-fry, add them to a grain bowl, crumble them into scrambled eggs, or pan-fry slices and tuck them into a sandwich. Paneer also works beautifully with roasted vegetables, lentils, chickpeas, and fresh herbs.
For a quick snack, season cubes with salt, pepper, cumin, chili powder, and a little oil. Pan-sear until golden on the edges. Serve with cucumber, tomatoes, and a squeeze of lemon. It is simple, fast, and much more exciting than staring into the fridge hoping inspiration will arrive.
Troubleshooting Homemade Paneer
Why Did My Milk Not Curdle?
The most common reasons are ultra-pasteurized milk, not enough acid, or milk that was not hot enough. Add one more tablespoon of lemon juice or vinegar, stir gently, and wait. If nothing happens, the milk may not be suitable for paneer.
Why Is My Paneer Hard?
Hard paneer usually comes from overcooking, too much acid, or pressing too long with too much weight. Turn off the heat before adding acid, stop when the whey clears, rinse the curds, and press only as long as needed for your recipe.
Why Is My Paneer Crumbly?
Paneer may crumble if it was not pressed enough, if low-fat milk was used, or if the curds were handled too roughly. Use whole milk, gather the curds tightly in cloth, and press them into a compact shape.
Why Does My Paneer Taste Sour?
You may have added too much lemon juice or skipped rinsing the curds. Next time, add acid slowly and rinse the strained curds under cool water before pressing.
Tips for Soft, Creamy Paneer
- Use whole milk for better yield and richer texture.
- Heat the milk gently and stir to prevent scorching.
- Turn off the heat before adding lemon juice or vinegar.
- Add acid gradually and stop once the whey separates clearly.
- Rinse the curds to remove acidic flavor and protect softness.
- Do not over-squeeze or over-press the curds.
- Soak cut paneer in warm water for a few minutes before adding it to curry if it feels firm.
Homemade Paneer Experience: What I Learned After Making It Again and Again
Making paneer at home has a funny way of teaching you patience, confidence, and respect for milk. The first time many home cooks make paneer, they expect the process to feel technical. It sounds like cheese-making, and cheese-making sounds like something done by people wearing aprons with embroidered initials. But then you heat the milk, add lemon juice, watch the curds appear, and suddenly the whole thing feels almost suspiciously easy.
The biggest lesson is that paneer rewards calm cooking. If you rush the milk over high heat, it may scorch. If you dump in too much acid, the paneer can turn sharp and grainy. If you press it under a weight heavy enough to flatten a small planet, it becomes dry. The process is not difficult, but it does ask you to pay attention. Paneer is simple, not careless.
One useful experience is learning to read the whey. At first, the pot may look cloudy and confusing. After the acid works, the whey becomes clearer and slightly yellow-green, while the curds clump together. That visual cue is more helpful than the clock. Recipes can tell you “add 1/4 cup lemon juice,” but milk varies. Some batches need a little less; some need a splash more. The pot tells you when it is ready.
Another important lesson is that rinsing matters. Skipping the rinse may save thirty seconds, but it can leave paneer tasting too lemony or vinegary. A quick rinse under cool water makes the flavor cleaner and helps stop the curds from continuing to cook. It is a small step with a big payoff, like salting pasta water or not checking your phone while caramelizing onions.
Pressing is where personal preference enters the chat. If you love soft paneer for bhurji, press lightly and briefly. If you want neat cubes for curry, press longer. If you plan to grill paneer, press it firmly enough to hold its shape, but not so much that it turns into a dairy doorstop. After a few batches, you start adjusting the pressing time based on the dish, and that is when homemade paneer begins to feel less like a recipe and more like a kitchen skill.
Homemade paneer also changes how you think about leftovers. The whey can enrich bread dough, soups, dals, and rice. Small paneer scraps can go into omelets, wraps, salads, or quick masala sautés. Even a slightly imperfect batch is still useful. Too soft? Make paneer bhurji. Too firm? Simmer it in sauce or soak it in warm water. Too crumbly? Congratulations, you accidentally made the perfect filling for stuffed paratha.
The best experience, though, is the moment you add fresh paneer to a curry. Store-bought paneer can be convenient, but homemade paneer has a gentle freshness that makes the dish feel more alive. It absorbs spices without disappearing, stays creamy in the center, and gives you the quiet satisfaction of knowing you made it from scratch. That satisfaction may not be an official ingredient, but it absolutely improves the flavor.
Conclusion
Learning how to make paneer is one of the easiest ways to bring fresh Indian cooking into your kitchen. With whole milk, lemon juice or vinegar, and a simple pressing method, you can create a soft, versatile cheese for curries, wraps, grilled dishes, stir-fries, and snacks. The seven-step process is straightforward: choose good milk, heat it gently, add acid, rest the curds, strain and rinse, press, then cut and cook.
The secret to great homemade paneer is not complicated. Avoid ultra-pasteurized milk, do not overheat after curdling, add acid gradually, rinse the curds, and press only as long as needed. Once you understand those basics, you can make paneer that is tender, fresh, and ready to turn an ordinary meal into something worth bragging aboutpolitely, of course.