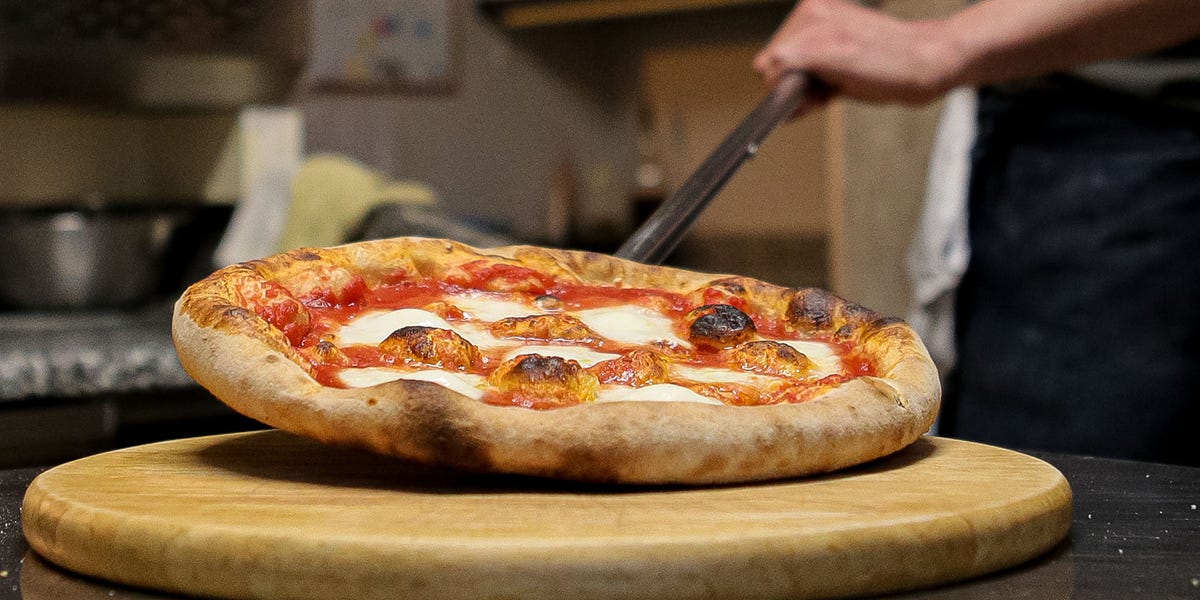
There is a special kind of happiness that happens when pizza dough hits a screaming-hot cooking surface, bubbles like it just heard good news, and comes out with a crisp bottom, melted cheese, and those slightly charred edges that make people say, “Wait, you made this at home?” The even better news: you do not need a fancy built-in brick oven or a backyard the size of a national park. You can make a grilltop pizza oven using equipment many home cooks already own, plus a few affordable add-ons.
A grilltop pizza oven is not a single gadget so much as a smart setup. It turns your gas or charcoal grill into a small outdoor pizza oven by combining high heat from below, retained heat around the dough, and enough reflected heat from above to melt toppings before the crust turns into a cracker with commitment issues. With a grill-safe pizza stone or baking steel, a lid, a heat-retaining dome or firebrick arrangement, and the right cooking technique, your grill can produce pizza that is crisp, smoky, and wonderfully backyard-worthy.
This guide explains how to build a safe, practical grilltop pizza oven, how to use it, what materials to avoid, and how to get better results from the first pie to the last slice. Apron optional. Enthusiasm required.
What Is a Grilltop Pizza Oven?
A grilltop pizza oven is a heat-focused cooking setup placed on or inside an outdoor grill. Its job is to mimic the behavior of a traditional pizza oven: intense heat from the floor, hot circulating air, and enough top heat to cook cheese, sauce, and toppings quickly. In a standard kitchen oven, pizza often cooks from below but struggles to brown the top unless you use a broiler. On a grill, you already have powerful heat. The trick is controlling it.
The simplest version uses a grill-safe pizza stone or baking steel set on the grill grates with the grill lid closed. A more advanced DIY version adds a raised metal dome, pizza oven insert, or carefully placed firebricks to create a smaller heated chamber. That chamber helps trap and reflect heat, so the pizza cooks more evenly instead of scorching underneath while the cheese sits there looking confused.
Why Make a Pizza Oven on Your Grill?
Making a grilltop pizza oven is a smart move for three reasons: temperature, flavor, and convenience. Most indoor ovens max out around 500 degrees Fahrenheit, while many grills can reach similar or higher temperatures outdoors. That high heat helps create a crisp crust and quick bake. The grill also adds subtle smoky flavor, especially when using charcoal or wood chunks. Finally, cooking pizza outside keeps your kitchen cooler and turns dinner into an event. Suddenly, “pizza night” sounds less like takeout and more like a tiny backyard festival.
It is also customizable. You can make one Margherita pizza, one pepperoni, one veggie-loaded pie, and one experimental “leftover barbecue chicken with suspicious confidence” creation. Small pizzas work best because they are easier to launch, rotate, and remove before anything gets dramatic.
Tools and Materials You Will Need
Before building your grilltop pizza oven, gather the right materials. Heat safety matters here. Pizza needs high temperatures, and not every surface or metal belongs near your dinner.
Essential Equipment
- Outdoor gas or charcoal grill with a working lid
- Grill-safe pizza stone, cordierite stone, cast iron pizza pan, or baking steel
- Pizza peel or rimless baking sheet for launching pizzas
- Long-handled tongs
- Heat-resistant gloves
- Infrared thermometer or grill thermometer
- Bench scraper or spatula for cleanup
- Cornmeal, semolina, or flour for dusting the peel
Optional Materials for a Better Oven Effect
- Food-safe stainless steel grill dome or pizza oven insert
- Unglazed firebricks rated for high heat
- Second pizza stone or steel positioned above the pizza with a safe rack setup
- Wood chunks for charcoal grills, used sparingly for flavor
Materials to Avoid
Do not use painted metal, galvanized metal, random tiles, decorative stones, concrete pavers, or bricks that are not rated for high heat. Some materials can crack, release fumes, or fail under thermal stress. Your pizza should taste like basil and mozzarella, not like a hardware aisle having a meltdown.
Step-by-Step: How to Make a Grilltop Pizza Oven
Step 1: Clean and Inspect the Grill
Start with a clean grill. Remove old grease, ash, and food debris from the grates and drip tray. Grease buildup can cause flare-ups, and flare-ups are not a gourmet topping. Check that the grill sits on a stable, outdoor surface away from walls, railings, branches, and anything flammable. If you are using a gas grill, inspect the hose and connections before lighting.
Step 2: Choose the Right Pizza Surface
A pizza stone absorbs moisture and helps create a crisp crust. Cordierite stones are popular because they handle high heat better than many ceramic options. A baking steel or cast iron pizza pan heats faster and transfers heat aggressively, which can create excellent browning. However, steel can also burn the bottom faster if the heat is too intense. For beginners, a grill-safe stone is forgiving and reliable.
Step 3: Place the Stone or Steel on the Grill
Put the stone or steel on the grill grates before preheating. This allows it to warm gradually, which helps reduce the chance of cracking. Center it if you want even heat, or place it slightly away from the hottest burner or coal zone if your grill runs aggressively hot. Leave enough room around the edges for airflow.
Step 4: Create a Heat Chamber
The grill lid creates the basic oven effect, but you can improve it by reducing the empty space above the pizza. A stainless steel grill dome or a manufactured pizza oven insert works well because it traps heat closer to the pizza. Another DIY option is to place firebricks around the sides and back of the stone, leaving the front open for access. The goal is to guide heat around and over the pizza without blocking airflow completely.
If you use firebricks, stack them securely in a low, stable arrangement. Do not create a wobbly tower. Pizza is exciting, but not “falling masonry near open flame” exciting.
Step 5: Preheat Thoroughly
Close the grill lid and preheat the setup. For many grilltop pizza oven builds, aim for about 500 to 650 degrees Fahrenheit inside the chamber, depending on your equipment and dough. A pizza stone often needs 20 to 30 minutes to fully heat. Do not rush this step. A half-heated stone gives you pale, soft crust, which is basically bread wearing pizza toppings.
Step 6: Set Up Heat Zones
On a gas grill, use medium-high to high heat during preheating, then adjust burners as needed. If the bottom cooks too fast, lower the burner directly under the stone and keep side burners higher to maintain ambient heat. On a charcoal grill, bank hot coals to the sides or back to create indirect heat while still heating the stone. This gives you a better chance of browning the top without blackening the bottom.
Step 7: Prepare the Dough
Use room-temperature pizza dough because cold dough resists stretching and may spring back like it has personal boundaries. Shape the dough into small rounds, usually 8 to 12 inches wide. Thin to medium-thin crust works best for grilltop pizza because it cooks quickly. Avoid a thick, heavy crust unless your oven setup can maintain steady heat for a longer bake.
Step 8: Keep Toppings Light
Grilltop pizza cooks fast, so toppings should be thin, light, or pre-cooked. Use a modest layer of sauce, low-moisture mozzarella, small amounts of fresh mozzarella, thin vegetables, cured meats, or cooked sausage. Watery toppings can make the crust soggy. If using mushrooms, onions, peppers, or zucchini, consider grilling or sautéing them first. The pizza oven is powerful, but it is not a miracle worker with wet vegetables piled like a salad bar avalanche.
Step 9: Launch the Pizza
Dust your pizza peel with flour, semolina, or cornmeal. Build the pizza quickly on the peel and give it a gentle shake before launching. If it sticks, lift the edge and add a little more dusting flour. Slide the pizza onto the hot stone with one confident forward-and-back motion. Confidence matters. Hesitation is how pizza becomes abstract art.
Step 10: Cook, Rotate, and Watch Closely
Close the grill lid after launching the pizza. Cook for 5 to 10 minutes, depending on heat level, dough thickness, and toppings. Rotate the pizza once or twice for even browning. If the bottom darkens too quickly, reduce heat under the stone or move the pizza to a cooler area. If the cheese needs more color, close the lid longer or use a dome to increase top heat.
Step 11: Remove and Rest
When the crust is crisp, the cheese is melted, and the edges are browned, remove the pizza with a peel. Let it rest for two minutes before slicing. This short pause helps the cheese settle so your first bite does not drag half the topping onto your chin. Add fresh basil, chili flakes, parmesan, or a drizzle of olive oil after baking for a clean finish.
Gas Grill vs. Charcoal Grill: Which Works Better?
Gas Grill Advantages
A gas grill is easy to control, quick to preheat, and convenient for repeat pizzas. You can adjust burners to fine-tune the heat, making it beginner-friendly. A three-burner gas grill is especially useful because you can lower the center burner under the stone while keeping the side burners hot.
Charcoal Grill Advantages
A charcoal grill brings deeper smoky flavor and can get very hot with the right fuel arrangement. It requires more attention, but many pizza fans love the live-fire character. Place coals to the rear or sides and rotate pizzas often. If adding wood chunks, use a light hand. Too much smoke can overpower the pizza and make mozzarella taste like it spent the weekend camping.
Best Dough for a Grilltop Pizza Oven
The best dough for a grilltop pizza oven is elastic, well-rested, and not too wet. A standard pizza dough made with bread flour or all-purpose flour works well. High-hydration dough can be delicious, but it is harder to handle on a peel and may stick. If you are new to grilled pizza, start with store-bought dough or a simple homemade dough, then experiment once you understand your grill’s heat pattern.
Divide dough into smaller portions instead of making one giant pizza. Smaller pies cook more evenly and are easier to rescue if something goes wrong. Also, they make everyone feel like they have their own personal pizza restaurant, which is excellent for morale.
Temperature Tips for Better Pizza
Temperature control is the heart of a good grilltop pizza oven. If the stone is too cool, the dough dries before it browns. If it is too hot, the bottom burns before the cheese melts. Start around 500 degrees Fahrenheit and adjust from there. For thin crust, higher heat and shorter cooking times work well. For thicker crust, use slightly lower heat and a longer bake.
An infrared thermometer is helpful because built-in grill thermometers measure air temperature near the lid, not necessarily the stone surface. Check the stone before launching your first pizza. After each pizza, allow the stone to recover heat for a few minutes before adding the next one.
Common Mistakes to Avoid
Using the Wrong Stone
Not every pizza stone is grill-safe. Some stones designed only for indoor ovens may crack on a grill. Choose a stone or steel specifically rated for grill use and high temperatures.
Skipping the Preheat
A cold or partially heated stone is the enemy of crisp crust. Give the grilltop oven time to heat fully. Good pizza rewards patience, then disappears in minutes. Such is life.
Overloading the Pizza
Too much sauce, cheese, or toppings slows cooking and creates sogginess. Use restraint. Think “balanced pizza,” not “edible storage unit.”
Launching Sticky Dough
If the dough sticks to the peel, it may fold, tear, or launch toppings first and crust second. Dust the peel, work quickly, and shake before launching.
Ignoring Safety
Always use grills outdoors in open air. Keep children and pets away from the cooking zone. Wear heat-resistant gloves, never leave the grill unattended, and allow stones or steels to cool completely before handling or cleaning.
How to Clean and Store Your Grilltop Pizza Oven Setup
After cooking, let everything cool fully. A pizza stone can stay hot long after the grill is off, so do not grab it because “it looks fine.” Famous last words usually begin that way. Once cool, scrape off stuck bits with a bench scraper or stiff brush. Avoid soaking a pizza stone, and do not wash it with soap because porous stone can absorb moisture and flavors. For a baking steel, follow the manufacturer’s cleaning instructions and dry it thoroughly to prevent rust.
Brush grill grates clean, empty ash from charcoal grills when completely cold, and cover or store your pizza stone in a dry place. If you used firebricks, let them cool before moving and store them somewhere dry and stable.
Pizza Ideas for Your Homemade Grilltop Pizza Oven
Classic Margherita
Use crushed tomatoes, low-moisture mozzarella, fresh basil after baking, olive oil, and a pinch of salt. Simple ingredients shine when the crust is crisp and lightly smoky.
Pepperoni and Hot Honey
Add a thin layer of sauce, mozzarella, pepperoni, and a drizzle of hot honey after baking. It is sweet, spicy, salty, and dangerously easy to eat standing up.
Grilled Vegetable Pizza
Pre-grill zucchini, onions, mushrooms, or bell peppers. Add them lightly over cheese with a sprinkle of parmesan. This is a great way to make vegetables feel invited instead of obligated.
BBQ Chicken Pizza
Use a thin layer of barbecue sauce, cooked chicken, red onion, mozzarella, and cilantro after baking. Keep the sauce light because sweet sauces can scorch quickly.
Real-World Experience: What You Learn After Making Grilltop Pizza Several Times
The first lesson of making a grilltop pizza oven is that your grill has a personality. Some grills are calm and predictable. Others behave like tiny dragons with temperature gauges. You may read every instruction perfectly and still discover that the back-left corner of your grill is hotter than the surface of the sun. This is normal. The best results come from learning your grill’s hot spots and rotating pizzas accordingly.
One practical experience is that smaller pizzas almost always win. A 10-inch pizza is easier to stretch, launch, turn, and remove. Large pizzas look impressive until half the dough lands on the stone and the other half tries to become a calzone without permission. When cooking for a group, make several smaller pies instead of one oversized masterpiece. Guests enjoy customizing toppings, and you get more chances to improve with each bake.
Another lesson is that the peel matters. A wooden peel is forgiving for launching because dough sticks less easily, while a metal peel is excellent for turning and removing pizzas. If you only have a rimless baking sheet, it can work, but dust it well and move quickly. Always test the dough with a little shake before heading to the grill. If it does not move on the peel, it will not magically move on the stone. Pizza is delicious, not telepathic.
Preheating also teaches patience. The grill may say it is hot after 10 minutes, but the stone may need more time to absorb heat. A properly heated stone gives the crust that firm, crisp bottom that holds up when sliced. When the stone is underheated, the pizza may cook on top while staying pale underneath. Giving the setup 20 to 30 minutes to preheat can feel excessive when everyone is hungry, but it saves the meal.
With toppings, experience quickly proves that less is more. A heavy pile of cheese and sauce may look generous, but it can trap moisture and slow cooking. Thin sauce, moderate cheese, and pre-cooked toppings are the secret. Fresh basil, arugula, parmesan, chili oil, and finishing salt are better added after baking. These finishing touches make the pizza taste fresh without weighing down the crust.
Fire management becomes easier after a few rounds. On a gas grill, lowering the burner under the stone can prevent burnt bottoms while side burners keep the chamber hot. On charcoal, banking coals to one side or the back gives better control than spreading coals evenly under the entire stone. The goal is not just maximum heat. The goal is balanced heat. Pizza needs a hot floor and a hot ceiling, not a blowtorch from below.
Finally, the best experience is the social one. A grilltop pizza oven turns dinner into participation. Someone stretches dough, someone adds toppings, someone watches the timer, and someone inevitably says, “This one is mine,” even though all the pizzas are technically for everyone. It is casual, fun, and slightly theatrical. Once you get the method right, it becomes the kind of backyard cooking project people remember.
Conclusion
Learning how to make a grilltop pizza oven is one of the most rewarding upgrades you can give your outdoor cooking setup. With a grill-safe stone or steel, a properly preheated grill, smart heat zones, and a simple heat chamber, your regular grill can become a capable pizza-making machine. You do not need a professional oven to create crisp crust, bubbling cheese, and smoky flavor. You just need the right setup, a little patience, and the courage to launch dough onto a very hot surface like a person who believes in dinner.
Keep the build safe, use high-heat materials, avoid overloading your pizza, and let your grill teach you as you go. The first pizza may not be perfect, but even imperfect grilled pizza has a strong chance of being eaten immediately. That is the beauty of it.