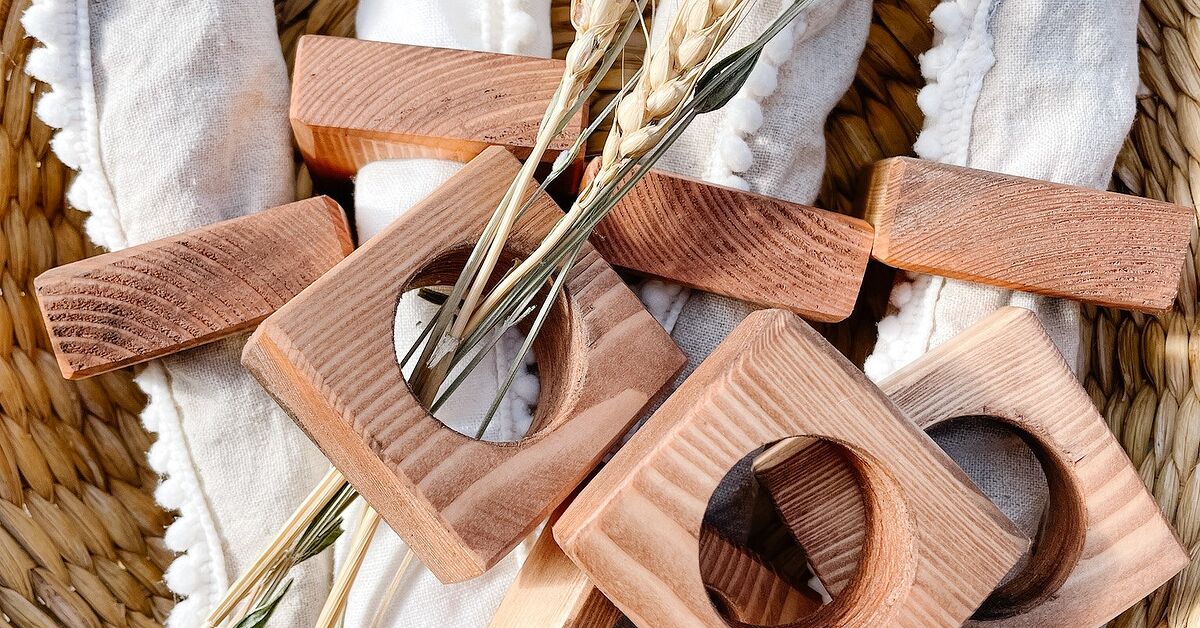
Designer napkin rings are the jewelry of a well-dressed table. They are small, decorative, and capable of making an ordinary cloth napkin look as though it has reservations at a restaurant with a six-week waiting list. Fortunately, you do not need a luxury decorating budget to get the effect. With wooden rings, cord, paint, beads, and a little patience, you can create DIY designer napkin rings that look polished, personal, and surprisingly expensive.
The core project below uses unfinished wooden rings wrapped with cord and finished with a decorative accent. Once you learn the method, you can adapt it for weddings, holidays, brunches, birthday dinners, or a regular Tuesday when the table deserves better than paper towels.
Why Make Your Own Napkin Rings?
Buying eight or twelve matching designer napkin rings can become expensive. A handmade set often costs about $10 to $25, depending on the materials, while giving you complete control over the colors, textures, and size. You can match the rings to your flatware, dishes, linens, or centerpiece instead of settling for accessories that are almostbut not quiteright.
A polished design usually combines three things: a sturdy base, a refined surface, and one focal detail. Wood, metal, wire, or heavy cardboard can form the base. Cord, ribbon, leather, paint, beads, or cane can cover it. A charm, tassel, flower, shell, monogram, or gemstone provides the finishing touch.
Materials and Tools
Basic Supplies for Six Rings
- Six unfinished wooden craft rings, about 1.5 to 2 inches in diameter
- Thin cotton cord, embroidery floss, narrow ribbon, raffia, or waxed string
- Acrylic or metallic craft paint
- Small paintbrush and fine-grit sandpaper
- Clear craft sealer
- Strong tacky glue or a low-temperature hot glue gun
- Scissors, ruler, and wax paper or a craft mat
Optional Embellishments
- Wood beads, pearls, mini tassels, or brass charms
- Faux greenery, dried flowers, or tiny silk blossoms
- Polymer-clay or air-dry-clay decorations
- Letter beads, shells, buttons, or repurposed jewelry
- Gold leaf, metallic wax, or foil tape
Check your sewing box and craft drawer before shopping. Napkin rings are excellent for using attractive leftovers that are too small for larger projects. Even a single orphaned earring may finally discover its true calling.
Step-by-Step: Cord-Wrapped Designer Napkin Rings
Step 1: Choose a Design Direction
Decide how the finished set should feel. Black cord with a brass bead looks modern. Natural cotton and shells create coastal style. Blush ribbon, pearls, and tiny flowers feel romantic. Jute, wood beads, and matte paint suit a rustic table.
Limit the palette to two or three colors. Small accessories become visually busy quickly, and the difference between “designer detail” and “craft-store traffic jam” is often one unnecessary embellishment.
Step 2: Prepare the Bases
Lightly sand rough wooden rings and wipe away the dust. Paint each ring in a color that blends with the wrapping material. This undercoat prevents raw wood from showing through tiny gaps. Apply two thin coats and let them dry completely.
Step 3: Measure the Cord
Measure generously. The cord travels around the thickness of the ring as well as around its circumference, so the project uses more material than it appears to require. For tangle-prone material, work in shorter sections and hide the joins beneath the focal accent.
Step 4: Wrap the Ring
Place a small dot of glue on the inside of the ring and secure the cord end. Wrap tightly, positioning every turn directly beside the previous one without overlapping. Pause every inch to push the rows together.
Add tiny dots of adhesive along the hidden inside edge rather than coating the whole base. Excess glue may seep through the fibers and dry shiny. When the ring is covered, trim the cord and secure the end near the starting point so both seams can be concealed.
Step 5: Add the Designer Accent
Arrange the decorations before gluing. A cluster of three small piecessuch as a wood bead, metallic spacer, and tasseloften looks more balanced than one enormous ornament. Another elegant combination is a pearl centered over two tiny leaves.
Thread beads onto thin jewelry wire, twist the wire around the ring, and tuck sharp ends beneath the cord. Glue flowers, charms, or shells over the seam. Let the rings dry flat with the embellishments facing upward.
Step 6: Seal, Cure, and Test
Seal painted wood, paper, or clay with a compatible clear finish. Follow the label’s drying and curing instructions; “dry to the touch” is not always the same as ready for use. Once cured, pull an actual napkin through every ring and check for rough wood, exposed wire, dried glue, or decorations that snag the fabric.
Five Stylish Variations
1. Minimalist Leather Loops
Cut faux-leather strips about 1 inch wide, overlap the ends, and connect them with a brass snap, rivet, or Chicago screw. Straight edges look modern, while rounded ends feel softer. Pair the loops with white, charcoal, olive, or rust-colored napkins.
2. Sculptural Clay Rings
Shape air-dry or polymer clay into circles, knots, waves, or open cuffs. Add texture with linen, leaves, stamps, or a toothbrush. Let air-dry clay harden fully before painting. Bake polymer clay only according to its package directions. Matte paint creates a stoneware effect; metallic wax can imitate aged brass.
3. Botanical Wire Rings
Wrap floral wire around a small bottle to form consistent circles. Cover the wire with floral tape, ribbon, or twine, then attach compact faux greenery, berries, or blossoms. Fresh rosemary also works for a same-day place setting, but keep the accent small enough that guests do not have to wrestle a shrub.
4. Beaded Place-Card Rings
Thread alphabet and spacer beads onto elastic cord or flexible wire. Spell each guest’s name, form a ring, and secure the ends. These personalized pieces double as place cards and party favors for showers, holiday dinners, weddings, and children’s tables.
5. Gilded Vintage Rings
Clean thrifted wood or metal rings, lightly sand glossy surfaces when appropriate, and apply primer before painting. Antique gold, champagne, bronze, or matte black usually looks more refined than bright yellow-gold. Add one vintage button, brooch component, or repurposed earring for character.
How to Make Handmade Rings Look Expensive
Repeat one visual element. The stones or flowers may vary slightly, but every ring should share the same cord, metal finish, or color. Controlled variation looks collected; random variation looks like six crafts met accidentally.
Hide the construction. Position seams, knots, wire twists, and cord ends on the inside or beneath an embellishment. Professional-looking craftwork often comes down to concealing how it was assembled.
Favor refined finishes. Matte, satin, brushed, aged, and natural surfaces generally look more sophisticated than thick glitter or high-gloss paint. Sparkle still works, but it should be an accent, not a disco emergency.
Coordinate with the table. Echo the metal of the flatware, the texture of the placemats, or a color from the centerpiece. The ring should support the setting rather than audition to become its only celebrity.
Common Mistakes and Easy Fixes
The Ring Is Too Small
Test the undecorated base with the actual napkin. Heavy cotton and linen need more room than thin fabric. If the finished ring is snug, use a loose gather instead of a bulky silverware roll.
The Cord Slides or Gaps
Paint or lightly sand slick bases, secure the starting end firmly, and maintain even tension. Push the wraps together every few rows rather than trying to repair all the gaps at the end.
The Decoration Falls Off
Match the adhesive to the materials. Hot glue suits lightweight porous pieces, while smooth metal or plastic may need a stronger multipurpose adhesive. Let the bond cure fully and resist checking it every six minutes. Gravity remains unimpressed by enthusiasm.
The Design Looks Too Busy
Remove one element, reduce the focal piece, or use plain napkins. Patterned linens, floral plates, glittery rings, and a dramatic centerpiece can all be lovely separately while collectively resembling a very polite yard sale.
Care and Storage
Wipe handmade rings with a soft cloth rather than submerging them. Store delicate sets flat in a divided box, away from moisture and direct sunlight. Before an event, check for lifted cord, loose beads, or sharp wire. Repairs are easier the day before dinner than three minutes before the doorbell rings.
Experience-Based Lessons From Making DIY Napkin Rings
The most useful lesson usually appears after the first ring, so treat it as a prototype. A design may look elegant in your imagination and slightly overcommitted in real life. A large flower, three charms, two tassels, and a bow may technically fit, but the napkin still needs somewhere to live. Finish one sample before cutting all the materials and creating six matching regrets.
Makers also tend to underestimate how much cord they need. The outer circumference is only part of the calculation because each wrap travels around the ring’s thickness. Keep the cord attached to its spool while starting the first piece, then cut it after learning how much the base actually consumes. A little extra cord is inexpensive insurance.
Consistency improves when the project is organized like a small assembly line. Sand and paint every base, cut the wrapping materials, prepare the bead clusters, and then assemble the rings. Repeatedly switching between paint, glue, wire, and scissors creates more mess and makes subtle differences between pieces more likely. Batch work also lets one stage dry while you prepare the next.
Glue discipline matters more than most beginners expect. A large blob may feel secure, but it can squeeze through cord, form a hard ridge, or remain visible after drying. Small dots on the hidden side usually produce a cleaner result. A low-temperature glue gun provides more working time and reduces burns. Silicone finger protectors are inexpensive and far more dignified than finishing the craft while holding an ice cube.
Testing with the actual napkin is essential. A ring that fits a thin practice cloth may be too narrow for heavyweight linen. The chosen fold changes the fit too: a loose gather needs less room than a rolled napkin containing flatware. Testing reveals whether the accent stays upright, twists sideways, catches the fabric, or disappears underneath the fold.
Materials may also look different once they meet the rest of the place setting. Warm gold can appear elegant beside cream linen but unexpectedly orange next to cool gray dishes. Natural jute may look rustic against white stoneware and muddy against beige fabric. Assemble one complete place setting under the lighting used in the dining area before committing to a color combination.
Durability is often determined by storage rather than construction. Delicate flowers survive repeated dinners when stored flat and separated, while sturdy rings become misshapen when tossed into a crowded drawer. A labeled photo box with simple dividers keeps each set together and makes seasonal designs easier to find.
Finally, handmade napkin rings benefit from small differences. A slight shift in bead position or a naturally varied leaf does not ruin the set. When the palette, scale, and materials remain consistent, minor variations read as craftsmanship. Guests may even ask where you bought them. That is the moment to smile modestly and decide whether to reveal that part of the collection began as cardboard tubing.
Conclusion
Learning how to make DIY designer napkin rings is mainly about thoughtful choices: start with a sturdy base, cover it neatly, add one well-scaled detail, and allow every finish to cure. The same method can create natural rope rings, sculptural clay cuffs, personalized bead designs, botanical accents, or gilded vintage pieces.
Make one prototype, test it with your linens, and then produce the full set. Your table will look custom, your guests will be impressed, and your craft drawer will finally have evidence that keeping all those tiny leftovers was a strategic decision.
Note: This original guide synthesizes established napkin-ring, table-styling, adhesive, wrapping, floral, upcycling, and clay-crafting techniques from major U.S. home and craft resources. Inspiration included ribbon, wire, tassel, floral, paper, wood, leather, bead, and sculpted-clay methods.